- Titanium Pedal System – The featherweight, podium-ready SPEEDPLAY NANO delivers every advantage on race-day.
- LOW WEIGHT – High Standards. Low weight – A mix of premium titanuim and carbon fiber makes up the SPEEDPLAY NANO, a feat…
- STACK HEIGHT/POWER TRANSFER – Every Watt Matters – SPEEDPLAY NANO transfers power more efficiently than the competition …


- Compatible with Wahoo Model WF123 Part # WFBKTR4 Fitness KICKR Core Smart Trainer Bike Cycling Indoor Ride Training Kick…
- Input voltage range of AC 100-240V allows for use in different countries and regions. Output current of DC 12V 5A 60W fo…
- Compatible with Wahoo WFBKTR3 WF118 WFBKTR2 WF110 Fitness KICKR SNAP Bike Smart Trainer Cycling Indoor Ride Training KIC…

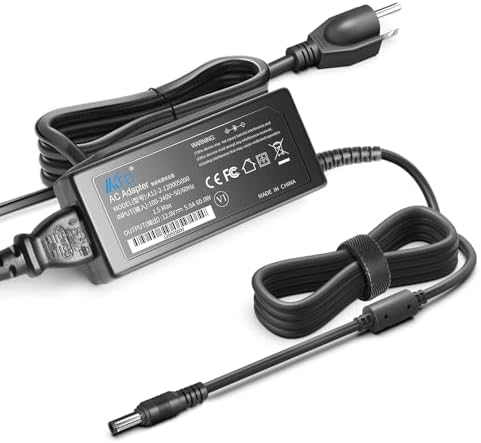
- KFD products are UL/ CE / FCC / RoHS certified, Warranty: 30 Days Free Exchange /36 Months Warranty; Input:100-240V 50-6…
- Replacement Wahoo Charger 12V Compatible with Wahoo Model WF123 Part # WFBKTR4 Fitness KICKR Core Smart Trainer Bike Cyc…
- Replacement Wahoo Power cord compatible with Wahoo WFBKTR4 WF123 Fitness for KICKR Core Cycling Indoor Ride Training ;Fo…
Wahoo Fitness KICKR SNAP Review: The Ultimate Indoor Trainer for New Cyclists?
Don’t let bad weather, short days, or a packed schedule derail your cycling goals ever again! If you’ve been dreaming of structured, engaging indoor workouts but felt priced out by high-end equipment, you’re in the right place. The Wahoo Fitness KICKR SNAP is designed to be the perfect bridge into the exciting world of smart training, offering an incredible experience without emptying your wallet. It’s a fantastic piece of gear that brings the fun and effectiveness of virtual cycling platforms right into your home.
This wheel-on smart trainer has been a favorite for years, and for good reason. It delivers the reliable performance and seamless connectivity Wahoo is known for in a convenient, easy-to-use package. We’re going to break down everything you need to know about this amazing Wahoo Fitness trainer, from its core features to who it’s truly built for.
Get ready to transform your indoor riding from a chore into an adventure. Let’s see if the KICKR SNAP is the perfect training partner you’ve been searching for!
Quick Summary
- Perfect Entry Point: The KICKR SNAP is an affordable and accessible way to start with smart training, connecting you to apps like Zwift and TrainerRoad for interactive workouts.
- Realistic Ride Feel: Its high-inertia flywheel technology does a fantastic job of mimicking the feeling of riding on an actual road, making indoor sessions more engaging.
- Convenient and Easy: As a wheel-on trainer, setup is incredibly simple. You can leave your rear wheel on, making it fast to switch between indoor training and outdoor rides.
- Solid Performance: With controlled resistance up to 1500 watts, a simulated 12% grade, and +/- 3% power accuracy, it provides all the metrics and control needed for serious training.
- Key Consideration: It’s a wheel-on trainer, which means it produces more noise and tire wear compared to more expensive direct-drive models, but it offers incredible value for its price point.
What Exactly is the Wahoo KICKR SNAP?


The Wahoo KICKR SNAP is what’s known as a “wheel-on” smart bike trainer. This means you keep your rear wheel on your bike and simply clamp your bike’s frame into the trainer. A roller on the trainer presses against your rear tire, providing resistance as you pedal. It’s an incredibly straightforward and user-friendly design that has made it a go-to for cyclists new to indoor training.
But what makes it “smart”? Unlike old-school “dumb” trainers that provide a fixed resistance you have to manually adjust, a smart trainer like the KICKR SNAP can communicate with cycling apps and software. It uses wireless technologies like ANT+ and Bluetooth to connect to your smartphone, tablet, or computer. This two-way communication is what makes the magic happen!
When you’re riding in a virtual world like Zwift, the app tells the KICKR SNAP to increase resistance as you start climbing a hill, and you’ll feel it in your legs instantly. If you’re following a structured workout on a platform like TrainerRoad or Wahoo SYSTM, the app will automatically set the resistance to the exact wattage required for your interval. This automated control is essential for effective, targeted training and makes indoor riding incredibly immersive and fun. The SNAP essentially turns your regular road or mountain bike into a high-tech indoor training machine.
Unleash Your Potential: Key Features of the KICKR SNAP Trainer
The Wahoo KICKR SNAP isn’t just a basic trainer; it’s packed with technology designed to give you a premium training experience. Wahoo has masterfully balanced cost and performance, including features that truly matter for getting faster and stronger on the bike. Let’s break down the standout elements that make this trainer so popular.

Realistic Ride Feel
One of the biggest complaints about older indoor trainers was that they felt nothing like riding outside. Pedaling felt sluggish and unnatural. Wahoo tackled this head-on with a high-inertia, 10.5-pound flywheel in the KICKR SNAP. This heavy, optimized flywheel is engineered to replicate the momentum you feel on the road, smoothing out your pedal stroke and providing a sensation of coasting when you ease off the power.
It makes a huge difference in ride quality, helping you stay engaged for longer and making those multi-hour sessions much more enjoyable.
Controlled Resistance
This is the heart of any smart trainer. The KICKR SNAP can provide up to 1500 watts of resistance, which is more than enough for even the most powerful sprinters. More importantly, it can simulate gradients up to a 12% incline. When you hit a steep climb in Zwift’s virtual Watopia, the trainer automatically ramps up the difficulty, forcing you to shift gears and work harder, just like you would outdoors.
This dynamic resistance makes virtual riding feel incredibly real and ensures your workouts are as challenging as they need to be.
Unmatched Connectivity
A trainer is only as smart as its ability to connect to your devices and apps. The KICKR SNAP excels here, offering both ANT+ and Bluetooth Smart (BLE) dual-band technology. This means you can connect it to virtually any device you own, from an iPhone or Android device to a laptop or a dedicated cycling computer from Garmin or Wahoo. You can even connect multiple devices at once, like broadcasting your power to your cycling computer while also being connected to Zwift on your laptop.
This flexibility is a huge plus and ensures you won’t run into compatibility issues.
Rock-Solid Stability
There’s nothing worse than feeling like your bike is going to topple over during an all-out sprint. The kickr snap trainer is built from high-strength carbon steel and features a wide stance for maximum stability. Once your bike is locked in, it feels incredibly secure, allowing you to focus on your effort without any wobbling or shaking. This robust construction ensures it will stand up to years of hard training sessions.
Power Accuracy
For structured training, accurate power measurement is key. The KICKR SNAP provides reliable power measurement with an accuracy of +/- 3%. While high-end direct-drive trainers might offer slightly better accuracy, +/- 3% is fantastic for this price point and is more than sufficient for the vast majority of athletes to track progress and execute workouts effectively. To get the most accurate readings, it’s important to perform a simple “spindown” calibration before your rides, which we’ll cover next.
Setting Up Your Wahoo KICKR SNAP: A Step-by-Step Guide


One of the best things about the wahoo kickr snap is how easy it is to get started. You can go from opening the box to riding in your favorite virtual world in under 15 minutes. Here’s a simple guide to get you up and running smoothly.
1. Unboxing and Assembly
Inside the box, you’ll find the KICKR SNAP main unit, a power cord, a power brick, a quick-release skewer, and a front wheel block. The trainer comes mostly assembled. All you need to do is open the legs until they click into place, which creates that stable base we talked about. Place the trainer on a flat, level surface, preferably on a trainer mat to protect your floor and dampen vibrations.
Next, you’ll need to replace your bike’s rear quick-release skewer with the one provided by Wahoo. This ensures a secure and perfect fit in the trainer’s clamps. Once that’s swapped, simply lift your bike, place the skewer into the clamps, and tighten them until your bike is held firmly in place.
2. Tire Pressure and Roller Tension
For a wheel-on trainer, consistency is everything. Before every ride, make sure your rear tire is inflated to the same pressure, typically around 100-110 PSI for a road bike. This prevents variations in power readings. Using a dedicated, hard-compound trainer tire is highly recommended to reduce noise and prevent wearing out your expensive road tires.
Now, adjust the blue roller tension knob. Turn it clockwise until the roller makes firm contact with your tire. Wahoo recommends turning the knob two full rotations after it first touches the tire. This ensures there’s no slippage when you’re putting down power but doesn’t create excessive resistance or tire wear.
3. Connecting to Your Favorite Apps
Plug in the trainer and you’ll see the indicator lights flash. The first step is to download the Wahoo Fitness app on your smartphone. Open the app, make sure your phone’s Bluetooth is on, and add the KICKR SNAP as a new sensor. This allows you to update the trainer’s firmware and perform calibrations.
Once it’s connected to the Wahoo app, you’re ready to pair it with third-party apps like Zwift, TrainerRoad, or Rouvy. Open your app of choice on your computer or tablet and search for controllable trainers. The KICKR SNAP should appear as a connectable device. Select it, and you’re ready to ride!
Pro Tip: Always perform a spindown calibration after the trainer has warmed up for about 10-15 minutes. This process, done through the Wahoo Fitness app, accounts for changes in temperature and tire pressure, ensuring your power data is as accurate as possible for that day’s session.
Is the KICKR SNAP the Right Wahoo Fitness Trainer for You?
Choosing an indoor trainer can feel overwhelming, but it really comes down to your goals, budget, and specific needs. The Wahoo Fitness KICKR SNAP occupies a brilliant spot in the market, but it’s important to understand who will get the most out of it. Let’s figure out if you’re the ideal rider for this fantastic piece of equipment.
The Ideal KICKR SNAP Rider
You are the perfect candidate for the KICKR SNAP if you identify with one or more of these points:
- You’re New to Smart Training: If you’re just dipping your toes into the world of Zwift and structured workouts, the SNAP is the perfect, low-commitment way to start. It gives you the full smart training experience without the hefty price tag of a top-tier model.
- You’re on a Budget: Let’s be honest, cycling can be an expensive hobby. The SNAP delivers about 80% of the performance of a high-end trainer for less than half the cost. It’s arguably the best value-for-money smart trainer available.
- You Value Convenience: The wheel-on design is incredibly convenient. If you frequently switch between riding indoors and outdoors, you’ll love that you don’t have to remove your rear wheel every time. Just unclamp your bike and go!
- You Have Limited Space: The SNAP has a relatively small footprint and its legs can be folded in for easier storage under a bed or in a closet, making it a great choice for apartment dwellers.
KICKR SNAP vs. KICKR CORE: The Wheel-On vs. Direct-Drive Debate
As you explore the Wahoo ecosystem, you’ll inevitably come across the KICKR CORE, Wahoo’s entry-level direct-drive trainer. A direct-drive trainer requires you to remove your rear wheel and mount your bike’s chain directly onto a cassette on the trainer. So, which is better?
| Feature | Wahoo KICKR SNAP | Wahoo KICKR CORE |
|---|---|---|
| Type | Wheel-On | Direct-Drive |
| Setup | Very easy, wheel stays on | More involved, wheel comes off |
| Accuracy | +/- 3% | +/- 2% |
| Max Wattage | 1500W | 1800W |
| Max Grade | 12% | 16% |
| Noise Level | Moderate | Very Quiet |
| Tire Wear | Yes | No |
| Price Point | Lower | Higher |
Choose the KICKR SNAP if: Your main priorities are cost and convenience. You want a great smart training experience and don’t mind a little extra noise or the need to use a trainer tire.
Choose the KICKR CORE if: You prioritize quiet operation, slightly better accuracy, and a more realistic road feel. If you plan on doing the majority of your riding indoors and want to eliminate tire wear, the extra investment for the CORE is often worth it.
Pricing and Value: What Does the Wahoo KICKR SNAP Cost?

When it comes to smart trainers, the Wahoo KICKR SNAP represents one of the best bangs for your buck on the market. It’s positioned as an entry-level smart trainer, making it significantly more affordable than the premium direct-drive models that can easily cost over a thousand dollars.
While prices can change, the SNAP typically sits in a very competitive price bracket that makes interactive indoor training accessible to a much wider audience. For the most up-to-date cost, it’s always best to check the current price on Amazon. This ensures you’re seeing the latest deals and availability.
To understand its incredible value, let’s put its cost into perspective. A basic, non-smart “dumb” trainer might be cheaper, but it offers none of the interactive features. You’ll be staring at a wall, manually adjusting resistance, and missing out on the engaging and motivating worlds of apps like Zwift. On the other end, a high-end direct-drive wahoo fitness trainer like the KICKR V6 offers superior performance, but the initial investment is substantial.
The KICKR SNAP hits the sweet spot right in the middle. It provides the core smart training experience—app-controlled resistance, power measurement, and virtual world integration—at a price that doesn’t break the bank. You’re not just buying a piece of metal to hold your bike; you’re investing in a tool that can make you a stronger, faster cyclist all year round. The cost of the trainer is a small price to pay for the consistency and quality of training it enables.
The Honest Breakdown: Pros and Cons of the KICKR SNAP
No product is perfect, and a balanced review is an honest one. The Wahoo KICKR SNAP gets so much right, but it’s important to understand its strengths and limitations to know if it’s the right fit for you. Here’s a straightforward look at what makes it shine and where it makes compromises.
Why You’ll Love the KICKR SNAP (Pros)
- Incredible Value: This is its biggest selling point. You get access to the full Wahoo ecosystem and smart training experience for a fraction of the cost of a direct-drive model. It’s the most affordable way to get a truly high-quality smart trainer.
- Supreme Convenience: The wheel-on design is a major plus for anyone who doesn’t want the hassle of removing their rear wheel. Setting up for a ride takes less than a minute, making it easy to squeeze in a quick session.
- Excellent App Compatibility: With both ANT+ and Bluetooth, the SNAP plays nicely with everything. Whether you’re using Zwift, TrainerRoad, Wahoo SYSTM, or another training app, you can be confident it will connect without issue.
- Durable and Stable: Wahoo is known for its build quality, and the SNAP is no exception. The steel frame is built like a tank and provides a super stable platform for even the most intense sprint efforts.
- Great Ride Feel for the Price: The heavy flywheel does an excellent job of simulating on-road momentum, making for a much more engaging and realistic ride than other trainers in its class.
What to Consider Before Buying (Cons)
- Noise Level: Because a roller is spinning against your tire, wheel-on trainers are inherently louder than their direct-drive counterparts. It’s not deafening, but if you live in an apartment with thin walls or need to train while others are sleeping, the hum might be a concern.
- Tire Wear: The friction from the roller will wear down your rear tire over time. It’s highly recommended to invest in a durable, slick trainer-specific tire to save your good road tires for the outdoors.
- Slightly Less Accurate: A power accuracy of +/- 3% is very good, but elite racers or data-obsessed cyclists might prefer the +/- 1-2% accuracy found on more expensive models. For most users, this difference is negligible.
- Requires Calibration: To maintain that +/- 3% accuracy, you need to perform a spindown calibration regularly, ideally 10 minutes into every ride. It only takes 30 seconds, but it is an extra step that direct-drive trainers don’t require.
Frequently Asked Questions about the Wahoo KICKR SNAP
Here are answers to some of the most common questions cyclists have about the KICKR SNAP. This should help clear up any lingering doubts you might have.
Is the Wahoo KICKR SNAP loud?
The KICKR SNAP is louder than a direct-drive trainer but generally considered quiet for a wheel-on trainer. The noise is a combination of the trainer’s flywheel and the sound of your tire on the roller. Using a smooth trainer tire instead of a treaded road tire will significantly reduce the noise level. Most users find that with a fan running and some music or their training app’s audio, the noise is perfectly manageable.
Do I need a special tire for the KICKR SNAP?
While not strictly required, it is highly recommended. A dedicated trainer tire is made from a harder rubber compound that resists heat buildup and wears down much more slowly than a standard road tire. This not only saves your expensive outdoor tires but also reduces slippage and provides a more consistent connection with the trainer’s roller, leading to better power accuracy.
What bikes are compatible with the KICKR SNAP?
The KICKR SNAP is compatible with a wide range of bikes. It fits most road, mountain, and gravel bikes with standard 130mm and 135mm quick-release hubs right out of the box. For bikes with thru-axles (common on modern disc brake bikes), Wahoo sells a separate adapter kit to ensure a secure fit. It accommodates wheel sizes from 26″ up to 29″.
How accurate is the KICKR SNAP?
The KICKR SNAP boasts a power accuracy of +/- 3%, which is excellent for a trainer in its price range. This level of accuracy is more than enough for effective structured training and for being competitive in Zwift races. To ensure you’re getting the most accurate data, remember to keep your tire pressure consistent and perform a spindown calibration once the trainer is warmed up.
Can you use the KICKR SNAP without an app?
Yes, you can. If you just want to pedal and get a workout in without connecting to an app, the KICKR SNAP will function like a classic fluid trainer, providing progressive resistance—the harder you pedal, the more resistance it provides. However, using it this way means you miss out on all the smart features that make it such a powerful training tool. The real magic happens when you pair it with a training application.
Final Verdict: Is the Wahoo KICKR SNAP Worth It in 2026?
Absolutely, yes! The Wahoo Fitness KICKR SNAP remains one of the best investments a cyclist can make to improve their fitness and enjoy riding year-round. It masterfully bridges the gap between affordability and performance, delivering a premium smart training experience that was once reserved for only the most expensive equipment.
If you are a beginner or intermediate cyclist looking to dive into the world of Zwift, a budget-conscious athlete who wants a reliable training tool, or someone who values the pure convenience of a wheel-on design, the KICKR SNAP is an outstanding choice. It’s built to last, connects to everything, and provides a ride feel that will keep you coming back for more.
While direct-drive trainers offer a quieter and slightly more refined experience, the KICKR SNAP provides all the essential features you need to follow structured workouts and have a blast doing it. It’s the perfect, no-regrets entry point into a world of fitness and fun. Ready to revolutionize your indoor training? You can grab your Wahoo KICKR SNAP on Amazon and start your journey today!