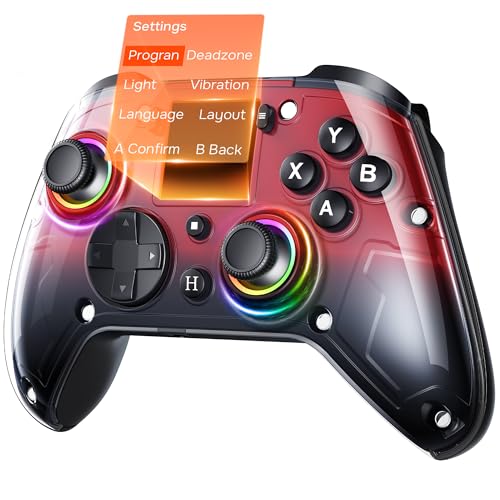
- ❗ Note: Currently not compatible with Xbox/PS5/Switch2. ❗
- 🎮 Interactive Screen & 4 Programmable Back Buttons: Effortlessly configure vibration, turbo, macros, joystick sensitivit…
- 🔧 Precision Hall Effect Joysticks & Dual-Stage Triggers: Featuring drift-free Hall sensors, the joysticks have a durabil…
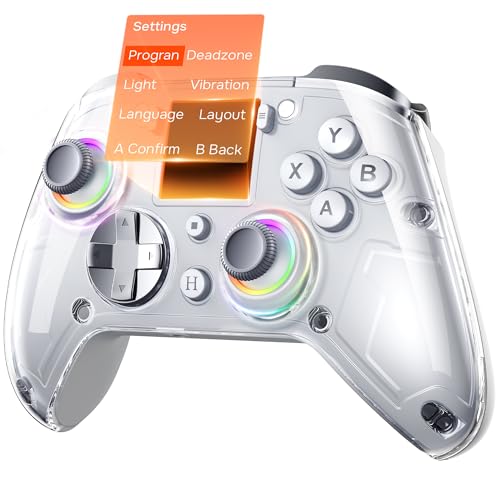
10 Best Controller Settings for Battlefield 6 to Dominate in 2026
Welcome to the warzone, soldier. You’ve got the grit, the reflexes, and the will to win. But if you’re still using the default controller layout, you’re fighting with one hand tied behind your back. Finding the best controller settings for Battlefield 6 isn’t just a minor tweak; it’s a fundamental step toward unlocking your true potential on the battlefield.
Default settings are designed for casual players, not for warriors looking to top the leaderboards. They often feel sluggish, imprecise, and can hold you back from making the lightning-fast plays that define a great player.
This guide is your new boot camp. We’re going to break down every critical setting, from sensitivity to aim assist, and give you the knowledge to build a completely custom and optimized control scheme. Forget clumsy aiming and missed shots. By the end of this, you’ll have a battlefield 6 controller setup that feels like a natural extension of your own hands, allowing you to snap to targets, control recoil, and move with incredible fluidity.
Let’s get you dialed in and ready for victory.
What You’ll Learn
- Sensitivity is Personal: The perfect sensitivity is a balance between speed for close-quarters combat and precision for long-range shots. Start around 40-70 and adjust from there.
- Turn Off Vibration: Controller vibration adds immersion but actively hurts your aim by shaking your controller during crucial moments. Turn it off for a competitive advantage.
- Maximize Your Field of View (FOV): A higher FOV (around 100-115) allows you to see more of the battlefield, giving you a massive awareness advantage over players on default settings.
- Uniform Soldier Aiming is a Must: Turning this setting on ensures your aim sensitivity feels consistent whether you’re hip-firing or looking down a 12x scope, which is vital for muscle memory.
- Test Everything: The firing range is your best friend. Use these recommendations as a starting point, then spend time fine-tuning every setting until it feels perfect for you.
1. An Overview of Your Battlefield 6 Controller Setup

Before we start flipping switches and sliding bars, it’s crucial to understand the philosophy behind creating the optimal controller settings for Battlefield 6. The goal isn’t to copy a pro player’s setup exactly, but to understand what each setting does so you can tailor it to your unique playstyle, reaction time, and even the type of controller you use. The default settings in most games, including Battlefield 6, are a compromise designed to be accessible to the widest possible audience. This means they are rarely, if ever, optimal for competitive play.
Think of your controller settings as three core pillars: Aiming, Movement, and Quality of Life. Aiming settings, like sensitivity and acceleration curves, directly impact your ability to put rounds on target. Movement settings, such as button layouts for sliding and jumping, dictate your agility and survivability in a firefight. Quality of Life settings, like vibration and FOV, affect your awareness and physical interaction with the game.
A common mistake players make is changing too much at once. This can overwhelm your muscle memory and make your performance even worse in the short term. The best approach is to make small, incremental adjustments, test them thoroughly in the firing range or a low-stakes match, and then decide whether to keep the change. This guide will walk you through each setting methodically, providing a strong baseline from which you can begin your journey to a perfectly personalized setup.
2. Nailing Your Sensitivity: The Foundation of Good Aim
This is the big one. Your sensitivity settings are the absolute bedrock of your performance. Get this right, and everything else falls into place. Get it wrong, and you’ll constantly feel like you’re fighting your controller.
The key is finding a balance between being fast enough to turn on enemies up close and precise enough to track distant targets.
Infantry Aim Sensitivity: This is your main look sensitivity for hip-firing. Most competitive players land somewhere between 40 and 75. A lower number offers more precision but slower turns, while a higher number allows for rapid 180-degree snaps but can feel twitchy. Start at 50 and play for an hour.
If you’re constantly over-aiming past your targets, lower it by 5. If you feel like you can’t turn fast enough, raise it by 5. Repeat until it feels right.
Zoom Aim Sensitivity: This controls your sensitivity while aiming down sights (ADS). A common practice is to set this slightly lower than your infantry sensitivity, often around 80-90% of that value. This gives you fluid movement while hip-firing and more controlled precision when you’re aiming for a headshot. However, this is where Uniform Soldier Aiming comes in.
Uniform Soldier Aiming (USA): Turn this ON. This is non-negotiable for building consistent muscle memory. USA ensures that the distance you move your thumbstick results in the same amount of on-screen cursor movement, regardless of your zoom level. It makes a 2x scope feel just as intuitive as a 8x scope.
Set the Coefficient to 178 (which translates to a 1:1 monitor match distance at 100% vertical FOV) for the most consistent feel across all optics.
3. Acceleration vs. Linear: Choosing Your Aim Input Curve
Your aim input curve determines how your aim speed responds to the movement of your thumbstick. This setting has a massive impact on the “feel” of your aim and is a critical part of finding your perfect battlefield 6 controller setup. There are two main philosophies here: using aim acceleration or a linear response.
Aim Acceleration: This setting means that the further and faster you push your stick, the more your aim speed accelerates. A small, slow movement will be very precise, while slamming the stick to the edge will whip your view around quickly. Some players like this because it offers a blend of precision for micro-adjustments and speed for large movements. However, it can be very difficult to master because the response is not consistent, making it harder to build reliable muscle memory.
If you’ve played older Battlefield titles, some of their default curves use a degree of acceleration.
Linear Response Curve: A linear curve means there is a direct, 1:1 relationship between how far you push the stick and how fast your operator turns. Pushing the stick 50% of the way will always result in 50% of your maximum turn speed. This is the preferred setting for most competitive players across all FPS titles. Why.
Consistency. Because the response is always predictable, you can build incredibly reliable muscle memory for exactly how far you need to move your stick to snap to a target’s head. It might feel a bit strange at first if you’re used to acceleration, but sticking with it will pay huge dividends for your long-term accuracy.
Our recommendation is to start with a Linear Curve (or a setting of 0 for Stick Input Acceleration). Give it a few days of practice to adjust. The raw, predictable input is the fastest path to developing crisp, consistent aim.
4. Remapping Your Controls for Lightning-Fast Reactions

In the heat of battle, milliseconds matter. Taking your thumb off the right stick to press a face button (like Circle or B to crouch) is a millisecond you can’t afford, as it means you temporarily lose the ability to aim. This is why custom button mapping is one of the most impactful changes you can make. The goal is to keep your thumbs on the sticks as much as possible.
Here are some of the most effective button remappings:
- Crouch/Slide on Right Stick (R3): This is arguably the most popular and effective change. By mapping crouch/slide to your right thumbstick click, you can instantly drop into a slide or crouch spam in a close-quarters fight without ever sacrificing your aim. This makes you a much harder target to hit and is a staple of high-level movement.
- Jump on Left Bumper (L1/LB): Known as the “Bumper Jumper” layout, this allows you to jump and aim simultaneously. This is incredibly useful for jumping around corners while pre-aiming or navigating complex terrain without taking your thumb off the aim stick.
- Melee on a Face Button: With crouch/slide moved to R3, you’ll need to move your melee attack. A face button like Circle/B is a perfect new home for it, as melee is a less frequent and less aim-critical action.
Pro Tip: If you’re serious about competitive play, consider investing in a pro-style controller with back paddles (like a SCUF, Razer Wolverine, or Xbox Elite). These paddles allow you to map crucial functions like jump, slide, reload, or weapon swap to your fingers on the back of the controller, meaning you never have to take your thumbs off the sticks. It’s a significant advantage.
Spending time in the settings menu to create a custom layout that feels intuitive to you is essential. Don’t be afraid to experiment. The ability to slide, jump, and aim all at the same time is what separates good players from great ones.
5. To Vibrate or Not to Vibrate? That Is the Question
This is one of the simplest yet most debated topics when discussing the top battlefield 6 controller settings. Controller vibration was designed to increase immersion, making you feel the rumble of a nearby explosion or the kick of your weapon. For a cinematic single-player campaign, it’s a fantastic feature that enhances the experience. For competitive multiplayer, it’s a liability.
Think about it: you’re in a tense, long-range firefight, carefully controlling your recoil to land headshots on a distant sniper. Suddenly, a grenade goes off 20 meters away. Your controller starts buzzing violently, shaking your hands at the exact moment you need maximum precision. This unwanted physical feedback can, and will, cause you to miss shots.
The subtle vibrations from firing your own weapon can also interfere with the fine motor skills needed to make micro-adjustments to your aim.
Every single competitive player, without exception, turns controller vibration OFF. There is simply no competitive advantage to leaving it on, and it actively works against your goal of achieving perfect accuracy. Go into your controller settings right now and disable it. It might feel a little strange for the first few matches, as the controller will feel “dead,” but you will quickly notice an improvement in your ability to stay on target during chaotic moments.
This is a free, instant upgrade to your gameplay that requires zero skill to implement. Do it.
6. Mastering Aim Assist: Your Best Friend on Console
Let’s clear the air: aim assist is not an aimbot. It’s a necessary tool to make playing a fast-paced FPS with small thumbsticks viable. A mouse offers a huge surface area for precision, while a thumbstick has a very limited range of motion. Aim assist helps bridge that gap.
Understanding how it works is key to maximizing its effectiveness.
Battlefield 6’s aim assist typically has two main components:
- Aim Assist Slowdown: When your crosshair moves over an enemy player, the sensitivity slows down, creating a “sticky” feeling. This helps you stay on target instead of over-aiming, especially while tracking a moving opponent. It’s the most important part of aim assist.
- Aim Assist Rotation (Rotational Aim Assist): When you are moving your character (strafing with the left stick) and an enemy enters your screen, your crosshair will be subtly pulled towards them. This helps with initial target acquisition as you peek around corners.
For your settings, you should almost always set Infantry Aim Assist to 100%. Turning it down or off is a massive handicap you don’t need to give yourself. You want the system to provide as much help as it’s designed to give. Some games also have an “Aim Assist Zoom Snap” feature, which makes your crosshair snap to the target’s chest when you first press the ADS button.
While this can be helpful for beginners, many advanced players find it can sometimes pull their aim away from a headshot they were lining up. Experiment with this setting, but leaving it on is generally fine.
The key to using aim assist effectively is not to fight it. Let the slowdown help you. When you feel the stickiness on a target, focus on making small, smooth adjustments to track them rather than jerky, panicked movements that can break the aim assist bubble. A common tactic is to use left-stick strafing to make fine horizontal adjustments while aiming, allowing the rotational aim assist to do some of the work for you.
7. Expanding Your Horizons: Why Field of View (FOV) Matters

Field of View, or FOV, determines how much of the game world you can see on your screen at one time. It’s like adjusting the zoom on a camera lens. A low FOV is like being zoomed in, offering a narrow, focused view. A high FOV is zoomed out, giving you a wide, panoramic perspective.
On consoles, the default FOV is often quite low (around 70-80) to ensure stable performance. Increasing it is one of the biggest advantages you can give yourself.
The Pros of a Higher FOV:
- Increased Peripheral Vision: You can see enemies to your sides that you would otherwise miss. This is a massive boost to your situational awareness.
- Reduced Visual Recoil: Because everything is more “zoomed out,” the apparent kick of your weapon when firing feels much less dramatic, making recoil easier to control.
- A Sense of Speed: A higher FOV makes you feel like you’re moving faster, which many players find more enjoyable.
The Cons of a Higher FOV:
- Targets Appear Smaller: The biggest trade-off is that enemies, especially at a distance, will be smaller and potentially harder to hit.
- Potential Performance Impact: On older consoles, a very high FOV can sometimes lead to a drop in frame rate, though modern consoles handle it much better.
For most players, the sweet spot for FOV is between 100 and 115. This provides a huge awareness advantage without making distant targets impossibly small. Start by increasing your FOV to 100 and see how it feels. If you’re comfortable, push it up in small increments.
It will feel strange at first—often described as a “fisheye” effect—but stick with it for a few games. Going back to a low FOV after you’ve adjusted will feel like you’re playing with blinders on.
8. The Right Tool for the Job: Best Controller Types for Battlefield 6
While settings are paramount, the hardware you use also plays a significant role. Your standard-issue Xbox Wireless Controller or PlayStation DualSense are fantastic pieces of kit, but the world of pro controllers offers features designed specifically for a competitive edge.
Standard Controllers: These are what most people use, and you can absolutely dominate with them. The key is to use a custom button layout like Bumper Jumper or a layout that maps slide to the stick click, as we discussed earlier. Their main limitation is the lack of extra inputs, forcing you to take your thumbs off the sticks.
Pro Controllers (SCUF, Xbox Elite, Razer Wolverine, etc.): These controllers are built for performance. Their defining feature is a set of back paddles. These paddles can be mapped to any button, allowing you to assign actions like jump, slide, reload, or weapon swap to the fingers that are already resting on the back of your controller. This means you can perform every action in the game without ever taking your thumbs off the sticks, which is a monumental advantage in terms of reaction time and movement fluidity.
Other common pro features include:
- Trigger Stops: A physical switch that shortens the pull distance of your triggers, allowing for faster single-shot firing and quicker ADS.
- Swappable Thumbsticks: The ability to change the height and shape (concave or convex) of your thumbsticks to better fit your hands and playstyle. Taller sticks can offer a greater range of motion for more precise aiming.
Of course, playing for hours to dial in these settings requires comfort. A high-quality gaming chair can make a world of difference in maintaining focus and preventing fatigue during long gaming sessions. Brands like Secretlab and TechniSport offer ergonomic support that helps you stay comfortable and locked in, whether you’re in the practice range or the final circle.
9. Creating and Saving Your Perfect Battlefield 6 Controller Setup
After spending all this time meticulously crafting the perfect settings, the last thing you want is to lose them or have to re-enter them constantly. This is where custom profiles come in. Most modern games, especially in a series as detailed as Battlefield, allow you to save your custom configurations.
Take advantage of this feature by creating specialized profiles for different aspects of the game. For example, your ideal infantry setup might not be the best for flying a jet or driving a tank. Vehicle controls often benefit from different sensitivity values and button layouts.
Consider creating and saving at least three distinct profiles:
- Infantry: This will be your primary profile, using all the settings we’ve discussed for on-foot combat.
- Aircraft: Flying jets and helicopters requires smooth, deliberate control. You might want a lower sensitivity and a completely different button layout for flight controls.
- Ground Vehicles: Driving tanks and other ground vehicles might also benefit from a unique sensitivity setting, especially for the turret controls.
Getting into the habit of switching to the appropriate profile will make every aspect of Battlefield’s combined-arms gameplay feel more intuitive. Name them clearly (e.g., “Infantry Pro,” “Jet Pilot”) so you can swap on the fly without confusion. This level of organization ensures you’re always using the most optimal controller settings for Battlefield 6, no matter what role you’re playing on the team.
10. The Firing Range: How to Test and Tweak Your Settings
Knowledge is useless without application. You can read guides and watch videos all day, but the only way to truly find the best controller settings for Battlefield 6 for you is to test them. The in-game firing range or an empty server is your laboratory. This is where you turn theory into practice and build muscle memory.
Pro Tip: Don’t just change your settings and jump straight into a competitive match. Your brain needs time to adapt. Spending 15-20 minutes in the firing range before each play session to warm up with your new settings can dramatically speed up the adjustment process.
Here are a few drills to run in the firing range:
- Target Snapping: Stand in one spot and quickly snap your aim from one target to another, firing a short burst. Focus on stopping your crosshair directly on the target. If you’re consistently overshooting, your sensitivity is too high. If you’re undershooting or feel slow, it’s too low.
- Recoil Control: Pick a weapon with significant recoil and empty a full magazine into a wall from about 15 meters away. Your goal is to create the tightest bullet grouping possible by pulling down on the right stick. Your new sensitivity should make this feel more manageable.
- Tracking Drill: Find a moving target in the range or practice on the dummies while you strafe back and forth. The goal is to keep your crosshair perfectly glued to the target. This tests the combination of your sensitivity and aim assist settings.
Remember to make one change at a time. If you change your sensitivity, button layout, and FOV all at once, you won’t know which change is responsible for what you’re feeling. Be patient and methodical. The process of refining your settings never truly ends, but by following this process, you’ll build a foundation that will serve you for your entire Battlefield career.
FAQ: Your Battlefield 6 Controller Questions Answered
What are the best deadzone settings for Battlefield 6?
Your stick deadzone is the small area around the center of the thumbstick where input is not registered. You want this to be as low as possible for maximum responsiveness, but not so low that you experience “stick drift” (where your aim or character moves without you touching the stick). A great starting point is a Center Deadzone between 3 and 7. Lower it until you see drift, then raise it by one or two points until the drift stops.
Should I use Uniform Soldier Aiming (USA)?
Yes, absolutely. Uniform Soldier Aiming is one of the most important settings for building consistent aim. It ensures your sensitivity feels the same across all zoom levels, which is crucial for developing muscle memory. Turn it on and set the coefficient to 178 for the most natural 1:1 feel.
What FOV do professional players use?
Most professional FPS players on controller use a Field of View (FOV) between 100 and 115. This range offers the best balance between maximizing peripheral vision and keeping enemies at a distance large enough to see and shoot accurately. Very few pros play at the maximum FOV (usually 120) as it can make long-range targets too small.
How long does it take to get used to new controller settings?
It varies from person to person, but you should generally give yourself at least a few days to a week of consistent play to adapt to significant changes, especially a new sensitivity or button layout. The key is to stick with it and not get discouraged if your performance dips initially. Consistent practice in the firing range will speed up the process significantly.
Final Thoughts
Dialing in the best controller settings for Battlefield 6 is a journey, not a destination. The settings provided in this guide are a powerful starting point used by countless high-level players, but the ultimate goal is to create a setup that feels perfect for you. Don’t be afraid to experiment and deviate from these recommendations once you understand what each setting does.
Remember the core principles: turn off vibration, increase your FOV, use a linear response curve for consistency, and find a button layout that keeps your thumbs on the sticks. By investing the time to test and refine your setup in the firing range, you’re not just changing settings; you’re sharpening your most important weapon.
Now, take this knowledge, get your settings dialed in, and go dominate the battlefield. We’ll see you on the leaderboards!