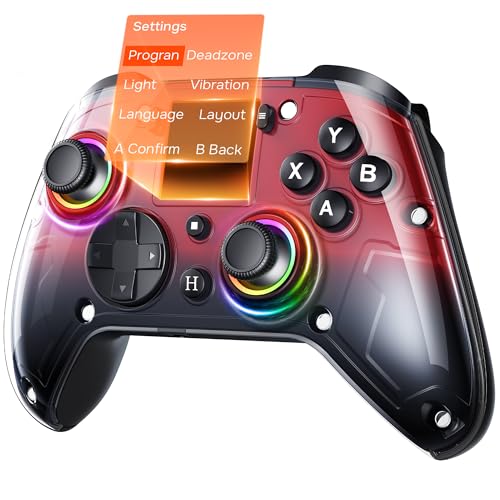
- ❗ Note: Currently not compatible with Xbox/PS5/Switch2. ❗
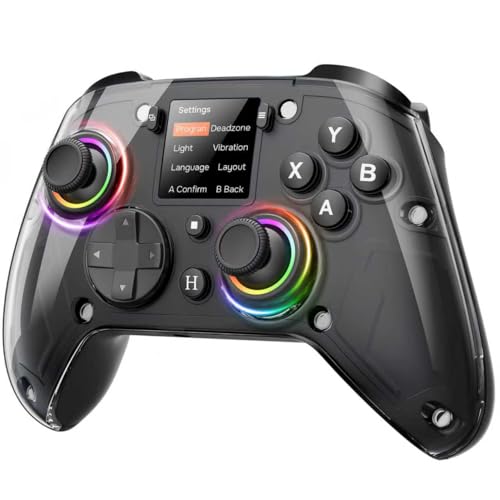
- 🎮 Interactive Screen & 4 Programmable Back Buttons: Effortlessly configure vibration, turbo, macros, joystick sensitivit…
- 🔧 Precision Hall Effect Joysticks & Dual-Stage Triggers: Featuring drift-free Hall sensors, the joysticks have a durabil…
- Compatible with Windows 10 and above, Android 9.0 and above. Mode switch button. 2.4G and wired for Windows, Bluetooth f…
- Extra R4/L4 bumpers. Designed for personalized configuration to help you react faster in games. No software needed. Turb…
- 1000Hz* polling rate under both 2.4G and wired connections ensures precise, low-latency responsiveness.
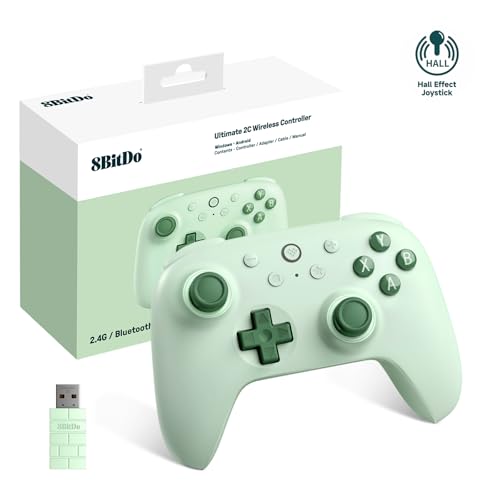
- ❗ Note: Currently not compatible with Xbox/PS5/Switch2. ❗
- 🎮 Interactive Screen & 4 Programmable Back Buttons: Effortlessly configure vibration, turbo, macros, joystick sensitivit…
- 🔧 Precision Hall Effect Joysticks & Dual-Stage Triggers: Featuring drift-free Hall sensors, the joysticks have a durabil…
10 Best Controller Settings for Warzone to Dominate in 2025
Losing a gunfight you know you should have won is one of the most frustrating experiences in Warzone. You had the drop on them, your aim was on point, but somehow they turned and melted you in an instant. Often, the culprit isn’t just skill; it’s your setup. Finding the best controller settings for Warzone is the single most impactful change you can make to instantly improve your consistency, win more 1v1s, and climb the ranks.
It’s the foundation upon which every great game is built.
This isn’t just about copying a pro player’s layout and hoping for the best. It’s about understanding why certain settings work and how to tailor them to your unique playstyle and hardware. We’re going to break down every crucial setting, from sensitivity and aim response curve to the nitty-gritty of deadzones, giving you the knowledge to build the perfect configuration. Get ready to transform your gameplay from inconsistent to absolutely dominant!
What You’ll Learn
- Sensitivity is Personal: We’ll show you how to find the perfect sensitivity sweet spot (typically between 6-10) and why the “Dynamic” Aim Response Curve is a top choice for most players.
- Deadzone is Non-Negotiable: Learn how to set your stick deadzones as low as possible (ideally 0-5) without introducing stick drift for maximum responsiveness.
- Button Layout Matters: Discover why the “Tactical” button layout is the meta for fluid movement, allowing you to slide, dive, and dropshot without taking your thumb off the aim stick.
- Maximize Your Vision: Understand why a higher Field of View (FOV) of 110-120 combined with “Affected” ADS FOV gives you a massive competitive advantage.
- Turn Off the Fluff: We’ll explain why disabling Controller Vibration and Trigger Effects is a simple but powerful trick to improve your aim consistency and firing speed.
1. Why Your Controller Settings Are Your Secret Weapon

Think of your controller settings as the transmission in a race car. You can have the most powerful engine (your raw skill), but if the transmission is clunky and inefficient, you’ll never reach your top speed. In Warzone, your settings translate your physical movements and intentions into in-game actions. Poorly optimized settings create a delay or inaccuracy between what you want to do and what your operator actually does on screen.
This disconnect is what leads to over-aiming, missing easy shots, and feeling like you’re fighting your controller instead of the enemy. The goal of finding an optimal controller setup for Warzone is to make the controller an extension of your hands, creating a seamless connection that feels intuitive and responsive. Every millisecond counts in a fast-paced shooter, and a dialed-in configuration ensures your reactions are translated to the screen instantly.
Furthermore, a proper setup reduces physical and mental strain. When your aim is smooth and predictable, you don’t have to work as hard to line up shots. This frees up mental energy to focus on the bigger picture: positioning, strategy, and game awareness. It’s not just about aim; it’s about making every aspect of gameplay, from looting to movement, feel effortless so you can focus on outsmarting your opponents.
2. Finding Your Perfect Aim: A Deep Dive into Sensitivity
Sensitivity is the most personal setting in the game, and what works for a pro might feel terrible for you. The core idea is to find a balance: high enough to quickly turn on enemies behind you, but low enough to make precise micro-adjustments during a gunfight. For most players, a Horizontal and Vertical Stick Sensitivity between 6 and 10 is the sweet spot. Start at 6-6 and play a few games.
If it feels too slow, bump it up by one until it feels right.
ADS Sensitivity Multiplier: This setting adjusts your sensitivity only when you’re aiming down sights (ADS). A value below 1.0 will slow down your aim, allowing for more precise tracking. A great starting point is between 0.85 and 0.95. This gives you the best of both worlds: fast movement when not aiming and steady control when you are.
Aim Response Curve Type: This is one of the most critical settings for how your aim feels. There are three main types:
- Standard: A simple power curve map from stick input. A decent starting point, but often feels less responsive than Dynamic. * Linear: A direct 1:1 map of stick movement to aim speed.
This is great for small, precise adjustments but can feel twitchy and difficult to control for large movements. * Dynamic: This is the overwhelming favorite for a reason. It uses a reverse S-curve, meaning it slows down initial stick movements for fine-tuning aim but ramps up quickly for fast turns. It provides a snappy, responsive feel that gives you both precision and speed.
For 99% of players, Dynamic is the way to go. It offers the most intuitive and balanced feel, making it easier to build muscle memory and stay on target.
3. The Best Controller Setup for Competitive Play
When you’re trying to compete at a higher level, every setting needs to be optimized for performance. This means prioritizing speed, accuracy, and consistency. A solid competitive baseline combines the settings we’ve discussed with a few other crucial tweaks.
First, let’s talk about Aim Assist. It’s a fundamental part of controller gameplay, and you should always have it turned on. For the Aim Assist Type, most players stick with Default or Black Ops. The “Black Ops” setting is known for a slightly “stickier” feel that can help with tracking moving targets, but it’s largely a matter of preference.
Try both in the firing range to see which one feels more natural to you.
Here’s a look at a recommended competitive setup:
| Setting | Recommended Value | Why It Works |
|---|---|---|
| Button Layout | Tactical | Allows you to crouch/slide/dive without moving your thumb from the right stick. |
| Sensitivity (H/V) | 7-7 | A balanced starting point for speed and control. |
| ADS Sensitivity Multiplier | 0.90 | Slows your aim just enough for precise tracking during gunfights. |
| Aim Response Curve | Dynamic | The best blend of precision for small adjustments and speed for large turns. |
| Target Aim Assist | On | Essential for controller gameplay. |
| Aim Assist Type | Default or Black Ops | Both are strong choices; test to find your preference. |
| FOV | 115 | Provides excellent peripheral vision without major visual distortion. |
| ADS FOV | Affected | Keeps your view zoomed out while aiming, reducing visual recoil. |
This combination provides a fantastic foundation. Remember, these are starting points. The ultimate goal is to use these top Warzone controller settings as a base and then fine-tune them until they feel perfect for you.
4. Remapping for Victory: Customizing Your Button Layout

Your button layout dictates your movement capabilities. The default layout in Warzone requires you to take your right thumb off the analog stick to jump, crouch, or slide. That fraction of a second where you can’t adjust your aim is often the difference between winning and losing a fight. That’s why experienced players almost never use the default settings.
Here are the most popular and effective button layouts:
-
Tactical: This is the most common and highly recommended layout. It swaps the crouch/slide/dive button (Circle/B) with the melee button (R3). This allows you to perform all your essential movement mechanics—sliding, diving, dropshotting—by simply pressing the right stick. Your thumb never has to leave the stick, meaning you can aim while you move. It’s a simple change with a massive impact on your fluidity.
-
Bumper Jumper Tactical: This layout takes it a step further. It moves the jump action to a bumper (L1/LB), allowing you to jump and aim simultaneously. This is especially powerful for players who like to “jump-shot” around corners to gain an advantage. It has a steeper learning curve but offers the highest possible movement skill ceiling.
-
Stick and Move: This layout is similar to Tactical but swaps the jump button with the melee button (R3). It lets you jump and aim at the same time, which is great for aggressive players. The choice between this and Tactical often comes down to whether you prioritize sliding or jumping more in your engagements.
For the vast majority of players, switching to Tactical is the single best warzone controller configuration tip. It’s easy to learn and immediately unlocks a higher level of movement, letting you slide-cancel and challenge enemies more effectively.
5. See More, Win More: Mastering Field of View (FOV)
Field of View, or FOV, determines how much of the game world you can see on your screen at once. A lower FOV is like looking through binoculars—it’s zoomed in and narrow. A higher FOV is like a wide-angle lens, giving you much better peripheral vision. For a game like Warzone, where enemies can come from any direction, a higher FOV is a massive advantage.
Most competitive players and streamers use an FOV between 110 and 120. This allows you to see more enemies on the edges of your screen, gather more information about your surroundings, and even makes the game feel faster and smoother. A higher FOV also has the added benefit of making visual recoil seem less intense because your weapon model takes up less screen space.
However, there is a trade-off. A very high FOV can make distant enemies appear smaller and harder to hit. This is why 120 is generally the maximum recommended value. Anything higher can create a “fisheye” effect that distorts the image.
Finding your perfect number between 110 and 120 is key.

ADS Field of View: You have two options here: Independent and Affected. * Independent: When you ADS, your view will zoom in to the default FOV. This makes distant targets larger but can feel jarring and disorienting. * Affected: Your FOV remains wide even when you ADS.
This keeps your peripheral vision, makes recoil feel more manageable, and provides a much more consistent aiming experience. Affected is the universally recommended setting..
To run a high FOV while maintaining a high, stable frame rate, you need a powerful machine. A pre-built system from a company like ORIGIN PC ensures you have the horsepower to push these settings without sacrificing performance, which is crucial for competitive play.
6. The Great Debate: Xbox vs. PlayStation Controllers
When it comes to the standard controllers, the choice between Xbox and PlayStation often comes down to personal preference, specifically regarding ergonomics and analog stick placement. Neither controller offers an inherent competitive advantage in terms of core functionality for Warzone.
Xbox Controller: The key feature is its asymmetrical (offset) analog stick layout. Many players find this more ergonomic for longer gaming sessions, as it places the left thumb in a more natural resting position. The controller itself is generally larger, which can be more comfortable for players with bigger hands.
PlayStation DualSense (PS5) Controller: This controller features a symmetrical stick layout, which some players prefer for its consistency between the left and right thumbs. The DualSense also has advanced haptic feedback and adaptive triggers. However, for competitive Warzone play, these features are almost always turned off. As we’ll discuss later, vibration and trigger resistance can interfere with your aim and reaction time.
What About Pro Controllers?
Many serious players eventually upgrade to a “pro” controller from brands like Scuf or Battle Beaver. These controllers offer features like:
-
Paddles: Extra buttons on the back of the controller that can be mapped to any action (like jump or slide). This allows you to perform key actions without ever taking your thumbs off the sticks, offering the ultimate movement advantage. * Trigger Stops: Physical switches that shorten the pull distance of the triggers, allowing you to fire semi-automatic weapons faster.
-
Interchangeable Thumbsticks: The ability to swap out thumbsticks of different heights and shapes to find what’s most comfortable for your aim.
While a standard controller is perfectly capable of getting you wins, a pro controller can provide that extra edge in performance and comfort once you’ve mastered the fundamentals.
7. Eliminating Stick Drift: The Critical Role of Deadzone Settings
Deadzone is arguably the most important and misunderstood setting for controller players. Your controller’s deadzone is a small area around the center of the analog stick where movement is not registered. This is designed to prevent “stick drift”—the annoying phenomenon where your aim or character moves on its own, even when you’re not touching the sticks.
However, a deadzone that is set too high creates a noticeable delay. Your aim won’t start moving until you’ve pushed the stick outside of that central dead area, making small, precise adjustments feel sluggish and unresponsive. The goal is to set your Minimum Input Deadzone as low as possible without experiencing any stick drift.
Here’s how to find your perfect deadzone setting:
- Go to the Controller Settings Menu: Navigate to the deadzone section.
- Set Left and Right Stick Min to 0: Lower both minimum values all the way down to zero.
- Observe Your Screen: Look closely at your aim or character. If nothing moves, congratulations, your controller has no drift! You can use a very low deadzone (0-1).
- Test for Drift: If your aim is slowly moving on its own, increase the Right Stick Min by 1. Repeat this process until the drift stops completely. That number is your perfect minimum deadzone. Do the same for the Left Stick if your character is moving on their own.
For most controllers, this value will land somewhere between 3 and 7. Setting it correctly will make your aim feel incredibly responsive and connected.
What about Max Input Deadzone?
- Left Stick Max: Setting this lower (around 75-85) can make your operator reach a full sprint faster, as you don’t have to push the stick all the way to the edge.
- Right Stick Max: This should almost always be left at 99 (or 100). Lowering it can mess with aim assist and make your aim feel inconsistent.
Pro Tip: Test your deadzone settings every few months, especially if you play a lot. Analog sticks wear down over time, and a setting that worked perfectly a month ago might start showing drift later on.
8. Feel the Game, Not the Shake: Vibration and Trigger Effects
This is one of the simplest but most effective warzone controller configuration tips you can implement. Turn off controller vibration. Immediately. While vibration can add to the immersion in single-player story games, it’s a massive detriment in a competitive shooter like Warzone.
Every time your controller vibrates—from shooting, getting hit, or explosions—it introduces tiny, random movements to your hands. These micro-shakes actively work against your muscle memory and make it harder to maintain precise aim on a target. The best players rely on consistency, and vibration is the enemy of consistency. By turning it off, you create a stable platform for aiming, ensuring that the only movements being made are the ones you intend to make.
Similarly, if you’re playing on a PlayStation 5 with the DualSense controller, you should also turn off the Trigger Effect (Haptic Feedback). These settings create resistance in the triggers to simulate the feel of a real gun. While it’s a cool piece of tech, it actively slows down your reaction time. The added resistance means you have to press harder and longer to fire your weapon, which can easily cost you a gunfight where every millisecond matters.
For the fastest possible semi-auto fire rate and quickest ADS time, both of these features should be disabled.
9. Common Warzone Controller Configuration Mistakes to Avoid
Dialing in the perfect settings is a process of trial and error, but there are several common pitfalls that can hold players back. Avoiding these mistakes is just as important as knowing which settings to enable.
-
Blindly Copying Pro Settings: It’s tempting to find your favorite streamer’s settings and copy them exactly. The problem is that their settings are tailored to their specific controller, playstyle, and years of muscle memory. A pro who plays on a 20-20 sensitivity has spent thousands of hours mastering it. If you jump straight to that, your aim will be all over the place. Use pro settings as a guideline or a starting point, not a final destination.
-
Setting Deadzone Too Low: While a low deadzone is ideal, setting it too low is a huge mistake. If you set it below the point where your stick drift begins, your aim will constantly be fighting a slight, unpredictable pull. This makes holding angles and hitting long-range shots incredibly difficult. Always test for drift and set your minimum just above where it stops.
-
Ignoring FOV on Console: For years, console players were stuck at a low FOV. Now that modern consoles support it, failing to increase your FOV is a massive tactical error. Playing on the default 80 FOV puts you at a significant disadvantage against players who can see far more of the battlefield.
-
Changing Settings Too Often: Once you find a comfortable base setup, stick with it! Constantly tweaking your sensitivity every other day prevents you from building crucial muscle memory. Give yourself at least a week or two with a new setup to truly adapt before deciding if another change is needed.
10. What the Pros Use: A Look at Pro Player Settings
While you shouldn’t copy pro settings verbatim, looking at what the best players in the world use can reveal important trends and give you a fantastic starting point. You’ll notice that despite having different preferences, most pro players operate within a similar range for the most critical settings.
Sensitivity: The vast majority of professional Warzone players use a sensitivity between 6-6 and 10-10. It’s very rare to see a top player using anything extremely low or extremely high. This range has proven to be the meta because it offers that perfect balance of turning speed and fine-aim control.
ADS Multiplier: Almost universally, you’ll see pros using an ADS multiplier just under 1.00, typically from 0.80 to 0.95. This confirms the principle that slowing down your aim slightly while ADS is crucial for maintaining accuracy, especially when tracking targets at range.
FOV: You will not find a single pro PC player using a low FOV. The standard is 110-120, with most settling around 115-120. The competitive advantage of increased peripheral vision is simply too large to ignore. They all use “Affected” for their ADS Field of View to maintain that wide view and reduce visual recoil.
Button Layout & Controller: Tactical is the overwhelming favorite layout. When it comes to hardware, many pros use customized controllers with paddles, like Scuf or Battle Beaver, to maximize their movement potential. This allows them to jump, slide, and plate up all while keeping their thumbs firmly on the sticks, ready to aim at a moment’s notice.
Your entire gaming environment contributes to your performance. A comfortable setup allows for longer, more focused sessions. Investing in a quality ergonomic chair like those from Secretlab or TechniSport can reduce fatigue and help you maintain peak performance during those intense, multi-hour gaming nights.
Frequently Asked Questions (FAQ)
How can I aim better in Warzone with a controller?
Improving your aim is a multi-step process. First, ensure your settings are optimized using the guide above, focusing on a comfortable sensitivity, the Dynamic response curve, and a minimal deadzone. Second, practice. Spend 10-15 minutes in the firing range before you play, shooting bots to warm up.
Practice target switching and recoil control. Finally, focus on crosshair placement. Always try to keep your crosshair at head or chest level and anticipate where enemies might appear. This reduces the amount you have to adjust your aim when a fight starts.
What sensitivity do most pros play on in Warzone?
Most professional Warzone players use a stick sensitivity that falls within the 6-10 range for both horizontal and vertical. It’s rare to see a top-tier player go much higher or lower than this. This range is considered the sweet spot because it allows for quick 180-degree turns to handle enemies from behind while still being controllable enough for precise tracking and recoil management in head-to-head gunfights. They almost always pair this with an ADS Sensitivity Multiplier below 1.0, typically around 0.85-0.95.
How do I control recoil on a controller in Warzone?
Recoil control on a controller is about applying smooth, consistent counter-pressure with your right thumbstick. When you fire a weapon, observe which way the recoil kicks (usually up and to one side). To counteract it, you need to gently pull the right stick in the opposite direction (down and to the other side). The key is to be smooth, not jerky.
Using the “Affected” ADS FOV setting and building your weapons with attachments that improve recoil control (like certain muzzles, underbarrels, and stocks) will also make this much easier.
Which controllers do CoD pros use?
While many pros start on standard Xbox or PlayStation controllers, a large number upgrade to specialized “pro” controllers. Brands like Scuf Gaming, Battle Beaver Customs, and the official Xbox Elite Controller are extremely popular. The main advantage of these controllers is the addition of back paddles, which allow players to map actions like jump, slide, and reload to their fingers on the back, so their thumbs never have to leave the analog sticks. This provides a significant advantage in movement and reaction time.
How do I get 100% aim assist?
There is no setting for “100% aim assist.” Aim assist is a built-in mechanic that has different strengths and behaviors depending on the type you select (e.g., Default, Black Ops). To get the most out of it, you need to use it correctly. Aim assist is most effective when your character is also moving. Strafe left and right with your left stick during a gunfight.
This rotational movement strengthens the aim assist slowdown effect, making it “stickier” and helping you track targets more effectively. Standing still is the easiest way to get minimal help from aim assist.
Final Thoughts
Finding the best controller settings for Warzone is a journey, not a destination. The settings laid out in this guide represent the pinnacle of what works for the majority of competitive players, but the final tweaks will always come down to you. Use this information as your roadmap, spend time in the firing range, and don’t be afraid to experiment to find what makes you feel fast, accurate, and confident.
Remember the core principles: a moderate sensitivity with a Dynamic curve, a Tactical button layout for superior movement, the lowest possible deadzone without drift, and a high FOV to see everything. By mastering these settings, you’re not just changing numbers in a menu; you’re removing the barriers between you and your true potential.
And don’t forget that your audio is just as important as your visuals. Pinpointing enemy footsteps and gunfire direction is critical for survival. A high-quality headset, like the immersive options from BASN Audio, can give you the auditory awareness you need to complement your perfectly tuned visual settings and truly dominate the battlefield.