


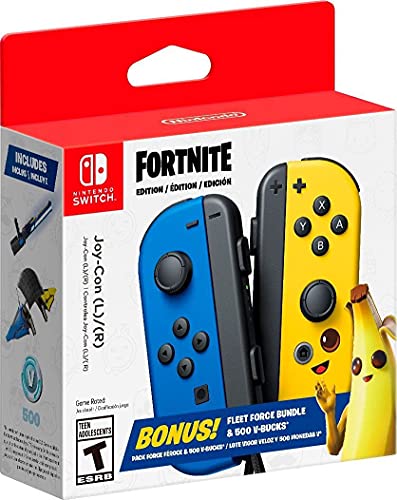
- The Nintendo Switch Joy-Con Fortnite fleet force bundle includes a uniquely Designed blue Joy-Con (L) and a yellow Joy-C…
- It also includes 500 v-bucks and a download code for an in-game Pack with cosmetic items, such as a unique glider and el…
- The Fortnite fleet force bundle with special Joy-Con will be launching June 4, so stay tuned for more information.

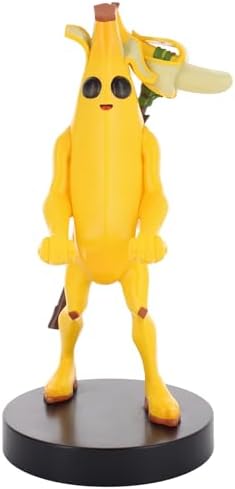
- Peely phone, remote control and gaming controller stand / holder
- Compatible with most types of smartphones and console controllers, including the next-gen PlayStation 5 DualSense, Xbox …
- A perfect gift, for you or your fellow Fortnite fan

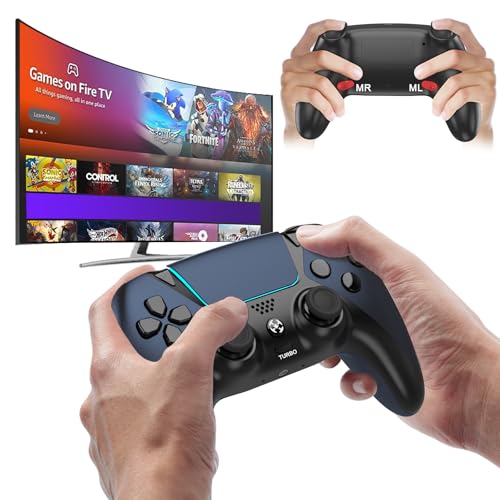
- 🎮【𝐄𝐧𝐡𝐚𝐧𝐜𝐞𝐝 𝐆𝐚𝐦𝐢𝐧𝐠 𝐂𝐨𝐧𝐭𝐫𝐨𝐥𝐥𝐞𝐫 𝐟𝐨𝐫 𝐋𝐮𝐧𝐚】Ymir Upgrade for luna controller for fire tv has Patent: No.US D998,043 S. Experie…
- 🎮【𝐀𝐝𝐯𝐚𝐧𝐜𝐞𝐝 𝐀𝐋𝐏𝐒 𝐉𝐨𝐲𝐬𝐭𝐢𝐜𝐤𝐬,𝐍𝐨 𝐃𝐫𝐢𝐟𝐭 𝐆𝐮𝐚𝐫𝐚𝐧𝐭𝐞𝐞】Say goodbye to joystick drift with our high-precision ALPS analog sticks.Ou…
- 🎮【𝐏𝐫𝐨-𝐆𝐚𝐦𝐞𝐫 𝐅𝐞𝐚𝐭𝐮𝐫𝐞𝐬,𝐓𝐮𝐫𝐛𝐨 & 𝐏𝐫𝐨𝐠𝐫𝐚𝐦𝐦𝐚𝐛𝐥𝐞 𝐏𝐚𝐝𝐝𝐥𝐞𝐬】Replacement for fire tv game controller,Gain the competitive edge with…
Best Controller Settings for Fortnite: A Pro Player’s Guide to Aim, Builds & Edits
Are you tired of losing build fights you should have won. Do you feel like your aim is inconsistent, letting you down in crucial moments. The secret to breaking through that skill plateau might not be just more practice, but smarter practice with the best controller settings for Fortnite tailored specifically for you. Default settings are designed for casual play, not for the lightning-fast edits and precise shots needed to secure a Victory Royale in today’s lobbies.
This guide will walk you through every setting, from sensitivity to deadzone, to help you build an optimal controller setup that feels like an extension of your own hands.
Getting your settings right is the first step toward unlocking your true potential. It’s about creating a foundation of muscle memory and responsiveness that allows your natural skill to shine. Whether you’re on PlayStation, Xbox, or PC with a controller, these principles will transform your gameplay, making you a faster builder, a sharper shooter, and a more confident player.
What You’ll Learn
- Sensitivity is Key: Understand the difference between Look and ADS sensitivity, and why finding your personal sweet spot is crucial for both building and aiming.
- Linear vs. Exponential: Discover which input curve matches your playstyle, whether you prefer raw stick input for building or smooth control for aiming.
- Deadzone and Stick Drift: Learn how to set your deadzone to the lowest possible value for maximum responsiveness without suffering from annoying stick drift.
- Pro-Level Binds: Explore why custom keybindings, especially for editing, are essential for competing at a higher level and how to set them up.
- Test and Refine: The best settings are personal. We’ll show you how to use Creative maps to test, tweak, and perfect your setup until it feels just right.
Why Your Fortnite Controller Settings Matter More Than You Think


In a game as fast-paced as Fortnite, every millisecond counts. The difference between winning and losing a fight often comes down to who can build, edit, and shoot the fastest and most accurately. Your controller settings are the direct interface between your brain’s commands and your character’s actions on screen. If they’re clunky, slow, or inconsistent, your gameplay will suffer, no matter how skilled you are.
Think of it like driving a high-performance sports car. You could have the fastest car on the track, but if the steering is too loose or the brakes are too sensitive, you’ll never be able to control it effectively. The same logic applies to your fortnite controller settings. Default settings are often too slow and unresponsive for high-level play.
They might feel comfortable for a brand new player, but they create a low skill ceiling that can be incredibly frustrating to break through.
Optimizing your settings allows for greater precision and speed. A well-tuned sensitivity lets you flick to targets without over-aiming, while a higher build sensitivity enables you to crank 90s and protect yourself instantly. A low deadzone makes your movements feel immediate and snappy. By customizing these values, you’re not just changing numbers; you’re building a system that allows for the development of consistent muscle memory, which is the foundation of all high-level mechanical skill in Fortnite.
The Foundation: Mastering Your Sensitivity Settings
Sensitivity is the heart and soul of your controller setup. It dictates how quickly your camera moves when you touch the look stick. Finding the right balance is a personal journey, but understanding the core components is the first step. There are two primary sensitivity settings you need to master: Look Sensitivity and Aim Down Sights (ADS) Sensitivity.
Getting these right is the difference between snapping onto an opponent for a clean headshot and wildly spraying bullets around them. It’s the foundation upon which all your aiming mechanics are built. Don’t just copy a pro player’s settings and call it a day. Take the time to understand what each setting does and how it affects your gameplay.
This knowledge will empower you to make small, informed adjustments over time, constantly refining your control.
Look Sensitivity vs. Aim Down Sights (ADS) Sensitivity
Look Sensitivity controls your camera speed when you’re not aiming down sights (hip-firing). This is your primary setting for navigating the map, looking around for opponents, and, most importantly, building and editing. A higher look sensitivity allows you to turn around quickly to react to threats from behind and perform fast building techniques like 90s and tunneling. Most players find a sweet spot between 40% and 60% (or 4-6 on the simple scale).
Start around 45% and adjust from there.
Aim Down Sights (ADS) Sensitivity controls your camera speed only when you are aiming your weapon. This setting needs to be much lower than your look sensitivity. Why. Because you need fine-tuned control for making micro-adjustments to track moving targets or line up headshots from a distance.
A high ADS sensitivity will make your aim feel shaky and uncontrollable. A good starting point for ADS is between 8% and 15%. You want it slow enough for precision but fast enough to track an opponent who is jumping or running.
Linear vs. Exponential: Choosing Your Input Curve
Under the advanced settings, you’ll find an option for “Look Input Curve.” This is one of the most impactful choices you’ll make. It determines how the game interprets the input from your right stick.
Exponential (Expo): This is the classic Fortnite feel and the default setting. With Expo, small movements of the stick result in small camera movements, but the speed ramps up exponentially as you push the stick further to the edge. This makes small aiming adjustments feel smoother and more controlled, which can be great for long-range AR tracking. However, it can sometimes feel a bit “heavy” or less responsive for quick flicks and building.
Linear: This setting provides a raw, 1-to-1 input from your stick. The camera moves at a consistent speed relative to how far you push the stick. Many top-tier builders and box fighters prefer Linear because it feels incredibly responsive and predictable for fast edits and shotgun flicks. The trade-off is that long-range aim can feel a bit shakier without the initial dampening that Expo provides.
If you value mechanical speed above all else, give Linear a try.
Building Like a Pro: Combat vs. Build Mode Sensitivity
One of the most critical adjustments for any serious controller player is separating your build and edit sensitivity from your combat sensitivity. In the settings menu, you’ll find a “Build Mode Sensitivity Multiplier” and an “Edit Mode Sensitivity Multiplier.” These values are applied on top of your base Look Sensitivity whenever you have your build menu or an edit selected.
This feature is absolutely essential. In combat, you need controlled, precise aim. But when you’re building, you need to be able to spin 180 or 360 degrees in an instant to place walls, ramps, and cones around you. Having a single sensitivity for both tasks is a massive compromise.
You’d either be too slow to build or too fast to aim. The multipliers solve this problem perfectly.
Most competitive players set their Build and Edit multipliers somewhere between 1.8x and 2.4x. This means if your Look Sensitivity is 45%, a 2.0x multiplier would make your building sensitivity feel like 90%. It allows you to perform lightning-fast building maneuvers without making your base aiming sensitivity uncontrollably high. Start with both multipliers at 2.0x and see how it feels.
If you find yourself unable to place walls behind you quickly enough, nudge it up. If your building feels too chaotic, bring it down slightly.
Eliminating Stick Drift: Nailing Your Controller Deadzone
Controller deadzone is one of the most misunderstood but vital settings. The deadzone is a small area around the center of your analog stick where input is not registered. Its primary purpose is to combat “stick drift,” which is when your camera or character moves on its own because the controller’s analog sticks are slightly worn out and don’t return perfectly to the center.
Your goal is to set the deadzone as low as possible without experiencing any stick drift. A lower deadzone makes your controller feel far more responsive because the game registers your input the instant you move the stick. A high deadzone creates a “mushy” or delayed feeling, as you have to move the stick a certain distance before anything happens on screen.
To find your perfect deadzone setting, go into a Creative match and stand still. Lower your Look Stick and Move Stick Deadzone settings one percent at a time. As soon as you see your camera or character start to move on its own, raise the setting back up by one or two percent. For a new controller, this might be as low as 5-7%.
For an older, more worn controller, it might be 10-14%. Finding this perfect balance provides the best of both worlds: maximum responsiveness with zero unwanted movement.


Beyond the Defaults: Customizing Your Keybindings (Controller Binds)
While sensitivity affects your aim, your keybindings (or binds) dictate your mechanical speed. Using the default controller layout is a major handicap if you want to play competitively. The ability to jump, build, edit, and aim all at the same time is crucial. Standard layouts often require you to take your thumb off the right stick to press face buttons (like Triangle/Y to switch to builds or Circle/B to edit), which means you can’t aim and perform these actions simultaneously.
This is where custom binds come in. The goal is to map essential actions to buttons you can press without sacrificing your ability to aim. This is often achieved by playing “Claw” (using your index finger for face buttons) or by using a controller with back paddles, like a SCUF or an Xbox Elite Controller.
Builder Pro: The Modern Standard
If you’re new to customizing your settings, the first step is to ensure you’re using the “Builder Pro” controller layout. This preset is the foundation for all modern Fortnite building. It assigns each build piece (wall, floor, ramp, cone) to a different trigger or bumper (L1/LB, L2/LT, R1/RB, R2/RT). This allows you to place any piece you want instantly without having to cycle through them, which is a massive speed advantage over older layouts.
Almost every good controller player uses Builder Pro as their base. From there, they make custom adjustments to optimize it even further. If you’re still on an older layout, switching to Builder Pro should be your absolute first priority. It will feel awkward for a few days, but the long-term payoff is enormous.
The Next Level: Custom Binds for Instant Edits
Once you’re comfortable with Builder Pro, the next step is creating an “instant edit” bind. By default, you have to press and hold the edit button to start an edit, which introduces a small but significant delay. You can eliminate this by binding “Edit” to a button that doesn’t have a conflicting “hold” action.
One of the most popular custom binds is mapping Edit to the Left Stick (L3). This allows you to start an edit instantly by clicking the stick, all while keeping your thumb on it to control movement. You can then map “Confirm Edit” to a bumper like L1/LB or L2/LT, creating a super-fast Edit-Confirm sequence. This setup, often called “edit on release,” allows you to select the edit tiles and simply let go of your select button (R2/RT) to confirm the edit, further increasing your speed.
Finding a comfortable and fast editing scheme is a cornerstone of any optimal controller setup for Fortnite.
Pro Tip: Many players bind Switch Mode (switching between combat and building) to a face button like Triangle/Y and bind Edit to L3. This keeps your most frequent combat action (editing) on a stick you never leave, while the less frequent action (switching modes) is moved to a face button.
Diving Deeper: Advanced Controller Options Explained
Once you’ve dialed in your core settings, it’s time to venture into the “Advanced Options” tab. This section can look intimidating, but it holds the keys to fine-tuning your aim and feel to perfection. Don’t just ignore these settings; understanding them can give you a subtle but significant edge.
These settings control the finer points of how your aim behaves, adding dampening effects or acceleration boosts. While the defaults are serviceable, customizing them allows you to smooth out any remaining inconsistencies in your aim. It’s about taking a setup that’s 90% there and pushing it to 100%.
Look Dampening Time, Boosts, and More
Look Dampening Time: This setting smooths out your camera movement when you first move the stick from a neutral position. It’s intended to help with small, precise adjustments. Most competitive players turn this down to 0.00 seconds. They prefer a raw, unfiltered input without any artificial smoothing or delays, especially if they are using the Linear input curve.
Look Horizontal/Vertical Speed Boosts: These settings add an extra burst of speed when you slam your look stick all the way to the edge. This can help you turn around quickly without needing an extremely high base sensitivity. However, many players find that boosts make their aim feel inconsistent and unpredictable. It’s generally recommended to turn all boosts off (set to 0%) and control your turn speed purely with your base sensitivity and multipliers.
This creates a more predictable and easier-to-master aiming system.
The Power of Aim Assist Strength
Aim assist is a feature designed to help controller players compete with the precision of a mouse and keyboard. It subtly slows down your crosshair when it passes over an enemy player, making it easier to stay on target. For controller players, this is an absolutely essential feature.
In the advanced settings, you’ll find “Aim Assist Strength.” For the vast majority of players, this should be set to 100%. There is a common misconception that lowering aim assist can help with aim, but this is not the case. Lowering the strength simply makes the feature less effective, putting you at a disadvantage against other controller players. Aim assist is your friend; it helps bridge the mechanical gap between controller and mouse.
Make sure you’re getting its full benefit by keeping it at 100%.
Finding Your Fit: Optimal Controller Setup for Different Playstyles
While the principles of good settings are universal, the exact numbers can vary based on your personal playstyle. Are you an aggressive W-keyer who loves to box fight, or are you a more strategic player who focuses on positioning and late-game placement?
An aggressive player who is constantly pushing boxes and taking 50/50 fights might prefer a slightly higher sensitivity and the Linear input curve. Linear’s raw input is fantastic for the fast, snappy edits and quick shotgun flicks required for close-quarters combat. They need to be able to react and build in an instant, and the responsiveness of Linear is perfect for that.
A passive or strategic player, on the other hand, might favor the Exponential input curve. Expo’s smoother feel at the start of a stick movement makes it excellent for precise, long-range AR shots and tracking opponents from a distance. Since they engage in fewer chaotic box fights, the raw speed of Linear is less of a priority compared to the consistent long-range aim that Expo can provide. There is no single set of best settings for Fortnite; the optimal setup is one that enhances your natural strengths.
Should You Use Controller Vibration? (The Pro Answer is NO!)
This is one of the simplest but most impactful changes you can make. Go into your controller settings and turn Vibration OFF. Immediately.
While vibration can add a layer of immersion in single-player story games, it is a major detriment in a competitive shooter like Fortnite. The shaking of the controller during crucial moments—like when you’re shooting or being shot at—actively interferes with your ability to make fine adjustments to your aim. It introduces a random physical variable that you have no control over.
Imagine trying to draw a perfectly straight line while someone is shaking your hand. That’s what you’re doing to your aim when you leave vibration on. Every single professional player turns vibration off for this reason. It provides zero competitive advantage and actively works against the muscle memory you’re trying to build.
It’s a simple switch that will instantly make your aim feel more stable and consistent.
Learning from the Best: A Look at Pro Player Settings
Watching professional players can be a great way to find a starting point for your own settings. Players like Clix, Bugha, and Mero have spent thousands of hours refining their setups. However, it’s crucial to remember that you shouldn’t just copy their settings and expect to play like them. Their settings are tailored to their specific playstyle, controller, and years of muscle memory.
What you should do is look at the trends among pro players. You’ll notice that most of them use:
-
A low deadzone (usually between 5% and 10%). – A look sensitivity between 40-55%. – A lower ADS sensitivity, often around 8-12%.
-
Build and Edit multipliers around 2.0x. – Custom binds for editing and building. – Vibration turned off.
Use these ranges as a baseline. For example, try starting with a 45% Look Sensitivity, 10% ADS, and a 2.1x Build Multiplier. Play with these for a few hours. Does your building feel too slow.
Bump up the multiplier. Is your shotgun aim too fast. Lower your look sensitivity slightly. Use pro settings as a template, not a rulebook.
The Ultimate Test: How to Find and Refine Your Perfect Settings
Finding your perfect settings is a process of trial and error. The best place to do this is not in a hectic Battle Royale match, but in Fortnite’s Creative mode. There are thousands of maps designed specifically for practicing your aim, edits, and builds. This controlled environment allows you to focus purely on how the settings feel.

Here’s a simple process to follow:
- Load into an Aim Training Map: Search for maps like “Skaavok Aim Trainer” or “Raider’s Mechanics Training Map.” These have scenarios for tracking, flick shots, and more.
- Test Your ADS: Practice tracking the moving bots. If you’re constantly falling behind the target, your ADS sensitivity might be too low. If you’re overcorrecting and moving past the target, it’s likely too high. Make small, 1% adjustments until it feels smooth.
- Test Your Look Sensitivity: Go to the shotgun flick-shot section. Your goal is to snap from one target to the next quickly and accurately. If you’re consistently undershooting (not turning far enough), your look sensitivity is too low. If you’re overshooting, it’s too high.
- Test Your Builds in an Edit Course: Load up an edit course and run through it. Do your edits feel fluid? Can you perform a triple edit without getting stuck? This is where you can tweak your Edit Mode Multiplier until it feels fast but controlled.
- Don’t Change Too Often: Once you find a setup that feels good, stick with it! Constantly changing your settings is the worst thing you can do for muscle memory. Give yourself at least a week with a new setup before deciding to make another change.
The Gear That Complements Your Grind
While the best controller settings for Fortnite are software-based, your physical hardware plays a massive role in your performance. Perfect settings won’t matter if you can’t hear your opponent’s footsteps or if you’re uncomfortable during a long gaming session.
Clear audio is non-negotiable. Hearing the direction of footsteps or a player editing a wall can give you the critical information needed to win a fight. A quality audio setup, like the in-ear monitors from BASN Audio, can provide the detailed soundscape you need to pinpoint enemy locations. Furthermore, practicing for hours to dial in your settings requires comfort.
An ergonomic gaming chair from a brand like Secretlab or TechniSport ensures you maintain good posture and can focus on your gameplay, not your back pain.
For PC players, stable, high framerates are just as important. Your settings will feel much more responsive on a powerful machine that minimizes input lag. A pre-built system from a company like ORIGIN PC can deliver the consistent performance needed to make your gameplay feel as smooth as possible.
Frequently Asked Questions (FAQ)
What are the best Fortnite settings for controllers?
There’s no single “best” set, but a great starting point for most players is: Look Sensitivity around 40-50%, ADS Sensitivity around 8-15%, Build/Edit Multipliers at 1.9x-2.2x, Linear input curve for responsiveness, and the lowest possible deadzone that doesn’t cause stick drift (usually 5-10%). Always turn vibration off.
How can I aim better with a Fortnite controller?
Improving your aim involves several factors. First, find the right ADS sensitivity—low enough for fine control but high enough to track targets. Use an aim training map in Creative mode daily. Ensure Aim Assist is at 100%.
Finally, practice crosshair placement; always try to keep your crosshair at head level where an opponent is likely to appear.
What are the best pro controller settings?
Pro settings vary, but they share common themes: low deadzones, high build/edit multipliers, and custom keybinds for fast editing. For example, a pro might use 43% X/Y sensitivity, 9% ADS, a 2.1x build multiplier, and L3 for edit. Use these as a baseline to find what works for you, but don’t copy them exactly without testing.
What is the best sensitivity for Fortnite?
The best sensitivity is highly personal. A good method to find yours is to start in the middle (around 45%) and adjust. If you consistently overshoot targets when flicking, your sensitivity is too high. If you consistently undershoot and can’t turn fast enough, it’s too low.
Make small adjustments in Creative mode until it feels natural.
What is the best aim assist setting in Fortnite?
For 99.9% of players, the best aim assist setting is 100%. Aim assist is a crucial tool for controller players to compete with mouse and keyboard accuracy. Lowering it only puts you at a disadvantage against other controller players who are using its full strength. There is no competitive benefit to reducing it.
Do Fortnite pros use controllers?
Yes, absolutely! While many pros use a keyboard and mouse, there is a very strong contingent of professional players who dominate on controller. Players like Mero, Deyy, and Reet have won major tournaments and are considered some of the best players in the world, proving that controller is more than viable at the highest level of competition.
Final Thoughts: Finding Your Perfect Settings
Dialing in the best controller settings for Fortnite is a journey, not a destination. It’s about understanding what each option does and then embarking on a process of testing and refinement until you’ve built a setup that feels perfect for you. Don’t be afraid to experiment, but once you find something that feels comfortable, give it time. Consistency is how you build the muscle memory that leads to incredible mechanical skill.
Use this guide as your roadmap. Start with the recommended ranges, spend time in Creative mode feeling out the changes, and don’t just blindly copy your favorite pro. The goal is to create an optimal controller setup that removes all friction between your intentions and your actions in the game. When your settings are perfect, your controller disappears, and it’s just you and the game.
Now go out there and start claiming those Victory Royales.
