Custom Gaming PC Building: A 10-Step Beginner’s Guide to Your Dream Rig
There’s nothing quite like the feeling of booting up a high-performance gaming rig that you built with your own two hands. The process of custom gaming pc building is an incredibly rewarding journey that gives you complete control over every component, every wire, and every glowing LED. You’re not just buying a computer; you’re creating a personalized machine perfectly tailored to your games, your style, and your budget. It’s the ultimate way to achieve peak performance and truly own your gaming experience!
This guide is your ultimate co-pilot on this exciting adventure. We’ll walk you through everything, from selecting the perfect parts to the triumphant moment you press the power button for the first time. Forget the confusion and intimidation—we’re breaking it all down into simple, actionable steps. Let’s build something amazing!
What You’ll Learn
- Component Selection is Key: The heart of your build lies in choosing compatible and powerful components like the CPU, GPU, and motherboard. We’ll show you how to pick the right parts for your budget and performance goals.
- Budgeting Makes it Possible: You don’t need to spend a fortune. We’ll break down how to plan your budget across different tiers, ensuring you get the most bang for your buck without overspending.
- Assembly is a Step-by-Step Process: Building a gaming PC is like assembling a high-tech LEGO set. Our detailed, step-by-step instructions will guide you through the entire physical assembly process, making it easy for first-timers.
- The Full Setup Matters: A powerful PC is just the start. Creating the perfect gaming PC setup involves choosing the right monitor, audio, and ergonomic chair to complete your battle station.
- Troubleshooting is Normal: Hitting a snag is part of the process. We’ll cover common issues and how to solve them, so you can get back to gaming faster.
Why Build a Custom Gaming PC? Upgrading vs. Buying Pre-Built

Before we dive into the nuts and bolts, let’s tackle the big question: why go through the effort to build a gaming PC yourself? The alternative is buying a pre-built machine or simply upgrading your current one. While those are valid options, the custom route offers some incredible advantages.
The biggest benefit is total customization. You get to hand-pick every single component. This means you can allocate your budget to the parts that matter most to you, whether that’s a top-tier graphics card for 4K gaming or a super-fast SSD for lightning-quick load times. You’re not stuck with a low-quality power supply or a generic motherboard that a pre-built manufacturer chose to cut costs.
Another huge plus is the potential for cost savings. While not always cheaper, building your own PC often allows you to get more performance for your money. You can hunt for deals on individual components and avoid the labor costs that companies charge for assembly. Plus, the knowledge you gain is priceless.
You’ll understand exactly how your computer works, making future upgrades and troubleshooting a breeze.
Of course, the DIY path isn’t for everyone. It requires time, research, and patience. If you’re short on time or the idea of handling delicate electronics is nerve-wracking, a high-quality custom builder is an excellent alternative. Companies like ORIGIN PC let you choose your components and have experts assemble and test the machine for you, giving you the best of both worlds: customization without the construction.
Planning Your Build: Budgeting and Cost Analysis
Your journey into custom PC building starts with a single, crucial question: how much do you want to spend? Establishing a budget is the foundation of your entire project, as it dictates the performance and capabilities of your future rig. Don’t worry, you can build a fantastic gaming machine across a wide range of price points.
Let’s break down the common budget tiers:
- Entry-Level (The Budget Champion: ~$800 – $1,200): This is the perfect starting point for 1080p gaming. At this price, you can build a PC that will handle most modern titles at medium to high settings with smooth frame rates. You’ll focus on getting the best value CPU and GPU combination.
- Mid-Range (The Sweet Spot: ~$1,200 – $2,000): This is where most gamers land. A mid-range build is ideal for high-refresh-rate 1080p gaming or making a solid jump to 1440p resolution. You can afford more powerful components, faster storage, and better cooling.
- High-End (The Enthusiast Rig: $2,000+): If you’re chasing the highest frame rates at 1440p or want to dive into 4K gaming, this is your territory. This budget allows for top-of-the-line CPUs and GPUs, premium motherboards, and custom cooling solutions. The sky’s the limit!
No matter your budget, the allocation is key. Generally, the graphics card (GPU) should be the most expensive component, taking up around 30-40% of your total budget. The central processing unit (CPU) comes next, at about 15-25%. The rest is distributed among the motherboard, RAM, storage, power supply, and case.
The Heart of Your Rig: Choosing the Right Components
This is where the real fun begins! Picking your parts is like assembling your dream team. Each component plays a vital role, and ensuring they work together in harmony is crucial for a stable and powerful system. Let’s break down the core components you’ll need.
The Brains: CPU and Motherboard Compatibility
The CPU is the brain of your computer, handling all the instructions and calculations that make your games run. The motherboard is the central nervous system, connecting every single component so they can communicate. These two parts are intrinsically linked, and compatibility is non-negotiable.
Your first choice is between the two major CPU manufacturers: Intel and AMD. Both offer fantastic options at every price point. The key is to match your chosen CPU with a motherboard that has the correct socket. For example, modern Intel CPUs use an LGA socket (like LGA 1700), while modern AMD CPUs use an AM socket (like AM5).
You cannot put an AMD chip in an Intel motherboard, or vice versa.
Beyond the socket, you need to consider the motherboard’s chipset. The chipset determines the features your motherboard will have, such as the number of USB ports, PCIe lane availability, and overclocking support. For instance, an Intel Z790 chipset is designed for high-end, overclockable CPUs, while a B760 is a more budget-friendly option. Similarly, for AMD, an X670E chipset is top-tier, while a B650 offers a great balance of features and price.
To avoid any headaches, use a tool like PCPartPicker.com, which automatically checks for compatibility issues as you select your parts.
The Powerhouse: Selecting the Best Graphics Card (GPU)
For a gaming PC, the graphics card is the undisputed star of the show. The GPU is responsible for rendering the stunning visuals you see on screen, and its power directly impacts your in-game frame rates and graphical settings. This is where you should invest a significant portion of your budget.
The main players in the GPU market are NVIDIA (GeForce RTX series) and AMD (Radeon RX series). The performance you need depends entirely on your gaming goals. Are you aiming for ultra-smooth 1080p gameplay at 144Hz. Or are you looking to power a massive 4K monitor.
A more powerful GPU is required for higher resolutions and refresh rates.
When comparing cards, look at benchmarks for the specific games you play. Key specs to consider are VRAM (video memory), which is crucial for high-resolution textures, and clock speed. A good rule of thumb for 2026 is to aim for at least 8GB of VRAM for 1080p, 12GB for 1440p, and 16GB or more for 4K gaming. The GPU is the single most important component for determining your gaming performance, so choose wisely!
Memory and Storage: RAM and SSDs Explained
RAM (Random Access Memory) is your PC’s short-term memory. It holds the data for the applications and games you’re currently running. For modern gaming, 16GB is the recommended minimum, providing a smooth experience in most titles. If you’re a heavy multitasker who likes to stream, game, and have dozens of browser tabs open, stepping up to 32GB is a worthy investment.
You’ll also see terms like DDR4 and DDR5. DDR5 is the newer, faster standard, but it requires a compatible motherboard and CPU. If your budget allows, opting for a DDR5 platform is a great way to future-proof your build.
Storage is where your operating system, games, and files are permanently stored. The days of slow hard disk drives (HDDs) as your primary drive are over. A Solid State Drive (SSD) is essential for a modern gaming PC. An NVMe M.2 SSD, which plugs directly into the motherboard, offers the fastest speeds available, dramatically reducing game load times and making your entire system feel snappier.
A 1TB NVMe SSD is a great starting point for your OS and favorite games. You can always add a larger, cheaper SATA SSD later for additional game storage.
Powering It All: The Power Supply Unit (PSU)
The Power Supply Unit (PSU) is the unsung hero of your build. It takes power from your wall outlet and converts it into the precise voltages your delicate components need to operate. This is absolutely not the place to cut corners. A cheap, low-quality PSU can be unreliable and even damage your entire system if it fails.
When choosing a PSU, you need to consider two main things: wattage and efficiency rating. The wattage determines how much power the unit can supply. You can use an online PSU calculator to estimate how much wattage your components will draw, then add about 20-30% headroom for future upgrades. For most mid-range builds, a 650W to 850W PSU is plenty.
The efficiency rating is indicated by the “80 Plus” certification (Bronze, Silver, Gold, Platinum, Titanium). A higher rating means the PSU wastes less energy as heat and runs more efficiently. An 80 Plus Bronze or Gold certified PSU from a reputable brand like Corsair, Seasonic, or EVGA is a solid choice for any build.
The Foundation: Choosing Your Case
Finally, you need a home for all your new components! The PC case is more than just a box; it affects cooling, noise levels, and how easy your PC is to build in. The most important factor is airflow. Look for a case with a mesh front panel and multiple fan mounts to ensure your components get plenty of cool air.
Cases come in different sizes, or form factors, which need to match your motherboard. The most common is ATX (mid-tower), which offers plenty of space and compatibility. Micro-ATX and Mini-ITX are smaller options for more compact builds, but they can be more challenging to work in. Make sure your case has enough clearance for your GPU’s length and your CPU cooler’s height.
Check the specs before you buy.
Pro Tip: Before you start building, watch a few full build videos on YouTube featuring the case you’ve chosen. This will give you a great visual guide and highlight any specific quirks or best practices for cable management in that particular model.
Keeping it Cool: Air vs. Liquid Cooling Systems

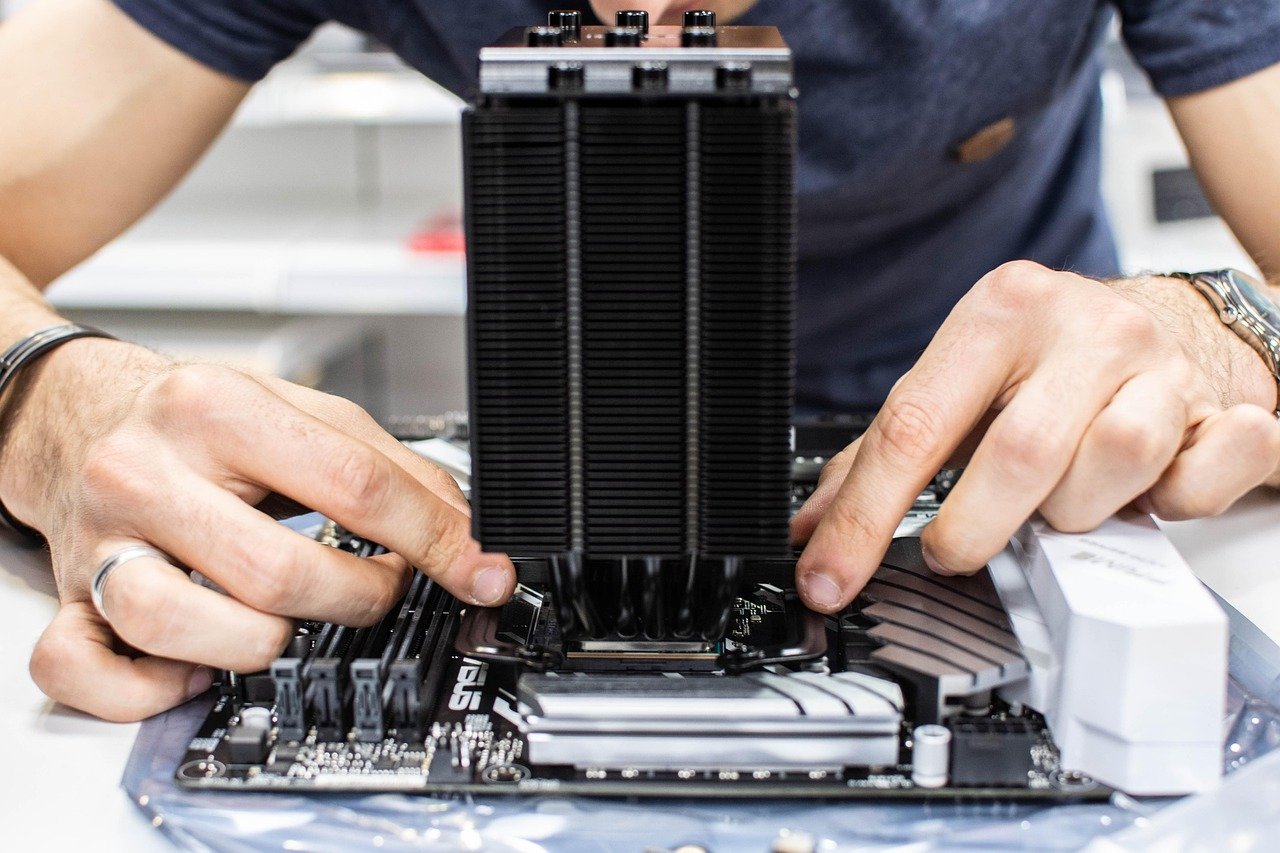
Your high-performance components, especially the CPU, generate a lot of heat. Keeping them cool is essential for maintaining performance and ensuring their longevity. You have two primary options for cooling your CPU: traditional air coolers and All-in-One (AIO) liquid coolers.
Air coolers are the classic, reliable choice. They consist of a heatsink with metal fins and one or more fans. The heatsink draws heat away from the CPU, and the fans dissipate that heat into the air. The pros of air cooling are its simplicity, reliability (no moving parts besides the fan), and cost-effectiveness.
High-end air coolers from brands like Noctua or be quiet. can even compete with many AIOs in terms of performance.
AIO liquid coolers use a closed loop of liquid to transfer heat. A pump attached to a cold plate on the CPU circulates liquid to a radiator, where fans cool it down. AIOs often provide superior cooling performance, especially for high-end, power-hungry CPUs. They also offer a cleaner, more modern aesthetic inside your case.
The downsides are a higher cost, more complex installation, and the (very small) risk of leaks, though modern AIOs are extremely reliable.
Which should you choose? For most entry-level to mid-range builds, a quality air cooler is more than sufficient and offers fantastic value. If you’re planning on heavy overclocking, have a top-tier CPU, or simply love the look of a liquid cooler, an AIO is an excellent choice.
The Fun Part: A Step-by-Step Guide to Assembling Your Gaming PC
Alright, the boxes have arrived, and your components are laid out. It’s time to build! Take a deep breath—this is the most exciting part. Follow these steps carefully, and you’ll have your PC assembled in no time.
How to Build Your PC
-
Prepare Your Workspace: Find a large, clean, well-lit area to work in, like a wooden or plastic table. Avoid building on carpet if possible to minimize static electricity. Keep your motherboard manual handy; it’s your best friend during this process.
-
Motherboard Prep (Outside the Case): It’s easiest to install the CPU, RAM, and M.2 SSD onto the motherboard before you put it in the case. Open the CPU socket lever, carefully align the triangle on the CPU with the triangle on the socket, and gently place it in. Close the lever—it will require a bit of force. Next, open the RAM slot clips, align the notch on the RAM stick with the notch in the slot, and press down firmly on both ends until they click into place. Finally, install your M.2 SSD by sliding it into its slot and securing it with the small screw.
-
Install the Motherboard: First, install the motherboard’s I/O shield into the back of the case. Then, make sure the case standoffs are aligned with the screw holes on your motherboard. Carefully lower the motherboard into the case and secure it with the provided screws. Don’t overtighten them—just snug is fine.
-
Install the Graphics Card: Locate the top-most PCIe x16 slot on your motherboard (it’s the long one). Open the clip at the end of the slot and remove the corresponding metal brackets from the back of your case. Align the GPU with the slot and press down firmly until it clicks into place. Secure it to the case with the screws you removed from the brackets.
-
Install the Power Supply: The PSU usually mounts at the bottom or top rear of the case. Slide it into place and secure it with four screws from the outside of the case. If you have a modular PSU, now is a good time to plug in only the cables you’ll need.
-
Connect All the Cables: This can be the most intimidating part, but your motherboard manual makes it easy. Connect the large 24-pin motherboard power cable, the 4/8-pin CPU power cable (usually at the top-left of the motherboard), and the 6/8-pin PCIe power cables to your GPU. Then, connect your storage drives and case fans. Finally, connect the tiny front panel connectors (power switch, reset switch, USB, audio) by following the diagram in your manual.
-
Cable Management: Before you close up the case, take some time to route your cables neatly. Use the back of the motherboard tray and zip ties to tuck away excess wiring. Good cable management isn’t just for looks; it also improves airflow inside your case.
-
The First Boot: The moment of truth! Plug in the power cord, your monitor, keyboard, and mouse. Press the power button. If everything lights up and you see the manufacturer’s logo or BIOS screen on your monitor, congratulations! You’ve successfully built a PC!
Bringing It to Life: Software Setup and Essential Programs
Building the hardware is only half the battle. Now you need to install the software that will turn your collection of components into a functional gaming machine. The first step is installing an operating system (OS).
Most gamers use Windows, which you’ll need to purchase a license for. Using another computer, visit the Microsoft website to download the Media Creation Tool, which will help you create a bootable USB drive with the Windows installer. Once you have your bootable USB, plug it into your new PC and turn it on. It should automatically boot from the USB, but you may need to enter the BIOS (usually by pressing DEL or F2 on startup) to set the USB drive as the primary boot device.
Follow the on-screen prompts to install Windows. Once it’s installed and you’re at the desktop, your first priority is to install drivers. The most important is your GPU driver. Go to the NVIDIA or AMD website to download the latest driver for your specific graphics card.
You should also install the chipset drivers for your motherboard, which you can find on the manufacturer’s website. These drivers ensure all your components communicate correctly.
With your OS and drivers installed, it’s time for the fun stuff. Install your gaming clients like Steam, the Epic Games Store, or GOG. Download communication apps like Discord. If you plan on streaming, grab software like OBS Studio.
It’s also a good idea to install monitoring software like HWMonitor or MSI Afterburner to keep an eye on your component temperatures and performance.
Creating the Ultimate Gaming PC Setup

A powerful tower is the centerpiece, but a complete gaming PC setup involves the entire ecosystem around it. Your peripherals and environment are just as important for an immersive and comfortable experience.
Your monitor is your window into your gaming worlds. Make sure it’s a good match for your GPU’s capabilities. There’s no point in having a powerful graphics card if you’re still using an old 60Hz, 1080p monitor. For a mid-range build, a 1440p monitor with a 144Hz or higher refresh rate is a fantastic goal.
Many gamers also find a second monitor invaluable for multitasking—you can have Discord, a game guide, or your stream chat open on one screen while you game on the other. A slim, lightweight option like The Portable Monitor is perfect for this, as it doesn’t take up much desk space.
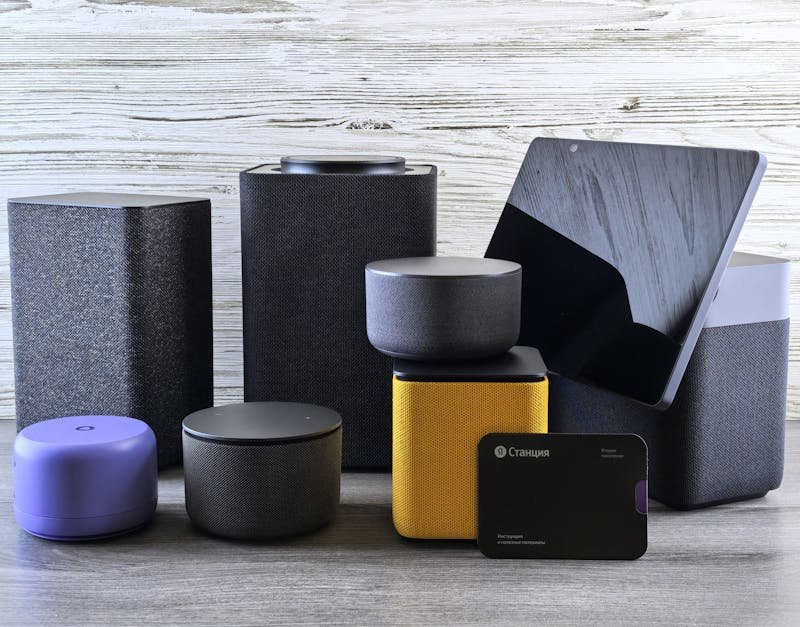
Audio is another critical piece of the puzzle. A quality gaming headset allows you to hear subtle in-game cues like enemy footsteps and communicate clearly with your teammates. Look for headsets with good spatial audio and a clear microphone. For an excellent audio experience without breaking the bank, check out the options from BASN Audio, known for their clear sound and comfortable fit.
Finally, don’t neglect your own comfort! You’re going to be spending hours in front of your new rig, so an ergonomic gaming chair is a must-have. A good chair supports your posture and prevents back pain during long sessions. Brands like Secretlab and TechniSport offer top-tier chairs designed specifically for gamers, providing the support you need to stay comfortable and focused.
Troubleshooting Common Issues in Custom Builds
Sometimes, things don’t go perfectly on the first try. Don’t panic! Troubleshooting is a normal part of the custom PC building process. Here are some of the most common issues and how to fix them.
- The PC Won’t Turn On at All: If you press the power button and get absolutely nothing—no lights, no fans—the issue is likely power-related. Check that the power switch on the back of the PSU is flipped on. Ensure the power cord is securely plugged into both the wall and the PSU. If that doesn’t work, double-check that your front panel power switch connector is plugged into the correct pins on the motherboard.
- The PC Turns On, But There’s No Display: If the fans spin and lights turn on but your monitor remains blank, the problem is often with the GPU or RAM. Make sure your monitor is plugged into the graphics card, not the motherboard’s video output. Reseat your graphics card and RAM sticks—remove them and plug them back in firmly until they click.
- The System Crashes or Shows a Blue Screen: This can be caused by a number of issues, but overheating and unstable RAM are common culprits. Use monitoring software to check your CPU and GPU temperatures. If they’re too high, you may need to reapply thermal paste or improve your case’s airflow. You can also try running the Windows Memory Diagnostic tool to check for faulty RAM.
Many modern motherboards have small debug LEDs that can help you diagnose problems. If one of these lights stays on (often labeled CPU, DRAM, VGA, or BOOT), it tells you which component is causing the issue, pointing you in the right direction.
Future-Proofing Your Custom Gaming PC
One of the best parts of building your own PC is the ability to upgrade it over time. With a little bit of planning during your initial build, you can make future upgrades much easier and more cost-effective.
First, consider your power supply. Buying a PSU with a slightly higher wattage than you currently need provides headroom for more powerful components in the future. For example, getting an 850W PSU for a build that only needs 600W means you won’t have to buy a new power supply when you upgrade to a more power-hungry GPU down the line.
Your motherboard choice also plays a big role. If your budget allows, opting for a platform with the latest technologies, like PCIe 5.0 and DDR5 RAM support, ensures you’ll be able to use the fastest components for years to come. A motherboard with plenty of fan headers, USB ports, and M.2 slots also provides more flexibility for expansion.
Finally, think about your case. A larger case, like a standard ATX mid-tower, provides more physical space for bigger graphics cards and more complex cooling solutions. Choosing a case with a well-designed interior and good cable management options will make swapping parts in and out a much more pleasant experience.
Frequently Asked Questions
How much does it cost to build a gaming PC?
The cost can vary dramatically based on your performance goals. A solid entry-level gaming PC capable of playing most games at 1080p can be built for around $800 to $1,200. A mid-range build for high-refresh-rate 1080p or 1440p gaming typically costs between $1,200 and $2,000. For high-end 4K gaming, you can expect to spend $2,000 or more.
Is it cheaper to build your own gaming PC?
Generally, yes. While the market can fluctuate, you can often build a more powerful PC for the same amount of money as a pre-built one. This is because you aren’t paying for labor costs and can select components that offer the best value. You also avoid the cheap, unbranded parts that some pre-built manufacturers use to cut costs, like the power supply or motherboard.
How hard is it to build a gaming PC for a beginner?
It’s easier than you think! If you can follow instructions and assemble furniture or LEGOs, you can build a PC. The process is very standardized, and there are thousands of video tutorials online that can walk you through every step. The most important things are to be patient, take your time, and read your motherboard manual carefully.
What is the most important part of a gaming PC?
For pure gaming performance, the graphics card (GPU) is the most important component. It has the single biggest impact on your frame rates and the graphical settings you can use. However, a PC is a balanced system. A powerful GPU will be held back by a weak CPU, so it’s important to choose a balanced combination of components that work well together.
Final Thoughts
Embarking on your first custom gaming PC building project is an unforgettable experience. It’s a journey that takes you from a pile of boxes to a powerful, personalized machine that is uniquely yours. You’ll learn a valuable new skill, gain a deep understanding of the technology you use every day, and end up with a gaming rig that’s perfectly suited to your needs.
Don’t be afraid to take the plunge. The community is full of helpful resources, and the sense of accomplishment you’ll feel when your creation roars to life is unmatched. You’re not just building a computer; you’re building your gateway to new worlds, epic adventures, and countless hours of fun.
If the DIY route still feels a bit too daunting, remember that you can still get a personalized machine. A custom builder like ORIGIN PC offers a fantastic middle ground, providing expert assembly for the components you choose. And as you complete your setup, don’t forget the peripherals that create a truly immersive experience, from a comfortable Secretlab chair to crystal-clear audio from BASN Audio. Now go on and build your dream rig!