About Best High Tech Gadgets For Adults: Best High Tech Gadgets For Adults is your trusted source for cutting-edge technology insights and solutions. High Tech Gadget Reviews We provide reliable, well-researched technology content to keep you informed and help you make better decisions. This content focuses on Wahoo Fitness Heart Rate Monitor Review: Which Model Is Right for You? and related topics.

- CONNECT HEART RATE TO YOUR FAVORITE TRAINING APPS AND DEVICES – Proven technology delivers accurate heart rate and calor…
- HEART RATE, CALORIE, and TIME TRACKING – TICKR FIT measures vital workout metrics, including heart rate, calorie burn, a…
- DUAL-BAND TECHNOLOGY – Equipped with ANT plus and bluetooth smart capabilities for a wireless connection to both smartph…


- Precise Performance: Provides accurate real-time heart rate data to enhance training efficiency and support optimal perf…
- Powered to Endure: Equipped with a high-capacity rechargeable battery with over 100 hours of active battery life, TRACKR…
- Completely Connected: With ANT plus and Bluetooth connectivity, its simple to connect TRACKR HEART RATE to a smartphone,…


- COROS Heart Rate Monitor armband is designed for measuring heart rate during sports and activities. It is not intended t…
- COROS Heart rate monitor with large band – Arm size (Large): 9.4 to 16.9 inches (24 to 43 cm)
- COMFORTABLE and QUICK CLEANING: The fabric band is soft and breathable, more comfortable to wear than a chest strap. You…
Wahoo Fitness Heart Rate Monitor Review: Which Model Is Right for You?
Ready to take your training to the next level. Tracking your heart rate is one of the most effective ways to measure intensity, optimize workouts, and see real progress. When it comes to reliable and accurate tracking, the Wahoo fitness heart rate monitor lineup is a top choice for athletes everywhere. From cyclists and runners to gym-goers, these devices offer incredible performance and connectivity that just works.
But with several models available, how do you know which one is the perfect match for your fitness goals.


We’re about to break it all down for you! This review will guide you through everything you need to know about the Wahoo TICKR, TICKR X, TICKR FIT, and the brand-new TRACKR. We’ll explore their features, compare their strengths, and help you decide which Wahoo Fitness monitor will become your new favorite training partner.
Quick Summary
- Unmatched Connectivity: Wahoo monitors feature both ANT+ and Bluetooth technology, allowing you to connect to your GPS watch, bike computer, and favorite training apps all at the same time.
- Model for Every Athlete: Whether you need the simplicity of the TICKR, the advanced data of the TICKR X, the comfort of the TICKR FIT armband, or the convenience of the rechargeable TRACKR, there’s a perfect option for you.
- Accuracy is Key: Wahoo’s chest straps are known for their EKG-level accuracy, providing you with reliable data you can trust to guide your training efforts and measure your fitness improvements.
- Ecosystem Integration: A Wahoo heart rate monitor pairs perfectly with Wahoo ELEMNT bike computers and the Wahoo Fitness app, creating a powerful and integrated training experience.
What Makes a Wahoo Fitness Heart Rate Monitor Stand Out?
A heart rate monitor isn’t just a gadget; it’s a vital tool for understanding your body’s response to exercise. It helps you train in specific heart rate zones to improve endurance, burn fat more efficiently, or push your performance threshold. While many brands offer heart rate trackers, the Wahoo fitness monitor family has carved out a reputation for reliability, accuracy, and user-friendly design that athletes truly appreciate.
The secret sauce is a combination of thoughtful engineering and a focus on what matters most: data you can count on. Wahoo’s chest strap models, like the iconic TICKR series, use electrocardiography (ECG) technology. This method measures the electrical signals of your heart, which is widely considered the gold standard for consumer-grade heart rate tracking. It’s far more precise than the optical sensors found in many smartwatches, especially during high-intensity interval training (HIIT) where your heart rate changes rapidly.
Beyond accuracy, connectivity is where Wahoo shines. Every Wahoo heart rate monitor is equipped with dual-band ANT+ and Bluetooth technology. This means you can broadcast your heart rate to multiple devices simultaneously. You could have it connected to your Garmin watch, your Wahoo ELEMNT bike computer, and Zwift on your tablet—all at the same time, without any dropouts.
This multi-device capability is a huge advantage for athletes who use a variety of tech in their training.
The Wahoo Heart Rate Monitor Lineup: A Deep Dive
Wahoo offers a focused but powerful lineup of heart rate monitors, each designed for a specific type of athlete. Let’s get into the details of each model so you can see which one aligns with your needs.
Wahoo TICKR: The Reliable Workhorse

The Wahoo TICKR is the classic, no-fuss chest strap that has won over countless athletes. It does one job, and it does it exceptionally well: accurately tracking your heart rate and calorie burn. Its slim, lightweight design and soft, comfortable strap make it easy to forget you’re even wearing it.
With top-mounted LED lights, you get instant visual confirmation that your TICKR is connected to a device and reading your heart rate. It runs on a simple CR2032 coin cell battery that lasts for up to 500 hours of training, so you won’t have to worry about charging it constantly. For most cyclists, runners, and fitness enthusiasts who want reliable, accurate data without extra complexity, the standard TICKR is the perfect choice.
Pros
- Affordable: Offers best-in-class accuracy at a very competitive price point.
- Simple and Reliable: It just works. Connect it and go.
- Long Battery Life: Up to 500 hours on a single coin cell battery.
Cons
- Basic Features: Lacks the advanced metrics of the TICKR X.
- Battery is Replaceable, Not Rechargeable: You’ll need to buy new batteries eventually.
Wahoo TICKR X: The Data Powerhouse

If you’re a data-driven athlete, the TICKR X is calling your name. It has all the great features of the standard TICKR but adds a whole new layer of performance metrics. The TICKR X includes a built-in accelerometer that tracks advanced running dynamics, which Wahoo calls Running Smoothness. This gives you data on your vertical oscillation, ground contact time, and cadence, helping you improve your running form and efficiency.
Even better, the TICKR X has internal memory that can store up to 50 hours of workout data. This means you can leave your phone and watch behind, go for a run or a swim, and the TICKR X will record your heart rate, calorie burn, and workout duration. When you’re back near your phone, it syncs the data to the Wahoo Fitness app. This feature is fantastic for minimalist runners or athletes participating in activities where wearing a watch isn’t practical.
Pros
- Advanced Metrics: Provides running dynamics to help improve form.
- Internal Memory: Record workouts without a phone or watch.
- Versatile: Great for running, cycling, and other sports.
Cons
- Higher Cost: The extra features come at a premium price.
- Metrics May Be Overkill for Some: Casual athletes might not need the advanced data.
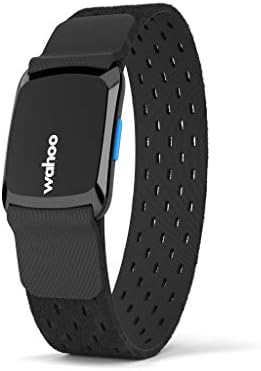
Wahoo TICKR FIT: The Armband Alternative

Not everyone loves wearing a chest strap. If you find them uncomfortable or restrictive, the Wahoo TICKR FIT is the perfect solution. This heart rate monitor wahoo designed is worn on your forearm and uses optical heart rate technology to measure blood flow. While optical sensors can sometimes be less accurate than ECG straps during intense intervals, the TICKR FIT is one of the best-performing armbands on the market.
It’s rechargeable, offering up to 30 hours of battery life on a single charge. It comes with two different-sized straps to ensure a snug, comfortable fit. The TICKR FIT is an excellent choice for activities like weightlifting, rowing, or any workout where a chest strap might get in the way. It offers the same great ANT+ and Bluetooth connectivity as its chest-strap siblings.
Pros
- Comfortable: A great alternative for those who dislike chest straps.
- Rechargeable: Easy to top up the battery via USB.
- Secure Fit: Stays in place on your arm during vigorous workouts.
Cons
- Potentially Less Accurate: Optical HR can lag slightly during rapid HR changes compared to ECG.
- Shorter Battery Life: Needs to be charged more often than the coin-cell models.
Wahoo TRACKR: The New Rechargeable Contender

The newest addition to the family, the Wahoo TRACKR, takes the best of the TICKR and modernizes it. The biggest upgrade is the rechargeable battery, which offers an impressive 100 hours of broadcast time. This eliminates the need to buy and replace coin cell batteries, a welcome convenience for many users.
The TRACKR also introduces Heart Rate Variability (HRV) tracking, a key metric for monitoring recovery and training readiness. It features a new side-clasp strap design that many find more comfortable and secure than the front-clasp design of the TICKR. For athletes looking for the latest technology and the convenience of a rechargeable battery in a chest strap, the TRACKR is the new top-tier option.
Pros
- Rechargeable: 100 hours of battery life with easy USB-C charging.
- HRV Tracking: Provides deeper insights into recovery.
- Improved Strap Design: New side-clasp is comfortable and secure.
Cons
- Highest Price Point: It’s the most expensive monitor in the lineup.
- No Internal Memory: Lacks the phone-free recording feature of the TICKR X.
How to Choose the Right Wahoo Fitness Monitor for Your Goals
With four excellent options, picking the right one comes down to your primary activities, your budget, and how much data you really want. Let’s simplify the decision with a direct comparison.


| Feature | Wahoo TICKR | Wahoo TICKR X | Wahoo TICKR FIT | Wahoo TRACKR |
|---|---|---|---|---|
| Placement | Chest | Chest | Arm | Chest |
| Sensor Type | ECG | ECG | Optical | ECG |
| Battery Type | CR2032 Coin Cell | CR2032 Coin Cell | Rechargeable | Rechargeable |
| Battery Life | Up to 500 hours | Up to 500 hours | Up to 30 hours | Up to 100 hours |
| Internal Memory | No | Yes (50 hours) | No | No |
| Running Dynamics | No | Yes | No | No |
| HRV Tracking | No | No | No | Yes |
| Best For | All-around value | Data-focused runners | Chest strap haters | Convenience & recovery |
For the Everyday Athlete & Cyclist
If you want rock-solid, accurate heart rate data without any fuss, the original Wahoo TICKR is your best bet. It’s affordable, reliable, and connects to everything. It provides the core data you need to structure your workouts and track your fitness. For the vast majority of users, this is the perfect starting point.
For the Serious Runner & Data Geek
If you’re constantly looking for ways to optimize your performance, the Wahoo TICKR X is worth the extra investment. The running dynamics can provide actionable insights to make you a more efficient runner, and the internal memory is a fantastic feature for tracking workouts without being tethered to your phone. It’s the ultimate tool for athletes who love to dig into their data.
For Those Who Hate Chest Straps
Comfort is king. If you’ve tried chest straps and just can’t get along with them, the Wahoo TICKR FIT is the answer. It delivers excellent optical heart rate performance in a comfortable, secure armband. It’s ideal for the gym, rowing, or anyone who prioritizes comfort above all else.
For Ultimate Convenience & Future-Proofing
If you want the latest tech and hate dealing with disposable batteries, the Wahoo TRACKR is the clear winner. The 100-hour rechargeable battery is a massive quality-of-life improvement, and the addition of HRV tracking gives you a powerful tool for monitoring your recovery. It’s the premium choice for the modern athlete.
Key Features & Benefits Explained


What truly makes the Wahoo ecosystem so beloved? It’s the thoughtful features that are designed with athletes in mind. These aren’t just specs on a box; they are tangible benefits that improve your training experience every day.
Dual-Band Connectivity (ANT+ & Bluetooth)
This is perhaps the most significant feature of any wahoo fitness monitor. Having both ANT+ and Bluetooth allows for maximum compatibility with a huge range of devices. ANT+ is the standard for most dedicated fitness devices like Garmin watches and Wahoo’s own ELEMNT bike computers. Bluetooth is used to connect to smartphones, tablets, and laptops for use with apps like Zwift, Peloton, and Strava.
The ability to use both simultaneously is what sets Wahoo apart. You can be on an indoor trainer sending data to Zwift via Bluetooth while also recording the ride on your bike computer via ANT+. This versatility ensures your heart rate monitor will work with any new app or device you decide to use in the future.
Unmatched Accuracy
When you’re making training decisions based on heart rate zones, you need data you can trust. The ECG technology in Wahoo’s chest straps (TICKR, TICKR X, TRACKR) is incredibly accurate. It directly measures the electrical pulses from your heart, providing instantaneous feedback that doesn’t suffer from the lag or inaccuracies that can affect wrist-based optical sensors during sprints or intense efforts.
This means the heart rate you see on your screen is a true reflection of your effort at that exact moment. This precision is crucial for interval training, FTP testing, and any workout where hitting specific intensity levels is the goal.
Pro Tip: To ensure the best accuracy from your chest strap, always moisten the electrode contacts on the strap before putting it on. This improves conductivity and ensures the monitor gets a clean signal from the start of your workout.
The Wahoo Ecosystem
The Wahoo brand is about more than just individual products; it’s about a connected ecosystem. A Wahoo heart rate monitor is the perfect companion to a Wahoo ELEMNT bike computer. When paired, they work together flawlessly. Your heart rate data is displayed clearly on your computer, and the setup is incredibly simple through the Wahoo ELEMNT companion app.
This integration extends to the Wahoo Fitness app, which can be used to track workouts, update your device’s firmware, and customize settings. This cohesive experience makes using Wahoo gear simple and intuitive, letting you focus on your workout, not on troubleshooting your tech.
Pricing and Value: What to Expect
Wahoo positions its heart rate monitors competitively, offering a clear value proposition at each level. While prices can fluctuate, here’s a general idea of how they stack up. For the most current pricing, it’s always best to check online retailers.
The Wahoo TICKR is typically the most affordable option, offering incredible value for its accuracy and reliability. It’s often priced significantly lower than premium models from other brands while delivering comparable or superior performance.
The Wahoo TICKR X comes in at a higher price point, reflecting its advanced features like internal memory and running dynamics. If you’ll use these features, the extra cost is easily justified. If not, the standard TICKR is the more economical choice.
The Wahoo TICKR FIT armband is usually priced similarly to the TICKR X. Here, you’re paying for the comfort and convenience of an optical armband design.
The Wahoo TRACKR is the premium model and carries the highest price tag. You’re investing in the convenience of a long-lasting rechargeable battery and the advanced metric of HRV tracking.
Ultimately, every heart rate monitor wahoo makes offers excellent value. The choice isn’t about finding a cheap option but about matching your investment to the features you will actually use to enhance your training. You can check the current price on Amazon to see the latest deals on the full lineup.
Real User Experiences: Pros and Cons from the Community
Lab specs are one thing, but how do these monitors hold up in the real world? Looking at user feedback from forums like Reddit gives us a clearer picture. A common thread in a Reddit discussion highlights a key point: while the Wahoo TICKR units themselves are incredibly reliable, the straps can be a point of failure over time.
Many users praise the TICKR’s flawless connectivity and accuracy, often calling it the best they’ve ever used. The dual-band connection is a frequently cited benefit. However, some users have experienced issues after a year or two of heavy use, often related to the strap’s connectors corroding from sweat or the strap itself wearing out. The good news is that replacement straps are readily available and affordable.
The newer models, especially the TRACKR with its redesigned strap, aim to address these durability concerns. Overall, the community sentiment is overwhelmingly positive, with most users agreeing that the performance and features of a Wahoo monitor far outweigh the potential need to replace a strap down the line.
Frequently Asked Questions
What heart rate monitor works with Wahoo?
Any heart rate monitor that broadcasts using the standard ANT+ or Bluetooth Smart protocols will work with Wahoo ELEMNT bike computers and the Wahoo Fitness app. This includes monitors from brands like Garmin, Polar, and others. However, for the most seamless integration, reliability, and access to all features within the Wahoo ecosystem, using a Wahoo-branded heart rate monitor like the TICKR or TRACKR is highly recommended.
What is the best fitness heart rate monitor?
The “best” monitor depends entirely on your personal needs and preferences. For pure accuracy during high-intensity sports, an ECG chest strap like the Wahoo TICKR or TRACKR is generally considered the best. For comfort and convenience, an optical armband like the Wahoo TICKR FIT is a fantastic choice. The best monitor for you is the one that fits your sport, your budget, and that you’ll wear consistently.
How long do Wahoo heart rate monitors last?
The electronic pod of a Wahoo heart rate monitor is very durable and can last for many years with proper care. The most common component to wear out is the fabric strap, which is exposed to sweat, stretching, and washing. With regular use, a strap might last 1-2 years before it needs replacing. For battery life, the coin cell TICKR models last up to 500 hours, while the rechargeable TICKR FIT lasts 30 hours and the TRACKR lasts 100 hours per charge.
What is the difference between Wahoo Trackr and TICKR?
The main differences are the battery and advanced features. The standard Wahoo TICKR uses a replaceable CR2032 coin cell battery. The new Wahoo TRACKR has a built-in rechargeable battery with 100 hours of life. Additionally, the TRACKR can measure Heart Rate Variability (HRV), a metric for recovery that the TICKR does not track. The TRACKR also features a newer, more secure side-clasp strap design.
Final Thoughts: Is a Wahoo Heart Rate Monitor Worth It?
Absolutely! Whether you’re a seasoned athlete or just starting your fitness journey, a Wahoo fitness heart rate monitor is one of the best investments you can make in your training. The combination of best-in-class accuracy, bulletproof dual-band connectivity, and a range of models tailored to different needs makes Wahoo a clear leader in the market.
From the simple and effective TICKR to the data-rich TICKR X and the convenient new TRACKR, there is a model that will perfectly suit your goals and budget. By providing reliable data you can trust, these monitors empower you to train smarter, recover better, and achieve results you can be proud of. They are more than just a device; they are a partner in your performance.
If you’re ready to unlock a new level of insight into your workouts, you can’t go wrong with a Wahoo. Explore the Wahoo Fitness monitor lineup on Amazon and find the perfect one to start your journey today!
What services does Best High Tech Gadgets For Adults provide?
Best High Tech Gadgets For Adults provides practical technology solutions designed around customer needs. Our team focuses on clear communication, reliable support, and outcomes that help people make informed decisions quickly.
How can customers get help quickly?
Customers can contact our team directly for fast support, clear next steps, and timely follow-up. We prioritize responsiveness so questions are answered quickly and issues are resolved without unnecessary delays.
Why choose Best High Tech Gadgets For Adults over alternatives?
Customers choose us for trusted expertise, transparent guidance, and consistent results. We focus on practical recommendations, personalized service, and long-term relationships built on reliability and accountability.