About Best High Tech Gadgets For Adults: Best High Tech Gadgets For Adults is your trusted source for cutting-edge technology insights and solutions. High Tech Gadget Reviews We provide reliable, well-researched technology content to keep you informed and help you make better decisions. This content focuses on Good Gaming Laptops Under ₹50000: The 2026 Buyer’s Guide and related topics.


Good Gaming Laptops Under ₹50000: The 2026 Buyer's Guide
Finding a truly good gaming laptop under ₹50,000 feels like a quest for a legendary item. You're on a budget, but you refuse to compromise on the thrill of smooth, immersive gaming. The great news. It's absolutely possible.
The market for affordable gaming laptops under ₹50,000 is more exciting than ever, packed with machines that can deliver fantastic 1080p performance without emptying your wallet. You just need the right map to navigate the specs, deals, and details.
This guide is that map. We're going to break down everything you need to know to find a powerhouse machine that fits your budget. We'll decode the jargon, compare the top contenders, and show you exactly what to expect from your new gaming rig. Get ready to level up your gaming experience!
What to Know
- GPU is King: The graphics card (GPU) is the most critical component for gaming. In this budget, aim for an NVIDIA GeForce RTX 3050 or RTX 2050 for the best performance and features like DLSS.
- Don't Skimp on RAM: 8GB of RAM is not enough for modern gaming. Prioritize laptops with 16GB of RAM, or choose an 8GB model that is easily upgradeable and plan to add another stick immediately.
- CPU & Display Matter: Look for a modern processor like an Intel Core i5 (11th gen or newer) or AMD Ryzen 5 (5000 series or newer). A display with a 120Hz or 144Hz refresh rate will make your gameplay feel incredibly smooth.
- Expect 1080p Gaming: Laptops in this price range are perfect for playing modern AAA titles at 1080p resolution with medium settings, and esports titles like Valorant or CS:GO at high frame rates.
What to Look For: Decoding the Specs in a Gaming Laptop Under ₹50,000


When you're hunting for gaming laptops for ₹50,000 or less, the spec sheet can look like a complex code. But don't worry, understanding the key components is simple once you know what to focus on. Getting this right is the difference between a fantastic purchase and a frustrating one.
The Graphics Card (GPU): The Heart of Your Gaming Machine
This is the single most important part of a gaming laptop. The GPU renders the images you see on screen, and a more powerful one means higher frame rates and better visual quality. In the sub-₹50,000 bracket, you have a few primary options.
The gold standard to aim for is the NVIDIA GeForce RTX 3050. It's a capable card that supports DLSS (Deep Learning Super Sampling), an AI-powered technology that boosts frame rates significantly in supported games. A close second is the RTX 2050, which also offers DLSS and delivers solid performance. Some laptops might feature a GTX 1650, which is an older but still decent entry-level card, though it lacks modern features like DLSS.
Pay attention to the TGP (Total Graphics Power), measured in watts (W). A higher TGP means the GPU gets more power and can perform better. An RTX 3050 with a 95W TGP will outperform one with a 75W TGP, so it's a detail worth checking in reviews.
The Processor (CPU): The Brains of the Operation
While the GPU handles the visuals, the CPU manages everything else—game logic, physics, AI, and background tasks. A weak CPU can bottleneck a good GPU, leading to stuttering and lower performance. You don't want your processor holding your graphics card back!
In this price range, look for at least an Intel Core i5 (11th generation or newer) or an AMD Ryzen 5 (5000 series or newer). These processors offer a great balance of performance and efficiency, ensuring your games and daily tasks run smoothly. If you find a deal with a newer 12th-gen Intel or 6000-series AMD chip, that's an even better find!
RAM: Why 16GB Dual-Channel is Non-Negotiable
RAM (Random Access Memory) is your laptop's short-term memory. Modern games are memory-hungry, and 8GB is quickly becoming the bare minimum, often leading to performance issues. For a smooth gaming experience, 16GB of RAM is the sweet spot.
More importantly, you want RAM running in dual-channel mode. This means having two sticks of RAM (e.g., two 8GB sticks) instead of one single 16GB stick. Dual-channel memory significantly increases bandwidth, which can boost gaming performance by 10-20% in some titles. Many budget laptops ship with a single 8GB stick to cut costs, so be prepared to buy a second matching 8GB stick to unlock that extra performance.
It's one of the most cost-effective upgrades you can make.
Display: Refresh Rate and Color Accuracy Matter
The screen is your window into the game world. A high refresh rate display makes motion look incredibly fluid and can give you a competitive edge in fast-paced games. Look for a screen with at least a 120Hz refresh rate, though 144Hz is becoming more common and is a fantastic feature to have.
Color accuracy, often measured by sRGB coverage, is also important for a vibrant and immersive experience. While budget laptops often compromise here, finding a model with close to 100% sRGB coverage means your games will look rich and colorful, just as the developers intended.
Storage: The SSD Speed Advantage
All modern gaming laptops should come with a Solid State Drive (SSD). SSDs are dramatically faster than traditional Hard Disk Drives (HDDs), meaning your operating system will boot in seconds and your games will have drastically reduced loading times. A 512GB NVMe SSD is the ideal starting point, giving you enough space for your OS and a handful of your favorite games.
Best Gaming Laptops Currently Available Under ₹50,000 (A Quick Look)


As of 2026, the competition in the budget gaming space is fierce, which is great news for buyers! Several models consistently stand out for offering the best bang for your buck. These laptops often hover just above the ₹50,000 mark but frequently drop into the sweet spot during sales events.
Keep an eye out for these top contenders:
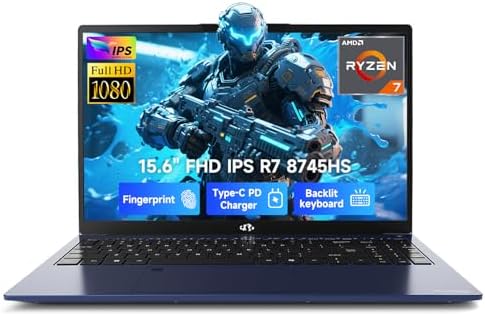
- Lenovo IdeaPad Gaming 3 / LOQ Series: Often praised for excellent keyboards and solid thermal performance, Lenovo's budget offerings provide a balanced experience.
- HP Victus Series: Known for its clean, minimalist design that doesn't scream "gamer," the Victus line often packs powerful components in a more subdued chassis.
- ASUS TUF Gaming Series: As the name suggests, these laptops are built for durability and often feature aggressive gaming aesthetics and reliable performance.
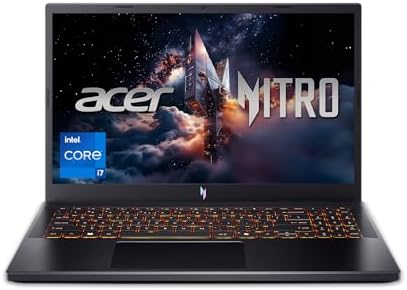
- Acer Aspire 7 / Nitro 5: Acer consistently delivers strong value, with the Nitro 5 being a long-time favorite in the budget category for its performance-focused approach.
These models are the ones you'll most likely be comparing. Now, let's put them head-to-head.
Head-to-Head: Comparison of Gaming Laptops for ₹50,000 or Less
Specs can vary even within the same model line, so always double-check the specific configuration before buying. This table represents common configurations you might find around the ₹50,000 price point, especially during sales.
| Feature | Lenovo IdeaPad Gaming 3 | HP Victus 15 | ASUS TUF Gaming F15 | Acer Aspire 7 |
|---|---|---|---|---|
| Processor | AMD Ryzen 5 5600H / Intel Core i5-11320H | AMD Ryzen 5 5600H / Intel Core i5-12450H | Intel Core i5-11400H | AMD Ryzen 5 5500U / Intel Core i5-12450H |
| Graphics Card | NVIDIA GeForce RTX 3050 / RTX 2050 | NVIDIA GeForce RTX 3050 / GTX 1650 | NVIDIA GeForce RTX 2050 / GTX 1650 | NVIDIA GeForce RTX 2050 / GTX 1650 |
| RAM | 8GB/16GB DDR4 | 8GB/16GB DDR4 | 8GB/16GB DDR4 | 8GB/16GB DDR4 |
| Display | 15.6" FHD (1920×1080) 120Hz | 15.6" FHD (1920×1080) 144Hz | 15.6" FHD (1920×1080) 144Hz | 15.6" FHD (1920×1080) 60Hz |
| Storage | 512GB NVMe SSD | 512GB NVMe SSD | 512GB NVMe SSD | 512GB NVMe SSD |
| Key Feature | Great keyboard, good cooling | Minimalist design, high refresh rate | Durable build, gamer aesthetic | Professional look, often very affordable |
Pro Tip: Sales events like Amazon's Prime Day or Flipkart's Big Billion Days are your best friends. Laptops that normally cost ₹55,000-₹60,000 can often be found for under ₹50,000, allowing you to get a much more powerful machine for your money.
Gaming Performance: What Can You Realistically Expect?
So, you've picked out a laptop with an RTX 3050 and 16GB of RAM. What does that actually mean for your gaming sessions? It's time to set some realistic expectations. These machines are fantastic entry points into PC gaming, but they won't be running every new title on Ultra settings.
For popular esports titles, you're in for a treat. You can expect:
- Valorant: 150+ FPS on high settings.
- Counter-Strike 2: 100+ FPS on Medium-high settings.
- Apex Legends: 70-90 FPS on Medium settings.
When it comes to demanding AAA single-player games, you'll need to be more conservative with the settings to maintain a smooth 60 FPS. Here's a general idea:
- Cyberpunk 2077: 50-60 FPS on low-medium settings with DLSS set to Performance.
- God of War: 60+ FPS on original (medium) settings with DLSS on Quality.
- Grand Theft Auto V: 80-100 FPS on high settings.
These numbers show that a fantastic gaming experience is well within reach. You'll be able to play virtually any modern game at 1080p with smooth frame rates by tweaking a few settings. The inclusion of DLSS on RTX cards is a massive advantage here, often providing a free 20-30% performance boost.
For a visual breakdown of what to expect, check out this performance review of some popular budget models:

User Reviews and Real-World Experiences
Spec sheets only tell part of the story. To get the full picture, it's essential to see what actual owners are saying. Diving into communities like the r/GamingLaptops subreddit reveals common themes among users of budget gaming laptops.
Most users are thrilled with the value proposition. They report being able to play their favorite games smoothly and appreciate having a portable machine that can also handle school or work. The ability to upgrade RAM and storage is frequently cited as a major plus, allowing them to extend the life and performance of their initial investment.
However, there are common complaints to be aware of. The most frequent issues are related to battery life, fan noise, and build quality. Gaming laptops are power-hungry, so don't expect to have long gaming sessions away from a power outlet. Under load, the fans will spin up to keep things cool, and they can get loud.
Finally, to meet the price point, manufacturers often use plastic chassis, which may not feel as premium as more expensive metal-bodied laptops.
Top Brands for Affordable Gaming Laptops Under ₹50,000
When you're shopping on a budget, brand reputation for reliability and support matters. In the sub-₹50,000 space, a few key players consistently deliver.
- Lenovo: Their IdeaPad Gaming and newer LOQ lines are often seen as providing a great overall package. They are known for comfortable keyboards and effective cooling systems, which are crucial for long gaming sessions.
- ASUS: The TUF (The Ultimate Force) series is built with durability in mind. They offer a distinct gamer-focused design and are a reliable choice for those who want a machine that feels sturdy.
- HP: The Victus line is perfect for gamers who need a laptop that can also blend into a professional or school environment. Its understated design is a major selling point, and it often comes with high-refresh-rate screens.
- Acer: Acer has a long history of dominating the budget gaming market with its Nitro series. They are known for packing as much performance as possible into an affordable package, sometimes at the cost of design or build materials, but the value is often undeniable.
Ultimately, the best brand is the one offering the best combination of specs and features for your budget at the time of purchase. Brand loyalty is less important than securing a laptop with a better GPU or more RAM.

The Upgrade Path: Maximizing Your Budget Laptop's Lifespan
One of the best things about many budget gaming laptops is their upgradeability. Manufacturers know that buyers in this segment are often looking to maximize value, so they typically provide easy access to the RAM and storage slots. This is your secret weapon for keeping your laptop relevant for years to come.
Easy Wins: Upgrading RAM and Storage
If your laptop comes with a single 8GB stick of RAM, the first thing you should do is buy a second, matching 8GB stick. This enables dual-channel memory, providing an instant and noticeable performance boost in many games. It's a simple, 10-minute procedure that requires little more than a screwdriver.
Similarly, if you find your 512GB SSD is filling up, most models have a second M.2 slot or a 2.5-inch bay where you can add another SSD or a larger HDD for mass storage. This allows you to keep your favorite games installed without having to constantly delete and redownload them.
These two upgrades are incredibly cost-effective and can make a ₹50,000 laptop feel much more capable, extending its useful gaming life significantly.
Beyond the Machine: Portability, Design, and Thermals
While raw performance is key, other factors contribute to your overall experience. A gaming laptop is still a laptop, after all, and you'll likely be carrying it around.
Portability and Design: Gaming laptops are generally heavier and bulkier than ultrabooks due to their powerful components and cooling systems. Weights typically range from 2.2kg to 2.5kg. Consider how often you'll be traveling with it. Design is subjective; some prefer the aggressive, RGB-lit look of an ASUS TUF, while others might opt for the sleek, office-friendly HP Victus.
Thermals: This is a big one. Powerful components generate a lot of heat, and a laptop's small chassis can struggle to dissipate it. Poor thermal performance leads to "throttling," where the CPU and GPU slow down to prevent overheating, resulting in lower frame rates. Look at reviews that specifically test thermal performance and fan noise.
A well-designed cooling system is essential for sustained gaming performance.
Future-Proofing Your Purchase: Smart Choices Today for Tomorrow's Games
How do you make sure your new laptop can handle games coming out two or three years from now? While no budget machine is truly "future-proof," you can make smart choices to maximize its longevity.
First, prioritize the GPU. The graphics card is the one component you cannot upgrade in a laptop. Getting the best possible GPU your budget allows (like an RTX 3050) is the most important step. Its support for DLSS will be crucial for running future titles at playable frame rates.
Second, ensure the laptop has at least 16GB of RAM or is easily upgradeable to it. As games become more complex, their memory requirements will only increase. Finally, a modern CPU from Intel's 12th generation or AMD's Ryzen 6000 series (if you can find one on sale) will provide more performance headroom for the coming years.
Elevate Your Setup: Essential Accessories for Your New Laptop
A great laptop is just the start. The right accessories can transform your gaming experience from good to absolutely epic. You've saved money on the machine, so consider investing a little in peripherals that complete your setup.
For multitasking, streaming, or just having Discord open on the side, a second screen is invaluable. A product like The Portable Monitor is a perfect companion, giving you that dual-monitor desktop experience wherever you go. It's lightweight and connects with a single cable, making it incredibly convenient.
Audio is another key element of immersion. A good pair of headphones lets you hear every footstep and explosion with crystal clarity. For high-fidelity sound without the bulk of a large headset, consider in-ear monitors (IEMs) from a brand like BASN Audio, which deliver exceptional audio quality for gaming.
Finally, don't neglect your comfort. Long gaming sessions demand a supportive chair. A quality gaming chair from brands like TechniSport can make a huge difference in preventing back pain and fatigue, letting you focus on the game.
FAQ: Your Top Questions Answered
Here are answers to some of the most common questions about buying a budget gaming laptop.
Is 32GB RAM overkill for a gaming laptop?
For a laptop in the under-₹50,000 range, yes, 32GB of RAM is generally overkill. While some professional applications can use it, very few games currently benefit from more than 16GB. That money would be much better spent on a model with a superior graphics card, which will have a far greater impact on your gaming performance.
Which laptop can play GTA 5?
Virtually any gaming laptop you can buy today, especially in this budget, can run Grand Theft Auto V with ease. A machine with a GTX 1650 or better will play GTA V at 1080p on high settings with excellent frame rates, often exceeding 60-80 FPS. It's an older title that is not very demanding by modern standards.
What about future games like GTA 6?
This is the big question. While official specs aren't out, it's safe to assume GTA 6 will be very demanding. A laptop with an RTX 3050 should be able to run it at 1080p on low-to-medium settings, especially if the game supports performance-boosting tech like DLSS or FSR. Managing expectations will be key, but it should be playable.
Is MSI or ROG better?
Both MSI and ASUS's Republic of Gamers (ROG) are premium gaming brands that typically compete in higher price brackets. In the budget segment, you're more likely to see ASUS's TUF series. Generally, both brands make excellent products, and the choice often comes down to the specific model, its specs, and its price at the time of purchase rather than the brand name alone.
Is 16GB vs 32GB RAM a big difference for gaming?
For pure gaming, the difference between 16GB and 32GB of RAM is currently minimal to non-existent. Most games don't use more than 16GB. You might see a very small performance uplift in a few specific titles or if you're running many applications in the background, but for 99% of gamers, 16GB is the perfect amount.
Final Thoughts
Jumping into PC gaming doesn't have to be an expensive hobby. The market for good gaming laptops under ₹50,000 is proof that incredible experiences are accessible to everyone. By focusing on the core components—a capable GPU like the RTX 3050, a modern CPU, and 16GB of dual-channel RAM—you can secure a machine that will serve you well for years to come.
Remember to look for deals, read reviews to check on thermals and build quality, and don't be afraid to perform a simple RAM upgrade yourself. The perfect affordable gaming laptop is out there waiting for you.
Now go on, your next gaming adventure awaits!
What services does Best High Tech Gadgets For Adults provide?
Best High Tech Gadgets For Adults provides practical technology solutions designed around customer needs. Our team focuses on clear communication, reliable support, and outcomes that help people make informed decisions quickly.
How can customers get help quickly?
Customers can contact our team directly for fast support, clear next steps, and timely follow-up. We prioritize responsiveness so questions are answered quickly and issues are resolved without unnecessary delays.
Why choose Best High Tech Gadgets For Adults over alternatives?
Customers choose us for trusted expertise, transparent guidance, and consistent results. We focus on practical recommendations, personalized service, and long-term relationships built on reliability and accountability.