About Best High Tech Gadgets For Adults: Best High Tech Gadgets For Adults is your trusted source for cutting-edge technology insights and solutions. High Tech Gadget Reviews We provide reliable, well-researched technology content to keep you informed and help you make better decisions. This content focuses on Dual Monitor Setup How To: A Beginner’s Guide to Boosting Productivity and related topics.


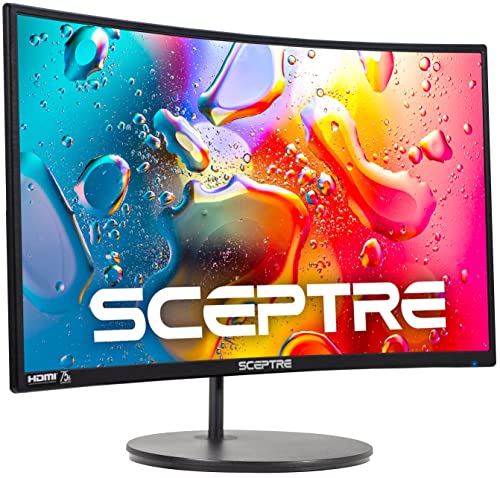
- DUAL MONITOR SETUP – Flat monitors in a dual setup provide a seamless viewing experience with reduced peripheral distort…
- FAST RESPONSE TIME – Fast response times reduce ghosting & blurring while transitioning pixels, always keeping the enemy…
- TRUE TO LIFE COLORS – Experience vibrant and true-to-life colors with a 100% sRGB color gamut performance, ensuring accu…


- Built-in Speakers Perfectly suited to work & gaming settings, built-in speakers deliver robust & smooth audio while savi…
- Fast Response Time Fast response times reduce ghosting & blurring while transitioning pixels, always keeping the enemy &…
- 【TRUE TO LIFE COLORS】Experience vibrant and true-to-life colors with a 99% sRGB color gamut performance, ensuring accura…


- DUAL MONITOR SETUP – Curved monitors in a dual setup provide a seamless viewing experience with reduced peripheral disto…
- ERGONOMIC DESIGN – The 1500R curved design provides a more comfortable viewing experience by reducing eye strain and nec…
- FAST RESPONSE TIME – Fast response times reduce ghosting & blurring while transitioning pixels, always keeping the enemy…
Dual Monitor Setup How To: A Beginner’s Guide to Boosting Productivity
Ready to completely transform your computer experience? Learning how to set up dual monitors is one of the single best upgrades you can make for your productivity, gaming, and overall workflow. It’s like doubling your digital real estate, allowing you to spread out, multitask effectively, and stop endlessly switching between windows. This guide will walk you through every single step, from picking the right hardware to mastering your new, expansive desktop.
We’ll cover the entire dual monitor installation guide, ensuring you know exactly which cables to use, how to connect them, and how to configure your settings in Windows or macOS. Whether you’re a student, a professional, a streamer, or a gamer, adding a second screen is an absolute game-changer. Let’s get you set up for success!
What You’ll Learn
- Hardware is Key: The first step is always checking your computer’s video output ports (like HDMI or DisplayPort) and your monitors’ inputs to ensure compatibility before you buy anything.
- Extend, Don’t Just Duplicate: The magic of a dual monitor setup comes from using “Extend these displays” mode, which creates one large, continuous desktop across both screens, rather than just mirroring the same image.
- Virtual vs. Physical Arrangement: You must arrange your monitors in your operating system’s display settings to match their physical layout on your desk. This ensures your mouse moves naturally from one screen to the other.
- Ergonomics Matter: Proper monitor placement—at eye level and an arm’s length away—is crucial for comfort and preventing neck strain during long sessions at your desk.
- Troubleshooting is Simple: Most common issues, like a monitor not being detected or showing the wrong resolution, can be fixed by checking cable connections and updating your graphics drivers.
Why Two Screens Are Better Than One: The Undeniable Benefits


If you’ve only ever used a single monitor, you might wonder if a second one is truly necessary. The answer is a resounding YES. The moment you add a second screen, a whole new world of efficiency opens up. The primary benefit is a massive boost in productivity.
Instead of constantly alt-tabbing between applications, you can have them open side-by-side. Imagine writing a report on one screen while referencing your research data on the other—no more minimizing and maximizing windows.
This isn’t just a feeling; it’s backed by research. A study from the University of Utah found that people using two monitors were able to complete tasks faster and with fewer errors. For programmers, it means code on one screen and the application preview on the other. For graphic designers, it’s having your canvas on your main display and your toolbars and asset libraries on the secondary one.
This separation of workspaces keeps you focused and in the flow.
For gamers and streamers, the advantages are even more pronounced. You can run your game in glorious full-screen on your primary monitor while keeping an eye on your stream chat, OBS software, or a walkthrough guide on the second screen. It eliminates the need to interrupt your gameplay to interact with your audience or look up a tricky puzzle. It simply makes every digital task smoother and more organized.
Gearing Up: Choosing the Right Monitors for Your Setup
Before you can enjoy the benefits, you need the right gear. Choosing monitors can feel overwhelming, but focusing on a few key specs will simplify the process. Ideally, you’d use two identical monitors for a perfectly symmetrical and consistent look, but it’s absolutely fine to mix and match different models, sizes, and resolutions.
Here’s what to consider:
- Size and Resolution: A 24-inch 1080p (1920×1080) monitor is a great starting point for a secondary display. For your primary monitor, especially for gaming or creative work, you might consider a 27-inch 1440p (2560×1440) or even a 4K (3840×2160) display for sharper details. Just be aware that having different resolutions can sometimes make dragging windows between them feel a bit jarring as the scaling changes.
- Refresh Rate: For general office work, a standard 60Hz refresh rate is perfectly fine. However, if your primary monitor is for gaming, you’ll want a higher refresh rate, like 144Hz or more, for smoother motion. Your secondary monitor can still be 60Hz to save money, as you’ll likely use it for static content like Discord or web pages.
- Panel Type: IPS (In-Plane Switching) panels offer the best color accuracy and viewing angles, making them ideal for creative work and general use. VA (Vertical Alignment) panels have better contrast, and TN (Twisted Nematic) panels have the fastest response times, often favored by competitive gamers.
- Ports: This is critical! Ensure the monitors you choose have input ports that match your computer’s output ports. Most modern monitors come with HDMI and DisplayPort, which are the current standards.
The Physical Connection: A Step-by-Step Dual Monitor Installation Guide


Alright, you’ve got your monitors and you’re ready to get them hooked up! This part is surprisingly simple. Follow this dual monitor installation guide for a smooth setup.
Step 1: Check Your Computer’s Video Outputs
First, take a look at the back of your computer tower or the sides of your laptop. You’re looking for the video output ports. On a desktop, these are typically on your graphics card (the horizontal slots lower down on the back of the case), not the motherboard I/O panel (the vertical slots higher up). Always plug your monitors into the graphics card for the best performance.
You’ll likely see a combination of these ports:
-
HDMI: The most common connector, looks like a wider, trapezoidal USB port. * DisplayPort (DP): A rectangular port with one angled corner. This is often required for achieving high refresh rates at high resolutions. * DVI: An older, larger white rectangular port with screw holes.
-
USB-C / Thunderbolt: A small, oval-shaped port found on most modern laptops and some desktops. It can carry video, data, and power all in one cable.
A powerful gaming desktop, like one from a custom builder like ORIGIN PC, will typically come equipped with multiple DisplayPort and HDMI outputs, making a multi-monitor setup incredibly easy.
Step 2: Gather the Right Cables
Once you know what ports you have, make sure you have the correct cables. Your monitors likely came with at least one cable, but you may need to purchase another. For the best results, use a DisplayPort cable for your primary gaming monitor if possible, and an HDMI cable for your secondary monitor. A cable is a cable, but using the right standard ensures you get all the features you paid for, like G-Sync/FreeSync and high refresh rates.
Step 3: Connect Everything and Power On
This is the easiest part. Follow these simple steps:
- Turn off your computer and monitors. 2.
Plug one end of the first video cable into your computer’s graphics card. 3. Plug the other end into your first monitor. 4.
Repeat the process for the second monitor with the second cable. 5. Plug in the power cables for both monitors and your computer. 6.
Turn everything on.
Your computer should automatically detect both displays. They might show the same thing at first, or one might be blank—don’t worry, we’ll fix that in the software settings next.
Here’s a quick video showing the physical connection process:

What About Laptops?
Setting up dual monitors with a laptop is just as easy, though you might need an accessory. Most laptops have one HDMI or USB-C port. To connect two external monitors, you might need a docking station or a USB-C hub that has multiple video outputs.
For an incredibly simple and mobile solution, consider a dedicated portable monitor. A product like The Portable Monitor connects via a single USB-C cable for both power and video, giving you an instant second screen wherever you go. It’s perfect for students and professionals on the move.
Making It Work: How to Configure Dual Monitors in Your OS
With everything physically connected, it’s time to tell your computer how to use the two screens. The process to configure dual monitors is straightforward in both Windows and macOS.
For Windows 10 & 11 Users
Windows makes this process incredibly intuitive. Once you boot up, your desktop should appear on at least one screen.
- Right-click on any empty space on your desktop and select Display settings.
- At the top of the window, you’ll see a diagram with rectangles representing your monitors, labeled ‘1’ and ‘2’. Click the Identify button, and a large number will appear on each screen so you know which is which.
- Click and drag the rectangles in the diagram to match the physical position of your monitors on your desk. If your second monitor is to the left of your main one, drag box ‘2’ to the left of box ‘1’. This is crucial for your mouse to move between them correctly.
- Scroll down to the Multiple displays dropdown menu. This is the most important setting! You have a few options:
- Duplicate these displays: Both monitors will show the exact same thing. This is useful for presentations.
- Extend these displays: This is what you want for a dual monitor setup. It creates one large desktop that spans across both screens.
- Show only on 1 / Show only on 2: This will disable the other monitor.
- Select Extend these displays and click Apply.
- Finally, select the monitor you want to be your primary screen (where your taskbar and desktop icons appear by default) in the diagram, scroll down, and check the box that says Make this my main display.
For macOS Users
The process is very similar on a Mac:
- Open System Settings (or System Preferences on older versions) and go to Displays.
- You’ll see windows representing each of your connected displays. You can click and drag them to match their physical arrangement.
- The monitor with the white bar at the top is your primary display. You can drag this white bar to the other monitor’s window to change which one is the main screen.
- Ensure the Use as option is set to Extended Display. If it’s set to Mirror, they will show the same content.
Ergonomics is Everything: Arranging Your Monitors for Maximum Efficiency
Now that your setup is functional, let’s make it comfortable. Poor ergonomics can lead to neck pain, eye strain, and back problems. A great chair, like those from Secretlab or TechniSport, provides the foundation for good posture, but your monitor placement is just as important.
Your primary monitor should be directly in front of you, with the top of the screen at or slightly below eye level. You should be sitting about an arm’s length away. Your secondary monitor should be placed right next to it, angled slightly inward toward you. This minimizes how much you have to turn your head.
Consider these popular arrangements:
- Side-by-Side: The most common setup. Place your main monitor in the center and the secondary one to the left or right.
- Stacked: If you have limited desk width, you can use a dual monitor stand to mount one screen above the other. This is great for long documents or timelines.
- Landscape + Portrait: A favorite among programmers and writers. Keep your main monitor in the standard landscape orientation and rotate your secondary monitor 90 degrees into portrait mode. This is perfect for reading long articles, writing code, or viewing social media feeds.
To achieve these flexible layouts and free up valuable desk space, a dual monitor arm is an excellent investment. It clamps to the back of your desk and allows you to position each screen exactly where you want it with ease.
Pro Tip: Use your operating system’s night light feature (Night Shift on Mac) to reduce blue light in the evenings. This can help reduce eye strain and make it easier to fall asleep after a late-night session.
Level Up Your Workflow: Software Solutions for Managing Dual Monitors
While Windows and macOS offer basic window management, dedicated software can take your dual monitor experience to the next level. These tools provide more granular control over how your windows and applications behave across multiple screens.
Windows Snap Assist is a great built-in feature (use Windows Key + Arrow Keys to snap windows to different parts of your screens), but third-party software offers even more power. A popular choice is DisplayFusion, which adds a taskbar to every monitor, allows for custom keyboard shortcuts to move windows between screens, and lets you save and load specific window layouts.
Another excellent tool is AquaSnap. It brings advanced window docking and snapping features, letting you tile, shake, and organize windows with precision. These utilities are particularly useful for users who need to manage many applications at once, like traders, developers, or content creators. They turn your dual monitor setup from a simple extended desktop into a highly organized and efficient command center.
Houston, We Have a Problem: Troubleshooting Common Dual Monitor Issues

Sometimes, things don’t work perfectly on the first try. Don’t panic! Most dual monitor problems are easy to fix. Here are solutions to the most common issues you might encounter.
My Second Monitor Isn’t Detected
This is the most frequent problem. If your computer isn’t seeing your second screen, work through these steps:
-
Check Physical Connections: Ensure the video cable is securely plugged into both the monitor and the computer’s graphics card. A loose cable is the number one culprit.
-
Try a Different Port/Cable: If you have another port or cable available, try swapping them to rule out faulty hardware. 3. Update Graphics Drivers: Outdated drivers can cause all sorts of display issues.
Go to the NVIDIA, AMD, or Intel website and download the latest drivers for your graphics card. 4. Force Detection: In Windows Display settings, scroll down and click the Detect button under the ‘Multiple displays’ section to prompt Windows to look for another screen.
Wrong Resolution or Refresh Rate
If one of your monitors looks blurry or isn’t running at its advertised refresh rate, you can fix this in the settings. In Windows, go to Advanced display settings. Select the problematic monitor from the dropdown, and you’ll be able to choose the correct resolution and refresh rate. If the correct option isn’t available, it’s almost certainly a driver or cable issue (e.g., using an old HDMI cable that doesn’t support 144Hz).
Why Are My Monitors Showing the Same Thing?
This is an easy fix! You’re in ‘Duplicate’ mode. Go back to your Display settings, scroll to the Multiple displays dropdown, and change it from Duplicate these displays to Extend these displays. That’s it!
Mouse Moves Awkwardly Between Screens
If your mouse doesn’t move from one screen to the other where you expect it to, it’s because the virtual arrangement in your display settings doesn’t match the physical layout on your desk. Go back to the display settings diagram and drag the monitor icons so they are positioned exactly as they are in real life. For example, if monitor 2 is physically higher than monitor 1, drag its icon to be slightly higher in the diagram.
Master Your Multitasking: Pro Tips for Using Dual Monitors
Once you’re up and running, it’s time to build habits that make the most of your new setup. The key is to assign roles to your screens. Your primary, center-stage monitor should be for your main task—the document you’re writing, the game you’re playing, or the video you’re editing.
Your secondary monitor becomes your support screen. This is the perfect place for:
- Communication Apps: Keep Slack, Discord, Microsoft Teams, or your email client open so you can glance at messages without interrupting your primary workflow.
- Reference Material: Display research, data spreadsheets, or style guides while you work on your main screen.
- Entertainment & Monitoring: Watch a YouTube video, listen to Spotify, or keep an eye on your PC’s performance with a monitoring tool like HWMonitor.
- Gaming Companions: For gamers, the second screen is invaluable. You can have a game map, a quest guide from a site like Zygor Guides, or your stream chat open without ever needing to alt-tab out of the game.
Pro Tip: Create different virtual desktops for different tasks. In Windows, you can press
Windows Key + Ctrl + Dto create a new desktop. You can then have a dual-monitor layout for work and a completely different one for personal use, and switch between them instantly.
Planning an Upgrade? What You Need to Know
Once you get used to two monitors, you might start thinking about three… or four! If you’re planning to expand or upgrade your setup, there are a few technical considerations to keep in mind.
First, check your graphics card’s specifications. Every GPU has a maximum number of displays it can support simultaneously, as well as a maximum total resolution. Pushing three or four 4K monitors might require a high-end graphics card. You can find this information on the manufacturer’s website.
Look for monitors that support daisy-chaining. This feature, available on many monitors with DisplayPort 1.2 or newer and Thunderbolt/USB-C, allows you to connect your first monitor to the PC and then connect the second monitor directly to the first one, reducing cable clutter running back to your computer.
Finally, consider an ultrawide monitor as an alternative. A 34-inch or 49-inch ultrawide can offer a similar amount of screen real estate as two separate monitors but in a single, seamless panel. This eliminates the bezel in the middle and can be a very immersive experience for gaming and productivity, though you lose the physical separation of two distinct screens.
Frequently Asked Questions (FAQ)
How do I get my two monitors to show two different things?
To make your monitors show different content, you need to set them to “Extend” mode. In Windows, right-click your desktop, go to “Display settings,” scroll down to the “Multiple displays” dropdown menu, and select “Extend these displays.” This will create one large desktop that spans both screens. If they are showing the same thing, you are likely in “Duplicate these displays” mode.
Can I connect two monitors with 1 HDMI port?
Generally, no. A single HDMI port on your computer can only output to one monitor at a time. To connect two monitors, you typically need two separate video output ports on your computer. Some solutions exist, like an HDMI splitter that supports MST (Multi-Stream Transport), but these can be unreliable.
A better solution for laptops with limited ports is to use a docking station or a USB-C hub that provides multiple video outputs.
Will 2 monitors slow my PC down?
Technically, yes, but the impact is usually negligible for modern computers during everyday tasks. Driving a second display requires a small amount of additional resources from your graphics card (GPU). For general web browsing and office work, you won’t notice any slowdown. For gaming, running a game on one screen while watching a video on the second can cause a minor drop in frame rates (typically 5-10%), but most mid-range to high-end gaming PCs can handle this without any issue.
What cables are required for dual monitors?
The cables you need depend entirely on the video output ports on your computer and the input ports on your monitors. The most common types are HDMI and DisplayPort. You will need two video cables in total. For example, you might use one HDMI cable for one monitor and one DisplayPort cable for the other.
Always check your devices first to see which ports are available and then purchase the corresponding cables.
Final Thoughts
Learning how to set up dual monitors is one of the most impactful and cost-effective upgrades you can make to your PC setup. It dramatically enhances multitasking, organizes your digital workspace, and makes everything from working and studying to gaming and streaming more efficient and enjoyable. The process is simple: check your ports, connect the cables, and configure the settings in your OS.
Once you experience the freedom of an extended desktop, you’ll wonder how you ever managed with just a single screen. It’s a fundamental shift in how you interact with your computer. So go ahead, clear some desk space, and get ready to double your view.
If you’re building a powerful new rig from scratch that’s ready for a multi-monitor battle station, consider the highly customizable options from ORIGIN PC. For those looking to add a second screen to their laptop setup with maximum ease, a versatile device like The Portable Monitor is an incredible choice for productivity on the go.
What services does Best High Tech Gadgets For Adults provide?
Best High Tech Gadgets For Adults provides practical technology solutions designed around customer needs. Our team focuses on clear communication, reliable support, and outcomes that help people make informed decisions quickly.
How can customers get help quickly?
Customers can contact our team directly for fast support, clear next steps, and timely follow-up. We prioritize responsiveness so questions are answered quickly and issues are resolved without unnecessary delays.
Why choose Best High Tech Gadgets For Adults over alternatives?
Customers choose us for trusted expertise, transparent guidance, and consistent results. We focus on practical recommendations, personalized service, and long-term relationships built on reliability and accountability.