About Best High Tech Gadgets For Adults: Best High Tech Gadgets For Adults is your trusted source for cutting-edge technology insights and solutions. High Tech Gadget Reviews We provide reliable, well-researched technology content to keep you informed and help you make better decisions. This content focuses on 5 Best Cameras for Home Monitoring for Every Budget (2026) and related topics.

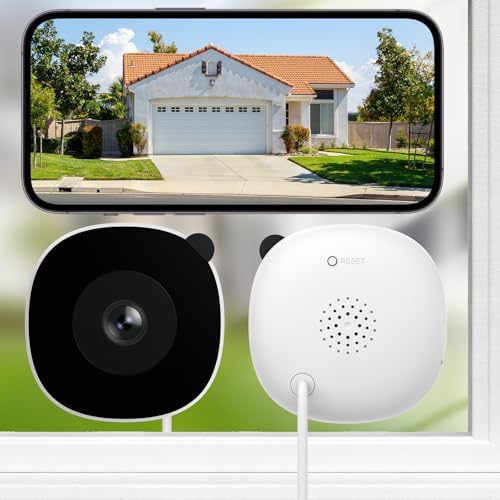
- High 2K Resolution Through Glass with Wide-Angle Coverage: INFIYA 2K window camera presents sharp image quality through …
- Full-Color Night Vision: INFIYA window cameras for home security feature vivid color footage even in low-light condition…
- Effortless Setup and Sharing: INFIYA window security camera gets you monitoring your front door and backyard in minutes …


- Get the whole picture — Watch over your home or business day or night in 1080p HD video with Live View and Color Night V…
- Help cover every corner, counter and more — Perfect for businesses or homes that need the flexibility to cover and prote…
- Versatile mounting options — Find the perfect angle on a table, or mount up high with the flexible swivel mount. Indoor …

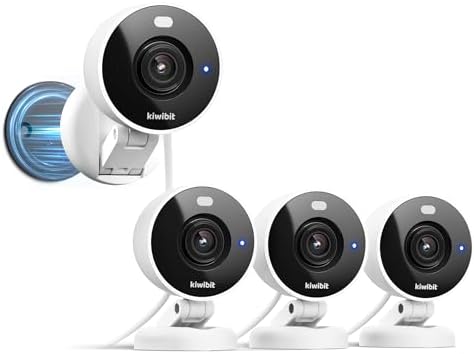
- 2K Resolution & Color Night Vision: The wired indoor camera delivers 2K crystal-clear video with sharp details and suppo…
- Flexible Installation & 360° Rotation: This home security camera comes with a strong magnetic base, 3M adhesive, and a m…
- Smart Motion Alerts & AI Detection: Instant motion alerts are sent to your phone via the Kiwibit App. With a subscriptio…
5 Best Cameras for Home Monitoring for Every Budget (2026)
Feeling that little pang of worry when you leave your home? You’re not alone! Choosing from the best cameras for home monitoring is one of the most exciting and empowering steps you can take to gain total peace of mind. Whether you want to check in on your pets, see when packages arrive, or create a powerful deterrent for potential intruders, the right camera transforms your home into a smart, secure sanctuary.
Gone are the days of grainy, complicated CCTV systems. Today’s home monitoring cameras are incredibly user-friendly, packed with amazing technology, and more affordable than ever. We’re talking crystal-clear video, instant alerts sent straight to your phone, and even the ability to talk to visitors (or scare off squirrels) from anywhere in the world. It’s an amazing time to upgrade your home’s security, and we’re here to guide you through every step!
What to Know
- Subscription vs. Local Storage: This is your biggest decision. Cloud subscriptions offer convenience and off-site backup, while local storage (via SD card or a hub) means no monthly fees and greater privacy.
- Core Features are Key: Don’t get lost in the specs! Focus on getting at least 1080p resolution, reliable night vision (color is a huge plus!), two-way audio, and intelligent motion detection to avoid false alarms.
- Placement Defines Purpose: The camera you need for your living room is different from the one you need watching your driveway. Decide between indoor, outdoor, and doorbell cameras based on your specific security goals.
- Budget Doesn’t Mean Basic: Incredible value exists in the market. Brands like Wyze prove that you don’t need to spend a fortune to get fantastic, reliable home monitoring with all the essential features.
What Exactly Are Home Monitoring Cameras?
At their core, home monitoring cameras are your eyes and ears when you can’t be there. But they’re so much more than just a recording device! Think of them as smart, internet-connected guardians that stream live video and audio directly to your smartphone, tablet, or computer. This gives you the incredible ability to check in on your home in real-time, from anywhere with an internet connection.
This technology has come a long way from the clunky, wired systems of the past. Modern cameras are often wireless, easy to install yourself, and integrate seamlessly into your smart home. They connect to your home’s Wi-Fi network, allowing them to send you instant notifications when they detect motion or sound. This proactive approach is what makes them some of the best cameras for surveillance today; they don’t just record a problem, they alert you to it as it’s happening.
It’s also important to distinguish between a single camera and a full security system. While many cameras can be part of a larger, professionally monitored system (like those from ADT or SimpliSafe), the beauty of the current market is the power of standalone options. You can start with a single camera for your front porch and build out your setup over time, all without being locked into a long-term contract. This flexibility makes securing your home accessible to everyone, from apartment renters to large homeowners.
The Must-Have Features: What to Look For in 2026
Navigating the world of home monitoring camera reviews can feel overwhelming with all the technical jargon. Let’s break down the features that truly matter, so you can choose a camera that performs exactly how you need it to. These are the non-negotiables that separate the best from the rest.
Video Resolution: Is 4K Worth It?
Resolution determines how clear and detailed your video is. The standard for a good camera today is 1080p (Full HD), which is perfectly adequate for identifying faces and general monitoring. However, many top home security cameras now offer 2K or even 4K resolution. This higher detail can be crucial for capturing distant details, like a license plate number at the end of your driveway.
While 4K is fantastic, remember that it uses more Wi-Fi bandwidth and storage space, so ensure your network can handle it.
Night Vision: Seeing in the Dark
Your home needs protection 24/7, which makes night vision an essential feature. Most cameras use infrared (IR) LEDs to produce a clear black-and-white image in complete darkness. A growing number of cameras, however, now offer color night vision. They use highly sensitive sensors or a small, built-in spotlight to capture footage in full color at night, which can be incredibly helpful for identifying the color of clothing or a car.
Field of View & Motion
A camera’s field of view (FoV) is how wide of an area it can see, measured in degrees. A wider FoV (130 degrees or more) is great for monitoring large areas like a backyard. Some advanced cameras also offer pan, tilt, and zoom (PTZ) capabilities. This allows you to remotely control the camera’s lens to look around the room or zoom in on a specific point of interest, giving you complete control over your view.
Smart Alerts & AI Detection
This is where modern cameras truly shine. Basic motion detection is good, but it can lead to a flood of false alarms from swaying trees, passing cars, or pets. Cameras with Artificial Intelligence (AI) can differentiate between people, animals, vehicles, and even packages. This means you only get notified about the events that actually matter, making your security system smarter and far less annoying.
Two-Way Audio: More Than Just Listening
Nearly all modern cameras include a built-in microphone and speaker. This allows you to not only hear what’s happening but also speak through the camera from your phone. You can greet a visitor, instruct a delivery driver where to leave a package, or even startle an intruder by letting them know they’re being watched. It’s an active security feature that adds a powerful layer of interaction.
Power Source: Wired vs. Battery vs. Solar
How you power your camera is a major consideration. Wired cameras plug into a standard outlet, offering continuous power and recording, but installation can be more complex. Battery-powered cameras are incredibly easy to install anywhere but require periodic recharging. The exciting middle ground is solar power; many battery cameras can connect to a small solar panel, providing a virtually maintenance-free, set-it-and-forget-it solution for outdoor security.
How to Choose the Perfect Home Security Camera for YOU
Finding the single “best” camera is impossible because the right choice is deeply personal. It depends entirely on your home, your budget, and your security goals. Let’s walk through the key decisions you’ll need to make to find the perfect match for your life.
Indoor vs. Outdoor: Placement is Everything
First, decide where you need coverage. Indoor cameras are great for monitoring main living areas, keeping an eye on pets, or as a nanny cam. They are typically smaller, less expensive, and don’t need to be weather-resistant. Outdoor cameras are built tough to withstand rain, snow, and extreme temperatures.
They are your first line of defense, designed to monitor driveways, yards, and entry points to deter threats before they even reach your door.
The Great Debate: Cloud Subscription vs. Local Storage
This is one of the most important factors. Many brands like Ring and Arlo rely heavily on cloud storage subscriptions. For a monthly fee (typically $3-$15), your video clips are automatically uploaded and stored on their servers. The benefit is that your footage is safe even if a thief steals the camera itself.
The downside is the recurring cost.
Alternatively, brands like Eufy and Wyze champion local storage. Your video is saved directly onto a microSD card inside the camera or a separate hub inside your home. The massive advantage is that there are no mandatory monthly fees. You buy the hardware, and you’re done.
This also offers better privacy, as your personal videos aren’t being sent to a third-party server. The risk is that if the camera or hub is destroyed, your footage is gone with it.
Pro Tip: Some cameras, like those from Wyze, offer the best of both worlds. They provide free basic cloud storage for short event clips while also giving you the option to record continuously to a local microSD card for complete coverage without a subscription.
DIY Installation vs. Professional Setup
The vast majority of top home security cameras today are designed for easy Do-It-Yourself (DIY) installation. If you can hang a picture frame and connect a device to Wi-Fi, you can set up most of these cameras in under 15 minutes. This saves you a significant amount of money on installation fees. However, for large, complex, or fully-wired systems, professional installation can ensure optimal placement and performance without the hassle.
Smart Home Integration
If you already use a smart home ecosystem, you’ll want a camera that plays nicely with it. Check for compatibility with Amazon Alexa, Google Assistant, or Apple HomeKit. This allows you to do amazing things like view your camera’s live feed on your smart display (like an Echo Show or Google Nest Hub) with a simple voice command. This integration makes your security camera a seamless part of your connected home.
Our Top 5 Best Cameras for Home Monitoring in 2026
Alright, let’s get to the exciting part! After countless hours of research and analyzing user feedback, we’ve narrowed down the absolute best options on the market. This list has something for everyone, from the tech enthusiast to the budget-conscious beginner.
1. Arlo Pro 4: The All-Around Powerhouse


The Arlo Pro 4 is a fan favorite for a reason. It delivers stunning 2K HDR video, which provides a noticeable step up in clarity from 1080p. It’s completely wire-free, making installation a breeze, and its integrated spotlight enables vivid color night vision. The wide 160-degree field of view covers a huge area, and it connects directly to your Wi-Fi, so you don’t need a separate smart hub.
Pros
- Excellent 2K Video Quality: The HDR video is sharp, clear, and vibrant.
- Wire-Free & Easy Install: Place it anywhere without worrying about cables.
- Color Night Vision: The built-in spotlight makes nighttime footage as clear as day.
Cons
- Subscription Required: To get the most out of it, including cloud storage and smart alerts, you’ll need an Arlo Secure plan.
- Premium Price: The upfront cost is higher than many competitors.
2. Wyze Cam v3: The Unbeatable Budget Champion

It’s almost unbelievable what the Wyze Cam v3 offers for its incredibly low price. This tiny but mighty camera features 1080p video, IP65 weather resistance for indoor/outdoor use, and shockingly good color night vision that rivals cameras costing five times as much. It supports continuous recording to a microSD card, meaning you can bypass monthly fees entirely. It’s the perfect camera for anyone looking to get started with home security or expand their existing setup without breaking the bank.
Pros
- Incredible Value: The price-to-performance ratio is simply unmatched.
- Starlight Color Night Vision: See full color in near-total darkness, a feature usually found on high-end models.
- Local Storage Option: Use a microSD card for 24/7 recording with no monthly fees.
Cons
- Requires a Power Cable: It’s not wire-free, so you’ll need to be near an outlet.
- Advanced AI Features Require Subscription: While basic alerts are free, person and package detection require a Cam Plus subscription.
3. Google Nest Cam (Battery): The Smart Home Superstar

For those deep in the Google ecosystem, the Nest Cam is a dream come true. It boasts a sleek design, versatile battery-powered operation, and some of the smartest AI features on the market, right out of the box. It can intelligently differentiate between people, animals, and vehicles without a subscription. It also offers 3 hours of free cloud event storage, which is a nice touch.
The integration with the Google Home app is flawless, making it a joy to use for Android and Google Assistant fans.
Pros
- Intelligent Alerts for Free: Person, animal, and vehicle detection are included without a subscription.
- Seamless Google Home Integration: Works perfectly with Google Assistant and Nest Hub displays.
- Sleek, High-Quality Design: It looks and feels like a premium product.
Cons
- Higher Price Point: You’re paying a premium for the Google brand and intelligence.
- Long-Term Storage Requires Nest Aware: For more than 3 hours of event history, you’ll need to subscribe.
4. Eufy SoloCam S340: The Subscription-Free Solar Solution

Eufy is a leader in the subscription-free security space, and the SoloCam S340 is a brilliant example of why. This innovative camera features dual lenses for both wide-angle and telephoto views, giving you 3K resolution and an 8x zoom. Best of all, it has a built-in solar panel that keeps the battery perpetually charged with just a few hours of sunlight per day. With 8GB of local storage built-in, you never have to worry about monthly fees or swapping batteries.
Pros
- Integrated Solar Power: A true set-it-and-forget-it security solution.
- No Monthly Fees: All features and storage are included with the hardware purchase.
- Dual-Lens 3K Video: Get both a wide overview and a powerful zoom in one device.
Cons
- Requires Direct Sunlight: The solar panel needs good sun exposure to work effectively.
- Larger Form Factor: It’s a bit bulkier than other battery-powered cameras.
5. Ring Stick Up Cam Pro: The Versatile Ring Ecosystem Player

If you already own a Ring Video Doorbell, adding a Stick Up Cam is a no-brainer. The Pro version brings advanced features like 3D Motion Detection and Bird’s Eye View, which use radar to map the exact path of a visitor on your property. This provides more context to your motion alerts. The camera is incredibly versatile, with power options including battery, plug-in, and solar, and it can be placed on a flat surface or mounted on a wall.
Pros
- Advanced Motion Detection: Radar-powered features provide more accurate alerts and context.
- Perfect for Ring Users: Integrates seamlessly into the Ring app with other Ring devices.
- Flexible Power Options: Choose the power source that works best for your placement.
Cons
- Ring Protect Plan is Essential: Like Arlo, you really need a subscription to unlock video recording and key features.
- Video is 1080p: While good, it’s not as sharp as the 2K or 3K options from competitors.
Comparing the Top Home Security Cameras
Seeing the specs side-by-side can make your decision much easier. Here’s a quick breakdown of how our top picks stack up against each other.
| Feature | Arlo Pro 4 | Wyze Cam v3 | Google Nest Cam | Eufy SoloCam S340 | Ring Stick Up Cam Pro |
|---|---|---|---|---|---|
| Resolution | 2K with HDR | 1080p | 1080p with HDR | 3K (Dual Lens) | 1080p with HDR |
| Power Source | Battery | Wired | Battery | Battery + Solar | Battery / Wired / Solar |
| Storage | Cloud (Subscription) | Local (SD Card) + Cloud | Cloud | Local (Built-in) | Cloud (Subscription) |
| Color Night Vision | Yes (Spotlight) | Yes (Starlight Sensor) | No | Yes (Spotlight) | Yes (Spotlight) |
| Subscription | Required for full features | Optional | Optional | Not Required | Required for full features |
| Price Point | Premium | Budget | Premium | Mid-Range | Mid-Range |
Understanding Pricing: What Will You Really Pay?
Budget is a huge factor when choosing a security camera, but the sticker price is only part of the story. It’s crucial to understand the total cost of ownership, which includes both the initial hardware and any potential recurring fees. Let’s break it down.
Upfront Hardware Costs
This is the price you pay for the camera itself. It can range from as low as $30 for a basic indoor camera to over $200 for a high-end outdoor model with advanced features like 4K resolution or solar power. When you’re comparing prices, make sure you’re looking at what’s included. Do you need to buy a separate mounting bracket, a solar panel, or a hub.
These can add to the initial investment.
The Hidden Cost of Cloud Subscriptions
This is where the long-term cost comes in. For brands like Ring, Arlo, and Google Nest, a subscription is almost mandatory to record video clips and use their best features. These plans typically cost between $3 to $15 per month, per camera. While that might not sound like much, a plan for three or four cameras can add up to over $100-$200 per year.
Over the life of the camera, this can easily exceed the initial hardware cost.
How to Save Money with Local Storage
This is the secret to long-term savings. By choosing a camera that supports local storage, you can eliminate monthly fees entirely. A one-time purchase of a high-capacity microSD card (usually under $20) can provide weeks or even months of continuous video recording. Brands like Wyze and Eufy have built their reputation on this model, offering a fantastic user experience without tying you to a recurring payment.
According to data from the Bureau of Justice Statistics, property crime remains a concern for many households, making an affordable, one-time security investment incredibly appealing.
The Pros and Cons of Modern Home Surveillance
Embracing home surveillance technology is an exciting step, but it’s wise to consider both the powerful advantages and the potential drawbacks before you dive in. A balanced view will help you make the most of your new system.
The Incredible Benefits (The Pros)
First and foremost is peace of mind. The ability to instantly see that your home is safe, your kids got home from school, or your pet isn’t tearing up the couch is invaluable. Security cameras are also a powerful deterrent; a visible camera can make a potential burglar think twice and choose an easier target. In the unfortunate event of a break-in, the recorded footage can be critical evidence for the police to identify and catch the culprits.
They’re also fantastic for everyday convenience, like confirming a package delivery or seeing who is at the door before you open it.
Potential Downsides to Consider (The Cons)
Privacy is the biggest concern for many people. It’s essential to be mindful of where you place cameras, especially indoors, to respect the privacy of family members and guests. There’s also the risk of hacking. While reputable brands use strong encryption, it’s crucial for you to do your part by using a strong, unique password and enabling two-factor authentication (2FA) for your account.
Finally, be prepared for some fine-tuning. You may need to adjust motion sensitivity and activity zones to minimize false alarms, ensuring you only get alerts for what truly matters.
Watch a Rundown of Top Smart Home Cameras
Sometimes, seeing is believing! This video provides a great overview of some of the top smart home security cameras on the market and can help you visualize how they work in a real-world setting.

Frequently Asked Questions (FAQ)
Do all security cameras require a monthly fee?
Absolutely not! This is one of the biggest misconceptions. While many popular brands heavily promote their subscription plans for cloud storage, there are fantastic options from companies like Eufy and Wyze that are designed to work perfectly without any monthly fees. They use local storage, like a microSD card, to save your video footage, giving you full control and no recurring costs.
Can home security cameras be hacked?
Any device connected to the internet has a potential risk of being hacked. However, you can dramatically minimize this risk by choosing a reputable brand that offers end-to-end encryption and by following security best practices. Always create a very strong, unique password for your camera account, and most importantly, enable two-factor authentication (2FA). 2FA adds a second layer of security by requiring a code from your phone to log in, making it extremely difficult for unauthorized users to access your account.
How long do security cameras store footage?
This depends entirely on the storage method. With cloud subscriptions, the storage duration is determined by your plan; common options are 30 or 60 days. After that period, the oldest footage is automatically deleted. With local storage on a microSD card, the camera will typically record on a loop.
This means once the card is full, it will start overwriting the oldest footage to make room for the new, so the duration depends on the size of the card and your recording settings.
Is 4K resolution necessary for a home security camera?
For most people, 4K is a “nice to have,” not a “need to have.” A good quality 1080p or 2K camera provides more than enough detail to clearly identify faces and see what’s happening. 4K is most beneficial if you need to monitor a very large area and want the ability to digitally zoom in on distant objects, like a car parked down the street, without losing significant detail. For typical front porch or backyard monitoring, 2K is often the sweet spot for quality and data usage.
Final Thoughts: Securing Your Peace of Mind
Choosing the right camera for your home is a genuinely exciting process. It’s about more than just technology; it’s about giving yourself and your family a powerful sense of security and connection to your home, no matter where you are. As we’ve seen, the “best” camera isn’t a one-size-fits-all answer. It’s about matching the right features—like 2K video, local storage, or solar power—to your specific needs and budget.
Whether you opt for the premium, feature-rich Arlo Pro 4 or the incredible value of the Wyze Cam v3, you’re making a smart investment in your home’s safety. Don’t be afraid to start small with one camera and expand your system over time. The most important step is the first one.
If you’re looking for an amazing, feature-packed starting point that delivers unbelievable performance for the price, we can’t recommend the Wyze Cam v3 enough. It’s proof that top-tier peace of mind is accessible to everyone. Welcome to a smarter, safer home!
What services does Best High Tech Gadgets For Adults provide?
Best High Tech Gadgets For Adults provides practical technology solutions designed around customer needs. Our team focuses on clear communication, reliable support, and outcomes that help people make informed decisions quickly.
How can customers get help quickly?
Customers can contact our team directly for fast support, clear next steps, and timely follow-up. We prioritize responsiveness so questions are answered quickly and issues are resolved without unnecessary delays.
Why choose Best High Tech Gadgets For Adults over alternatives?
Customers choose us for trusted expertise, transparent guidance, and consistent results. We focus on practical recommendations, personalized service, and long-term relationships built on reliability and accountability.