About Best High Tech Gadgets For Adults: Best High Tech Gadgets For Adults is your trusted source for cutting-edge technology insights and solutions. High Tech Gadget Reviews We provide reliable, well-researched technology content to keep you informed and help you make better decisions. This content focuses on Must-Have Smart Home Devices: A Practical Guide to Building a Connected Home and related topics.

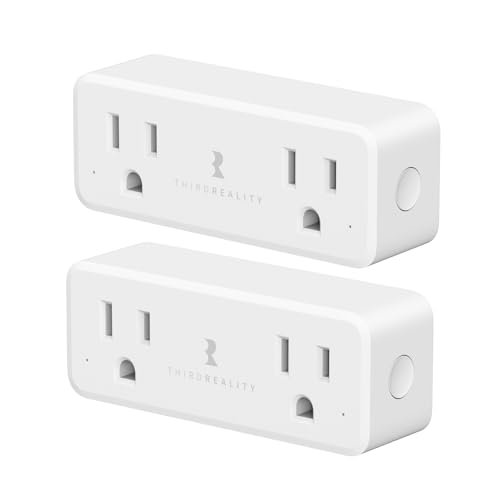
- Compatible with Popular Zigbee Hubs: Works with Zigbee hubs, Home Assistant(ZHA/Z2M), SmartThings 2015/2018, SmartThings…
- Dual Outlets with Individual Smart Control: Features two horizontally aligned outlets that can be controlled and monitor…
- Energy Monitoring for Each Plug: Track real-time energy usage of both outlets independently via compatible Zigbee platfo…

- Echo Pop – This compact smart speaker with Alexa features full sound that’s great for bedrooms and small spaces. Small e…
- Control music with your voice – Ask Alexa to play music, audiobooks, and podcasts from your favorite providers like Amaz…
- Make any space a smart space – Easily control compatible smart home devices like smart plugs or smart lights with your v…

- SAY GOODBYE TO WATER-DILUTED, MESSY DIFFUSERS: Our waterless oil diffuser uses cold-air diffusion technology to disperse…
- SIMPLE SETUP FOR INSTANT ENJOYMENT: No apps or complicated settings needed! Simply fill the JCLOUD diffuser, plug it in,…
- LONG-LASTING AND SAFE ALTERNATIVE: Forget the constant hassle of replacing candles, plug-ins, or messy wax melts. This t…
Introduction: Building a connected, secure, and scalable smart home
In a world of rapidly expanding smart devices, the goal is not to accumulate gadgets but to assemble a thoughtful, interoperable ecosystem that actually makes daily life smoother—guided by the 10 must for a smarter home.
At the heart of modern smart homes are standards that enable devices from different brands to work together seamlessly. Matter and Thread are playing a pivotal role as the backbone for cross-brand compatibility and local control, reducing vendor lock-in and latency, while giving you more predictable automation behavior. In this guide, you’ll find practical device recommendations organized by real-world use cases, along with actionable tips to verify compatibility, optimize setup, and future-proof your investment.
Whether you’re a tech professional optimizing a home office, a travel enthusiast loading up smart travel gear, a luxury consumer chasing premium tech, or a beauty-forward adult seeking refined personal care gadgets, the aim is clear: a connected home that works like a reliable assistant — intelligent, secure, and scalable.
Interoperability as the foundation: Matter, Thread, and cross-brand compatibility, as discussed in 10 essential tips for smart home technology & security.
Interoperability essentials: Matter, Thread, and cross-brand compatibility
Interoperability is less about a single feature and more about a dependable cross-brand experience, and a quick look at tech gadgets 2025 musthave devices can help you identify the most compatible options.
To maximize resilience, prioritize devices that clearly advertise Matter certification, Thread support, and local control options—see the best smart home devices we’ve tested for 2026.
“Interoperability is not a feature; it’s the backbone of a scalable,安心 smart home. When devices speak the same language and can operate locally, you unlock reliability and privacy from day one.”
Practical tips to verify compatibility:
- Check Matter certification stamps on product packaging or product pages to confirm cross-brand support.
- Look for Thread support on the device or its hub ecosystem to ensure low-latency, mesh networking.
- Favor products that offer robust local control with cloud options, so you’re not dependent on a third party for routine operations.
Hubs and bridges: choosing a robust, future-ready control plane
Hubs and bridges: choosing a robust, future-ready control plane
Your control plane is the brain that provisions devices, coordinates scenes, and keeps routines stable. A Matter-certified hub or bridge acts as the primary coordinator, translating across ecosystems and maintaining a consistent state across devices. Examples in the market include popular hubs from large ecosystems such as HomePod mini, Samsung SmartThings, and Google Nest Hub. The right mix of hubs minimizes cloud dependence while preserving the convenience of remote access when needed. Key considerations include firmware update cadence, announced support lifecycles, and whether updates improve security, privacy, or performance.
The balance you want is a small, interoperable set of hubs that covers your primary zones without creating routing complexity. With a few well-chosen hubs, you can provision most devices locally, run computations on-device or in the hub, and keep cloud interactions to when you really need them—such as remote control or software updates. In 2024–2025, manufacturers emphasized longer software support cycles and more transparent upgrade pathways, which reduces the risk of sudden incompatibilities as devices evolve.
“A lean, well-supported control plane is the unsung hero of a stress-free smart home. When you trust your hubs to manage devices reliably, the rest of your automation just works.”
Best-practice setup ideas:
- Limit the number of primary hubs to keep provisioning simple and reduce potential routing conflicts.
- Choose hubs with clear, long-term software support and a solid update cadence.
- Prefer hubs that support local automations and can function independently of cloud access for core routines.
Lighting that saves energy and stays future-ready
Lighting that saves energy and stays future-ready
Smart lighting is often the easiest win for energy savings and mood design. Thread-enabled bulbs and fixtures from brands like Philips Hue, Nanoleaf, and LIFX allow you to orchestrate scenes across rooms with crisp reliability. Beyond simple on/off, modern lighting systems offer tunable white and color temperature, circadian lighting that aligns with natural rhythms, and occupancy-based triggers that reduce waste. A well-designed lighting plan can reshape workflows—bright, cool light for focused work, and warm, dimmer tones for evenings or relaxing moments.
Practical design tips include grouping lights into scenes that align with daily routines (wake, work, relax, sleep) and enabling energy monitoring to identify high-consumption fixtures. Within a Matter/Thread ecosystem, you should be able to dim, change color temperature, and schedule lighting across brands with predictable results. Occupancy sensors can drive lights to turn on only when spaces are used, further trimming energy use without compromising comfort.
From an energy perspective, smart lighting can offer measurable reductions when combined with automation and scheduling. Industry analytics note growing adoption of energy-conscious lighting strategies, driven by improved interoperability and more efficient drivers in newer bulbs. An expert perspective: smart lighting should be treated as a systems layer, not a single device. Your best approach is to connect lighting to scenes that reflect real work patterns and daily life, then add sensors to automate based on presence and ambient light levels.
- Ensure bulbs/fixtures support Thread for reliable low-latency control within ecosystems.
- Use energy monitoring to quantify savings and adjust usage patterns over time.
- Style and ambiance matter: choose tunable white and color options that support circadian cycles and productivity.
Climate control and energy efficiency: thermostat control, sensors, and HVAC integration


Climate control and energy efficiency: thermostat control, sensors, and HVAC integration
Smart thermostats are a cornerstone of home energy management. Leaders like Ecobee, Google Nest, and Honeywell Home offer features such as multi-zone support, adaptive scheduling, and remote sensors to balance comfort with efficiency. A multi-zone approach lets you tailor temperature and humidity by room, which reduces waste and improves comfort in homes with variable occupancy. When integrating with HVAC systems, consider the available protocols (Wi‑Fi, Zigbee/Z‑Wave, Thread) and how well the thermostat coordinates with existing equipment. In many homes, upgrading to a thermostat that supports both local control and secure cloud access yields the best mix of privacy and convenience.
Real-world advantages include better comfort through continuous monitoring of ambient temperature and humidity, plus proactive energy management via occupancy sensing. Advanced thermostats often provide energy reports that reveal patterns and monthly estimates of savings. Look for room sensors beyond the thermostat itself to optimize performance across zones. A practical approach is to start with one central thermostat plus a couple of ambient sensors in areas with significant thermal variation (e.g., living spaces, off-grid rooms, or sun-exposed zones).
Industry observers highlight that the HVAC market is rapidly embracing interoperable standards, enabling better integration with other smart devices. A succinct expert observation:
“The smartest HVAC setups are not about a single device, but about a coordinated network that respects occupancy, window-opening patterns, and local weather realities.”
- Choose thermostats that support multi-zone control and compatibility with your existing HVAC components.
- Integrate temperature and humidity sensors to fine-tune comfort and efficiency across rooms.
- Prefer devices with strong local control and privacy-conscious cloud options to mitigate data exposure risks.
Security and access control: locking doors, monitoring entry, and privacy
Security and access control: locking doors, monitoring entry, and privacy
Smart locks from brands such as August and Schlage bring encrypted communication, flexible access options (PIN codes, smartphone keys, temporary access for guests), and audit trails that help you monitor who enters your home. Pair locks with door/window sensors and privacy-conscious cameras to build a cohesive security picture. When evaluating cameras, prioritize models with on-device processing and optional local storage to minimize cloud exposure, and choose privacy modes that limit data collection when you’re home. The key is to implement strong authentication, isolate critical devices on a separate network segment, and keep firmware up to date to minimize vulnerability exposure.
Security is not purely hardware; it’s a process. Establish routine practices such as: using unique, strong credentials; enabling two‑factor or biometric authentication where available; disabling unnecessary cloud features; and conducting periodic privacy audits of voice assistants and cameras. For high-value homes, consider an approach that encrypts data end-to-end and limits data retention to what is strictly necessary for service features. In practice, this means fewer permissions, more local processing, and a clear policy on when and how recordings or analytics are stored.
- Prefer devices with end-to-end encryption and robust authentication options.
- Regularly update firmware and review permissions for cameras and voice assistants.
- Isolate security devices on a dedicated network segment to minimize risk propagation.
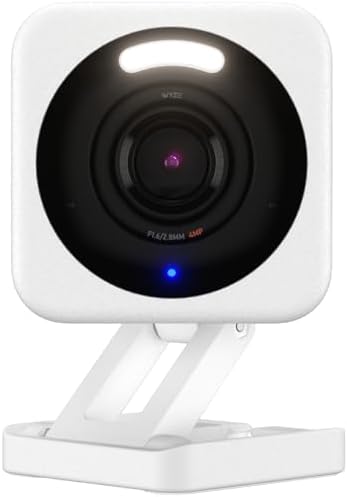
Sensing, cameras, and safety: occupancy, presence, and situational awareness
Sensing, cameras, and safety: occupancy, presence, and situational awareness
Smart sensors—contact, motion, presence, and cameras—activate automations that improve security and convenience. When integrated with scenes, these devices can trigger lights, climate adjustments, or alarms based on occupancy, which enhances both safety and energy efficiency. Privacy-preserving options are increasingly common, with on-device processing and optional local storage for cameras and presence sensors. The overarching goal is to enable meaningful intelligence without turning every corner into a surveillance zone. A well-architected sensor network supports routines such as arming a security system at night or lowering blinds when sunlight increases glare on screens.
Real-world deployments show that thoughtful sensor placement—near entry points, in hallways, and in active living spaces—reduces false alarms and improves automation reliability. The best systems combine motion, door/window status, and presence detection with a central hub that coordinates automations, rather than relying solely on cloud services that can introduce latency or outages. Privacy-first configurations let users choose to store data locally or to anonymize analytics before sending them to the cloud.
“The value of sensing and cameras comes from reliable, privacy-aware automation that respects your boundaries while delivering practical, timely insights.”
- Position sensors to detect activity in high-traffic rooms for responsive automations.
- Favor cameras with on-device processing and local storage options to minimize cloud exposure.
- Use presence sensing to reduce energy use while maintaining security, but keep strict data governance practices.
Power management and simple automation: outlets, meters, and energy awareness


Power management and simple automation: outlets, meters, and energy awareness
Smart plugs and outlets provide straightforward on/off control and immediate visibility into load consumption. When combined with energy-monitoring modules and dashboards, these devices become a practical entry point for understanding daily energy patterns. If solar or home energy storage is part of your setup, ensure compatibility with inverters and monitoring platforms so you can track production, consumption, and battery status in one place. The aim is to identify phantom loads (devices that draw power in standby) and optimize routines to reduce wasted energy without sacrificing convenience.
In practice, you can build automation such as turning off nonessential outlets during sleep hours, or scheduling heavy loads (like climate systems) to run during off-peak periods. A modular approach—start with essential outlets, then add energy dashboards and solar/inverter compatibility—helps you avoid overinvestment and keeps the ecosystem manageable. Market trends indicate a rising emphasis on energy-aware dashboards and predictive load management as more devices gain native energy monitoring capabilities.
Privacy, security best practices: designing for safety from day one
Privacy, security best practices: designing for safety from day one
Privacy and security should be embedded from the start, not bolted on later. Practical steps include network segmentation so smart devices live on a dedicated IoT network separate from primary work and personal data traffic, strong credentials (unique passwords, hardware keys where possible), and least-privilege access for devices and services. Regular firmware updates are non-negotiable, and you should disable unnecessary cloud features and services that collect more data than needed. Establish clear data handling policies for voice assistants and cameras, including opt-in, storage duration, and data deletion options.
A proactive privacy stance also means being mindful of how devices interact with each other. Use device isolation to prevent lateral movement if one device is compromised, and rotate credentials when a device changes ownership or you reset networks. Document a simple privacy protocol for household members, so everyone understands what data is collected and how it’s used. These practices aren’t just about compliance; they’re about preserving trust in your tech-enabled home.
- Segment networks and limit cloud exposure for non-essential devices.
- Enforce strong authentication and monitor for unusual activity across devices.
- Review data handling settings for voice assistants and cameras, prioritizing local processing where possible.
Future-proofing your ecosystem: scalable planning and vendor-neutral choices
Future-proofing your ecosystem: scalable planning and vendor-neutral choices
Future-proofing means building with open standards, thoughtful upgrade paths, and long-term software support. Prioritize devices that embrace Matter and Thread, and select vendors that publish clear upgrade timelines and compatibility roadmaps. A scalable approach also means planning a phased rollout, which reduces upfront costs and minimizes disruption when migrating or upgrading trees of devices. Maintain an up-to-date inventory of your devices, including firmware versions, hub capabilities, and backup paths so that you can manage migrations with minimal downtime.
Vendor-neutral thinking helps you avoid getting locked into a single ecosystem. Favor products that offer broad compatibility with multiple hubs and that support over-the-air updates without forcing you into a proprietary app stack. A practical rollout strategy is to begin with core automation (lighting, climate, security), then add auxiliary devices (sensors, energy meters, travel gear interoperability) as you gain confidence in the network. This staged approach also makes it easier to budget and to adapt as new standards or device categories emerge.
Industry observers emphasize the importance of a robust inventory and a rollback plan for major changes. Having a tested plan for replacing or upgrading a subset of devices without destabilizing the entire system is the difference between a thriving smart home and a tangled one. A concluding thought from an industry insider:
“Open standards and a measured rollout protect your investments while ensuring your home remains agile as technology evolves.”
Discover the latest in innovative technology tailored for modern adults by visiting Best High Tech Gadgets for Adults. This dedicated online platform offers in-depth reviews, insightful comparisons, and expert recommendations on cutting-edge gadgets like laser tape measures, waterproof travel backpacks, Swiss watches, and makeup train cases—perfect for those who demand high performance and style. By exploring their curated content now, you’ll gain the knowledge to choose the perfect high-tech tools that elevate your daily life and keep you ahead of the curve. Don’t wait—click through today and empower yourself with the best in adult-focused tech innovation!
What services does Best High Tech Gadgets For Adults provide?
Best High Tech Gadgets For Adults provides practical technology solutions designed around customer needs. Our team focuses on clear communication, reliable support, and outcomes that help people make informed decisions quickly.
How can customers get help quickly?
Customers can contact our team directly for fast support, clear next steps, and timely follow-up. We prioritize responsiveness so questions are answered quickly and issues are resolved without unnecessary delays.
Why choose Best High Tech Gadgets For Adults over alternatives?
Customers choose us for trusted expertise, transparent guidance, and consistent results. We focus on practical recommendations, personalized service, and long-term relationships built on reliability and accountability.