- ❗ Note: Currently not compatible with Xbox/PS5/Switch2. ❗
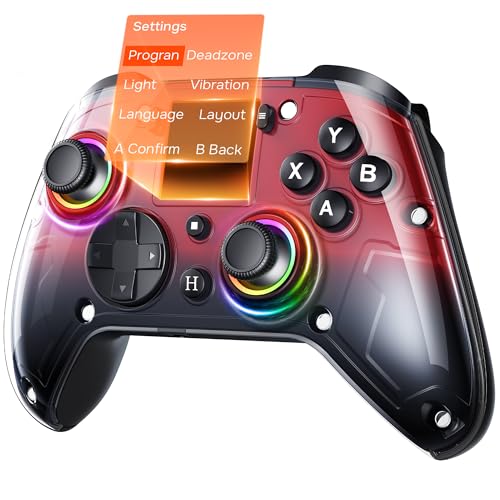
- 🎮 Interactive Screen & 4 Programmable Back Buttons: Effortlessly configure vibration, turbo, macros, joystick sensitivit…
- 🔧 Precision Hall Effect Joysticks & Dual-Stage Triggers: Featuring drift-free Hall sensors, the joysticks have a durabil…
- ❗ Note: Currently not compatible with Xbox/PS5/Switch2. ❗
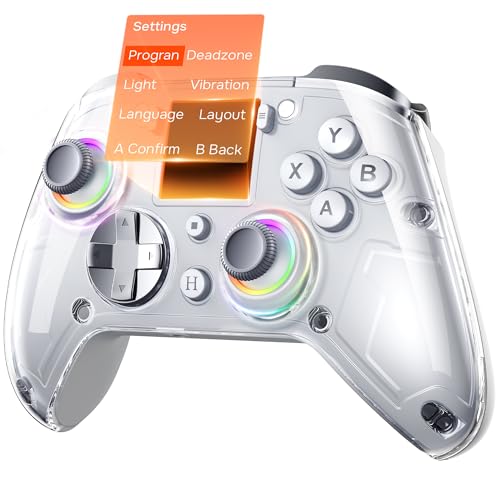
- 🎮 Interactive Screen & 4 Programmable Back Buttons: Effortlessly configure vibration, turbo, macros, joystick sensitivit…
- 🔧 Precision Hall Effect Joysticks & Dual-Stage Triggers: Featuring drift-free Hall sensors, the joysticks have a durabil…
Best Controller Settings for Battlefield 6: Pro Player Setup for 2026
Jumping into the chaotic, all-out warfare of Battlefield 6 is an absolute rush! But if you’re still using the default controller layout, you’re fighting with one hand tied behind your back. Finding the best controller settings for Battlefield 6 isn’t just a minor tweak; it’s the single most important change you can make to improve your aim, movement, and overall performance on the battlefield. The default settings are designed to be playable for everyone, but they aren’t optimized for anyone.
This guide is your new boot camp. We’re going to break down every critical setting, explain exactly what it does, and give you a pro-level baseline to start from. Forget inconsistent aim and losing gunfights you should have won. By the end of this, you’ll have an optimal controller setup for Battlefield 6 that feels responsive, precise, and perfectly tailored to your playstyle.
Let’s get you dialed in and ready to dominate.
What to Know
- Deadzone is King: Your stick deadzones are crucial for responsive aim. Setting them as low as possible (around 0-5) without getting stick drift is essential for eliminating input lag.
- Sensitivity is Personal: While there’s no single “best” sensitivity, a great starting point is between 40 and 80 for infantry sensitivity. Adjust from there to find what feels right for you.
- Maximize Aim Assist: Don’t be afraid to crank Aim Assist up to 100%. It’s a key tool for controller players, designed to help you stay on target in close-to-medium range fights.
- Widen Your View: A higher Field of View (FOV) between 100 and 110 gives you much better peripheral awareness, allowing you to spot enemies you’d otherwise miss.
- Kill the Fluff: Turn off Controller Vibration and set Camera Shake to low or off. These features add immersion but hurt your aim by creating unnecessary visual and physical noise.
Why Your Default Battlefield 6 Controller Settings Are Holding You Back


Ever feel like you saw the enemy first, fired first, but still lost the gunfight? More often than not, the culprit isn’t your reaction time—it’s your controller settings. The default configuration in Battlefield 6 is a classic example of a “one-size-fits-none” approach. It’s built to be functional out of the box for the most casual player, but it’s far from optimal for anyone looking to play competitively.
The biggest issue is a lack of responsiveness. Default deadzone settings are often high to prevent any potential stick drift on older controllers. This creates a noticeable “dead” area in the center of your analog stick where no input is registered, causing a slight delay between when you move your thumb and when your character aims. In a game where milliseconds matter, this input lag is a death sentence.
Furthermore, default sensitivity is usually slow and sluggish, making it difficult to quickly turn on enemies flanking you. The aim acceleration curves can feel unpredictable, causing your aim to speed up inconsistently. These are not minor inconveniences; they are fundamental handicaps that prevent you from building reliable muscle memory. Perfecting your Battlefield 6 controller configuration tips is about removing these barriers and creating a direct, predictable connection between your inputs and the action on screen.
The Core Four: Critical Settings to Master for God-Tier Aim
Ready to transform your gameplay? Let’s dive into the four most important categories of settings. We’ll provide a recommended starting point for each, but more importantly, we’ll explain why it works, so you can fine-tune it to perfection.
1. Sensitivity & Aiming: Finding Your Sweet Spot
This is where you control how fast and consistently your crosshair moves. Getting this right is the foundation of accurate shooting.
- Infantry Aim Sensitivity: This is your main look sensitivity when not aiming down sights (ADS). A good starting range is 40-80. Lower settings (40-50) offer more precision for careful aiming, while higher settings (60-80) allow for faster 180-degree turns. Start at 50 and adjust up or down by 5 until it feels snappy but controllable.
- Vertical Aim Ratio: This setting determines how fast your vertical aim is relative to your horizontal aim. Keep this around 45-56. You rarely need to flick vertically as much as you do horizontally, and a lower value here helps control recoil more effectively.
- Uniform Soldier Aiming (USA): Turn this On. This is a massive deal for muscle memory. It ensures that your aim sensitivity feels consistent regardless of your weapon’s zoom level. With it on, moving your stick a certain distance will always translate to the same movement on-screen, making your aim incredibly intuitive over time.
- Zoom Sensitivity Coefficient: When USA is on, this setting fine-tunes the feel. A value of 133% is a popular choice as it creates a 1:1 feel between your hip-fire and ADS sensitivity, further reinforcing muscle memory.
2. Deadzone Tuning: Eliminating Input Lag & Stick Drift
Deadzones are the silent killer of good aim. A deadzone is a small area around the center of the analog stick that doesn’t register input. We want this area to be as small as possible for instant responsiveness.
- Left & Right Stick Center Deadzone: This is the most important one. Set this to the lowest possible value without experiencing “stick drift” (where your character moves or aims on their own). Start at 5 and lower it by 1 until you see drift, then raise it back up by 1. For most new controllers, a value between 0 and 5 is perfect.
- Axial Deadzone: This affects the diagonal movement of your sticks. A setting of 10-15 is generally recommended. It helps prevent accidental diagonal input when you intend to move purely vertically or horizontally.
- Max Input Threshold (Sticks & Triggers): Set these to 100. This ensures that the game registers the full range of motion from your analog sticks and triggers without any artificial limits.
3. Aim Assist: Your Best Friend on the Battlefield
Aim assist is a vital tool for controller players, designed to level the playing field against the precision of a mouse. Understanding and using it correctly is key.
- Aim Assist: Set this to 100%. There is no reason to lower this. Battlefield’s aim assist primarily works as a slowdown bubble around targets. When your crosshair passes over an enemy, your sensitivity will decrease slightly, making it easier to stay on target and make micro-adjustments.
- Aim Assist Zoom Snap: This is more of a preference, but many pros turn it Off. Zoom snap can automatically pull your crosshair towards a target when you first ADS. While helpful for beginners, it can sometimes pull you off the target you actually intended to shoot, especially in a group of enemies. Turning it off gives you full control.
Pro Tip: Aim assist is most effective when you are actively strafing with your left stick while aiming with your right. This combination of movements allows the rotational component of aim assist to kick in, helping your crosshair “stick” to moving targets.
4. Visuals & Movement: Seeing and Reacting Faster
What you see and how you move are just as important as how you aim. These settings optimize your awareness and agility.
- Field of View (FOV): Set this between 100-110. A higher FOV widens your screen, allowing you to see more of the battlefield in your peripheral vision. This is a huge advantage for spotting flanking enemies. Be aware that a very high FOV can make distant targets appear smaller.
- ADS Field ofView: Set this to On. This prevents your view from zooming in dramatically when you aim down sights, which can be disorienting. It keeps your FOV consistent, helping with target acquisition and tracking.
- Camera Shake: Set this to the lowest possible value, ideally Off. While cinematic, camera shake from explosions and sprinting is just visual noise that makes it harder to aim accurately.
- Button Layout: Consider switching to Alternate. This swaps your melee and crouch/slide buttons (Circle/B and R3). This allows you to crouch, slide, and dropshot without ever taking your thumb off the right analog stick, which is a massive advantage for movement.
A Complete Battlefield 6 Controller Settings Breakdown (Table)


For a quick reference, here is a table summarizing the top controller settings for BF6. Use this as your starting point and tweak from here!
| Setting Category | Setting Name | Recommended Value | Why It Matters |
|---|---|---|---|
| Aiming | Infantry Aim Sensitivity | 40-80 (Start at 50) | Balances speed and precision for turning and aiming. |
| Vertical Aim Ratio | 45-56 | Helps with vertical recoil control. | |
| Uniform Soldier Aiming | On | Creates consistent aim feel for building muscle memory. | |
| Zoom Sensitivity Coefficient | 133% | Creates a 1:1 feel between hip-fire and ADS. | |
| Deadzones | Right Stick Center Deadzone | 0-5 (as low as possible) | Minimizes input lag for instant aim response. |
| Left Stick Center Deadzone | 0-5 (as low as possible) | Makes movement feel more responsive. | |
| Axial Deadzone | 10-15 | Prevents unwanted diagonal inputs. | |
| Aim Assist | Aim Assist Strength | 100% | Maximizes the slowdown effect on targets. |
| Aim Assist Zoom Snap | Off (Preference) | Gives you full control over initial ADS placement. | |
| Visuals | Field of View (FOV) | 100-110 | Increases peripheral vision and battlefield awareness. |
| ADS Field of View | On | Keeps your view consistent when aiming down sights. | |
| Camera Shake | Off / Lowest Setting | Removes distracting visual noise for clearer aim. | |
| Movement | Button Layout | Alternate | Allows you to crouch/slide without taking your thumb off the aim stick. |


How to Find Your Perfect Controller Setup in Battlefield 6
Copying settings is a great start, but true mastery comes from personalization. The goal of finding an optimal controller setup for Battlefield 6 is to make the controller an extension of your will. Here’s a simple, step-by-step process to dial in your perfect configuration.
-
Apply the Baseline Settings: Start by inputting all the recommended values from the table above. This gives you a strong, professionally vetted foundation to build upon.
-
Hit the Practice Range: Don’t jump straight into a live match. The practice range is your laboratory. Find a wall and practice controlling the recoil pattern of your favorite gun. Then, practice snapping between different targets at various distances.
-
Focus on Sensitivity First: Your primary focus in the range should be Infantry Aim Sensitivity. Does it feel too slow when you try to snap 180 degrees? Increase it by 5. Does it feel too fast and uncontrollable when tracking a moving target? Decrease it by 5. Repeat this until it feels just right.
-
Adjust One Thing at a Time: This is critical. If you change five settings at once, you’ll never know which change actually helped or hurt. Tweak one value, test it thoroughly, and then move to the next. This methodical approach is the fastest way to find what works.
-
Test Under Pressure: Once you feel comfortable in the practice range, jump into a few rounds of a fast-paced game mode like Team Deathmatch or Domination. This will test your settings in real combat scenarios. What feels good in a calm environment might feel different with explosions and bullets flying past your head. Don’t be afraid to go back to the drawing board and make small adjustments.
Advanced Battlefield 6 Controller Configuration Tips
Once you’ve mastered the basics, there are a few more advanced tweaks you can explore to gain an even greater edge. These settings are highly preferential but can offer a higher skill ceiling for dedicated players.
One of the most debated advanced settings is the Infantry Aim Input Curve. The default curve has a slight acceleration. Many veteran players prefer switching this to the “Battlefield 1” or “Battlefield 4/3” setting. These curves offer a more linear response, meaning the aim speed directly corresponds to how far you push the stick, without any unpredictable acceleration.
This can feel more raw and difficult at first, but it offers a more consistent feel that many find superior for building precise muscle memory.
Another area for optimization is your Trigger Deadzones. In the controller tuning menu, you can set the minimum and maximum input thresholds for your triggers. By setting the minimum to 0 and the maximum to a low value like 10-20, you can create a “hair trigger” effect. This means your weapon will fire with a much shorter trigger pull, which can slightly improve your time-to-kill in a direct gunfight.
This is especially effective for semi-automatic weapons.
Finally, if you use a pro-style controller with back paddles, take full advantage of them! Mapping essential functions like jump, slide/crouch, or even reload to these paddles allows you to perform these actions without ever taking your thumbs off the analog sticks. This provides a significant advantage in movement and reaction time, allowing you to stay mobile and keep your aim locked on target simultaneously.
Does Your Gear Affect Your Performance?
Dialing in the perfect settings is paramount, but it’s only one part of the equation. The physical hardware you use can absolutely impact your performance. Let’s look at the pros and cons of upgrading your gear to complement your new, optimized settings.
The Controller Itself: Standard vs. Pro
- Pros: Pro controllers (like those from Scuf or the Xbox Elite series) offer features like interchangeable thumbsticks, trigger stops for faster firing, and, most importantly, back paddles. As mentioned, paddles are a huge benefit, allowing you to keep your thumbs on the sticks at all times.
- Cons: The primary drawback is cost. Pro controllers can be two to three times more expensive than their standard counterparts. For most players, a standard controller is perfectly fine, but for those seeking every possible advantage, the investment can be worthwhile.
Your Audio Setup: Hearing Footsteps is a Must
- Pros: A high-quality audio setup is non-negotiable for competitive play. Being able to accurately hear enemy footsteps, reloads, and other audio cues can give you critical information on enemy positions. It turns you from a reactive player into a proactive one.
- Cons: A cheap or poor-quality headset can provide muddy, inaccurate sound, putting you at a disadvantage. Investing in a good pair is crucial. For crystal-clear positional audio, a set of in-ear monitors from BASN Audio can provide the detailed soundscape needed to pinpoint every enemy movement without the bulk of a large headset.
The Foundation: Your Chair and Desk
- Pros: It might sound trivial, but your physical comfort plays a huge role in your performance over long gaming sessions. An ergonomic gaming chair promotes good posture, reduces fatigue, and allows you to stay focused and comfortable for hours. This means your reaction time and concentration won’t dip in the final minutes of a close match.
- Cons: A simple office chair or couch can lead to back pain and fatigue, which directly impacts your ability to play at your best. Investing in a quality chair from a brand like Secretlab or TechniSport is an investment in your health and your in-game performance. Check current prices on Amazon to see if one fits your budget.
The Powerhouse: Does Your PC Matter?
- Pros: For PC players using a controller, a powerful machine is vital. A stable, high frame rate (FPS) is essential for smooth gameplay and reduced input lag. The more frames your PC can push, the more up-to-date the information on your screen is, giving you a tangible reaction time advantage.
- Cons: An underpowered PC that suffers from frame drops and stuttering will make even the most perfect controller settings feel sluggish and inconsistent. If you want to ensure you have the horsepower to run Battlefield 6 flawlessly, a pre-built system from a reputable company like ORIGIN PC guarantees top-tier components that deliver a smooth, competitive experience right out of the box.
Frequently Asked Questions about BF6 Controller Settings
Here are answers to some of the most common questions players have about dialing in their controller settings.
Can I play Battlefield 6 with a controller?
Absolutely! Battlefield 6 has excellent controller support on both console and PC. With the robust aim assist system and deep customization options, controller players can be just as competitive as those using a keyboard and mouse, especially in the close-to-medium ranges where most firefights occur.
How do I customize my Battlefield 6 controls?
It’s easy. From the main menu, navigate to the Options screen. From there, select the Controller tab. Here you will find all the settings we’ve discussed, including sensitivity, deadzones, button layouts, and advanced controller tuning.
Take your time to go through each sub-menu to apply the changes.
What are the best aim controller settings?
The best settings for aim revolve around creating consistency and responsiveness. This means setting your Right Stick Center Deadzone as low as possible (0-5), turning Uniform Soldier Aiming ON with a 133% Coefficient, and setting Aim Assist to 100%. Combine this with a comfortable sensitivity (start at 50) for a solid foundation.
How can I reduce recoil in Battlefield 6 with a controller?
Recoil control is a mix of settings and skill. In your settings, a lower Vertical Aim Ratio (around 45-56) can help, as it makes pulling down on the right stick to counteract recoil less sensitive. Beyond settings, the best way to reduce recoil is to practice in the firing range and learn the specific spray pattern of your favorite weapons. Also, using the correct weapon attachments like grips and muzzle brakes makes a huge difference.
What is the best sensitivity for Battlefield 6?
There is no single “best” sensitivity; it’s highly personal. However, a great starting point for most players is an Infantry Aim Sensitivity between 40 and 80. A lower sensitivity offers more precision but slower turning, while a higher sensitivity offers faster turning but can be harder to control. The key is to experiment within this range and find the highest speed you can comfortably control.
Is Battlefield 6 better on Controller or keyboard and mouse?
This is the timeless debate. Each input has its advantages. Keyboard and mouse (KBM) offers unmatched precision for long-range sniping and fast, snappy aiming. Controller, on the other hand, excels in movement and close-quarters combat, where aim assist helps track targets effectively.
Neither is definitively “better”; they are just different. Many of the world’s best players use controllers, proving you can reach the highest level of skill with one.
Final Thoughts: Your Path to Battlefield Dominance
Mastering your controller settings is a journey, not a destination. The values in this guide represent one of the best starting points you can find, built on the preferences of professional players and the logic of how the game’s mechanics work. Use this as your foundation to build upon, and don’t be afraid to experiment. The goal is to create a setup that feels so natural it becomes invisible, allowing you to focus on strategy, positioning, and clicking heads.
Remember to be patient. It will take a few hours of gameplay for these new settings to feel normal, especially if you’re coming from the defaults. Stick with it, trust the process, and you’ll soon see a dramatic improvement in your consistency and confidence in every gunfight.
Once your settings are dialed in, you might find that your gear is the next bottleneck. If you’re looking to complete your setup for peak performance, consider how an ergonomic chair from Secretlab or a high-fidelity audio solution from BASN Audio could be the final piece of the puzzle. Now get out there and conquer the battlefield!