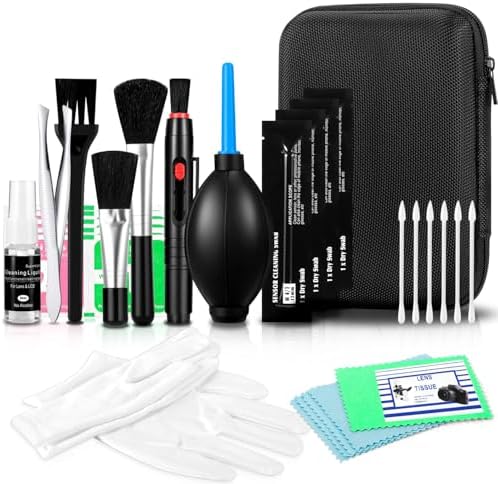
- [Professional Camera Cleaning Kit] Air Blower*1+Short Nozzle*1+Long Nozzle*1+Cleaning Cloth*6+Cleaning Pen*1+15ML Cleane…
- [15ml Cleaning Liquid ] Lens cleaner adopts vacuum pump head, effective for cleaning and maintaining the optical lens, t…
- [Air Blower] This camera air blower is made of environmentally friendly silicone material, which is soft and moderately …


- Must-Have Camera Accessories for Every Photographer: This all-in-one camera cleaning kit is a must-have for all photogra…
- Safe Professional-Grade Lens Cleaner: Camera lens cleaning kit includes a premium lens cleaner spray that’s alcohol-free…
- All-in-One Photography Accessories Set: This professional lens cleaning kit features high quality photography accessorie…


- WHAT YOU CAN GET: 1 camera lens Cleaner 50ml + 1 air blower + 1 two in one Lens Cleaning Pen + 1 Retractable wool soft b…
- WHAT IT USED FOR : Professional Camera cleaning kit for Canon, Sony, Nikon, Pentax, drone, is mainly used for camera, ds…
- WHAT WE DIFFERENT FROM OTHERS: We equipped A retractable wool brush, which is super soft and bushy, can be great used in…
How to Clean Camera Lenses: A Pro’s Guide for Spotless Shots
There’s nothing more heartbreaking for a photographer than capturing the perfect moment—the perfect light, the perfect expression—only to find it ruined by a blurry smudge or a distracting dust spot right in the middle of the frame. That tiny speck of dust becomes a giant monster in your final image! Learning how to clean camera lenses isn’t just a chore; it’s one of the most crucial skills you can master to protect your investment and guarantee every shot is as crisp and clear as you envisioned it. It’s the secret handshake of photographers who consistently produce stunning, professional-quality work.
This guide is your new best friend! We’re going to walk through everything, from the essential tools you absolutely need in your bag to the professional, step-by-step techniques that remove grime without harming your precious glass. Get ready to say goodbye to frustrating smudges and hello to flawlessly clean lenses. Let’s make every click count!
Quick Summary
- Start with the Safest Method First: Always clean your lens in a specific order: air blower first to remove loose dust, then a soft brush for stubborn particles, and finally a microfiber cloth for smudges.
- Use the Right Tools for the Job: Never use your t-shirt, paper towels, or household cleaners. Stick to dedicated gear like a rocket blower, a camel hair brush, optical-grade microfiber cloths, and a proper lens cleaning solution.
- Apply Cleaning Fluid Correctly: Never, ever spray or drop cleaning solution directly onto your lens. Apply a drop or two to your microfiber cloth first to prevent liquid from seeping into the lens barrel.
- Master the Cleaning Motion: When using a cloth, wipe gently in a circular motion, starting from the center of the lens and spiraling your way to the edges. This pushes debris outward instead of grinding it into the glass.
- Prevention is Better Than Cure: Keep your lens cap on whenever you’re not shooting. This simple habit is the number one way to prevent dust, fingerprints, and scratches.
Why a Spotless Lens is Your Secret Weapon for Amazing Photos
Think of your camera lens as the eye of your camera. If that eye is dirty, smudged, or dusty, the world it sees—and the photos it captures—will be compromised. Knowing the best way to clean camera lenses is fundamental because it directly impacts your final product in ways you might not even realize. It’s not just about removing an obvious fingerprint; it’s about maintaining the peak performance of your gear.
A clean lens ensures maximum sharpness and contrast. Even a thin layer of dust or haze can scatter light as it enters the lens, subtly reducing the crispness and vibrancy of your images. This can make your photos look slightly soft or dull, forcing you to overcompensate with editing software, which is never as good as getting it right in-camera. Furthermore, smudges and grease are notorious for causing unwanted lens flare, especially when shooting into a light source.
Those cool, artistic flares are great when you want them, but a greasy fingerprint can create ugly, distracting blobs of light that ruin a shot.
Beyond image quality, proper cleaning is about protecting your investment. Camera lenses are coated with delicate, multi-layered chemical compounds that reduce reflections and improve color transmission. Using the wrong materials—like a rough t-shirt or a harsh chemical like Windex—can permanently scratch or strip these coatings, irreversibly damaging your lens and tanking its resale value. Regular, gentle cleaning removes abrasive dust particles that could otherwise get dragged across the glass and cause micro-scratches.
It’s an essential maintenance routine that extends the life of your gear and gives you the confidence that your equipment is always ready to perform at its best.
Assembling Your Ultimate Camera Lens Cleaning Toolkit
Walking into a camera store or browsing online can present you with a dizzying array of cleaning gadgets. But you don’t need to buy everything. A truly effective kit is built on a few high-quality essentials. Choosing the right tools is the first step in mastering how to clean lenses properly and safely.
Let’s break down what you absolutely need and what can take your cleaning game to the next level.
The Non-Negotiables: Must-Have Tools


These are the core items every single photographer should have in their camera bag. Don’t leave home without them!
- Air Blower: This is your first line of defense. A rocket-style air blower lets you blast away loose dust and sand without ever touching the glass. It’s the most non-abrasive cleaning method possible. Look for one with a one-way valve so it doesn’t suck dusty air back in.
- Soft-Bristled Brush: For particles that the blower can’t dislodge, a super-soft brush is next. A retractable brush with camel hair bristles is a fantastic choice because the bristles are incredibly gentle and the retractable design keeps the brush clean when not in use.
- Microfiber Cloths: Not all cloths are created equal. You need optical-grade, lint-free microfiber cloths specifically designed for lenses and glasses. They are woven to trap oils and dirt without scratching delicate coatings. Have several clean ones on hand and wash them regularly (separately, without fabric softener).
- Lens Cleaning Solution: For stubborn smudges and oily fingerprints, a cleaning fluid is necessary. Always choose a solution formulated specifically for multi-coated optical lenses. These are typically alcohol-and-ammonia-free, ensuring they won’t damage your lens coatings.
The Next-Level Upgrades: Tools for Pros
Once you have the basics covered, these tools can offer more convenience and specialized cleaning power.
- Lens Pen: This is a brilliant, all-in-one tool. One end typically has a retractable soft brush, while the other has a carbon-based cleaning tip. This carbon compound is amazing at absorbing and lifting away oily residue from fingerprints without any liquids. Many photographers, like those on the r/Nikon subreddit, swear by them for quick, effective field cleaning.
- Pre-Moistened Lens Wipes: For ultimate convenience, single-use, pre-moistened wipes (like those from Zeiss) are fantastic. They are individually sealed, ensuring they are always clean, and have the perfect amount of cleaning solution. They are perfect for travel or quick clean-ups on a shoot.


The Step-by-Step Professional Method to Clean Camera Lenses
Alright, you’ve got your tools ready to go. Now it’s time for the main event. Following this specific order is absolutely critical to ensure you don’t accidentally scratch your lens by grinding in a piece of dirt. This process moves from the least invasive method to the most, tackling different types of grime at each stage.
It’s the same method professionals use to keep their gear in pristine condition.
Step 1: The Air Assault – Banish Loose Dust
Before you even think about touching the glass, you need to remove any loose particles. This is the most important step!
Hold your lens facing downward to let gravity help. Grab your rocket blower and, holding it a few inches from the lens surface, give it several strong puffs of air. Work your way across the entire surface. This will dislodge most of the dust, lint, and other large debris that could cause a scratch in the later steps.
Crucially, never use your breath—it contains moisture and acids that are bad for coatings—and never use canned air, as the powerful propellants can freeze and damage your lens.
Step 2: The Gentle Sweep – Brush Away Stubborn Particles
Sometimes, a few stubborn particles will cling to the lens even after a good blowing. This is where your soft brush comes in.
Use a gentle, sweeping motion with the brush. Don’t apply pressure; you’re just lightly flicking the particles off the surface. Start from the middle and sweep outwards. If you have a retractable brush, make sure the bristles are fully extended.
The goal is simply to dislodge anything the blower missed. Once you’re done, retract the brush to keep it clean for next time.
Step 3: The Microfiber Magic – Tackling Smudges and Fingerprints
Now that all the abrasive dust is gone, it’s safe to make contact with the glass. This step is for removing the oily stuff: fingerprints, grease, and smudges.
First, take a clean, dry microfiber cloth and gently wipe the lens. Use that classic circular motion, starting from the center and spiraling out to the edges. Often, this is all you need. If the smudges persist, it’s time for the cleaning solution.
Do not apply the solution directly to the lens! Put one or two small drops on your microfiber cloth, then use the damp part of the cloth to clean the lens with the same center-outward spiral. Follow up immediately with a dry part of the cloth (or a second, dry cloth) to polish away any streaks.
Step 4: The Carbon Tip Takedown – Using a Lens Pen
If you have a Lens Pen, this can replace or supplement Step 3. After brushing away dust, uncap the carbon tip. Using the same gentle, circular motion, go over the lens surface. You’ll be amazed at how the carbon tip lifts oils right off the glass, leaving a perfectly clear surface.
It’s a dry cleaning process, so it’s incredibly fast and effective for fingerprint removal in the field.
Pro Tip: When washing your microfiber cloths, never use fabric softener. Fabric softeners leave behind a chemical residue that is designed to stick to fabrics. This residue will transfer to your lens and create a streaky, hazy mess that’s even harder to clean off than the original smudge.
Common Lens Cleaning Disasters and How to Avoid Them

Knowing how to clean your lens is half the battle; knowing what not to do is the other, equally important half. Many well-intentioned photographers have accidentally damaged their expensive gear by using the wrong materials or techniques. These are the cardinal sins of lens cleaning. Avoid them at all costs!
The “DON’T EVER DO THIS” List
- Don’t Use Your T-Shirt or Breath: This is the most common mistake. Your shirt is full of abrasive fabric fibers and embedded dust that will scratch your lens coatings. Your breath coats the lens in a fine mist of acidic saliva, which can degrade coatings over time. It’s a definite no-go.
- Don’t Use Household Cleaners: Window cleaners like Windex, alcohol-based wipes for electronics, or any other household chemical are a recipe for disaster. They often contain ammonia, alcohol, and other harsh solvents that will strip the delicate anti-reflective coatings right off your lens, causing permanent damage.
- Don’t Use Canned/Compressed Air: While it seems like a good idea, the propellants in canned air can shoot out as a freezing liquid, causing thermal shock that can crack the lens element or damage coatings. The force can also blast dust into the internal mechanics of the lens.
- Don’t Apply Cleaning Fluid Directly to the Lens: This is a huge risk. Excess fluid can easily seep around the edge of the front element and get inside your lens. Once inside, it can cause fungus to grow, damage electronics, or leave residue on internal elements that requires a costly professional disassembly to clean.
- Don’t Use Too Much Pressure: Your lens surface is delicate. Grinding a cloth into the glass, even a microfiber one, can drag any missed microscopic particles across the surface and cause scratches. A light, gentle touch is all you need.
The “ALWAYS DO THIS” List
- Always Start with a Blower: Make it a reflex. Blower first, always. This removes the scratchy stuff before you touch the glass.
- Always Use Clean Microfiber Cloths: A dirty cloth just moves grease around and can re-introduce abrasive particles. Keep your cloths in a small plastic bag to protect them from dirt in your camera bag.
- Always Work in a Clean, Well-Lit Environment: Trying to clean a lens in a dusty, dark environment is asking for trouble. Find a clean spot with good light so you can see what you’re doing.
- Always Put Your Lens Cap Back On: The best way to keep a lens clean is to prevent it from getting dirty in the first place. When you’re done shooting, cap it up!
Advanced Camera Lens Cleaning Tips for Tough Situations
Sometimes you’ll face cleaning challenges that go beyond a simple fingerprint. From sudden fogging to sticky residue from a sea breeze, here’s how to handle some of the trickier situations you might encounter.
How to Get Rid of Foggy Camera Lenses
This is a classic problem when moving from a cold, air-conditioned space to a warm, humid outdoor environment (or vice-versa). The lens glass is cold, and moisture from the warm air instantly condenses on its surface. The fix is simple: patience.
Do not try to wipe the condensation away. You’ll just smear the moisture and it will immediately fog up again. The best solution is to let your gear acclimate. Leave your lens cap on and let the camera sit for 10-20 minutes until it reaches the ambient temperature.
The fog will disappear on its own. To prevent this, you can place your camera in a sealed plastic bag before moving between temperature extremes. This allows the condensation to form on the outside of the bag, not your lens.
Dealing with Haze and Fungus (The Photographer’s Nightmare)
If you clean the front and back elements of your lens and it still looks cloudy or you see tiny, web-like patterns inside, you may have a bigger problem. Haze can be caused by the breakdown of lubricants inside the lens, while fungus is a living organism that can grow between lens elements if stored in a damp environment. Fungus will permanently etch the glass coatings if left untreated.
This is not a DIY job. If you suspect you have internal haze or fungus, take your lens to a reputable camera repair shop immediately. They have the tools and expertise to safely disassemble, clean, and reassemble the lens. Trying to do it yourself will almost certainly result in permanent damage.
Removing Sticky Residue (Like Salt Spray or Soda)
If you’ve been shooting near the ocean, you’ll inevitably get a fine mist of salt spray on your lens. If left to dry, it can be corrosive. Similarly, an accidental splash from a sugary drink can leave a sticky mess. For this, you’ll need a bit more than a dry cloth.
Start by using your blower and brush to remove any loose particles. Then, take a clean microfiber cloth and dampen a small section with a few drops of distilled water. Gently wipe the sticky area to dissolve the salt or sugar. Follow up immediately with a dry part of the cloth.
If water isn’t cutting it, you can then move on to your dedicated lens cleaning solution, which is formulated to break down more stubborn grime.
Building Your Kit on a Budget: Cost and Recommendations
Keeping your lenses clean doesn’t have to be expensive. While you can certainly buy premium kits, a highly effective setup can be assembled for less than the price of a pizza. The key is to invest in quality basics rather than a huge collection of unnecessary gadgets. Here’s a look at what you can expect to spend.
The DIY Starter Kit (Under $20)
You can get all the absolute essentials for a fantastic price. This is the perfect starting point for any photographer.
- Rocket Air Blower: A high-quality Giotto’s Rocket Blower or a similar model typically costs around $10-$15. This is the single most important tool, so it’s worth getting a good one.
- Microfiber Cloths: A multi-pack of six or more high-quality, optical-grade cloths can be found for about $5-$8. This gives you plenty of clean cloths to rotate through.
- Retractable Brush: A simple, effective lens brush can often be found for under $5.
With these three items, you can handle over 95% of all lens cleaning tasks safely and effectively for a total investment of around $20.
The Enthusiast’s All-in-One Kit ($20 – $50)
If you prefer the convenience of a pre-packaged kit, there are many excellent options available. These often provide great value and include a few extra tools.
Brands like Altura Photo, Zeiss, and CamKix offer popular kits in this price range. A typical kit will include a blower, a retractable brush, a Lens Pen, a spray bottle of cleaning solution, multiple microfiber cloths, and sometimes single-use wipes. These kits are great because they bundle everything you need into a convenient carrying case, making it easy to toss in your camera bag.
Is it Worth Making a Homemade Lens Solution?
This is a question that pops up frequently in photography forums. The short answer is: probably not. While you technically can make a lens cleaner with a specific mixture of 99% pure isopropyl alcohol and distilled water, the risks often outweigh the benefits. Using the wrong type of alcohol (like 70% rubbing alcohol) can leave a residue from its impurities, and getting the ratio wrong can be too harsh for lens coatings.
Considering a bottle of professionally formulated, coating-safe lens cleaning solution costs only $5-$10 and will last for years, buying a dedicated solution is the safest and most practical choice. It removes all the guesswork and ensures you’re using a product designed to be gentle on your expensive gear.
Frequently Asked Questions About Cleaning Camera Lenses
Navigating the world of lens care can bring up a lot of questions. Here are clear, direct answers to some of the most common queries photographers have.
What is the best thing to clean camera lenses with?
The best cleaning system involves a multi-step approach. Start with a rocket air blower to remove loose dust without contact. Follow with a soft, camel hair brush for more stubborn particles. For smudges and fingerprints, use a clean, optical-grade microfiber cloth, and if needed, a drop of cleaning solution specifically formulated for multi-coated lenses.
Is rubbing alcohol good for cleaning camera lenses?
Generally, you should avoid standard rubbing alcohol (typically 70% isopropyl). It contains a high percentage of water and impurities that can leave streaks and residue on your lens. While some professionals use a solution with very high-purity (99%+) isopropyl alcohol heavily diluted with distilled water, it’s risky for beginners. It’s much safer to buy a pre-made optical cleaning solution designed to be safe for lens coatings.
How do you clean fingerprints off a camera lens?
First, use a blower and brush to remove any abrasive dust. Then, breathe a short, gentle puff of warm air onto the lens to create a bit of condensation (this is one of the few times your breath is okay!). Immediately wipe the fingerprint away with a clean microfiber cloth or a Lens Pen, using a gentle, circular motion from the center outwards. If the fingerprint is particularly oily, use one drop of lens solution on the cloth.
What can ruin a camera lens?
Several things can permanently ruin a lens. Physical impact from dropping it is the most obvious. Scratches from improper cleaning (using abrasive materials like a t-shirt) can damage the front element and coatings. Using harsh chemicals like Windex or ammonia-based cleaners will strip the coatings.
Finally, storing a lens in a damp, dark environment can lead to the growth of internal fungus, which can etch the glass itself.
How do professionals clean lenses?
Professionals use the exact same tools and methods outlined in this guide: blower, brush, microfiber, and proper solution. The main difference is their experience and discipline. They make cleaning a regular habit and understand the importance of a gentle touch. For internal problems like dust, haze, or fungus inside the lens, they send their gear to a certified technician for professional servicing, which involves disassembling the lens in a dust-free environment.
Final Thoughts: Make Lens Cleaning a Habit, Not a Chore
Your camera lens is a masterpiece of optical engineering, and keeping it clean is an essential part of the art of photography. It’s a simple routine that pays huge dividends, protecting your gear and ensuring every photo you take is as sharp, clear, and vibrant as possible. By investing in a few basic tools and mastering the simple, safe techniques we’ve covered, you’re taking control of your image quality from the very first step.
Don’t let a stray piece of dust or an accidental fingerprint stand between you and a perfect shot. Embrace the process, make it a regular part of your pre-shoot checklist, and carry your cleaning kit with you everywhere. Your photos will thank you for it, and you’ll have the peace of mind that comes from knowing your gear is always ready to capture the next incredible moment, flawlessly.