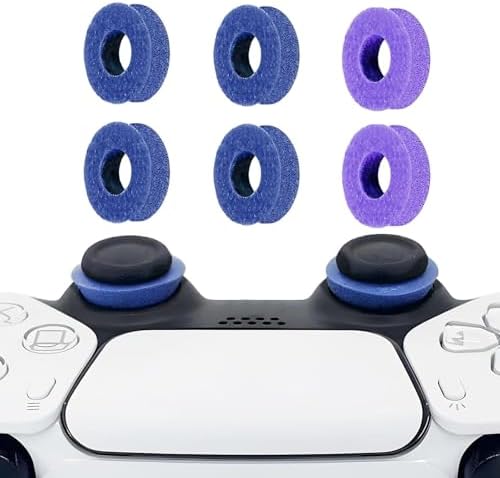
11 Best Underwater Photography Cameras for Every Budget (2025)

Bestseller #1
  • 【Waterproof & Dustproof & Shockproof Camera】This digital camera has a professional waterproof design that works well und…
  • 【8K Video & 70MP Image】This rugged camera supports 8K video shooting and captures images up to 70MP. Compared to traditi…
  • 【Dual-Screen Selfie Design】This photograph camera has dual front and rear screens for easy selfie shooting. Unlike other…
Bestseller #2
  • [Rugged Digital Camera] This compact digital camera, small enough to easily slip into your pocket, boasts a sturdy yet s…
  • [8KUHD Recording and 70MP Photo] Capture the world in stunning 8K ultra-high definition, offering a more vivid and intri…
  • [Autofocus & Macro Capability] This 8K autofocus camera elevates clarity to new heights. Its macro shooting feature allo…
Bestseller #3
  • 33FT Waterproof & Dustproof Design: With a waterproof capability of 33FT, this underwater camera allows you to dive into…
  • 4K UHD Video and 64MP High-Resolution Photos: Capture every exciting moment with stunning 4K ultra HD video recording, w…
  • Autofocus Macro Shooting & 16X Zoom: Experience precise automatic 3.97″focusing, clearly highlighting every detail. Simp…

11 Best Underwater Photography Cameras for Every Budget (2025)

Ready to capture the breathtaking beauty hidden beneath the waves? The underwater world is a vibrant, alien landscape filled with incredible creatures and stunning colors, just waiting to be photographed. Finding the best underwater photography cameras can feel like a deep dive in itself, but don’t worry! Whether you’re a curious beginner looking to snap photos of coral reefs on vacation or a seasoned pro ready to upgrade your rig, we’ve got the perfect camera for you.

This guide breaks down everything you need to know. We’ll explore top-tier models, budget-friendly options, and the essential underwater photography gear that turns a good shot into a mind-blowing one. Let’s get you geared up to bring those incredible underwater moments back to the surface!

Main Points

  • Best for Beginners: Rugged, waterproof compact cameras like the OM System Tough TG-7 are the ideal starting point. They are easy to use, durable, and capable of fantastic macro shots without a huge investment.
  • Enthusiast’s Choice: Advanced compacts and mirrorless cameras offer a significant jump in image quality and control. Models from Sony’s RX100 series or Canon’s G7 X series provide a perfect balance of performance and size.
  • Housing is Crucial: A high-quality waterproof housing is just as important as the camera. It protects your investment and provides the ergonomic controls needed to shoot effectively underwater.
  • Light is Everything: The secret to vibrant, colorful underwater photos isn’t the camera—it’s the lighting. External strobes or video lights are essential to restore the reds, oranges, and yellows that water absorbs.
  • Practice Makes Perfect: Your buoyancy control and comfort in the water are paramount. The steadiest hand and best camera can’t compensate for kicking up sand or scaring away marine life.

Top Features to Look for in Underwater Photography Cameras

Choosing the right camera is the first step on your underwater adventure. But what features truly matter when you’re 60 feet down? It’s a different world with unique challenges, and your camera needs to be up to the task.

Full Manual Controls

Automatic settings are great on land, but underwater, they often get confused by the low light and lack of contrast. The ability to manually control aperture, shutter speed, and ISO is non-negotiable for serious photography. Manual mode gives you complete creative control to properly expose your subject, create dark backgrounds, and capture the exact look you’re envisioning.

RAW Image Capability

Shooting in RAW format is a must. A RAW file captures all the image data recorded by the sensor, unlike a JPEG which compresses the file and discards information. This unprocessed data gives you massive flexibility in post-processing to adjust white balance, recover highlights and shadows, and fine-tune colors—all of which are critical for correcting the blue/green color cast of water.

Excellent Autofocus Performance

Marine life moves fast and often unpredictably. A camera with a quick, accurate, and reliable autofocus system is essential. Look for cameras with multiple focus points and advanced tracking capabilities, especially for capturing dynamic subjects like sharks, dolphins, or schooling fish. Nothing is more frustrating than a camera that hunts for focus while the perfect shot swims away.

Great Video Capabilities

Modern cameras are hybrid machines, and underwater video is just as captivating as stills. Look for cameras that can shoot in at least 4K resolution at 30 or 60 frames per second (fps). Higher frame rates allow for smooth slow-motion playback, perfect for emphasizing the graceful movement of a sea turtle or the explosive speed of a hunting fish.

The Best Underwater Cameras of 2025: Ranked & Reviewed

Here it is! Our breakdown of the top underwater cameras on the market today, sorted by skill level and budget. We’ve included options for everyone, from first-time snorkelers to professional photographers.

Best for Beginners & Budgets

1. OM System (Olympus) Tough TG-7

The TG-7 is the undisputed champion for beginners and for good reason. It’s waterproof out of the box to 50ft (15m), shockproof, and crushproof. It’s built like a tiny tank, so you can focus on learning without worrying too much about your gear.

Its real magic, however, is the incredible Microscope Mode, which allows for stunning macro photography without any extra expensive lenses. When paired with a simple housing and a single strobe, the TG-7 can produce images that rival much more expensive setups. It’s the camera that grows with you.

Pros
  • Incredibly durable and waterproof without a housing for shallow dives.
  • Best-in-class macro and microscope modes.
  • Shoots in RAW for better editing flexibility.
Cons
  • Small sensor limits low-light performance and dynamic range.
  • Manual controls are accessible but less intuitive than on larger cameras.

2. SeaLife Micro 3.0

If the thought of O-rings and potential floods gives you anxiety, the SeaLife Micro 3.0 is your answer. This camera is permanently sealed, meaning there are zero maintenance hassles. You just charge it and go diving. It’s the definition of point-and-shoot simplicity for underwater use.

It features a large 16MP sensor and offers 4K video, making it a powerful yet simple tool. It’s designed from the ground up for divers, with large, easy-to-press “piano key” controls that work perfectly even with thick gloves on. It’s an excellent choice for those who want great results with minimal fuss.

Pros
  • Permanently sealed design means no risk of flooding due to user error.
  • Extremely easy to use with large, glove-friendly controls.
  • Good image quality and 4K video.
Cons
  • No manual controls or RAW shooting capabilities.
  • Fixed lens means no option for wide-angle or macro attachments.

3. GoPro HERO12 Black

GoPro is famous for action, and it’s a fantastic tool for capturing underwater video. Its small size, wide field of view, and advanced image stabilization make it perfect for mounting on your gear and recording your entire dive. The video quality is outstanding, especially with good lighting.

However, for still photography, it has limitations. The fixed wide-angle lens isn’t ideal for fish portraits or macro shots, and its still-photo capabilities, while improved, don’t match a dedicated camera. Think of it as a video-first device that can also take good photos, especially of large scenes like reefs or shipwrecks.

Pros
  • Exceptional video quality with industry-leading stabilization.
  • Very compact and durable.
  • Huge ecosystem of mounts and accessories.
Cons
  • Not ideal for still photography, especially macro.
  • Requires color-correcting filters or significant post-processing to get good color.

Best for Enthusiasts (Advanced Compacts)

4. Sony Cyber-shot RX100 VII

The Sony RX100 series has long been a favorite of underwater photographers who want professional quality in a compact package. The RX100 VII packs a large 1-inch sensor and a sharp Zeiss lens into a tiny body. This combination delivers stunning image quality that punches way above its weight class.

Its biggest strength is its lightning-fast, super-intelligent autofocus system, inherited from Sony’s high-end mirrorless cameras. It can track a moving fish’s eye with incredible accuracy. When placed in a quality housing, it’s a compact rig that can handle nearly any photographic situation you’ll encounter underwater.

Pros
  • Superb image quality from its 1-inch sensor.
  • Best-in-class autofocus system.
  • Excellent 4K video features.
Cons
  • Very expensive for a compact camera.
  • Can be complex to operate with its extensive menu system.

5. Canon PowerShot G7 X Mark III

The Canon G7 X Mark III is another fantastic advanced compact that offers a great balance of performance and price. Like the Sony, it features a 1-inch sensor, delivering excellent image quality. It’s particularly well-regarded for its great color science and user-friendly interface.

Where it shines for underwater use is its great close-focusing distance, making it a macro photography star. You can fill the frame with tiny subjects without needing expensive wet lenses right away. It’s a powerful, intuitive camera that’s a joy to shoot with.

Pros
  • Excellent image quality with pleasing colors.
  • Great for macro photography.
  • More affordable than its direct Sony competitor.
Cons
  • Autofocus isn’t as fast or reliable as the Sony RX100 VII.
  • Battery life could be better.

Best for Serious Photographers (Mirrorless & DSLR)

6. Sony a7R V

For those who demand the absolute best in still image quality, the Sony a7R V is the current king. Its 61-megapixel full-frame sensor captures an astonishing amount of detail, allowing for massive prints and extreme cropping flexibility. The resolution is simply breathtaking.

Beyond resolution, its AI-powered autofocus is a true marvel, capable of identifying and tracking subjects with uncanny precision. This is a professional tool for those who need the highest possible image fidelity for commercial work, fine art prints, or major publications.

Pros
  • Unmatched 61MP resolution and image detail.
  • Incredibly advanced and intelligent autofocus system.
  • Robust build quality.
Cons
  • Extremely expensive camera body, lenses, and housing.
  • Massive file sizes require a powerful computer for editing.

7. Canon EOS R5

The Canon R5 is an amazing hybrid camera that excels at both stills and video. Its 45-megapixel full-frame sensor delivers beautiful, detailed images, and its Dual Pixel autofocus is fast and reliable. It’s a true workhorse that can handle any task with ease.

Its standout feature is its video capability, being one of the first mirrorless cameras to offer 8K RAW internal recording. For hybrid shooters who need world-class video alongside professional photos, the R5 is an incredible choice. It’s a powerhouse for underwater filmmakers and photographers alike.

Pros
  • Fantastic 45MP still image quality.
  • Class-leading video features, including 8K RAW.
  • Excellent ergonomics and user interface.
Cons
  • High price point.
  • Video recording can be limited by overheating in some modes (less of an issue underwater).

8. Nikon Z8

The Nikon Z8 is essentially the flagship Nikon Z9 packed into a smaller, more manageable body, making it nearly perfect for underwater photography. It offers a 45.7MP stacked sensor, which provides incredible readout speeds, eliminating rolling shutter and enabling blazing-fast burst shooting with no viewfinder blackout.

Its autofocus system is on par with the best from Sony and Canon, with sophisticated subject detection that works wonders on marine life. For longtime Nikon shooters looking to move to mirrorless for underwater work, the Z8 is the camera they’ve been waiting for.

Pros
  • Flagship performance in a more compact body.
  • No mechanical shutter means silent, high-speed shooting.
  • Excellent autofocus and image quality.
Cons
  • The lens ecosystem is still growing compared to Sony and Canon.
  • Premium price for a premium camera.

9. OM System OM-1

The OM-1 is the pinnacle of the Micro Four Thirds (MFT) system. While its sensor is smaller than full-frame or APS-C, it offers some compelling advantages for underwater use. The smaller sensor size means the camera, lenses, and ports can be smaller, lighter, and less expensive, creating a more compact and travel-friendly rig.

But don’t let the sensor size fool you; the OM-1 is a speed demon. Its stacked sensor allows for incredible burst rates (up to 120 fps) and computational photography features like Live ND. It’s a fantastic choice for photographers who prioritize speed, portability, and system cost.

Pros
  • Compact, lightweight, and weather-sealed system.
  • Incredibly fast performance and burst shooting.
  • More affordable lenses and ports compared to full-frame.
Cons
  • Smaller sensor has inherent disadvantages in low light and dynamic range.
  • 20MP resolution is lower than most competitors in this class.

DSLR vs. Mirrorless: Which is Better for Underwater Photography?

This is one of the biggest debates in modern photography, and it’s especially relevant underwater. For years, DSLRs were the standard for professionals, but mirrorless cameras have now largely taken over. Here’s a breakdown of why.

Feature Mirrorless Camera DSLR Camera
Viewfinder Electronic (EVF) – Shows real-time exposure Optical (OVF) – Sees through the lens directly
Size & Weight Generally smaller and lighter Generally larger and heavier
Autofocus On-sensor, often faster and more accurate Separate AF module, can be slower in live view
Video Typically superior, with better AF and features Often less advanced, especially autofocus
Battery Life Generally shorter due to power-hungry EVF Generally longer, as OVF uses no power

The Mirrorless Advantage: What You See is What You Get

The biggest advantage of mirrorless cameras underwater is the electronic viewfinder (EVF). An EVF is a tiny screen that shows you exactly what the sensor is seeing, including your exposure changes in real-time. When you adjust your shutter speed or aperture, you see the image get brighter or darker instantly. This is a massive help in the challenging and often dark underwater environment, saving you from chimping (checking your screen) after every shot.

The DSLR Argument: Still Kicking

DSLRs still have a few points in their favor. Their optical viewfinders use no power, contributing to significantly longer battery life—a big plus on a dive boat where charging opportunities are limited. Additionally, since DSLRs have been the professional standard for decades, there is a massive market for used lenses and accessories, which can save you money.

The Verdict for Underwater Shooters

For the vast majority of people buying a new system today, mirrorless is the way to go. The advantages of the EVF, superior video capabilities, and more advanced autofocus systems are too significant to ignore for underwater use. While a great DSLR can still produce incredible images, the future of camera development is clearly focused on mirrorless technology.

The Unsung Hero: Choosing a Waterproof Camera Housing

Your camera might be the brain of the operation, but the housing is its life support system. A housing does more than just keep your camera dry; it gives you access to all the essential controls and allows you to attach critical accessories like strobes and lenses. Investing in a good housing is just as important as choosing the right camera.

Why You Can’t Just Trust “Waterproof” Ratings

While some cameras like the TG-7 are rated as “waterproof,” this is typically limited to shallow depths (around 50ft/15m). For scuba diving, you need a dedicated housing rated for depths of 130ft (40m) or, more commonly, 200ft (60m). A housing is a precision-engineered piece of equipment designed to withstand immense pressure.

Materials: Polycarbonate vs. Aluminum

  • Polycarbonate: These clear plastic housings are more affordable and lighter, making them great for travel. They also let you see inside, which can help you spot a potential leak early. Ikelite is a popular brand known for its high-quality polycarbonate housings.
  • Aluminum: Machined from a solid block of aluminum, these housings are incredibly durable and rugged. They offer superior ergonomics, better heat dissipation for video shooting, and a more professional feel. Brands like Nauticam, Isotta, and Aquatica are leaders in aluminum housings, but they come at a premium price.

Key Features to Look For

  • Ergonomics: How well do the controls fit your hand? Can you easily reach all the important buttons and dials, even with gloves on?
  • Port System: The port is the clear window for your lens. A good housing has an interchangeable port system that allows you to use different ports for different lenses (e.g., a small flat port for macro and a large dome port for wide-angle).
  • Leak Alarms: Many modern housings come with a built-in moisture alarm that will flash and beep if even a single drop of water gets inside, giving you precious time to ascend and save your camera.

Essential Underwater Photography Gear Beyond the Camera

Getting amazing underwater photos involves more than just a camera and housing. The right accessories, especially lighting, are what truly bring your images to life. Here’s a look at the essential underwater photography gear you’ll need to build a complete rig.

Lighting is Everything: Strobes and Video Lights

Water acts as a giant blue filter, absorbing the red, orange, and yellow wavelengths of light first. This is why everything looks blue or green underwater. To restore those vibrant, natural colors, you need to bring your own light source.

  • Strobes: These are underwater flashes. They produce a powerful burst of light that freezes motion and illuminates your subject with beautiful, white light. For still photography, strobes are the number one most important accessory you can buy.
  • Video Lights: These are constant-on lights, like powerful flashlights. They are essential for shooting video and can also be used for still photography, though they are less powerful than strobes. Many photographers use a video light as a “focus light” to help the camera’s autofocus system work in dark environments.

Arms, Trays, and Clamps

To connect your strobes or video lights to your housing, you need a system of trays, arms, and clamps. A tray mounts to the bottom of your housing and provides handles to hold onto. Arms attach to the tray and hold your lights, and clamps allow you to position the arms exactly where you need them. This system gives you precise control over the direction and quality of your light.

Pro Tip: When positioning your strobes, keep them out wide and slightly behind your camera lens. This prevents backscatter, which is the ugly effect of your flash lighting up all the tiny particles floating in the water between your lens and your subject.

Lenses and Ports: Wide-Angle and Macro

The two main types of underwater photography are wide-angle and macro.

  • Wide-Angle: This is for shooting large scenes like reefs, shipwrecks, and big animals. You’ll typically use a large dome port on your housing, which corrects for the magnification effect of water and allows you to use wide-angle lenses.
  • Macro: This is for shooting tiny critters. You’ll use a flat port on your housing and often add a “wet lens”—a magnifying lens that screws onto the outside of your port—to get even closer to your subjects.

From Good to Great: Tips for Stunning Underwater Shots

Having the best cameras for underwater won’t guarantee great photos. Technique is just as important as technology. Here are five fundamental tips that will dramatically improve your underwater images.

1. Get Close, Then Get Closer

This is the golden rule of underwater photography. Water is about 800 times denser than air, and it’s full of floating particles. The more water there is between your lens and your subject, the more color loss, lack of contrast, and backscatter you’ll have. The goal is to minimize that distance. For wide-angle, you want to be just a few feet away. For macro, you should be mere inches away.

2. Shoot Upwards

Whenever possible, try to get below your subject and shoot at an upward angle. This does two things. First, it separates your subject from the busy reef background, making it stand out. Second, it can create a beautiful blue or black background, and if you’re shallow enough, you can even capture the sun’s rays filtering through the water (sunballs).

3. Master Your Lighting

Don’t just point your strobes directly at the subject. Experiment with different lighting positions to create depth and texture. Try lighting from one side to create dramatic shadows, or use one strobe as a main light and a second as a weaker “fill” light. Understanding how to shape light is what separates amateurs from pros.

4. Learn to Use Manual Mode

To take full creative control, you must shoot in Manual (M). In this mode, you set the three key elements of exposure:

  • Aperture (f-stop): Controls the depth of field (how much of the image is in focus).
  • Shutter Speed: Controls motion blur and how much ambient light you let in.
  • ISO: Controls the sensor’s sensitivity to light.

A common starting point is to use your shutter speed to control the background exposure (the blue water) and your aperture and strobe power to control the foreground exposure (the subject lit by your flash).

5. Perfect Your Buoyancy

Excellent buoyancy control is the most critical skill for any underwater photographer. A stable photographer is less likely to stir up sand, can get closer to marine life without disturbing it, and can take the time to carefully compose a shot. Before you even buy a camera, consider taking an advanced buoyancy course with an organization like PADI (Professional Association of Diving Instructors). It will make you a better, safer diver and a much better photographer.

A Beginner’s Guide to Your First Underwater Photoshoot

Feeling excited but a little intimidated? That’s totally normal! Follow these simple steps to make your first foray into underwater photography a success.

  1. Assemble and Test Your Gear on Land: Before you get anywhere near the water, put your camera in its housing at home. Make sure you can operate all the controls. Turn it on and take a few test shots to confirm everything is working as it should.

  2. Perform a Leak Test: Once assembled, submerge the empty housing (without the camera inside!) in a sink or rinse tank. Hold it underwater for a few minutes and watch carefully for any tiny bubbles streaming from the O-ring seals. This simple step can save you from a very expensive disaster.

  3. Practice in a Pool or Shallow Water: If possible, take your rig for a spin in a swimming pool or calm, shallow ocean water. This is a low-pressure environment where you can get a feel for the camera’s handling and buoyancy without the distractions of a full scuba dive.

  4. Set Your Camera Before You Dive: Get your basic settings dialed in on the boat. A good starting point for a sunny day is ISO 100 or 200, shutter speed 1/125s, and aperture f/8. Set your camera to shoot RAW and choose an appropriate white balance setting (like Auto or Underwater).

  5. Focus on a Single, Stationary Subject: On your first dive, don’t try to photograph the fast-moving shark. Find a patient subject, like a coral head, a sea star, or a stationary fish like a scorpionfish. Take your time, practice your composition, and experiment with your strobe positions.

Keeping Your Gear Safe: Maintenance and Care

Underwater photography gear is a significant investment, and the saltwater environment is incredibly harsh. Proper maintenance is not optional—it’s essential to protect your equipment and ensure it works reliably for years to come.

The Post-Dive Ritual: Rinsing and Soaking

As soon as you get out of the water, your camera rig should go straight into a dedicated freshwater rinse tank. Swish it around and work all the buttons and dials to dislodge any salt or sand. If possible, let it soak for at least 20-30 minutes after the dive. Salt crystals can form as the water evaporates, which can jam controls and damage seals.

O-Ring Care: The Most Important Step

Your housing’s O-rings are the only thing standing between the ocean and your expensive camera. They need to be treated with care. Before every single use, you should remove the main O-ring, clean it with a lint-free cloth, clean the groove it sits in, and apply a very light layer of silicone grease. The grease doesn’t make the seal; it just protects the O-ring from friction and cracking. A clean, properly lubricated O-ring is the key to a flood-free dive.

Long-Term Storage Tips

When you’re not diving for a while, store your housing with the back door unlatched to take pressure off the O-ring. It’s also a good idea to remove the O-rings, place them in a small plastic bag without sharp corners, and store them inside the housing. Keep your gear in a cool, dry place away from direct sunlight.

Dive In: 10 Incredible Underwater Photography Locations

Looking for inspiration for your next trip? Here are ten of the world’s most popular underwater photography locations, each offering something unique.

  1. Raja Ampat, Indonesia: The epicenter of marine biodiversity. Unbelievable coral reefs and an insane density of fish life.
  2. Galapagos Islands, Ecuador: A land of giants. Schooling hammerheads, marine iguanas, sea lions, and whale sharks.
  3. Red Sea, Egypt: Stunningly clear water, vibrant coral gardens, and historic shipwrecks like the SS Thistlegorm.
  4. Chuuk (Truk) Lagoon, Micronesia: The world’s greatest wreck diving destination, with a fleet of Japanese WWII ships.
  5. Cocos Island, Costa Rica: A remote island famous for massive schools of scalloped hammerhead sharks.
  6. Lembeh Strait, Indonesia: The muck diving capital of the world. A paradise for macro photographers seeking weird and wonderful critters.
  7. Palau: Famous for its unique Jellyfish Lake, pristine reefs, and thrilling channel dives.
  8. Baja California, Mexico: Get playful with curious sea lions in La Paz or encounter giant whales in the open ocean.
  9. Great Barrier Reef, Australia: The world’s largest coral reef system, an iconic destination with endless photo opportunities.
  10. Silfra, Iceland: Not much life, but you can dive between two tectonic plates in perfectly clear, 35°F (2°C) glacial water.

Frequently Asked Questions about Underwater Cameras

What is the best budget underwater camera?

The OM System (formerly Olympus) Tough TG-7 is widely considered the best budget underwater camera. It’s rugged, waterproof to 50ft (15m) without a housing, and has an incredible macro mode. It provides an excellent entry point into underwater photography with a clear upgrade path.

Is a mirrorless camera better than a DSLR for underwater photography?

Yes, for most users today, a mirrorless camera is the better choice. The electronic viewfinder (EVF) allows you to see your exposure in real-time, which is a huge advantage in dark underwater environments. They also tend to have superior autofocus and video features, and their smaller size makes for a more compact underwater rig.

Is a GoPro a good underwater camera?

A GoPro is an excellent underwater video camera. Its image stabilization, wide field of view, and compact size are perfect for capturing action and immersive dive footage. However, for still photography, its fixed wide-angle lens and limited controls make it less ideal than a dedicated still camera, especially for macro or fish portraits.

Can I use my phone for underwater photography?

Yes, you can! There are several high-quality underwater housings available for modern smartphones, such as those from SeaLife and Kraken Sports. These housings allow you to use your phone’s excellent camera to depths of 130ft (40m) or more and often connect via Bluetooth to give you full control. It’s a great, cost-effective way to get started.

How many lumens do I need for underwater photography?

For a focus light to help your camera’s autofocus, 1,000-2,000 lumens is usually sufficient. For video lights used as the primary light source, you’ll want much more power. A good starting point is around 2,500 lumens per light, with professional systems often using lights that are 10,000 lumens or more.

What is the 120 rule in scuba diving?

This is a great question that often comes up! The “120 rule” is actually not related to photography but to scuba diving safety and gas management, specifically for diving with doubles (two tanks). It’s a formula used to calculate rock bottom gas pressure. For photography, the most important rules are about getting close to your subject and mastering your buoyancy!

Final Thoughts: Capturing Your Underwater World

The journey into underwater photography is one of the most rewarding experiences you can have. It combines the adventure of scuba diving with the creative challenge of photography, allowing you to share a world that most people never get to see. The best underwater photography cameras are the ones that fit your budget, match your skill level, and get you excited to jump in the water.

Remember that the camera is just one piece of the puzzle. A solid housing, powerful strobes, and most importantly, excellent diving skills are the other key ingredients. Start simple, master the basics, and build your system over time. The ocean is full of wonders—now go out there and capture them!

Wahoo Fitness TICKR Heart Rate Monitor Review: Your Key to Smarter Training

Bestseller #1
  • ACCURATE AND DETAILED EKG RESULTS. KardiaMobile 6L records a medical-grade, six-lead EKG and provides FDA-cleared determ…
  • SIX LEADS, SIX TIMES THE DATA. Six-lead EKGs give you a more detailed view of your heart and more data to share with you…
  • TRUSTED BY PROFESSIONALS: Recommended by doctors, KardiaMobile 6L is the world’s only FDA-cleared six-lead personal EKG
Bestseller #2
  • All-in-One Health Monitoring – Equipped with advanced sensors to provide 24/7 real-time tracking of heart rate, blood pr…
  • Smarter Fitness & Activity Tracking — The fitness watch features motion algorithms and multiple exercise modes, includin…
  • Smart Calling and Remote Care — The call watch features the latest Bluetooth 5.4 BLE technology for a more stable connec…
Bestseller #3
  • 【10-14 Day Long Battery Life – Wear It Day and Night】Forget daily charging anxiety. A single, full charge powers up to 7…
  • 【24/7 Accurate Health Monitoring】Keep a close eye on your well-being with all-day automatic heart rate tracking, detaile…
  • 【25 Sports Modes & Smart Activity Tracking】Track virtually any activity with 25 built-in modes (Cycling, tennis, footbal…

Wahoo Fitness TICKR Heart Rate Monitor Review: Your Key to Smarter Training

If you’re serious about improving your fitness, you know that data is everything. Guesswork can only get you so far. To truly optimize your performance, prevent burnout, and see real results, you need accurate insights into how your body is responding to your workouts. This is where the Wahoo Fitness TICKR Heart Rate Monitor steps in, offering a powerful yet straightforward way to capture the most critical metric of all: your heart rate.

It’s designed for athletes who demand reliability without complexity.

This device isn’t just another gadget; it’s a training partner that provides real-time feedback, helping you push harder when you need to and pull back before you overdo it. Whether you’re a cyclist glued to your bike computer, a runner syncing with your favorite app, or a gym enthusiast tracking your effort, a dedicated heart rate tracker is essential. We’re going to explore every aspect of this popular device, from its standout features to how it stacks up against the competition.

What You’ll Learn

  • Dual-Band Connectivity: The TICKR connects effortlessly to virtually any device or app using both ANT+ and Bluetooth, making it one of the most versatile monitors available.
  • User-Friendly Design: Its slim profile, front-snap closure, and clear LED indicator lights make it incredibly easy to use and comfortable to wear during any workout.
  • Gold-Standard Accuracy: As a chest strap monitor, the TICKR uses ECG technology to provide highly accurate heart rate data, far surpassing the reliability of many wrist-based optical sensors.
  • Exceptional Battery Life: The device runs for up to 500 hours on a simple, user-replaceable CR2032 coin cell battery, so you can train for months without worry.
  • Simple Maintenance: Proper care is straightforward, involving a quick rinse of the strap after workouts and occasional hand washing to ensure longevity and consistent performance.

An Overview of the Wahoo Fitness TICKR Heart Rate Monitor

The Wahoo TICKR is an electrocardiogram (ECG) chest strap heart rate monitor. Unlike wrist-based trackers that use optical sensors to estimate blood flow, the TICKR measures the electrical signals from your heart directly. This method is widely considered the gold standard for accuracy in consumer fitness devices, providing data that is both precise and responsive to sudden changes in effort, like during high-intensity interval training (HIIT).

At its core, the Wahoo Fitness heart monitor is built for simplicity and reliability. It consists of two main parts: a soft, adjustable elastic strap that you wear around your chest and a small plastic pod that snaps onto the front. This pod houses the electronics, the battery, and the LED lights that provide visual confirmation of its status. The design is intentionally minimalist, focusing on performance without unnecessary frills.

Wahoo offers a few variations in the TICKR family. The standard TICKR is the focus of this review, providing excellent heart rate and calorie tracking. The TICKR X adds more advanced features like running dynamics (cadence, ground contact time) and internal memory to record workouts without a phone. The TICKR FIT is an armband that uses optical technology, offering a different form factor for those who prefer not to wear a chest strap.

For most athletes, the standard TICKR hits the sweet spot of performance, features, and value.

Unpacking the Key Features of the Wahoo TICKR

The Wahoo TICKR monitor stands out in a crowded market because it nails the fundamentals perfectly. It’s not loaded with confusing features; instead, it focuses on doing its core job exceptionally well. Let’s break down the features that make it a favorite among athletes of all levels.

Dual-Band ANT+ and Bluetooth Technology

This is arguably the TICKR’s most significant feature. By supporting both ANT+ and Bluetooth Smart (BLE), it can connect to a massive range of devices and apps simultaneously (up to three Bluetooth connections at once). You can have it paired with your Garmin watch via ANT+, your bike computer via ANT+, and your phone running the Zwift app via Bluetooth—all at the same time. This universal compatibility removes any guesswork and ensures the TICKR will work with the gear you already own and the apps you already love.

Slim, Integrated, and Comfortable Design

Comfort is critical for a device you’ll be wearing during intense, sweaty workouts. Wahoo designed the TICKR with a slim, lightweight pod that integrates cleanly with the strap. The front-snap closure is a simple but brilliant design choice. Instead of fumbling with hooks on your back, you can easily put the strap on and snap the pod in place from the front.

The soft, flexible strap material is designed to stay put without chafing, even on long runs or rides.

Top-Mounted LED Indicator Lights

Another user-friendly feature is the placement of two LED lights on top of the pod. This provides instant visual feedback, so you’re never left wondering if your monitor is working. A blue light flashes to show it’s searching for a connection and turns solid once paired. A red light flashes in sync with your heartbeat, confirming that it’s detecting your heart rate accurately.

It’s a small detail that eliminates a common point of frustration found with other monitors.

How to Set Up Your Wahoo TICKR for Accurate Heart Rate Tracking

Getting started with the Wahoo TICKR is incredibly straightforward, but following a few key steps will ensure you get the most accurate readings every time. Proper setup is the difference between flawless data and frustrating dropouts.

  1. Moisten the Electrodes: Before putting the strap on, lightly moisten the two rubbery electrode pads on the inside of the strap. You can use water or an electrode gel. This step is crucial because it improves conductivity between your skin and the sensors, allowing the device to pick up your heart’s electrical signals immediately and reliably. Without moisture, you might see erratic or no readings at the start of your workout.

  2. Position and Adjust the Strap: The strap should be worn around your chest, just below your sternum. The Wahoo logo on the pod should be centered and facing upright. Adjust the elastic strap so it’s snug but not uncomfortably tight. It needs to be firm enough to stay in place and maintain skin contact during movement, but not so tight that it restricts your breathing.

  3. Snap the Pod On: With the strap in place, simply snap the pod onto the two connection points on the front. You’ll hear a click, and the LED lights should begin to flash, indicating it’s powered on and ready to pair.

  4. Pair with Your Device or App: Turn on Bluetooth on your phone, watch, or bike computer. Open the app or device settings where you manage sensors. The Wahoo TICKR should appear in the list of available devices. Select it to pair, and you’re ready to go! The blue LED on the TICKR will turn solid for 30 seconds to confirm the connection.

Pro Tip: If you ever experience connection issues, the first step is always to check the battery. The second is to “forget” the device in your app or head unit’s Bluetooth settings and re-pair it from scratch. This often resolves minor software glitches.

Wahoo TICKR vs. The Competition: A Head-to-Head Comparison

While the Wahoo TICKR is a fantastic device, it’s not the only player in the game. Its main competitors are the Garmin HRM-Dual and the Polar H10. All three are excellent chest strap monitors, but they have subtle differences that might make one a better fit for you.

Here’s a quick breakdown of how they compare:

Feature Wahoo TICKR Garmin HRM-Dual Polar H10
Connectivity ANT+, 3x Bluetooth ANT+, Bluetooth ANT+, Bluetooth, 5 kHz
Battery Type CR2032 Coin Cell CR2032 Coin Cell CR2025 Coin Cell
Advertised Battery Life Up to 500 hours Up to 3.5 years Up to 400 hours
Special Features Top-mounted LEDs, Slim Profile Internal Memory, GoPro Control
Price Point Competitive Competitive Premium

The Wahoo TICKR shines with its user-friendly design, especially the LED indicators and multi-device Bluetooth support. It offers the best balance of features, reliability, and price for the vast majority of users.

The Garmin HRM-Dual is a workhorse known for its incredible battery life. It’s a simple, no-frills device that just works, making it a great choice for Garmin ecosystem users who want a set-and-forget experience. However, it lacks the multiple Bluetooth connections of the TICKR.

The Polar H10 is often considered the most feature-rich of the bunch. It includes internal memory to record a workout without a connected device and can even connect to some gym equipment using the 5 kHz frequency. These premium features come with a higher price tag, making it best for athletes who need those specific capabilities.

For most people, the Wahoo TICKR’s combination of universal connectivity and thoughtful design makes it the most practical and valuable choice.

The Importance of Heart Rate Monitoring for Fitness Training

Using a heart rate tracker is about more than just collecting data; it’s about training smarter, not just harder. Your heart rate is a direct indicator of how much effort your body is exerting. By monitoring it, you can train within specific intensity zones to achieve different fitness goals.

Training zones are typically calculated as a percentage of your maximum heart rate. Here’s a simple breakdown:

  • Zone 1 (50-60%): Very light activity. This is your recovery zone, perfect for warm-ups, cool-downs, and active recovery days. It helps improve blood flow and aids muscle repair.
  • Zone 2 (60-70%): Light activity. This is the foundation of endurance training. Working out in this zone for extended periods teaches your body to become more efficient at burning fat for fuel.
  • Zone 3 (70-80%): Moderate activity. You’re working hard enough to improve your cardiovascular fitness but can still hold a conversation. This zone improves circulation and builds aerobic strength.
  • Zone 4 (80-90%): Hard activity. This is your anaerobic threshold zone. Training here improves your body’s ability to handle lactic acid, allowing you to sustain higher intensities for longer.
  • Zone 5 (90-100%): Maximum effort. These are short, all-out bursts that can only be sustained for a minute or two. This zone is for developing top-end speed and power.

A reliable monitor like the Wahoo Fitness heart monitor ensures you’re actually in the zone you’re targeting. It helps you avoid the common mistake of going too hard on easy days and not hard enough on hard days, which is a recipe for burnout and plateaued progress.

Analyzing TICKR’s Battery Life and Maintenance

One of the most practical advantages of the Wahoo TICKR is its battery life and ease of maintenance. The last thing you want is another device you have to charge every night. The TICKR solves this by using a standard CR2032 coin cell battery, the same kind you find in car key fobs and watches.

Wahoo claims the battery can last for up to 500 hours of workout time. For someone who works out an hour a day, five days a week, that translates to nearly two years of use before needing a replacement. This is a huge convenience factor. When the battery does finally run out, you can easily replace it yourself.

The battery door on the back of the pod can be opened with a coin, making the process quick and tool-free.

Proper maintenance is key to ensuring the longevity and accuracy of your TICKR. Here are a few simple rules to follow:

  • Rinse the Strap: After every workout, rinse the strap with plain water and hang it to dry. This removes sweat and salt, which can degrade the material and interfere with the sensors over time.
  • Disconnect the Pod: Unsnap one side of the pod from the strap after each use. This ensures the device fully powers down and prevents unnecessary battery drain.
  • Wash Occasionally: Every 7-10 uses, hand wash the strap (without the pod) using a small amount of mild soap. Rinse it thoroughly and let it air dry completely. Never put the strap in a washing machine or dryer, as this can damage the delicate electrodes.

Following these simple steps will keep your wahoo tickr monitor performing accurately for years.

What Real Users Are Saying: Reviews and Experiences

Lab specs are one thing, but real-world performance is what truly matters. Overall, user feedback for the Wahoo TICKR is overwhelmingly positive. Athletes praise its seamless connectivity, comfort, and reliability. Many users report that it connects to their devices instantly and provides stable, accurate data throughout their workouts.

The simplicity of the device is a recurring theme. Users love the front-snap design and the at-a-glance confirmation from the LED lights. As one user on a popular cycling forum noted, “It just works. I put it on, it connects to my ELEMNT and my phone, and I don’t have to think about it again.”

However, no product is perfect, and it’s important to present a balanced view. Some long-term users have reported issues with strap durability or connection dropouts after a year or more of heavy use. A Reddit discussion highlights that some users have experienced corrosion at the snap points, often due to sweat. This underscores the importance of the maintenance tips mentioned earlier—rinsing the strap and disconnecting the pod can help prevent these issues.

Wahoo has also updated the design over the years to improve its durability and water resistance.

Seamless Integrations with Fitness Apps and Devices

The true power of the Wahoo TICKR is unlocked by its incredible ecosystem of compatible apps and devices. Its dual-band connectivity means it can communicate with almost any piece of fitness technology you can imagine, making it a central hub for your performance data.

On the app side, it integrates perfectly with all the major players. Whether you’re tracking outdoor runs on Strava, riding virtual worlds in Zwift, following classes on Peloton, or executing structured workouts in TrainerRoad, the TICKR sends your heart rate data flawlessly. This allows these apps to provide more accurate calorie burn estimates and performance analysis.

For hardware, the integration is just as deep. It’s the natural companion for Wahoo’s own ELEMNT line of bike computers. But it works just as well with devices from other brands, including Garmin watches and bike computers, Apple Watches, and virtually any Android or iOS smartphone. You can even pair it with ANT+-enabled treadmills and spin bikes at many commercial gyms.

This flexibility ensures that as your gear changes over time, your TICKR will remain a constant, reliable part of your setup.

Tips for Maximizing the Performance of Your TICKR

To get the most out of your Wahoo TICKR and ensure it remains a reliable training partner, here are a few expert tips that go beyond the basic setup.

  • Keep Firmware Updated: Wahoo occasionally releases firmware updates for the TICKR to improve performance and fix bugs. You can check for and install these updates using the free Wahoo Fitness app on your smartphone. It’s a good idea to check for an update every few months.
  • Troubleshoot Dropouts Systematically: If you experience data dropouts, don’t panic. Start by ensuring the strap is snug and the electrodes are moist. If that doesn’t work, try replacing the battery, even if you don’t think it’s dead. Finally, check for interference from other electronic devices or even certain types of synthetic athletic apparel that can create static electricity.
  • Use Electrode Gel for Ultimate Accuracy: While water works fine for moistening the electrodes, a dedicated electrode gel (available online or at medical supply stores) can provide a more stable and reliable connection, especially for long workouts or in very dry conditions. A tiny dab is all you need.

Pro Tip: When replacing the CR2032 battery, make sure you install it with the positive (+) side facing up, towards the battery cover. Installing it upside down is a common mistake and will prevent the device from powering on.

Where to Buy the Wahoo Fitness TICKR Heart Rate Monitor

Ready to take your training to the next level? The Wahoo Fitness TICKR Heart Rate Monitor is widely available from major retailers. For convenience and competitive pricing, one of the best places to purchase it is on Amazon.

You can find the latest model and check the current price directly through this link. Buying from a reputable seller like Amazon also ensures you have access to customer reviews and a straightforward return policy.

Check the current price for the Wahoo Fitness TICKR on Amazon.

Alternatively, you can purchase it directly from the Wahoo Fitness website or from specialty sports retailers like REI. Regardless of where you buy it, you’ll be investing in a piece of equipment that provides incredible value and can fundamentally change the way you approach your fitness.

Frequently Asked Questions (FAQ)

Here are answers to some of the most common questions about the Wahoo TICKR and heart rate training in general.

Are Wahoo heart rate monitors good?

Yes, Wahoo heart rate monitors are widely regarded as being very good. They are known for their excellent accuracy (especially the chest strap models), reliable dual-band connectivity with ANT+ and Bluetooth, and user-friendly design. The TICKR series is a popular choice for everyone from casual fitness enthusiasts to professional athletes due to its strong performance and competitive price point.

How does the Wahoo TICKR measure heart rate?

The Wahoo TICKR chest strap measures heart rate using electrocardiography (ECG). The electrode sensors on the strap detect the small electrical impulses generated by your heart as it contracts and relaxes. This method is extremely precise and captures beat-to-beat variability, making it the gold standard for consumer heart rate monitoring and more accurate than the optical (PPG) sensors found in most smartwatches.

Is the Wahoo TICKR FIT accurate?

The Wahoo TICKR FIT is an armband monitor that uses optical sensor technology, not ECG. While it is considered one of the more accurate optical monitors on the market, chest straps like the standard TICKR are generally more accurate, especially during high-intensity exercise or activities involving a lot of arm movement (like weightlifting), which can affect the optical sensor’s readings.

How long does a Wahoo TICKR battery last?

The Wahoo TICKR uses a CR2032 coin cell battery that is rated to last for up to 500 hours of use. The actual lifespan can vary depending on usage and environmental conditions, but for most users, this translates to well over a year of training before needing a replacement. The battery is inexpensive and easy to replace yourself.

What is the most accurate wearable heart rate monitor?

Generally, ECG chest strap monitors are the most accurate type of wearable heart rate monitor available to consumers. Models like the Wahoo TICKR, Polar H10, and Garmin HRM series are consistently shown to be more accurate and responsive than wrist-based optical monitors, particularly for tracking rapid changes in heart rate during interval training.

Can you wear the Wahoo TICKR on the upper arm?

No, the standard Wahoo TICKR and TICKR X are designed specifically to be worn around the chest. The sensors need to be positioned just below the sternum to accurately detect the heart’s electrical signals. If you want to wear a Wahoo monitor on your arm, you should choose the Wahoo TICKR FIT, which is an optical sensor designed for placement on the forearm or bicep.

Final Thoughts

The Wahoo Fitness TICKR Heart Rate Monitor is an exceptional tool for any athlete looking to train with more precision and intelligence. It strips away unnecessary complications and focuses on delivering what matters most: accurate, reliable heart rate data delivered seamlessly to the devices and apps you already use. Its dual-band connectivity is a massive advantage, ensuring it will fit into any fitness ecosystem.

From its comfortable and secure fit to its long-lasting, user-replaceable battery, every aspect of the TICKR is designed with the user in mind. While no device is without its quirks, the TICKR’s performance and value are hard to beat. It empowers you to understand your body better, structure your workouts more effectively, and ultimately, achieve your fitness goals faster.

If you’re ready to stop guessing and start training with purpose, the TICKR is an investment that will pay dividends with every workout. For its combination of accuracy, versatility, and user-friendly design, it’s an easy recommendation. You can check the latest price on Amazon and get started on your journey to smarter training.

The 9 Best Black Friday Deals on Gaming PCs for 2025 (For Every Gamer)

Bestseller #1
  • System: Intel Core i5-13400F 2.5GHz 10 Cores | Intel B760 Chipset | 16GB DDR5 6000MHz | 1TB PCIe 4.0 NVMe SSD | Windows …
  • Graphics: NVIDIA GeForce RTX 5060 8GB Graphics | 1x HDMI | 2x DisplayPort
  • Connectivity: 1 x USB-C 3.2 | 2 x USB-A 3.2 | 6 x USB-A 2.0 | 1 x LAN | WiFi 6 | Bluetooth 5.3 | 7.1 Channel Audio
Bestseller #2
  • Accelerated gaming pc performance: AMD Ryzen 7 5800X delivers 3.8 GHz great performance and up to 4.7 GHz boost via AMD …
  • Play fast online multiplayer games: This high-performance gaming pc desktop is capable of running a wide range of popula…
  • Multitask desktop computer: with the gaming pc and monitor, handle school and office tasks, day trading dashboards, mult…
$1,749.99
Bestseller #3
  • EMPOWER YOUR PASSIONS ELEVATE YOUR GAME – Whether you’re dominating the leaderboard, streaming your gameplay live, or ta…
  • BEYOND FAST – The Intel Core Ultra 7 265F CPU is designed to give you the power boost you need to dominate the latest an…
  • GAME CHANGER – The NVIDIA GeForce RTX 5070 Ti GPU is beyond fast for gamers and creators. Experience lifelike virtual wo…
$1,999.97

The 9 Best Black Friday Deals on Gaming PCs for 2025 (For Every Gamer)

Get ready, gamers. The most electrifying time of the year for tech enthusiasts is almost here. Black Friday is the ultimate battleground for scoring mind-blowing discounts, and if you’ve been dreaming of a new rig, the time to strike is now. Navigating the flood of offers can be overwhelming, but don’t worry—we’ve got your back.

This is your definitive guide to finding the absolute best black friday deals gaming pcs, ensuring you get maximum power for your money without the headache. Let’s jump in and find your next dream machine.

What to Know

  • Timing is Everything: The best deals often appear in the week leading up to Black Friday and extend through Cyber Monday. Start your research early to recognize a truly great offer when you see one.
  • The GPU is King: For gaming, the graphics card is the most important component. Look for deals featuring NVIDIA’s RTX 40-series (like the 4060 or 4070) or AMD’s RX 7000 series for excellent modern performance.
  • Top Brands Offer Deep Discounts: Keep a close eye on major players like Alienware, HP OMEN, iBUYPOWER, and premium builders like ORIGIN PC, as they often have the most aggressive sales directly on their websites.
  • Accessorize for Less: Black Friday isn’t just for towers. It’s the perfect opportunity to snag incredible deals on essential accessories like monitors, headsets, and ergonomic gaming chairs to complete your setup.

How to Snag the Absolute Best Gaming PC Black Friday Sales

Scoring the perfect deal requires a bit of strategy. It’s not just about finding the biggest percentage off; it’s about getting the right machine for your needs at the best possible price. Follow these steps to become a Black Friday deal-hunting champion!

1. Start Your Reconnaissance Early

Don’t wait until the day after Thanksgiving to start looking. Many retailers, including HP, Dell, and Best Buy, launch their sales a week or even two weeks in advance. Use this time to window shop.

Identify two or three PC models that fit your performance goals and budget. Track their regular prices so you can spot a genuine discount versus an inflated pre-sale price. This preparation prevents impulse buys on rigs that aren’t actually a good value.

2. Set a Firm Budget (and Stick to It!)

Black Friday can create a powerful sense of urgency, making it easy to overspend. Before you even look at a single deal, decide on your maximum budget. Your budget should cover the PC itself and any necessary accessories you plan to buy.

Remember to categorize your budget: are you looking for an entry-level rig (typically $700-$1,200), a mid-range powerhouse ($1,200-$2,000), or a high-end beast ($2,000+)? Knowing your price bracket will help you filter out the noise and focus on the deals that matter to you.

3. Know Your Must-Have Specs

To avoid buyer’s remorse, you need to know what’s inside the case. Create a short checklist of your non-negotiable components. For example, if you’re set on playing games at 1440p with high frame rates, your list might include an NVIDIA GeForce RTX 4070 or better, 32GB of DDR5 RAM, and a 1TB NVMe SSD.

Having this list makes it easy to quickly evaluate Black Friday gaming PC offers. If a deal doesn’t meet your minimum requirements, you can move on without wasting time, no matter how tempting the price tag looks.

4. Compare Retailers vs. Direct from Manufacturer

Check prices across multiple storefronts. Retailers like Best Buy and Newegg will have a wide selection of brands, but sometimes the best deals come directly from manufacturers like Dell (Alienware), HP (OMEN), or boutique builders like ORIGIN PC.

Manufacturers often offer more customization options and may throw in exclusive bundles, like free games or extended warranties, that you won’t find elsewhere. Always compare the final price, including shipping and taxes, before making a decision.

Decoding the Deals: What to Look for in Discounted Gaming PCs for Black Friday

Not all deals are created equal. A PC with a massive discount might be hiding an outdated component or a critical bottleneck. Here’s how to analyze the specs and ensure you’re getting a balanced, high-performance machine.

The Core Four: GPU, CPU, RAM, and Storage

These four components have the biggest impact on your gaming experience. Here’s a quick rundown for 2025 deals:

  • GPU (Graphics Card): This is your priority. For 1080p gaming, an RTX 4060 is a fantastic target. For 1440p, aim for an RTX 4070 or AMD Radeon RX 7800 XT. For 4K gaming, you’ll want an RTX 4080 or higher.
  • CPU (Processor): The GPU’s best friend. A good CPU prevents bottlenecks. Look for modern processors like the Intel Core i5-13600K/14600K or AMD Ryzen 5 7600X/Ryzen 7 7800X3D. These offer a great balance of gaming performance and multitasking power.
  • RAM (Memory): 16GB of DDR4 or DDR5 RAM is the minimum for modern gaming. However, 32GB of DDR5 is quickly becoming the new standard and provides excellent future-proofing. Pay attention to speed (e.g., 5600MHz for DDR5) as well.
  • Storage (SSD): A fast NVMe SSD is non-negotiable for quick load times. Aim for at least a 1TB NVMe SSD. Many games now exceed 100GB, so a 500GB drive will fill up incredibly fast.

Beyond the Basics: Motherboard, PSU, and Cooling

Prebuilt manufacturers sometimes cut corners on these components. A cheap Power Supply Unit (PSU) can be unreliable and even damage other parts. Look for PSUs from reputable brands like Corsair, Seasonic, or EVGA with an 80+ Bronze rating or better.

Similarly, ensure the PC has adequate cooling. A single, small case fan might not be enough for a high-end CPU and GPU. Look for systems with multiple intake and exhaust fans or, for high-performance builds, an All-in-One (AIO) liquid cooler for the CPU.

Reading Between the Lines: Is the Discount Really a Deal?

Some sellers inflate the “original price” to make a discount seem larger than it is. This is where your early research pays off. If you’ve been tracking a PC’s price for a few weeks, you’ll know its true market value.

Another tactic is to pair a powerful GPU with a much weaker CPU or a tiny amount of slow RAM. This creates a performance bottleneck where the expensive GPU can’t reach its full potential. Always look for a balanced build where the components complement each other.

Pro Tip: Check reviews for the specific prebuilt model you’re considering. Reviewers on YouTube and tech sites often do teardowns that reveal the quality of hidden components like the motherboard and PSU, giving you a much clearer picture of the build’s overall quality.

The 9 Best Black Friday Deals on Gaming PCs for 2025

Alright, this is the moment you’ve been waiting for! Here are our top picks for the best gaming PC Black Friday sales you’ll find this year, broken down by budget. These are based on typical deals we expect to see from these brands, so keep your eyes peeled for the official announcements!

Entry-Level Powerhouses (Under $1,200)

These PCs are perfect for 1080p gaming at high frame rates in popular titles like Fortnite, Valorant, and Call of Duty.

1. The Budget King: CyberPowerPC Gamer Xtreme VR

CyberPowerPC consistently delivers incredible value, and their Gamer Xtreme VR series is a fan favorite. On Black Friday, expect to see configurations with an Intel Core i5 and an NVIDIA RTX 4060 drop below the $1,000 mark, making it an almost unbeatable entry point into modern PC gaming.

  • Expected Specs: Intel Core i5-13400F, NVIDIA GeForce RTX 4060, 16GB DDR4 RAM, 1TB NVMe SSD.
  • Pros: Excellent price-to-performance, uses standard parts for easy upgrades, widely available at retailers like Best Buy and Amazon.
  • Cons: Case design and cooling can be basic on the lowest-priced models.

2. The All-Rounder: HP OMEN 25L

The HP OMEN line combines a clean, professional aesthetic with serious gaming power. The 25L is a compact and stylish machine that often sees significant discounts directly from HP’s website. It’s a great choice for someone who wants a PC that looks as good as it performs.

  • Expected Specs: AMD Ryzen 5 7600, NVIDIA GeForce RTX 4060, 16GB DDR5 RAM, 1TB NVMe SSD.
  • Pros: Sleek and minimalist design, tool-less entry for easy access, great thermal performance for its size.
  • Cons: May use some proprietary HP components, which can make future upgrades slightly more challenging.

3. The Compact Contender: MSI Trident AS

If space is a premium, the MSI Trident is a fantastic option. This console-sized PC packs a serious punch without taking over your desk. Black Friday is the perfect time to snag one of these small-form-factor beasts at a more accessible price point.

  • Expected Specs: Intel Core i7-13700F, NVIDIA GeForce RTX 4060 Ti, 16GB DDR5 RAM, 1TB NVMe SSD.
  • Pros: Extremely compact and portable design, surprisingly powerful for its size, excellent connectivity.
  • Cons: Limited internal upgradeability due to its compact nature, can run louder under load.

Mid-Range Monsters ($1,200 – $2,000)

This is the sweet spot for most gamers, offering incredible 1440p performance and a great foundation for years to come.

4. The Upgrade Path: iBUYPOWER Pro Gaming PC

iBUYPOWER is known for its stylish cases with beautiful RGB lighting and tempered glass panels. Their Pro series often features well-balanced component choices that are perfect for gamers looking to step up to high-refresh-rate 1440p gaming. Look for deals featuring the RTX 4070.

  • Expected Specs: AMD Ryzen 7 7700X, NVIDIA GeForce RTX 4070, 32GB DDR5 RAM, 2TB NVMe SSD.
  • Pros: Aesthetically pleasing cases with great airflow, uses off-the-shelf parts, often comes with a keyboard and mouse.
  • Cons: Cable management can sometimes be inconsistent.

5. The Premium Prebuilt: ORIGIN PC Neuron


For those who want a boutique, hand-built experience without the hassle, ORIGIN PC is a top-tier choice. Their Neuron model offers immense power in a mid-tower chassis with extensive customization options. Black Friday often brings rare discounts on these premium machines, backed by fantastic 24/7 US-based customer support.

  • Expected Specs: Intel Core i7-14700K, NVIDIA GeForce RTX 4070 Super, 32GB DDR5 RAM, 2TB NVMe SSD.
  • Pros: Impeccable build quality and cable management, top-tier component selection, industry-leading customer support, highly customizable.
  • Cons: Premium price point, even with Black Friday discounts.

6. The Alienware Experience: Dell Alienware Aurora R16

Alienware is one of the most iconic names in PC gaming, and the Aurora R16 is their latest flagship. With a redesigned chassis focused on improved airflow and a more traditional layout, it’s a performance-focused machine that frequently sees deep cuts during Dell’s Black Friday events.

  • Expected Specs: Intel Core i7-14700F, NVIDIA GeForce RTX 4070, 32GB DDR5 RAM, 1TB NVMe SSD.
  • Pros: Iconic brand with a unique design, strong performance, often bundled with Dell financing offers.
  • Cons: Still uses some proprietary Dell parts, which can limit future motherboard or PSU swaps.

High-End Behemoths ($2,000+)

These are the dream machines. Built for 4K gaming, streaming, and content creation, these PCs will handle anything you throw at them.

7. The 4K Champion: Corsair Vengeance i7500

Corsair is a name synonymous with high-quality PC components, and their prebuilt systems are no exception. The Vengeance series is packed with Corsair’s own excellent parts, from RAM and SSDs to AIO coolers and cases. This ensures a cohesive, high-performance system perfect for 4K gaming.

  • Expected Specs: Intel Core i9-14900K, NVIDIA GeForce RTX 4080 Super, 32GB Corsair Dominator DDR5 RAM, 2TB Corsair MP600 Pro NVMe SSD.
  • Pros: Built almost entirely with high-quality Corsair components, excellent cooling and airflow, beautiful integration with iCUE RGB software.
  • Cons: Can be more expensive than competitors with similar core specs.

8. The Ultimate Custom Build Feel: ORIGIN PC Millennium

If you want the absolute best of the best, the ORIGIN PC Millennium is a legend. This full-tower desktop is fully customizable with the most powerful hardware on the market, including options for custom liquid cooling loops. Black Friday might be your only chance to get a deal on a truly bespoke, top-of-the-line gaming rig.

  • Expected Specs: AMD Ryzen 9 7950X3D, NVIDIA GeForce RTX 4090, 64GB DDR5 RAM, 4TB NVMe SSD.
  • Pros: Unmatched performance and build quality, endless customization options, lifetime 24/7 support, a true enthusiast-grade machine.
  • Cons: The highest price tier on the market.

9. The Style Icon: NZXT Player: Three

NZXT’s cases are beloved for their clean, modern aesthetic, and their Player series of prebuilts brings that design philosophy to a complete system. The Player: Three is their high-end offering, providing a powerful and beautiful machine that looks incredible on any desk.

  • Expected Specs: Intel Core i7-14700K, NVIDIA GeForce RTX 4070 Ti Super, 32GB DDR5 RAM, 2TB NVMe SSD.
  • Pros: Stunning minimalist design, high-quality NZXT components (case, cooler, motherboard), simple and clean configuration.
  • Cons: NZXT’s CAM software can be resource-intensive for some users.

Don’t Forget the Peripherals! Best Black Friday Gaming PC Offers on Accessories

A new PC is only part of the equation. A great setup needs a great monitor, headset, and chair. Black Friday is the absolute best time to get massive discounts on these essential accessories.

Crystal-Clear Visuals: Monitors

Your powerful new PC is wasted without a monitor that can keep up. Look for deals on 1440p monitors with a 144Hz refresh rate or higher—this is the current sweet spot for gaming. For an amazing productivity and multitasking boost, consider adding a second screen like The Portable Monitor, which is perfect for displaying Discord, streaming software, or guides while you game.

Immersive Soundscapes: Headsets & Audio

Good audio can give you a competitive edge by letting you hear enemy footsteps and other crucial sound cues. For competitive players who demand the utmost clarity and positional accuracy, a pair of in-ear monitors (IEMs) from BASN Audio can be a fantastic alternative to bulky over-ear headsets. They offer superior noise isolation and detailed sound in a lightweight package.

Command in Comfort: Gaming Chairs & Desks

You’re going to be spending a lot of time in front of your new rig, so comfort is key. Premium ergonomic gaming chairs from brands like Secretlab and TechniSport often see their biggest sales of the year during Black Friday. Investing in a good chair is an investment in your health and gaming endurance.

The MMO Edge: Gaming Guides

Just got a new PC to dive into World of Warcraft or Final Fantasy XIV? Don’t waste time figuring out complex quests and leveling paths. A subscription to Zygor Guides is an incredible quality-of-life improvement, providing in-game, step-by-step instructions to streamline your adventure. It’s the perfect software companion for your new hardware.

Real Talk: What Gamers Are Saying About Past Black Friday PC Deals

It’s always wise to learn from the experiences of others. Scouring forums like the r/Prebuilts subreddit reveals common themes from past gaming PC Black Friday sales. Many users report great success, snagging powerful machines for hundreds of dollars less than usual.

However, there are cautionary tales. A common complaint cited by users on platforms like Reddit is that some budget prebuilts cut corners on the power supply or motherboard, which can cause issues down the line. Another point of frustration can be shipping delays. As Matthew Buzzi from PCMag noted in a past review, demand is so high that delivery times can sometimes slip, so it’s important to order from a retailer with a good track record.

Pro Tip: When you receive your new PC, open it up and inspect the inside before you even plug it in. Check to make sure the graphics card, RAM sticks, and all cables are securely seated. Shipping can sometimes jostle components loose, and a quick check can save you a major headache.

Looking Ahead: Gaming PC Trends After the Black Friday Dust Settles

Buying a gaming PC on Black Friday 2025 sets you up perfectly for the future of gaming. The deals this year are heavily focused on systems with NVIDIA’s RTX 40-series GPUs and DDR5 memory. This combination is the new baseline for modern gaming and will keep you playing the latest titles at high settings for years to come.

Post-Black Friday, we’ll likely see these component prices stabilize at a new, lower normal. The RTX 4060 and 4070 will become the definitive mid-range cards, and 32GB of RAM will be the standard recommendation. By buying now, you’re essentially getting ahead of the curve at a discount.

This also positions you well for future upgrades. A system with a solid motherboard and a good power supply purchased this Black Friday can easily accommodate a next-generation GPU in a few years, extending the life of your investment even further.

Frequently Asked Questions (FAQ)

Is it better to buy a prebuilt gaming PC on Black Friday or build my own?

This depends on your priorities. Building your own PC can be a rewarding experience and sometimes allows for more customization. However, during Black Friday, the deep discounts on prebuilt systems often make them cheaper than buying all the components separately, especially when you factor in the included Windows license. For pure value and convenience, prebuilt discounted gaming PCs for Black Friday are incredibly hard to beat.

What GPU should I look for in a Black Friday gaming PC deal?

The GPU is the heart of a gaming PC. For 1080p gaming, the NVIDIA GeForce RTX 4060 is the gold standard for value and performance. If you’re targeting 1440p resolution, you should aim for an RTX 4070, RTX 4070 Super, or an AMD Radeon RX 7800 XT. For those with a bigger budget looking to conquer 4K, the RTX 4080 Super and RTX 4090 are the top-tier choices.

Which retailers have the best Black Friday gaming PC offers?

Keep an eye on several places. Big-box retailers like Best Buy and Amazon will have a huge variety of brands. Direct manufacturers like Dell, HP, and Lenovo often have aggressive doorbuster deals on their specific models like Alienware and OMEN. Finally, boutique builders like iBUYPOWER, CyberPowerPC, and ORIGIN PC will have sales on their highly-regarded custom systems.

Are Black Friday gaming PC deals actually worth it?

Absolutely! Black Friday and Cyber Monday represent the single best time of year to buy a gaming PC. The discounts are genuine and often substantial, allowing you to get a much more powerful machine for your money than you could at any other time. The key is to do your research beforehand to ensure you’re getting a balanced build from a reputable brand.

Final Thoughts

Black Friday 2025 is shaping up to be an incredible event for anyone looking to buy a new gaming PC. With powerful components like RTX 40-series GPUs and DDR5 RAM becoming more affordable, you can secure a high-performance rig that will last for years, all while saving a significant amount of money. By starting your research early, setting a budget, and knowing what specs to look for, you can confidently navigate the sales and find the perfect machine.

Whether you’re looking for a budget-friendly 1080p rig or a top-of-the-line 4K monster, the deals are out there. For those seeking a premium, hassle-free experience with unmatched support, we highly recommend checking out the Black Friday offers on the ORIGIN PC Neuron. And don’t forget to complete your new battle station with discounted accessories from Secretlab and BASN Audio.

Happy deal hunting, and may your frame rates be high and your temperatures low!

Wahoo Fitness TICKR X Heart Rate Monitor Review: More Than Just Heart Rate

Bestseller #1
  • CONNECT HEART RATE TO YOUR FAVORITE TRAINING APPS AND DEVICES – Proven technology delivers accurate heart rate and calor…
  • HEART RATE, CALORIE, and TIME TRACKING – TICKR FIT measures vital workout metrics, including heart rate, calorie burn, a…
  • DUAL-BAND TECHNOLOGY – Equipped with ANT plus and bluetooth smart capabilities for a wireless connection to both smartph…
Bestseller #2
  • Precise Performance: Provides accurate real-time heart rate data to enhance training efficiency and support optimal perf…
  • Powered to Endure: Equipped with a high-capacity rechargeable battery with over 100 hours of active battery life, TRACKR…
  • Completely Connected: With ANT plus and Bluetooth connectivity, its simple to connect TRACKR HEART RATE to a smartphone,…
Bestseller #3
  • COROS Heart Rate Monitor armband is designed for measuring heart rate during sports and activities. It is not intended t…
  • COROS Heart rate monitor with large band – Arm size (Large): 9.4 to 16.9 inches (24 to 43 cm)
  • COMFORTABLE and QUICK CLEANING: The fabric band is soft and breathable, more comfortable to wear than a chest strap. You…

Wahoo Fitness TICKR X Heart Rate Monitor Review: More Than Just Heart Rate

If you’re serious about your training, you know that data is king. But not all data is created equal. While wrist-based trackers are convenient, they often lack the precision needed for serious performance analysis. This is where a dedicated chest strap shines, and the wahoo fitness tickr x heart rate monitor is a top contender that promises not just accuracy, but a wealth of advanced metrics to elevate your performance.

It’s designed for the athlete who wants to go beyond simple heart rate zones and truly understand their body’s mechanics.

This isn’t just another heart rate strap; it’s a sophisticated training tool. With features like onboard memory for phone-free workouts, running dynamics analysis, and indoor cycling cadence tracking, the TICKR X aims to be the central hub for all your performance data. Whether you’re a cyclist, a runner, or a gym enthusiast, this device is built to capture the metrics that matter most, helping you train smarter, not just harder.

In a Nutshell

  • Unmatched Accuracy: As a chest-strap monitor, the TICKR X uses ECG technology to provide highly accurate heart rate and calorie burn data, far surpassing most wrist-based optical sensors.
  • Advanced Training Metrics: It goes beyond heart rate, tracking running dynamics like cadence, ground contact time, and vertical oscillation, plus indoor cycling cadence and rep counting for strength training.
  • Ultimate Connectivity: Equipped with both ANT+ and Bluetooth, it can connect to up to three Bluetooth devices simultaneously, working with virtually any fitness app, GPS watch, or bike computer.
  • Workout Freedom: With 50 hours of onboard memory, you can leave your phone behind. The TICKR X will record your workout and sync it to your device later, perfect for swimming, team sports, or minimalist runs.

An Overview of the Wahoo Fitness TICKR X Heart Rate Monitor

So, what exactly is the Wahoo TICKR X? At its core, it’s a premium chest-strap heart rate monitor. Unlike the optical sensors found on smartwatches that shine a light through your skin to measure blood flow, the TICKR X uses electrocardiography (ECG) to measure the electrical signals from your heart. This method is the gold standard for accuracy, providing real-time data you can trust during your most intense intervals and recovery periods.

But calling it just a heart rate monitor is a massive understatement. Wahoo has packed this device with an array of sensors, including a 3-axis accelerometer, that transform it into a comprehensive TICKR X fitness tracker. This allows it to capture movement data that provides deeper insights into your form and efficiency. For runners, this means access to advanced running dynamics.

For cyclists, it means cadence tracking on an indoor trainer without an extra sensor. For those hitting the gym, it even offers automatic rep counting for specific exercises.

This device is designed for the data-driven athlete who demands precision and versatility. It bridges the gap between different sports and training platforms, ensuring all your effort is captured, analyzed, and used to make you a better, stronger, and more efficient athlete. It’s the brain of your training operation, worn discreetly on your chest.

Diving Deep: Features and Specifications of the TICKR X

The magic of the Wahoo TICKR X lies in its powerful combination of features. It’s not just one thing that makes it stand out; it’s how all its capabilities work together to create a complete training ecosystem. Let’s break down the key features that make this device a powerhouse.

Dual-Band ANT+ and Bluetooth Technology

Connectivity is never an issue with the TICKR X. It features both ANT+ and Bluetooth Smart (BLE) technology, allowing it to connect to a massive range of devices. What’s truly impressive is its ability to maintain up to three simultaneous Bluetooth connections. This means you can connect it to your favorite training app on your phone (like the Wahoo Fitness app), your bike computer (like a Wahoo ELEMNT), and your smartwatch all at the same time, without any signal drops.

Advanced Running Dynamics

This is where the TICKR X truly separates itself from basic heart rate monitors. Using its built-in accelerometer, it provides what Wahoo calls “Running Smoothness” metrics. When paired with a compatible GPS watch, you get real-time feedback on:

  • Cadence: Your steps per minute.
  • Ground Contact Time: How long your foot stays on the ground with each step.
  • Vertical Oscillation: How much your torso bounces up and down with each stride.

Analyzing these metrics can help you improve your running form, reduce your risk of injury, and become a more efficient runner. It’s like having a running coach analyzing your every step.

Onboard Memory for Phone-Free Workouts

Ever wanted to go for a run or hit the gym without your phone? The TICKR X has 50 hours of onboard memory. Simply start your workout, and the device will record your heart rate, calorie burn, and workout duration. When you’re done, it automatically syncs the data to your Wahoo Fitness app the next time you’re near your phone. This is perfect for swimmers, team sports players, or anyone who wants a distraction-free session.

Indoor Cycling Cadence and Rep Counting

When you’re on an indoor trainer, the TICKR X can transmit your cycling cadence directly to your favorite app, like Zwift or TrainerRoad, eliminating the need for a separate cadence sensor on your bike’s crank arm. Furthermore, for strength training, the Wahoo Fitness app includes a rep counting feature for a selection of bodyweight and dumbbell exercises, helping you stay focused on your form instead of counting.

Getting Started: How to Use the Wahoo TICKR X

One of the best things about the Wahoo TICKR X is how simple it is to set up and use. You’ll be tracking your workouts in just a few minutes. Here’s a quick step-by-step guide to get you going.

  1. Activate the Device: The TICKR X comes with a CR2032 coin cell battery already installed. To wake it up, you just need to snap the pod onto the chest strap. The LED lights on the pod will flash, indicating it’s awake and ready to pair.

  2. Position the Strap: For the most accurate readings, you need to wear the strap correctly. Lightly moisten the electrode pads on the back of the strap (the rubbery parts). Position the strap around your chest so the sensor pod sits right in the center, just below your sternum. It should be snug but not uncomfortably tight.

  3. Pair with Your Device or App: Turn on Bluetooth on your phone, GPS watch, or bike computer. Open the app or device settings where you’d add a new sensor. The Wahoo TICKR X should appear in the list of available devices. Select it to pair. The blue LED on the pod will flash to confirm a connection is made, and the red LED will flash with each heartbeat.

  4. Start Your Workout: Once paired, you’re ready to go! Start a workout in your chosen app or on your device, and you’ll see your heart rate data streaming in real-time. If you’re using the Wahoo Fitness app, you can also access the advanced features like running dynamics and rep counting.

Pro Tip: To ensure a solid connection every time, always moisten the electrode contacts on the strap before putting it on. Sweat helps improve the conductivity, but a little water at the start guarantees an instant and reliable reading from the moment you begin your workout.

Seamless Connectivity: Compatibility with Fitness Apps and Devices

A fitness tracker is only as good as the ecosystem it works with, and this is an area where the heart rate monitor Wahoo TICKR X excels. Thanks to its dual-band ANT+ and Bluetooth connectivity, its compatibility is nearly universal, making it a flexible choice for almost any athlete.

It works flawlessly with over 50 of the most popular fitness apps. Whether you’re a cyclist on Zwift, a runner using Strava, or following a training plan on TrainerRoad, the TICKR X will integrate without a hitch. It’s also the perfect companion for Peloton users who want to broadcast accurate heart rate data to their bike or tread. Other compatible apps include The Sufferfest (now Wahoo SYSTM), RGT Cycling, Nike Run Club, and MapMyRun.

On the hardware side, the compatibility is just as impressive. It pairs easily with all Wahoo ELEMNT bike computers and KICKR trainers. It’s also fully compatible with Garmin, Polar, and Suunto GPS watches, as well as most other ANT+ enabled devices. For Apple users, it connects directly to your iPhone and Apple Watch, allowing you to see your heart rate in the native workout app or third-party applications.

The ability to hold three simultaneous Bluetooth connections means you never have to choose which device gets your data—you can send it to all of them at once.

The Heart of the Matter: Accuracy and Performance Review

When you buy a heart rate monitor, the number one question is: “Is it accurate?” For the Wahoo TICKR X, the answer is a resounding yes. As a chest-strap monitor using ECG technology, it directly measures the electrical activity of your heart. This method is inherently more reliable than the photoplethysmography (PPG) optical sensors found in most smartwatches, especially during high-intensity exercise.

Wrist-based sensors can be prone to inaccuracies caused by wrist flexion, sweat, and rapid movements, leading to data spikes or dropouts during a tough interval session. The TICKR X, secured against your chest, avoids these issues entirely. It provides clean, reliable data that accurately reflects your effort, whether you’re sprinting, lifting, or holding a steady pace. This precision is critical for training in specific heart rate zones, calculating training load, and accurately measuring calorie expenditure.

But what about the advanced metrics. The running dynamics are surprisingly consistent and provide valuable insights into form. While they may not be as comprehensive as a dedicated foot pod, they offer more than enough data for most runners to identify areas for improvement. The indoor cycling cadence is also a fantastic feature, proving to be responsive and accurate when tested against dedicated crank-arm sensors.

The rep counting feature is a bit more hit-or-miss and works best for simple, controlled movements, but it’s a nice bonus for guided workouts in the Wahoo app.

Wahoo TICKR vs. Competitors

To see how it stacks up, check out this great video comparison:

What Real Athletes Are Saying: User Reviews and Testimonials

Lab tests and feature lists are one thing, but real-world performance is what truly matters. Across the board, the Wahoo TICKR X receives high praise from athletes of all levels. Users frequently comment on its rock-solid connectivity and the ease of pairing it with their devices. The “set it and forget it” nature of the device is a major selling point for people who just want their gear to work.

The accuracy is another point of constant praise. Many users who switched from wrist-based monitors report that the TICKR X provides much more stable and believable data, especially during HIIT workouts and sprints. Runners and triathletes particularly love the advanced running dynamics, finding the data useful for making tangible improvements to their form and efficiency over time.

However, no product is perfect. Some users have noted that, like any chest strap, comfort can be subjective. While most find the soft, flexible strap comfortable, a small minority prefer the feel of an armband monitor. There are also occasional discussions online, like in this Reddit thread on r/wahoofitness, about the long-term durability of the connection points on the strap itself.

Wahoo has made design improvements in recent generations to address this, but it’s a point worth considering. Overall, the sentiment is overwhelmingly positive, with most users viewing it as an essential piece of their training equipment.

TICKR X vs. The Competition: How Does It Stack Up?

The heart rate monitor market is competitive, so how does the Wahoo TICKR X compare to other popular options? Its main competitors are the standard Wahoo TICKR and the Garmin HRM-Pro Plus. Let’s see how they compare.

Feature Wahoo TICKR X Wahoo TICKR (Standard) Garmin HRM-Pro Plus
Connectivity ANT+, 3x Bluetooth ANT+, 3x Bluetooth ANT+, 2x Bluetooth
Heart Rate Accuracy Excellent (ECG) Excellent (ECG) Excellent (ECG)
Onboard Memory Yes (50 hours) No Yes (Stores data during activity)
Running Dynamics Yes No Yes (Advanced)
Indoor Cadence Yes (Cycling) No Yes (Running)
Rep Counting Yes No No
Battery Life ~500 hours ~500 hours ~1 year (365 hours)
Price $$ $ $$$

As you can see, the Wahoo TICKR X sits in a sweet spot. It offers nearly all the advanced features of the more expensive Garmin HRM-Pro Plus, like onboard memory and running dynamics, but at a more accessible price point. Compared to the standard Wahoo TICKR, the “X” version is the clear choice for anyone who runs, does phone-free workouts, or wants deeper performance insights. The standard TICKR is a fantastic, no-frills option for those who only need accurate heart rate data broadcast to their devices.

The choice between the TICKR X and the Garmin HRM-Pro Plus often comes down to brand ecosystem. If you’re heavily invested in Garmin Connect and use a high-end Garmin watch, the HRM-Pro Plus offers slightly more advanced running dynamics that integrate perfectly. For everyone else, the Wahoo TICKR X provides a more versatile and cost-effective package with comparable features.

Built to Last: Battery Life and Maintenance Tips

One of the most convenient aspects of the Wahoo TICKR X is its battery life. It’s powered by a single CR2032 coin cell battery, which is inexpensive and widely available. Wahoo claims the battery will last for up to 500 hours of use, which for most people translates to over a year of training before needing a replacement. This is a huge advantage over rechargeable monitors that you have to remember to plug in every few weeks.

Replacing the battery is simple. The back of the sensor pod has a battery door that can be opened with a coin. Just pop the old battery out and put the new one in, ensuring the positive (+) side is facing up. The device is also rated IPX7 for water resistance, meaning it’s waterproof up to 5 feet.

You can sweat all over it, run in the rain, and even swim with it without any worries.

To maximize the life of your TICKR X, proper care is important. Here are a few maintenance tips:

  • Rinse the Strap: After every workout, rinse the strap with fresh water and hang it to dry. This prevents a buildup of salt and sweat, which can degrade the material and interfere with the sensor’s accuracy over time.
  • Unsnap the Pod: When you’re not using it, unsnap the sensor pod from the strap. This disconnects the battery and prevents it from draining unnecessarily.
  • Wash Occasionally: Every 7-10 uses, you can hand wash the strap (without the pod) with a small amount of mild soap, then rinse thoroughly.

The Full Picture: Pros and Cons of the Wahoo TICKR X

No review is complete without a balanced look at the good and the bad. The Wahoo TICKR X is an exceptional device, but it’s important to know its strengths and potential drawbacks before you buy.

Pros

  • Superb Accuracy: The ECG-based sensor provides gold-standard heart rate data that you can rely on for serious training.
  • Rich Feature Set: With running dynamics, onboard memory, and indoor cadence, it’s far more than just a heart rate monitor.
  • Excellent Connectivity: Dual-band ANT+ and three simultaneous Bluetooth connections make it compatible with almost any device or app you can think of.
  • Long Battery Life: The 500-hour battery life from a simple coin cell means you rarely have to think about charging or power.
  • Great Value: It offers premium features found in more expensive competitors at a very competitive price point.

Cons

  • Chest Strap Comfort: While the strap is soft, some users will always find chest straps less comfortable than armbands or watches, especially for very long activities.
  • Rep Counting is Limited: The automatic rep counting feature is a nice idea but is limited to a small set of exercises and can be inconsistent with less-than-perfect form.
  • Strap Durability Concerns: Some long-term users have reported issues with the strap’s connection points wearing out over time, though this is a common issue for most chest straps.

Where to Buy the Wahoo TICKR X and Price Comparison

The Wahoo TICKR X is a popular piece of fitness tech, and you can find it at most major electronics retailers, specialty running and cycling shops, and online.

For convenience and competitive pricing, one of the best places to purchase it is online. Prices can fluctuate based on sales and promotions, so it’s always a good idea to check for the latest deals. To see the most current price and get it delivered right to your door, you can check it out on Amazon.

Check the current price of the Wahoo TICKR X on Amazon

When comparing prices, remember to factor in the value you’re getting. While it costs more than a basic heart rate monitor, its advanced features can replace the need for separate running pods or cadence sensors, potentially saving you money in the long run. It’s an investment in better data and smarter training.

Frequently Asked Questions (FAQ)

Here are answers to some of the most common questions about the Wahoo TICKR X.

Is the Wahoo Tickr X accurate?

Yes, the Wahoo TICKR X is highly accurate. It uses ECG technology to measure the electrical signals of your heart, which is considered the gold standard for consumer heart rate monitoring. It is significantly more accurate and responsive than wrist-based optical sensors, especially during high-intensity workouts where arm movements can cause faulty readings.

How long does a Wahoo Tickr battery last?

The Wahoo TICKR X is powered by a CR2032 coin cell battery that provides up to 500 hours of workout time. For an athlete training an hour a day, five days a week, this translates to nearly two years of use before needing to replace the battery. This long battery life is a major convenience compared to rechargeable devices.

Which is better, Garmin or Wahoo?

Both Garmin and Wahoo make excellent heart rate monitors. The Wahoo TICKR X is often praised for its superior connectivity (three Bluetooth channels vs. Garmin’s two) and its value. The Garmin HRM-Pro Plus offers slightly more advanced running dynamics and integrates seamlessly into the Garmin Connect ecosystem.

The best choice often depends on your existing devices and which ecosystem you prefer.

Is the Wahoo Tickr Bluetooth?

Yes, the Wahoo TICKR X is equipped with Bluetooth Smart technology. It can connect to up to three Bluetooth devices at the same time, such as your smartphone, a tablet, and a laptop. It also features ANT+ connectivity, making it compatible with a wide range of GPS watches and bike computers.

Where to wear the Wahoo Tickr?

You should wear the Wahoo TICKR X around your chest. The sensor pod should be positioned in the center of your chest, just below your sternum, with the Wahoo logo facing upright. The strap should be snug enough that it doesn’t move during exercise but not so tight that it restricts your breathing.

Final Thoughts: Is the Wahoo TICKR X for You?

After a thorough review, it’s clear that the wahoo fitness tickr x heart rate monitor is a phenomenal tool for any athlete who is serious about data-driven training. It delivers on its promise of accuracy, reliability, and versatility. The combination of precise heart rate tracking, advanced running dynamics, and phone-free workout capability makes it one of the most powerful and valuable fitness trackers on the market.

If you’re still relying on a wrist-based tracker for your heart rate data and feel like you’ve hit a plateau, upgrading to the TICKR X could be the key to unlocking your next level of performance. The insights it provides into your running form and training intensity are simply not available from most other devices in its price range.

For cyclists, runners, triathletes, and dedicated gym-goers, the Wahoo TICKR X is a fantastic investment. It consolidates the function of multiple sensors into one comfortable, easy-to-use device. If you’re ready to train smarter and get a true understanding of your body’s performance, this is the heart rate monitor to get.

Ready to take your training to the next level? Find the Wahoo TICKR X on Amazon and start tracking the data that matters.

Best Place to Buy Watches Online: A First-Timer’s Buying Guide (2025)

Bestseller #1
  • 📞 2026 Make/Answer Calls & Smart Notifications – The new digital smart watch uses the latest Bluetooth 5.3 connection te…
  • ⌚ 1.96” HD Touch Screen & 200+ DIY Watch Faces – The smart watch for men women is equipped with a 385*472mm extra-large…
  • 💖 24 Hour/7 Day Health Monitoring – The iOS and Android smart watch is equipped with high-performance optical sensors th…
Bestseller #2
  • Bluetooth Calling and Message Reminder: With the built-in microphone & speaker in the smart watches, you can make and re…
  • 1.85 HD Touch Display and 100+ Watch Faces: Featuring a vibrant 1.85-inch HD full-touch display, this fitness smartwatch…
  • 24/7 Health Monitoring and Sleep Tracking: BetterEquipped with advanced optical sensors, this activity tracker continuou…
Bestseller #3
  • 1.91-Inch High-Definition Full Screen: Experience the elegance of our fitness watch 1.91-inch HD full touch display (wit…
  • Wireless Calls and Message Push: Smart watches for men keep you connected anytime, anywhere, with clear speaker sound qu…
  • 110+ Sports Modes and IP68: The fitness tracker provides up to 110+ sports modes, covering running, cycling, swimming, f…

Best Place to Buy Watches Online: A First-Timer’s Buying Guide (2025)

The thrill of finding the perfect watch is incredible, but the online marketplace can feel like a maze. With countless sellers, varying prices, and the looming fear of fakes, figuring out the best place to buy watches online can be overwhelming. You want the excitement of the purchase without the anxiety of getting it wrong. That’s exactly why we’ve created this guide—to cut through the noise and show you exactly where to look, what to watch out for, and how to score the timepiece of your dreams with total confidence.

Whether you’re hunting for a brand-new luxury piece, a vintage grail, or a fantastic deal on a pre-owned classic, the right online store is out there. This guide will break down the top retailers, marketplaces, and specialists, giving you the tools to make an informed decision. Get ready to find your next favorite watch!

What You’ll Learn

  • Top Retailer Types: Understand the key differences between authorized dealers (ADs), gray market sellers, and pre-owned specialists to choose the right option for your needs and budget.
  • Authentication is Key: Learn the essential tips for verifying a watch’s authenticity online, including using escrow services and seller verification platforms to protect your purchase.
  • Warranty & Returns Matter: Discover the critical distinction between a manufacturer’s warranty and a third-party seller’s warranty, and why you must always read the return policy fine print.
  • Pre-Owned vs. New: Explore the pros and cons of buying second-hand watches online, including where to find the best deals and how to navigate the vintage market safely.
  • Smart Shopping Strategies: Get actionable advice on comparing prices, understanding shipping and customs fees, and identifying red flags to avoid common pitfalls.

Top Online Watch Stores: Where to Start Your Search

Finding the right place to buy watches online depends entirely on what you’re looking for. Are you after a factory-fresh model with a full manufacturer warranty? Or are you hunting for a discontinued piece or a great deal? Here’s a breakdown of the top online watch stores, categorized by type.

1. The Global Marketplaces: Maximum Selection

These are massive platforms that connect thousands of dealers and private sellers with buyers worldwide. They offer the largest selection but require you to be a savvy shopper.

  • Chrono24: The undisputed king of watch marketplaces. With millions of listings from over 100 countries, you can find virtually any watch here. Its greatest strength is the Buyer Protection program, which includes an escrow service. Your money is held securely until you’ve received the watch and confirmed it’s authentic, giving you incredible peace of mind.
  • eBay: Don’t sleep on eBay, especially for watches over $2,000. Their Authenticity Guarantee program means that eligible watches are shipped to a third-party authenticator for inspection before they get to you. This has transformed eBay into a much safer place for high-value watch purchases.

2. The Gray Market Dealers: Amazing Prices

Gray market dealers sell brand-new, authentic watches that have been acquired from sources other than the manufacturer directly, often from authorized dealers offloading excess inventory. The result? Lower prices for you.

  • Jomashop: A giant in the gray market world, Jomashop is known for its highly competitive pricing on a massive range of brands, from Seiko to Omega. The catch? You don’t get the manufacturer’s warranty. Instead, Jomashop provides its own warranty, which is a crucial factor to consider.
  • WatchMaxx: Similar to Jomashop, WatchMaxx offers significant discounts on new luxury watches. They are another trusted name in the gray market space, providing their own warranty service in place of the factory one.

3. The Pre-Owned Specialists: Curated & Certified

These retailers specialize in buying, servicing, and selling second-hand luxury watches. They offer a curated experience with a guarantee of authenticity.

  • Bob’s Watches: The go-to destination for pre-owned Rolex. Bob’s Watches is famous for its transparent pricing model, where they publish both the “buy” and “sell” prices for their watches. Every timepiece is certified authentic by their in-house experts.
  • Watchfinder & Co.: Owned by the luxury group Richemont (who also owns brands like Cartier and IWC), Watchfinder is a highly reputable UK-based dealer with a global presence. Every watch they sell is meticulously inspected, serviced, and comes with a 24-month warranty.

4. Authorized Dealers (ADs) Online: The Full Brand Experience

Many official brand retailers now have robust online stores. Buying from an AD is the only way to get a brand-new watch with a full, official manufacturer’s warranty.

  • Teddy Baldassarre: Starting as a popular YouTube channel, Teddy Baldassarre has grown into a major authorized dealer for dozens of respected brands like Omega, Longines, and Oris. They offer a fantastic customer experience backed by deep product knowledge.
  • Watches of Switzerland / Mayors: These are major luxury retail chains that are authorized dealers for top-tier brands, including Rolex, Patek Philippe, and Audemars Piguet. Their online presence offers the same trust and service as their physical boutiques.

The Big Debate: Online vs. In-Store Watch Prices

One of the biggest reasons people decide to buy watches online is the potential for better pricing. But is it always cheaper? The answer is nuanced and depends heavily on where you shop and what you’re buying.

Generally, online retailers have lower overhead costs than brick-and-mortar stores. They don’t need prime retail space or a large sales staff, and these savings are often passed on to the customer. This is most evident with gray market dealers like Jomashop, where discounts of 20-40% off MSRP are common for many luxury brands.

However, for highly sought-after models from brands like Rolex or Patek Philippe, the situation flips. These watches often sell for significantly above their retail price on the secondary market (both online and in-store). In this case, the only way to get one at MSRP is to build a relationship with a local authorized dealer and get on a waiting list, which can take years.

When comparing prices, always factor in the total cost. An online price might seem lower, but you need to account for shipping, insurance, and potentially customs duties or taxes if buying internationally. A local store’s price is typically all-inclusive. The biggest trade-off is often the warranty—a lower price on the gray market comes at the cost of the official manufacturer’s warranty, a factor we’ll explore more deeply.

Trust Signals: Using Customer Reviews and Ratings Effectively

In the world of online watch buying, reputation is everything. Before you even think about adding a watch to your cart, you need to become a detective and investigate the seller’s track record. Customer reviews and ratings are your best tools for this, but you need to know how to read them.

On large marketplaces like Chrono24, pay close attention to the dealer’s rating, the number of reviews, and how long they’ve been on the platform. A dealer with thousands of positive reviews over several years is a much safer bet than a new seller with only a handful. Read the actual comments—do they mention fast shipping, accurate descriptions, and good communication? These are all signs of a professional operation.

Beyond the platform itself, do a broader search. Look for discussions about the seller on watch forums like Reddit‘s r/Watches or WatchUSeek. The community there is incredibly knowledgeable and vocal about their experiences. A quick search for “[Seller Name] review” can uncover valuable insights or red flags that you wouldn’t find otherwise.

As one user on a Reddit discussion noted, “Jomashop and Watchmaxx are both good. I’ve bought several watches from both and never had an issue,” which is a common sentiment that builds trust in those gray market dealers.

Finally, look for professional affiliations. Are they members of trade organizations like the International Watch & Jewelry Guild (IWJG)? Do they have a physical storefront you can verify on Google Maps? These details help separate established businesses from fly-by-night operations.

The Authenticity Check: Your Guide to Avoiding Fakes

This is the number one fear for anyone looking to buy watches online: paying thousands of dollars for a counterfeit. Thankfully, the best online watch stores have implemented strong measures to protect buyers, and there are several steps you can take to ensure you’re getting the real deal.

First and foremost, use the platform’s safety nets. Chrono24’s Escrow service is your best friend. It ensures the seller doesn’t get paid until you have the watch in your hands and have verified it. This gives you a window to take it to a trusted watchmaker for inspection if you have any doubts.

Similarly, eBay’s Authenticity Guarantee for watches over $2,000 is a fantastic service that adds a professional layer of verification to the process.

Next, follow the golden rule of watch collecting: buy the seller, not the watch. A reputable seller with a long history of positive feedback is your best defense against fakes. Scrutinize the listing photos. Are they high-quality, original pictures of the actual watch for sale, or are they generic stock photos? A good seller will provide clear, detailed images from multiple angles, including the movement if possible.

Pro Tip: When you receive the watch, check the details meticulously. The quality of finishing on the dial, hands, and case of a luxury watch is extremely difficult to replicate. Look for crisp text, perfectly applied lume, and smooth movement of the hands. If anything feels off, trust your gut and use your buyer protection window to get it professionally authenticated.

Finally, if a deal seems too good to be true, it almost certainly is. A brand-new Rolex Submariner will not be selling for 50% off from a random website. Stick to well-known, trusted platforms and sellers to minimize your risk.

Finding Your Perfect Match: How to Choose a Watch Online

Shopping for a watch online gives you access to an almost infinite catalog, which is both exciting and a little daunting. How do you narrow it down to the one that’s right for you? It starts with understanding your personal style and how you plan to wear the watch.

Think about the main categories of watches:

  • Dive Watches: Characterized by their rotating bezels and high water resistance. They are robust, legible, and have a sporty, versatile look that works in almost any casual setting. Think of the classic Rolex Submariner or Seiko SKX007.
  • Chronographs: These are watches with a stopwatch function, featuring extra pushers and subdials. They have a technical, often racing-inspired aesthetic. The Omega Speedmaster Professional is the most iconic example.
  • Dress Watches: Typically slim, simple, and elegant, often on a leather strap. They are designed to be worn with formal attire and easily slip under a shirt cuff. Look to brands like Patek Philippe or Jaeger-LeCoultre for quintessential dress watches.
  • Field Watches: Originating from military use, these are rugged, highly legible, and no-nonsense timepieces. They prioritize function over form and have a utilitarian charm.

Once you have a style in mind, consider the size. Watch case diameter is measured in millimeters (mm). A common mistake for first-time buyers is getting a watch that’s too large or too small for their wrist. If you can, try on watches of different sizes in a store to see what you prefer.

Generally, sizes from 36mm to 42mm are a safe bet for the average wrist.

Use the powerful filtering tools on websites like Chrono24 to your advantage. You can filter by brand, style, case size, movement type, and price to quickly narrow down the millions of options to a manageable selection that fits your criteria perfectly.

The Perks of Clicks Over Bricks: Benefits of Buying Watches Online

While there’s a certain romance to visiting a physical watch boutique, the advantages of buying online are compelling and have converted millions of enthusiasts. The benefits go far beyond just convenience.

First is the unmatched selection. A local store can only carry so much inventory. Online, the entire world’s inventory is at your fingertips. You can browse rare vintage pieces, limited editions, and models that were never even sold in your country.

This access is a dream for collectors and anyone looking for something unique.

Second is competitive pricing. As mentioned earlier, the lower overhead of online retailers often translates into better prices. More importantly, the ability to easily compare prices across multiple sellers in minutes empowers you as a buyer. You can quickly see the market rate for a specific model and ensure you’re not overpaying.

Third is the wealth of information and research. The internet is home to countless reviews, videos, and forum discussions about nearly every watch ever made. You can spend hours learning about a watch’s history, movement, and common issues before making a purchase—a level of due diligence that’s difficult to achieve on the spot in a store.

Finally, there’s the lack of sales pressure. You can take your time, deliberate over your choice for days or weeks, and make a decision on your own terms without a salesperson looking over your shoulder. This thoughtful approach often leads to a more satisfying purchase in the long run.

Decoding the Fine Print: Warranty and Return Policies

This is one of the most critical, yet often overlooked, aspects of buying a watch online. Understanding the warranty and return policy before you buy can save you from a major headache later on. The policies differ dramatically between authorized dealers and gray market sellers.

When you buy from an Authorized Dealer (AD), your watch comes with the full manufacturer’s warranty. This warranty is international and will be honored by any of the brand’s service centers worldwide. It typically lasts from two to five years (with some brands like Omega and Rolex now offering more) and covers any manufacturing defects.

When you buy from a Gray Market Dealer, you do not get the manufacturer’s warranty. The original warranty card may be included, but it will likely be unstamped or undated, rendering it void. Instead, the gray market seller provides their own in-house warranty. This means if something goes wrong, you must send the watch back to them for repair, not the manufacturer.

The quality and scope of these warranties can vary, so it’s essential to read the terms carefully.

Return policies are equally important. Most online sellers offer a return window, but the conditions can be strict. Often, you cannot return a watch if you’ve removed any of the protective plastics, sized the bracelet, or if it shows any signs of wear. The return period can be as short as a few days, so inspect your watch immediately upon arrival.

Make sure you understand who pays for return shipping and if there are any restocking fees involved.

The Thrill of the Hunt: Best Online Marketplaces for Second-Hand Watches

Buying a pre-owned watch is an amazing way to get a timepiece with history, access a discontinued model, or get a luxury watch at a more accessible price point. The second-hand market is booming, and these online platforms are the best places to explore it.

Chrono24 stands out as the largest marketplace for both new and used watches. Its sheer volume of listings from private sellers and dealers makes it an essential tool for any watch hunter. The platform’s search filters allow you to specify the condition of the watch (from unworn to used) and whether it comes with its original box and papers. The escrow service is particularly valuable when buying pre-owned, as it gives you time to verify the watch’s condition and authenticity.

Bob’s Watches is a specialist, focusing primarily on pre-owned Rolex but also carrying other top brands like Omega and Panerai. Their process is highly curated. They buy watches from the public, service them in-house, and then list them for sale. This means you are buying directly from them, not a third-party seller, which adds a layer of trust and accountability.

Every watch is guaranteed authentic and comes with a one-year warranty.

eBay has become a major player in the pre-owned luxury space thanks to its Authenticity Guarantee. This program has significantly reduced the risk of buying from individual sellers. You can find incredible variety on eBay, from vintage Seikos to modern Patek Philippes. The auction format can sometimes lead to great deals, but the “Buy It Now” option is also widely available for those who prefer a fixed price.

What’s Hot: Trending Watch Brands to Buy Online

While the timeless appeal of heritage brands will never fade, the online watch world is also a hotbed for exciting new trends and brands that offer incredible value. Keeping an eye on these can help you find a truly special piece.

The giants like Rolex, Omega, and Patek Philippe continue to dominate the luxury conversation, with demand for their sports models at an all-time high on pre-owned marketplaces. On the more accessible side, Japanese brand Seiko remains a fan favorite, beloved for its high-quality dive watches and mechanical movements at unbeatable prices.

However, one of the most exciting trends is the rise of microbrands. These are small, independent companies, often founded by passionate enthusiasts, that sell directly to consumers online. They cut out the middleman to offer watches with premium features—like Swiss movements, sapphire crystals, and innovative designs—at a fraction of the cost of established luxury brands.

Pro Tip: A fantastic example of a microbrand that punches way above its weight is LIV Swiss Watches. They create bold, rugged, and meticulously crafted Swiss-made chronographs and divers that have gained a cult following. Finding brands like this on platforms like Amazon or directly from their websites is one of the great joys of shopping for watches online.

Exploring these microbrands is a great way to get a unique, high-quality timepiece that stands out from the crowd. They represent the passion and innovation that make the modern watch scene so vibrant.

From Their Door to Yours: Shipping and Handling Considerations

You’ve found the perfect watch and are ready to click “buy.” But before you do, it’s crucial to understand the logistics of getting a valuable and delicate item shipped to you, especially if it’s coming from another country.

First, always confirm that the shipment is fully insured. Any reputable seller will use a shipping method that includes insurance for the full value of the watch. This protects both you and the seller in the rare event that the package is lost, stolen, or damaged in transit. Common carriers for valuable items include FedEx, UPS, and DHL, often using their priority services.

If you are buying from a seller in another country, you must be prepared for customs duties and import taxes. These fees are determined by your country’s government and are separate from the seller’s shipping charges. They can be a significant additional cost, sometimes as much as 20-30% of the watch’s value. Some platforms, like eBay with its Global Shipping Program, will calculate and collect these fees at checkout, which is incredibly convenient.

Otherwise, you’ll be responsible for paying the carrier directly before they release the package to you.

Finally, think about delivery security. Many sellers will require a direct signature upon delivery to ensure the watch doesn’t get left on your doorstep. It’s a good idea to have the package shipped to a location where you know someone will be available to sign for it, like your office or a FedEx/UPS store for pickup. Taking these precautions ensures your new timepiece arrives safely and securely.

Frequently Asked Questions (FAQ)

Is it a good idea to buy a watch online?

Yes, it is an excellent idea to buy a watch online, provided you do your homework. The main advantages are a vastly larger selection, more competitive pricing, and the convenience of shopping from home. The key is to buy from reputable sources. Using trusted marketplaces with buyer protection programs like Chrono24’s escrow service or eBay’s Authenticity Guarantee minimizes risk and makes the process very safe.

Is Jomashop a good place to buy watches?

Jomashop is a very popular and generally trusted gray market dealer. They are known for offering significant discounts on authentic, brand-new watches. The main thing to understand is that you will not receive the manufacturer’s warranty. Instead, Jomashop provides its own warranty.

For many buyers, the substantial cost savings are well worth this trade-off, especially for reliable watches that are unlikely to have issues.

Are all watches on Chrono24 real?

Chrono24 is a marketplace, so it’s home to both professional dealers and private sellers. While the platform has strict policies against counterfeits, the ultimate responsibility lies in vetting the seller. However, Chrono24’s Buyer Protection program is a massive safety net. The escrow system ensures your payment is held until you receive the watch and approve it, giving you time to have it authenticated.

By sticking to sellers with high ratings and many transactions, you can buy with a very high degree of confidence.

What are red flags in luxury watch sales?

Several red flags should make you pause. Be wary of prices that are drastically lower than the established market rate—if it seems too good to be true, it is. Low-quality photos, stock images, or a seller’s refusal to provide more pictures are also warning signs. Vague descriptions, a lack of feedback or a brand-new seller profile, and pressure to complete the transaction outside of the platform’s secure payment system are all major red flags.

Why does Jomashop sell so cheap?

Jomashop can sell watches for less than authorized dealers because they are a gray market seller. They acquire their inventory from a network of distributors and authorized dealers who are looking to offload excess stock. By buying in bulk and operating with lower overhead than a luxury boutique, they can pass those savings on to customers. The primary trade-off for the lower price is the absence of a factory warranty.

Final Thoughts

Navigating the world of online watch buying is an adventure, and with the right knowledge, it’s an incredibly rewarding one. The key is to understand the landscape—from the trusted authorized dealers to the deal-rich gray market and the treasure-filled pre-owned platforms. By prioritizing seller reputation, using platform protections like escrow services, and carefully reading the fine print on warranties and returns, you can shop with complete confidence.

The best place to buy watches online isn’t a single website; it’s the one that best matches your specific search. Whether you’re chasing the security of a full manufacturer’s warranty from an AD, the unbeatable price of a gray market find, or the unique character of a vintage piece from a specialist, the perfect source is waiting for you.

So, do your research, trust your instincts, and get ready to find the watch that you’ll be excited to wear for years to come. Happy hunting!

Your Ultimate Travel Packing Checklist for Women: Stress-Free Trips!

Bestseller #1
  • Effortless Organization: Streamline your gadgets with this innovative travel tech organizer. Keep all your devices in on…
  • Reliable Travel Companion: This durable travel essential features smooth-action zippers for quick access. The water-resi…
  • Versatile Travel Essential: This multipurpose bag is a must-have for all your journeys. Whether it’s a weekend getaway, …
Bestseller #2
  • Compact Size: The electronics organizer bag is 9.4″ L x 6.7″ W x 1.4″ H and weighs 0.24 lb, making it a lightweight and …
  • Secure Storage: The bag features 5 elastic loops(S) and 2 elastic loops(L) to keep cables and accessories organized and …
  • Multipurpose Use: This practical bag is ideal for office, business, daily use, outdoor activities, and makes a great gif…
Bestseller #3
  • A well-thought-out Pouch: No matter your daily commute or an extended vacation, you may travel with a lot of electronic …
  • Smart Organization: This tech bag has smart divisions and powerful storage features to meet your richer storage needs. T…
  • Built for Convenience: The organizer pouch stands up nicely on a tabletop whether it’s full or empty, giving an unobstru…

Your Ultimate Travel Packing Checklist for Women: Stress-Free Trips!

Let’s be real: the excitement of an upcoming trip can quickly get overshadowed by the sheer panic of packing. Staring into an empty suitcase, wondering what to bring, what to leave, and how to make it all fit is a universal travel stressor. But it doesn’t have to be. A well-thought-out travel packing checklist for women is the secret weapon to a seamless, stress-free start to any adventure.

This isn’t just a list; it’s your roadmap to packing smarter, lighter, and with total confidence, no matter where you’re headed.

This guide is designed to be the only women’s packing list you’ll ever need. Whether you’re planning a tropical beach getaway, a European city tour, or a rugged outdoor adventure, we’ve got you covered. Get ready to transform your packing process from a chore into an exciting first step of your journey!

Quick Summary

  • Build a Capsule Wardrobe: Focus on versatile, mix-and-match clothing items in a neutral color palette to create dozens of outfits from just a few key pieces.
  • Organize Like a Pro: Use packing cubes for clothes and a dedicated toiletry bag for personal items to keep your suitcase tidy and everything easy to find.
  • Prioritize Footwear: Limit yourself to three pairs of shoes: comfortable walkers for daytime, stylish flats or sandals, and one dressier option for evenings.
  • Don’t Forget the Essentials: Always double-check for your passport, necessary visas, travel documents, medications, and chargers before you leave the house.
  • Pack for Your Destination: Tailor your list based on the climate and planned activities, whether it’s adding a swimsuit for the beach or thermal layers for a winter trip.

The Foundation: Essential Clothing for Any Trip

Creating the perfect travel wardrobe is an art, and the masterpiece is a suitcase filled with versatile pieces that can be mixed and matched effortlessly. The goal isn’t to bring your entire closet, but to curate a small collection of items that work hard for you. This approach, often called a capsule wardrobe, is the key to packing light without sacrificing style.

Building a Versatile Travel Wardrobe

Start with the basics. For a one-week trip, a good rule of thumb is to pack:

  • Tops: 5-7 versatile tops. Include a mix of neutral t-shirts or tank tops, a couple of blouses or nicer tops for evenings, and at least one long-sleeved shirt for layering.
  • Bottoms: 3 bottoms that pair with all your tops. This could be a pair of well-fitting jeans, comfortable travel pants, and a skirt or a pair of tailored shorts depending on your destination.
  • Dresses/Jumpsuits: 1-2 one-piece outfits. A simple black dress can be dressed down with sneakers for a day of exploring or dressed up with accessories for dinner. A comfortable jumpsuit is another fantastic all-in-one option.
  • Outerwear: 1-2 layering pieces. A lightweight jacket (like a denim or leather jacket) and a neutral cardigan or sweater are perfect. They can be worn over any outfit and are easy to carry if the weather changes.

The Magic of a Neutral Color Palette

Choosing a core color palette is a packing game-changer. Stick to 2-3 neutral colors for your main pieces—think black, navy, beige, white, or grey. These colors all go with each other, making it impossible to create a clashing outfit.

Then, add 1-2 accent colors through your accessories like scarves, jewelry, or a fun top. This strategy ensures maximum outfit combinations from a minimal number of items. You’ll be amazed at how many different looks you can create!

Don’t Forget Undergarments and Sleepwear

This seems obvious, but it’s easy to miscalculate. Pack one pair of underwear for each day of your trip, plus two extras just in case. For bras, 2-3 should be sufficient (a mix of neutral, sports, and strapless, depending on your outfits). Pack 3-4 pairs of socks if you’ll be wearing closed-toe shoes.

Finally, choose comfortable sleepwear that is appropriate for your accommodation’s environment.

Your Home Away From Home: Toiletries & Personal Care

Navigating airport security rules and minimizing spills requires a smart approach to packing toiletries. The key is to downsize everything. Never pack full-size bottles unless you’re checking a bag for a very long trip. Instead, invest in a set of reusable, travel-sized bottles and pots for your favorite products.

The Ultimate Skincare & Makeup List (Travel-Sized!)

Your skin still needs love on the road! Decant your must-have products into smaller containers.

  • Skincare: Face wash, moisturizer with SPF, serum, eye cream, and makeup remover wipes or a travel-sized cleansing balm.
  • Makeup: Stick to the essentials. A good concealer, tinted moisturizer or foundation, mascara, blush, and a versatile lip color are often all you need. A small, neutral eyeshadow palette can cover both day and night looks.
  • Don’t Forget: Sunscreen for both face and body is non-negotiable!

Hair Care on the Go

Unless you’re very particular, consider using the hotel-provided shampoo and conditioner to save space. If you have specific hair needs, solid shampoo and conditioner bars are a fantastic, leak-proof alternative. Also pack a travel-sized dry shampoo, a small hairbrush or comb, and a few hair ties or clips.

Health & Hygiene Essentials

This category is crucial for comfort and well-being. Your list should include a toothbrush, toothpaste, deodorant, and any menstrual products you might need (it’s always better to bring your preferred brand from home). Hand sanitizer and a small pack of tissues are also travel lifesavers.

Organizing It All: The Power of a Good Toiletry Bag

Throwing everything into a plastic bag is a recipe for disaster. A high-quality, well-designed toiletry bag keeps everything organized, prevents leaks, and makes your daily routine so much easier. Look for one with multiple compartments and a waterproof lining.

The Bagsmart Toiletry Bag is a fantastic option because it hangs, giving you easy access to everything without cluttering up a tiny hotel bathroom counter. Its multiple transparent compartments let you see everything at a glance, so you’re not digging around for your lip balm. It’s the perfect way to keep your liquids, makeup, and other essentials perfectly organized.

Step Smarter: Choosing the Right Footwear

Shoes are often the bulkiest and heaviest items in a suitcase, so choosing wisely is critical. The goal is to cover all your bases—comfort, style, and activity—with the fewest pairs possible. For most trips, three pairs are all you need.

The Holy Trinity of Travel Shoes

  1. Comfortable Walking Shoes: This is your most important pair. You’ll likely be on your feet exploring for hours, so prioritize comfort above all else. This could be a pair of stylish sneakers, supportive flats, or comfortable walking sandals. Wear this pair on the plane to save space in your luggage.
  2. Versatile Flats or Sandals: Pack a pair of shoes that can transition from day to night. A pair of chic leather sandals, ballet flats, or loafers can be worn for sightseeing during the day and still look appropriate for a nice dinner in the evening.
  3. One Dressier Option: Depending on your itinerary, you might want something a little more elevated. This could be a pair of block heels, wedges, or elegant heeled sandals. Choose something that is still relatively comfortable to walk in and pairs with your dressier outfits.

How to Pack Shoes Without Getting Everything Dirty

Never just toss your shoes into your suitcase. The soles are dirty and can stain your clean clothes. Use shoe bags, disposable shower caps, or simple plastic grocery bags to cover each pair before packing them. Place them along the edges of your suitcase, heel to toe, to maximize space.

Pro Tip: Stuff your shoes with small items like socks, underwear, or chargers. This not only saves space but also helps your shoes keep their shape during transit.

The Game-Changers: Must-Have Travel Accessories

While clothing and toiletries form the core of your packing list, the right accessories can elevate your travel experience from good to great. These are the items that provide comfort, organization, and peace of mind on the road.

Organization is Everything: Packing Cubes and Organizers

If you’re not using packing cubes, you’re missing out! These small fabric cubes are revolutionary for organization. Use them to compartmentalize your clothing—one for tops, one for bottoms, one for underwear, etc. They not only keep your suitcase incredibly neat but also compress your clothes, saving a surprising amount of space.

Beyond clothes, consider an electronics organizer. A dedicated case for your chargers, cables, and adapters prevents a tangled mess at the bottom of your bag. The Bagsmart Electronic Organizer is perfect for this, with dedicated loops and pockets for all your tech gear.

Comfort in Transit

Long flights or train rides can be tough. A few key items can make a world of difference. A supportive travel pillow (inflatable or memory foam), a quality eye mask to block out light, and a pair of noise-canceling headphones or earplugs are essential for getting some rest while on the move.

Security and Peace of Mind

Feeling secure allows you to relax and enjoy your trip. A small TSA-approved lock for your luggage can deter opportunistic theft. For crowded areas, a money belt or anti-theft bag can keep your passport, cash, and cards safe and out of sight.

Staying Hydrated and Eco-Friendly

A collapsible or reusable water bottle is a must. It saves you money on buying overpriced water at the airport and is much better for the environment. Most airports have water filling stations past security, so you can stay hydrated throughout your flight.

Packing for the Elements: A Seasonal Travel Guide

Your destination’s climate is the single biggest factor that should influence your packing list. A travel checklist for women heading to Thailand in July will look very different from one for a trip to Iceland in December. Here’s how to adjust for the seasons.

Sun-Kissed Summer Trips: What to Pack for Warm Weather

For tropical, beach, or summer city destinations, focus on lightweight, breathable fabrics like cotton, linen, and rayon.

  • Clothing: Pack extra shorts, skirts, sundresses, and tank tops. Include at least two swimsuits so one can dry while you wear the other. A wide-brimmed hat and sunglasses are crucial for sun protection.
  • Footwear: Focus on open-toed shoes like sandals and espadrilles, but still bring one pair of closed-toe sneakers for more active days.
  • Extras: Don’t forget after-sun lotion or aloe vera, insect repellent (especially for tropical locations), and a lightweight beach cover-up or sarong.

Cozy Winter Escapes: Layering for the Cold

For cold-weather trips, layering is your best friend. It allows you to adapt to changing temperatures as you move from the frigid outdoors to heated indoor spaces.

  • Clothing: Start with a base layer of thermal underwear (tops and bottoms). Add a mid-layer of fleece or wool sweaters. Your outer layer should be a waterproof and windproof coat. Pack warm pants like fleece-lined leggings or wool trousers instead of standard jeans.
  • Accessories: These are non-negotiable. Pack a warm hat, gloves or mittens, a scarf, and thick wool socks. These small items make a huge difference in your overall warmth and comfort.
  • Footwear: You’ll need waterproof, insulated boots with good traction to handle snow or ice.

Stay Connected: Your Essential Tech & Electronics Checklist

In our connected world, forgetting a key piece of tech can be a major headache. Create a dedicated spot in your carry-on for all your electronics and double-check this list before you walk out the door.

The Non-Negotiables: Phone, Chargers, and Power Bank

Your smartphone is your camera, map, translator, and lifeline. Make sure it’s fully charged before you leave. Pack its corresponding wall charger and cable. A portable power bank is one of the most important travel items you can own; it’s a lifesaver for long travel days when you don’t have access to an outlet.

Adapters and Converters: A Global Traveler’s Best Friend

Outlet shapes and voltage vary around the world. Research your destination’s requirements before you go. A universal travel adapter is a great investment, as it will work in most countries. Remember that an adapter only changes the plug shape; a converter changes the electrical voltage.

Most modern electronics (like phones and laptops) are dual-voltage and don’t need a converter, but always check the fine print on your device’s charger.

Entertainment for the Journey

Download movies, podcasts, music, and books to your devices before you leave home, as Wi-Fi can be spotty or expensive. A pair of noise-canceling headphones is fantastic for blocking out engine noise on a plane. An e-reader like a Kindle is perfect for book lovers, as it holds thousands of books in one lightweight device.

Health First: Building Your Travel First-Aid Kit

While you can often find pharmacies abroad, it’s always wise to carry a small, personalized first-aid kit with familiar remedies for minor issues. This way, you’re prepared and don’t have to navigate a foreign pharmacy when you’re feeling unwell.

Basic Medications and Pain Relievers

Pack a small supply of over-the-counter medications you use at home. This should include:

  • Pain and fever relievers (ibuprofen or acetaminophen)
  • Antihistamines for allergic reactions
  • Motion sickness medication if you’re prone to it
  • Medication for stomach upset (antacids, anti-diarrhea pills)
  • Cold and flu medicine

Blister Care and Minor Injury Supplies

A day of heavy walking can easily lead to blisters. Pack moleskin or blister bandages—they are far more effective than regular bandages. Also include a few assorted bandages, antiseptic wipes, and a small tube of antibiotic ointment for minor cuts and scrapes.

Prescription Medications and Personal Health Items

This is the most critical part of your health kit. Always pack your prescription medications in your carry-on bag, never in your checked luggage. Bring enough for your entire trip, plus a few extra days’ worth in case of delays. Keep them in their original prescription bottles to avoid issues at customs, and carry a copy of your prescription if possible.

The Lifeline: Documents, Money, and Important Papers

This is the stuff you absolutely cannot forget. Keep all these items together in a secure, easily accessible part of your carry-on bag. Losing any of these can turn a dream vacation into a nightmare.

Your Passport, Visas, and IDs

Your passport is your golden ticket. Check its expiration date well in advance of your trip—many countries require it to be valid for at least six months beyond your planned departure date. Make sure you have any necessary visas for your destination. Also, carry another form of photo ID, like your driver’s license.

Tickets, Boarding Passes, and Reservations

While most of this is digital now, it’s a good idea to have screenshots or offline copies available in case you can’t get Wi-Fi. This includes your flight boarding passes, train tickets, hotel confirmations, and any tour or event reservations. A printed copy of your itinerary can also be helpful.

Managing Money Abroad

Notify your bank and credit card companies of your travel dates to prevent them from freezing your accounts for suspicious activity. Carry a mix of payment methods: two different credit cards (in case one is lost or doesn’t work), one debit card for ATM withdrawals, and a small amount of local currency for immediate expenses like a taxi from the airport.

Pro Tip: Before you leave, take photos of your passport, driver’s license, and credit cards (front and back). Email them to yourself or save them in a secure cloud storage service. If they are lost or stolen, having this information readily available will be incredibly helpful.

Tailored for Your Adventure: Packing for Specific Activities

A generic packing guide for female travelers is a great start, but the best checklists are customized to the trip’s specific activities. Here’s how to tweak your list for three common vacation types.

For the Beach Babe: Sun, Sand, and Swimwear

  • Must-Haves: At least two swimsuits, a quick-dry towel, a stylish beach cover-up, a waterproof phone case, and a beach bag to carry it all.
  • Sun Protection: High-SPF reef-safe sunscreen, a wide-brimmed hat, UV-protective sunglasses, and lip balm with SPF.
  • Footwear: Flip-flops for the sand and a pair of nicer sandals for beachside bars or restaurants.

For the Trailblazer: Hiking and Outdoor Gear

  • Clothing: Moisture-wicking shirts, hiking pants or shorts, and a waterproof rain jacket. Avoid cotton, as it retains moisture.
  • Footwear: Broken-in hiking boots with good ankle support are essential. Pack moisture-wicking wool socks to prevent blisters.
  • Gear: A small daypack to carry water, snacks, a map, and your first-aid kit. Don’t forget insect repellent and a portable charger.

For the Business Pro: Polished and Professional Attire

  • Clothing: Pack wrinkle-resistant pieces like knit blazers, tailored trousers, and simple blouses. A versatile sheath dress can work for meetings and client dinners.
  • Accessories: A structured tote bag that can fit a laptop and other essentials. Keep jewelry simple and professional.
  • Extras: A portable steamer or wrinkle-release spray is a lifesaver for keeping your outfits looking crisp.

Pack Like a Pro: Genius Tips for Lighter, Smarter Luggage

Having the right items is only half the battle; how you pack them makes all the difference. These tried-and-true strategies will help you maximize space, minimize weight, and keep everything organized. This is where a great piece of luggage can make all the difference.

The Great Debate: Rolling vs. Folding Clothes

For most clothing items, rolling is superior. Tightly rolled clothes take up less space than folded ones and are less prone to hard creases. For more structured items like blazers, folding is better. The best method is often a combination of both.

The Magic of a Great Carry-On

Traveling with only a carry-on is the ultimate freedom. You can skip the baggage claim, avoid lost luggage, and navigate airports with ease. To do this successfully, you need a carry-on that is designed for maximum organization and capacity.

The Tortuga Travel Backpack is specifically designed for this purpose. It opens like a suitcase for easy packing and access, has dedicated compartments for your laptop and other essentials, and its size is optimized to meet carry-on restrictions for most airlines. It’s the perfect foundation for a light and efficient packing system.

Understanding Packing Rules: The 5-4-3-2-1 and 333 Methods Explained

These minimalist packing challenges can be a fun way to force yourself to pack less. The rules vary, but the principle is the same: limit the number of items you bring.

  • The 333 Method: For a set period (like 3 months), you live with only 33 items in your wardrobe, including clothes, shoes, and accessories.
  • The 5-4-3-2-1 Rule: This is a popular one-week carry-on method: 5 tops, 4 bottoms, 3 accessories (including shoes), 2 pairs of shoes (often a typo, should be 3), and 1 swimsuit. You can adapt the numbers to fit your trip!

A Minimalist Approach to Packing

Want to see how little you can truly get away with? Sometimes seeing it in action is the best inspiration. This video from Aly Smalls breaks down how to pack for any trip with just a handful of essential items.

Frequently Asked Packing Questions

Even with a great list, questions always pop up. Here are answers to some of the most common packing queries.

What is the 5-4-3-2-1 rule for packing?

The 5-4-3-2-1 rule is a simple guideline for packing light for a week-long trip, typically in a carry-on. It stands for packing five tops, four bottoms, three pairs of shoes, two dresses or one-piece outfits, and one of each key accessory like a swimsuit, jacket, or handbag. The numbers can be adjusted, but the core idea is to provide a simple structure to prevent overpacking.

What is the most forgotten item when packing for vacation?

It’s amazing how often the most common items are forgotten! According to numerous travel surveys and experts, the most frequently forgotten items include phone chargers, toothbrushes, sunglasses, sunscreen, and swimsuits. A physical checklist is the best way to combat this; check off each item as it goes into your bag.

What are the 5 biggest packing mistakes to avoid?

  1. Overpacking: Bringing too many “just in case” outfits that never get worn.
  2. Forgetting to Check the Weather: Packing for the wrong climate leads to discomfort and unnecessary purchases.
  3. Packing Full-Sized Toiletries: They take up too much space and often violate carry-on liquid rules.
  4. Waiting Until the Last Minute: This causes stress and leads to forgetting important items.
  5. Not Leaving Room for Souvenirs: Always leave a little extra space in your suitcase for things you might buy on your trip.

Is it better to roll or lay clothes flat when packing?

For most fabrics like cotton, synthetics, and knits, rolling is generally better. It compresses the clothing, saves significant space, and helps prevent major wrinkles. For delicate fabrics like silk or structured items like blazers and dress pants, carefully folding them is a better option to maintain their shape.

How to pack clothes for travel without wrinkling them?

While some wrinkling is inevitable, you can minimize it. Rolling clothes instead of folding them is a great start. Packing cubes also help by keeping clothes snugly in place, preventing them from shifting and wrinkling. For very delicate items, you can use tissue paper between folds.

Unpacking and hanging your clothes as soon as you arrive at your destination is also crucial.

Final Thoughts: Your Adventure Awaits!

Packing doesn’t have to be a source of anxiety. With this comprehensive travel checklist for women, you have all the tools you need to pack efficiently, intelligently, and confidently for any trip on your horizon. Remember that preparation is the key to freedom. When you know you have everything you need, you can stop worrying about your luggage and start focusing on the incredible experiences that await you.

So, use this guide, adapt it to your personal style and destination, and get excited! A well-packed bag is the first step toward a fantastic adventure. For a truly seamless experience, investing in smart travel gear like the organizational powerhouse Bagsmart Toiletry Bag and the perfectly designed Tortuga Travel Backpack can make all the difference. Happy travels!

Wide Angle Camera Lenses Explained: A Beginner’s Guide to Epic Shots

Bestseller #1
  • 50 millimeter focal length and maximum aperture of f/1.8
  • Great for portraits, action, and nighttime photography; Angle of view (horizontal, vertical, diagonal): 40º, 27º,46º
  • Minimum focusing distance of 1.15 feet (0.35 meter) and a maximum magnification of 0.21x
Bestseller #2
  • 【HD Telescope】 : 28 times long shooting can record clear targets, telephoto lens for with an eye Mask can be used for lo…
  • 【Individual Focus Capability】 :phone camera lens Featured with exact adjustment for the objective, with Focus Ring is me…
  • 【2 in 1】telephoto lens for Not only a phone lens for photo taking, but also one perfect monocular telescope for handheld…
Bestseller #3
  • 【4K & 64MP High Resolution】- Capture stunning 4K videos and 64MP ultra-clear photos with this digital camera,perfect for…
  • 【Detachable Wide-Angle Lens & 16X Digital Zoom】- Expand your view with the detachable wide-angle lens and get closer to …
  • 【Innovative Autofocus & Anti-Shake】- This compact digital camera has an innovative autofocus that allows you to press th…

Wide Angle Camera Lenses Explained: A Beginner’s Guide to Epic Shots

Have you ever stood before a jaw-dropping mountain range or a sprawling cityscape and felt your standard camera lens just couldn’t do it justice. You try to back up, but you can’t fit the entire epic scene into the frame. This is the exact moment every photographer realizes they need the incredible power of wide angle camera lenses. These aren’t just about fitting more in; they’re about changing the way you see and capture the world, creating immersive, dynamic, and breathtaking images that pull the viewer right into the moment.

It’s time to go wide and transform your photography.

This guide is your ticket to understanding everything about these fantastic tools. We’ll break down what they are, how they work their magic, and how you can choose the perfect one to start capturing those expansive shots you’ve always dreamed of. Get ready to think bigger and shoot wider!

What You’ll Learn

  • The Wide View Defined: Wide angle lenses typically have a focal length under 35mm on a full-frame camera, allowing them to capture a much broader field of view than standard lenses.
  • Creative Applications: They are the go-to choice for landscape, architecture, and interior photography, but also have exciting uses in street photography and vlogging.
  • Prime vs. Zoom: Your choice between a fixed prime lens or a versatile zoom lens will depend on factors like your budget, need for low-light performance, and overall shooting style.
  • Mastering Composition: The key to stunning wide angle shots is managing perspective distortion and using strong foreground elements to create depth and lead the viewer’s eye.
  • Choosing Your Lens: Understanding your camera’s sensor size (full-frame vs. crop) is critical to selecting a lens that gives you the truly wide perspective you’re looking for.

What Exactly Are Wide Angle Camera Lenses?

At its core, a wide angle lens is defined by its short focal length. On a full-frame camera, any lens with a focal length of 35mm or less is considered a wide angle. Lenses from 24mm to 35mm are standard wides, while anything below 24mm, like a 16mm or 14mm, enters the exciting territory of “ultra-wide.”

Think of the focal length as how much of the scene the lens can see—its field of view. A standard 50mm lens offers a field of view similar to the human eye. A telephoto lens (like 200mm) is like looking through binoculars, narrowing your view to bring distant objects closer. A wide angle lens does the opposite; it’s like stepping back and taking in the entire room, capturing a vast, expansive perspective.

This wide field of view is their superpower. It allows you to photograph massive landscapes, towering skyscrapers, and cramped interiors with ease. But it also introduces some unique characteristics. Wide lenses for cameras create a greater sense of depth, making the distance between foreground and background elements feel exaggerated.

They also tend to keep more of the scene in sharp focus, a quality known as a deep depth of field, which is fantastic for landscapes where you want everything from the flowers at your feet to the mountains in the distance to be crisp.

Wide Angle vs. Telephoto: A Tale of Two Perspectives

A common point of confusion for beginners is the difference between wide angle and telephoto lenses. It’s simple: they are opposites. A wide angle lens pushes the background away and expands the scene, while a telephoto lens compresses the background and isolates a subject. If you want to capture the grand scale of the Grand Canyon, you grab a wide angle.

If you want to capture a single bird on a distant tree, you need a telephoto.

The Wide World of Options: Prime vs. Zoom Lenses

When you start shopping for wide angle lenses, you’ll immediately face a classic choice: prime or zoom? Neither is definitively better; they just serve different purposes. Your decision will come down to your shooting style, priorities, and budget.

The Purity of Prime Lenses

A prime lens has a single, fixed focal length. For wide angles, this might be a 20mm, 24mm, or 35mm lens. You can’t zoom in or out; to change your composition, you have to physically move your feet. While this might sound limiting, it comes with some incredible advantages!

  • Superior Image Quality: Because their optics are designed for just one focal length, prime lenses are often sharper and produce higher-quality images than their zoom counterparts.
  • Wider Apertures: Primes typically offer much wider maximum apertures (e.g., f/1.8 or f/1.4). This allows more light to enter the lens, making them phenomenal for low-light situations like astrophotography or indoor events.
  • Lighter and More Compact: With fewer moving parts and less glass, prime lenses are generally smaller and lighter, making them a joy to carry around for a full day of shooting.

The Versatility of Zoom Lenses

A zoom lens offers a range of focal lengths in a single package, such as the popular 16-35mm or 14-24mm. This flexibility is their main selling point, allowing you to reframe your shot without moving.

  • Incredible Flexibility: With a wide angle zoom, you can go from an ultra-wide 16mm landscape shot to a more standard 35mm environmental portrait with a simple twist of the lens barrel. This is perfect for travel and situations where you need to adapt quickly.
  • Convenience: Carrying one zoom lens can replace two or three prime lenses, saving space in your camera bag and reducing the need to swap lenses in potentially dusty or wet conditions.
  • Great for Composition: For beginners, a zoom lens is an excellent learning tool. It allows you to experiment with different focal lengths to see how they affect your composition and find the perspectives you like best.

Unleash Your Creativity: Epic Applications for Wide Lenses

Wide angle camera lenses are incredibly versatile tools that open up a universe of creative possibilities. While they are famous for landscapes, their unique perspective can add drama and context to many other types of photography.

Sweeping Vistas: Landscape Photography

This is the classic use for wide angle lenses, and for good reason! When you’re standing in front of a stunning natural scene, a wide lens is the only way to capture its immense scale and grandeur. It allows you to include a compelling foreground—like a winding river, interesting rock formations, or a field of wildflowers—that leads the viewer’s eye toward the majestic background of mountains or a dramatic sunset. This creates a powerful sense of depth and immersion that makes the viewer feel like they are standing right there with you.

Grand Designs: Architectural Photography

Trying to photograph a tall building from the street below. A standard lens will force you to crop off the top. A wide angle lens lets you capture the entire structure from base to spire, even when you’re close. These lenses are essential for both exterior and interior architectural work.

Inside, they can make small rooms feel more spacious and open. The perspective distortion can also be used creatively to emphasize the leading lines and geometric shapes of a building, creating powerful and dynamic compositions.

Capturing the Vibe: Event and Street Photography

While not the first choice for every street photographer, wide lenses for cameras can be amazing for capturing environmental portraits and scenes full of life. A 28mm or 35mm lens allows you to get close to your subject while still including the surrounding environment, which tells a richer story. Imagine a photo of a street vendor where you can see not just their face, but also their cart, the bustling crowd, and the city behind them. That’s the storytelling power of a wide angle lens.

Beyond the Camera: Other Uses for Wide Angle Lenses

The principles of wide angle lenses extend beyond traditional photography. They are the foundation of action cameras like GoPros, which need to capture as much of the action as possible. Vlogging cameras often use wide lenses so the creator can hold the camera at arm’s length and still fit their face and background in the shot. They are also crucial in security systems, where a wide field of view is needed to monitor a large area.

A product like the Wyze security camera uses a wide angle lens to provide comprehensive coverage of a room or outdoor space from a single, fixed position.

The Magic of Perspective: How Wide Lenses Shape Your Photos

Understanding how wide angle lenses impact perspective is the key to mastering them. They don’t just fit more in the frame; they fundamentally alter the relationship between objects in your photo. This is often called perspective distortion, and it’s your most powerful creative tool.

This type of distortion makes objects close to the lens appear significantly larger than objects farther away. This is the opposite of telephoto compression, which makes distant objects seem closer together. You can use this effect to create incredibly dramatic and three-dimensional images. By placing a compelling subject in your foreground—a small flower, a weathered fence post, a colorful boat—you can make it a dominant anchor in your photo, even if it’s small in real life.

This foreground element then leads the viewer’s eye through the scene to the background.

To make the most of this, follow these compositional tips:

  1. Find a Strong Foreground: Your wide angle shots will instantly become more interesting when you stop just pointing at the horizon. Get low to the ground and find something interesting to place in the bottom third of your frame.
  2. Use Leading Lines: Roads, rivers, fences, and pathways become powerful compositional elements with a wide lens. They appear to stretch into the distance, pulling the viewer deep into the image.
  3. Watch Your Edges: Because these lenses see so much, it’s easy to accidentally include distracting elements at the edges of your frame, like a stray tree branch or a trash can. Always scan the entire viewfinder before you take the shot.

Pro Tip: One of the best ways to create dramatic wide angle shots is to get extremely close to your foreground subject. Don’t be afraid to get your camera just inches away from a flower or a pattern in the sand. This will exaggerate its size and create a massive sense of scale against the background.

The Not-So-Perfect Picture: Challenges and Limitations

For all their amazing benefits, wide angle lenses come with a unique set of challenges you need to be aware of. Learning to manage these limitations is part of the journey to becoming a skilled wide angle photographer.

Taming the Beast: Understanding Lens Distortion

The most common issue is barrel distortion. This causes straight lines, especially near the edges of the frame, to appear as if they are bowing outwards from the center. It’s most noticeable in architectural photos where you have straight lines of buildings, windows, and horizons. While some distortion can be a creative effect (like in fisheye lenses), it’s usually something you’ll want to correct.

The Stretching Effect: Unflattering Portraits

If you get too close to a person with a wide angle lens for a portrait, you’ll see perspective distortion in action—and it’s not pretty. It will exaggerate the size of whatever is closest to the lens, often resulting in a large nose and distorted facial features. This is why portrait photographers typically use lenses of 85mm or longer. Wide lenses are great for environmental portraits where the person is a smaller part of a larger scene, but not for tight headshots.

Flare and Ghosting

Wide angle lenses have a large, curved front glass element that is more susceptible to catching stray light, especially from the sun. This can result in lens flare (bright streaks or circles of light) and ghosting (faint, washed-out copies of the light source) in your images. While sometimes used for creative effect, it can often reduce contrast and ruin a shot. Using a lens hood and being mindful of where the sun is can help minimize this issue.

Your Guide to Fixing It in Post: Correcting Wide Angle Distortion

Luckily, fixing the most common issue with wide angle lenses—barrel distortion—is easier than ever with modern editing software. You don’t have to live with curved horizons or bent buildings! Here’s a look at how to approach it.

Most professional photo editing applications, like Adobe Lightroom, Capture One, and DxO PhotoLab, have built-in tools designed specifically for this. The process is usually incredibly simple:

  1. Enable Lens Profile Corrections: The easiest first step is to find the “Lens Corrections” panel in your software. There’s typically a checkbox to “Enable Profile Corrections.” This feature uses a database of thousands of lenses to automatically identify the lens you used and apply a specific profile to counteract its known distortion, vignetting, and chromatic aberration. In 90% of cases, this one click does most of the work!
  2. Manual Adjustments: If the automatic correction isn’t perfect or if your lens isn’t in the database, you can use manual sliders. The “Distortion” slider allows you to manually counteract the barrel effect. You can also use the vertical and horizontal perspective sliders to fix converging lines, which is common when you tilt your camera up to photograph a tall building.
  3. Use Grid Overlays: To help you get your lines perfectly straight, turn on a grid overlay in your editing software. This makes it much easier to align the horizons and vertical lines in your photo with the grid, ensuring a perfectly corrected image.

How to Choose the Perfect Wide Angle Lens for You

Ready to add a wide angle lens to your kit? The options can be overwhelming, but you can narrow it down by considering a few key factors. Making the right choice starts with understanding your gear and your goals.

Know Your Camera: Full-Frame vs. Crop Sensor

This is the single most important factor. The sensor size in your camera affects the effective focal length of your lens. A full-frame sensor is the same size as a 35mm film negative. A crop sensor (like APS-C or Micro Four Thirds) is smaller.

This smaller sensor size introduces a “crop factor.” For example, most APS-C cameras (used in many entry-level to mid-range DSLRs and mirrorless cameras) have a crop factor of 1.5x or 1.6x. This means a 20mm lens on an APS-C camera will give you the field of view of a 30mm or 32mm lens on a full-frame camera (20mm x 1.5 = 30mm). To get a truly wide view on a crop sensor camera, you need to look for lenses specifically designed for them, often in the 10-22mm range.

Define Your Budget and Needs

Wide angle lenses can range from a few hundred dollars to several thousand. Set a realistic budget. Are you a hobbyist looking to experiment, or a professional who needs top-tier performance. Third-party brands like Rokinon, Samyang, and Viltrox offer excellent manual focus prime lenses at very affordable prices—perfect for landscape and astrophotography.

Brands like Sigma and Tamron offer high-quality zooms that often rival the performance of first-party Canon, Nikon, and Sony lenses at a lower cost.

Key Features to Look For

Beyond focal length, consider these features:

  • Aperture (f-stop): If you plan to shoot in low light (like stars or indoor events), a wide maximum aperture (a low f-number like f/2.8 or f/1.8) is essential.
  • Image Stabilization (IS/VR): While less critical on ultra-wide lenses, stabilization can be helpful for handheld shooting at slower shutter speeds, especially for video.
  • Weather Sealing: If you’re a landscape or travel photographer who often shoots in harsh conditions, investing in a weather-sealed lens can protect your gear from dust and moisture.
  • Filter Thread: Some ultra-wide lenses have a very bulbous front element that prevents you from screwing on standard filters. If using filters like polarizers or neutral density filters is important to your work, look for a lens with a standard filter thread.

A Look at the Landscape: Popular Wide Angle Lenses and Brands

Navigating the market for wide lenses for cameras can be exciting. Every major camera manufacturer produces a fantastic range of wide angle options, and a thriving ecosystem of third-party lens makers provides even more choice.

First-Party Brands (Canon, Nikon, Sony, Fujifilm): These brands offer lenses perfectly tailored to their camera systems. They often have premium lines (like Canon’s L-series or Sony’s G Master) that deliver exceptional sharpness and build quality, but at a premium price. Their standard offerings are also excellent and provide a great balance of performance and cost.

Third-Party Innovators (Sigma, Tamron): In recent years, brands like Sigma and Tamron have become famous for producing lenses that meet or even exceed the quality of first-party options, often for less money. Sigma’s “Art” series of prime and zoom lenses are particularly renowned for their incredible sharpness. Tamron is known for creating innovative zoom lenses with versatile ranges.

Budget-Friendly Specialists (Rokinon, Samyang, Viltrox): These brands are fantastic for photographers on a budget or those looking for a specialty lens. Rokinon and Samyang are kings of the manual focus, wide-aperture prime lens, making them a top choice for astrophotographers. Viltrox has emerged as a strong contender with affordable autofocus lenses.

To give you an idea of what to look for, here’s a quick breakdown of common wide angle focal lengths and their uses:

Focal Length (Full-Frame) Common Use Cases
14-20mm Ultra-wide; ideal for astrophotography, dramatic landscapes, and grand architecture.
24mm A classic wide perspective; great for street photography, environmental portraits, and general travel.
35mm The widest end of “normal”; a favorite for documentary, street, and everyday photography.
16-35mm Zoom The workhorse wide angle zoom; perfect for landscapes, travel, and events.

Frequently Asked Questions

What is a wide-angle lens for a camera?

A wide-angle lens is a camera lens with a focal length shorter than a standard lens (typically 35mm or less on a full-frame camera). This short focal length provides a wide field of view, allowing you to capture more of a scene in a single frame. They are commonly used for landscape, architectural, and interior photography to convey a sense of space and scale.

What are the downsides of wide-angle lenses?

The main downsides are distortion and perspective exaggeration. Wide-angle lenses can cause barrel distortion, where straight lines appear to curve outwards. They also exaggerate perspective, which can lead to unflattering portraits if used too close to a person. Finally, their large front elements can be more prone to lens flare when pointed near a bright light source like the sun.

Is 50mm a wide-angle lens?

No, on a full-frame camera, a 50mm lens is considered a “standard” or “normal” lens. Its field of view is very similar to that of the human eye, which is why it produces images that feel natural and true to life. On a crop sensor (APS-C) camera, a 50mm lens acts more like a short telephoto lens (around 75mm), making it great for portraits.

What 3 lenses does every photographer need?

Many photographers refer to the “holy trinity” of zoom lenses, which covers a vast range of focal lengths. This typically includes an ultra-wide zoom (like a 16-35mm), a standard zoom (like a 24-70mm), and a telephoto zoom (like a 70-200mm). With these three lenses, a photographer is equipped to handle almost any situation, from sweeping landscapes to distant wildlife.

In what situation would you want to use a wide-angle lens?

You’d want to use a wide-angle lens whenever you need to capture a large area from a relatively close distance. This is perfect for capturing the full scope of a mountain range, fitting a tall building into the frame from the street, making a small room look more spacious in a real estate photo, or capturing a large group of people in a tight space.

Final Thoughts

Wide angle camera lenses are more than just tools for fitting more into your shot; they are instruments of perspective and creativity. They invite you to explore the world differently, to get closer to your subjects, and to build images with layers of depth and drama. From the vastness of a starry night sky to the dynamic lines of a modern city, these lenses unlock a new way of telling visual stories.

Don’t be intimidated by the challenges like distortion. With a little practice and the help of modern software, you can easily manage the technical side and focus on the creative fun. The most important step is to get one, put it on your camera, and start experimenting. You’ll be amazed at how it changes your view of the world and the incredible photos you can create!

Men’s Luxury Watches: A First-Time Buyer’s Guide to Finding Your Perfect Timepiece

Men’s Luxury Watches: A First-Time Buyer’s Guide to Finding Your Perfect Timepiece

A luxury watch is so much more than a device for telling time. It’s a statement of style, a piece of personal history, and a marvel of engineering you can wear on your wrist. When exploring the incredible world of luxury watches, men’s watches represent a pinnacle of craftsmanship, heritage, and passion that can last a lifetime—and beyond. Getting into this hobby is an absolutely thrilling journey!

Whether you’re celebrating a milestone, making your first significant investment in a timepiece, or simply appreciating the art of horology, this guide is for you. We’ll walk through everything from the legendary brands that define the industry to the intricate details that make these timepieces tick. Get ready to find the watch that doesn’t just tell time, but tells your story.

What You’ll Learn

  • The Titans of Time: Discover the most iconic and respected luxury watch brands, from household names like Rolex to the exclusive ‘Holy Trinity’ of watchmaking.
  • Choosing Your First Timepiece: Learn a practical, step-by-step process for selecting the perfect watch based on your style, budget, and lifestyle.
  • Movement Matters: Understand the critical differences between automatic and quartz movements and decide which mechanical heart is right for you.
  • Investment & Value: Explore whether high-end men’s watches are a good investment and which factors contribute to a watch holding or increasing its value over time.
  • Care and Complications: Get essential tips on maintaining your watch and demystify common features (complications) like chronographs and GMTs.

The Timeless Allure: A Brief History of Men’s Luxury Watches

The story of the men’s watch is a fascinating journey from battlefield necessity to boardroom staple. For centuries, the personal timepiece was the pocket watch—a delicate, chained accessory. The idea of strapping a watch to one’s wrist was considered feminine, a novelty for ladies of leisure. That all changed with the dawn of the 20th century.

Pilots and soldiers during World War I needed to coordinate attacks and check the time quickly without fumbling for a pocket watch. The wristwatch became an essential piece of military gear, and its association with bravery and masculinity was cemented. Brands like Cartier, with its legendary Tank watch inspired by military vehicles, helped popularize the form for civilians after the war.

The mid-20th century was the golden age for mechanical watches. Brands pushed the boundaries of innovation, creating iconic dive watches like the Rolex Submariner, racing chronographs like the TAG Heuer Carrera, and the Omega Speedmaster—the first watch on the moon! These weren’t just timekeepers; they were specialized tools built for adventure. This era defined the designs and complications we still cherish today in premium watches for men.

Then came the “Quartz Crisis” of the 1970s and 80s, when cheap, ultra-accurate battery-powered watches from Japan threatened to make traditional Swiss watchmaking obsolete. Many historic brands nearly vanished. But a funny thing happened: instead of dying out, mechanical watches became a symbol of luxury, tradition, and artistry—a conscious choice to value craftsmanship over convenience. This resurgence cemented the status of men’s luxury watches as objects of passion and prestige.

The Titans of Time: Top Luxury Watch Brands for Men

Navigating the world of luxury watch brands can feel overwhelming, but it’s also one of the most exciting parts of the journey! These brands, or “maisons,” each have a unique story, design language, and specialty. Here’s a breakdown of some of the key players you should know.

The Unquestionable Icons

These are the brands that even non-watch enthusiasts recognize. They’ve built their reputations on decades of quality, innovation, and masterful marketing.

  • Rolex: Perhaps the most recognized luxury brand on the planet. Rolex is synonymous with durability, timeless design, and holding value. Models like the Submariner, Daytona, and Datejust are true industry benchmarks.
  • Omega: Famous for being the official watch of James Bond and NASA’s choice for moon missions (the Speedmaster). Omega offers incredible quality and horological history, often at a more accessible price point than Rolex.
  • Cartier: A Parisian jeweler at heart, Cartier brings an unmatched level of elegance and design sophistication to watchmaking. The Tank and Santos models are iconic for their distinctive shapes and timeless appeal.

The “Holy Trinity” of Watchmaking

For serious collectors, these three brands represent the absolute pinnacle of watchmaking artistry, finishing, and complexity.

  • Patek Philippe: A family-owned Geneva institution, Patek Philippe is often considered the most prestigious watchmaker in the world. Their motto is, “You never actually own a Patek Philippe. You merely look after it for the next generation.”
  • Audemars Piguet: Best known for the revolutionary Royal Oak, the first luxury steel sports watch designed by the legendary Gérald Genta in 1972. AP is celebrated for its bold designs and exceptional hand-finishing.
  • Vacheron Constantin: The oldest continuously operating watchmaker in the world, founded in 1755. Vacheron Constantin is a master of both classical dress watches and highly complicated masterpieces.

Modern Innovators and Accessible Luxury

Beyond the giants, a new wave of brands offers exceptional quality and unique designs, often providing incredible value.

  • Tudor: Rolex’s sibling company, Tudor has stepped out of the shadows to become a fan favorite. It offers Rolex-level build quality and vintage-inspired designs, like the Black Bay, at a more attainable price.
  • Grand Seiko: A Japanese brand that rivals the best of Switzerland in terms of finishing and accuracy. Grand Seiko is famous for its nature-inspired dials and innovative Spring Drive movements.
  • LIV Swiss Watches: For those seeking robust, modern design backed by Swiss-made quality without the traditional luxury markup, LIV is a fantastic choice. They focus on creating bold, limited-edition chronographs and sports watches that offer a ton of value. If you want a durable, eye-catching piece that stands out, you should definitely explore what LIV Swiss Watches has to offer.

The watch world is always evolving, blending timeless traditions with modern tastes. Staying on top of trends can help you choose a watch that feels both classic and current. Here are some of the biggest trends shaping the market right now.

One of the most welcome trends is the return to more classic, wearable case sizes. For years, the trend was for larger, more aggressive watches, often 44mm and above. Today, many brands are releasing new models and re-issuing classics in sizes ranging from 36mm to 40mm, which fit a wider range of wrists and have a more timeless, understated appeal.

Color is another area of exciting innovation. While black, white, and blue dials will always be popular, green has become the hottest color in the industry, with nearly every brand offering a flagship model in a shade of olive, forest, or emerald. We’re also seeing more adventurous colors like salmon, light blue, and even purple dials gaining popularity, allowing collectors to express more personality.

The integrated bracelet sports watch, pioneered by the Audemars Piguet Royal Oak and Patek Philippe Nautilus in the 1970s, is more popular than ever. This design, where the bracelet flows seamlessly from the case, creates a cohesive, architectural look that is incredibly versatile. Many brands are now offering their own take on this iconic style.

Finally, vintage-inspired designs continue to dominate. Brands are diving deep into their archives to release modern versions of their most beloved historical models. These “re-issues” offer the charm and aesthetic of a vintage piece but with the reliability and advanced technology of a modern watch, giving you the best of both worlds.

Finding Your Perfect Match: How to Choose a Premium Watch for Men

Choosing your first—or next—luxury watch is a deeply personal and exciting process. It’s not about finding the “best” watch, but the best watch for you. Here’s a simple framework to guide your decision.

1. Define Your Budget and Purpose

First, be honest about your budget. Luxury watches can range from a couple of thousand dollars to millions. Set a comfortable price range to narrow your search. Also, think about when and where you’ll wear the watch. Is it for daily wear at the office, special occasions, or rugged weekend adventures? Your answer will guide the style.

2. Understand Case Size and Materials

Fit is everything. A watch that’s too big or too small for your wrist won’t feel right. Visit a store to try on different sizes (measured in millimeters) to see what you prefer. Common materials include durable stainless steel, lightweight titanium, and precious metals like gold or platinum. Steel is the most versatile and popular choice for a first luxury piece.

3. Choose Your Style Category

Men’s luxury watches generally fall into a few key categories:

  • Dive Watches (e.g., Rolex Submariner): Robust, highly water-resistant, with a rotating bezel to time dives. Their sporty, go-anywhere vibe makes them incredibly popular for daily wear.
  • Chronographs (e.g., Omega Speedmaster): Essentially a stopwatch on your wrist, with pushers to start, stop, and reset the timer. They have a sporty, technical look.
  • Dress Watches (e.g., Cartier Tank): Slim, simple, and elegant, usually on a leather strap. Perfect for formal occasions and business settings.
  • Pilot/Field Watches (e.g., IWC Pilot’s Watch): Designed for legibility and durability, with large numerals and a clean, functional aesthetic.

4. Research the Brand and Movement

Once you have a style in mind, research the brands that excel in that category. Read reviews, watch videos, and learn about their history. Finally, consider the movement—the engine of the watch. This brings us to a crucial comparison.

Pro Tip: Don’t buy a watch just because of hype or what you see on social media. The most satisfying purchase is one that genuinely connects with your personal style and story. Try on as many watches as you can before making a decision.

The Heart of the Matter: Automatic vs. Quartz Movements Explained

The movement is what makes a watch tick, and in the world of luxury watches, the choice usually comes down to automatic (a type of mechanical) versus quartz. There’s no right or wrong answer, but they offer vastly different experiences.

An automatic movement is a purely mechanical marvel. It’s powered by a mainspring that is wound by the natural motion of your wrist via a weighted rotor. There are no batteries or electronics. The appeal is in the intricate craftsmanship—hundreds of tiny, hand-finished parts working in perfect harmony.

You can often see this beautiful mechanism through a sapphire case back. The smooth, sweeping motion of the seconds hand is a hallmark of a mechanical watch.

A quartz movement, on the other hand, is powered by a battery. The battery sends an electrical signal through a tiny quartz crystal, causing it to vibrate at a precise frequency. These vibrations drive a motor that moves the watch hands. Quartz watches are incredibly accurate, require very little maintenance (just a battery change every few years), and are generally much more affordable.

Here’s a quick breakdown of the key differences:

Feature Automatic (Mechanical) Quartz (Battery-Powered)
Power Source Mainspring wound by wrist motion Battery
Accuracy Can lose/gain a few seconds per day Extremely accurate, loses a few seconds per month
Maintenance Requires servicing every 5-10 years Battery change every 2-5 years
Seconds Hand Smooth, sweeping motion Ticks once per second
Price Generally more expensive Generally more affordable
Appeal Craftsmanship, tradition, artistry Reliability, accuracy, convenience

For most enthusiasts, the soul of a luxury watch lies in its mechanical movement. It represents a connection to centuries of watchmaking tradition. However, a high-end quartz watch from a brand like Grand Seiko or Cartier can offer beautiful design and finishing with grab-and-go convenience.

More Than Just Telling Time: Understanding Watch Complications

In horology, a “complication” is any function on a watch that does more than tell the hours, minutes, and seconds. Complications showcase a brand’s technical skill and can add incredible functionality to your timepiece. They can seem intimidating, but the most common ones are easy to understand.

  • Date: The most common complication. It displays the current date in a small window, or “aperture,” on the dial. An Annual Calendar is a more advanced version that automatically adjusts for months with 30 and 31 days, only needing to be set once a year (on March 1st). A Perpetual Calendar is even more complex, accounting for leap years as well.
  • Chronograph: A stopwatch function, controlled by two pushers on the side of the case. The large seconds hand, which is usually stationary, is used for the chronograph, while small subdials track elapsed minutes and hours.
  • GMT / Dual Time: This complication allows you to track two time zones at once. It features an extra hour hand that makes one full rotation every 24 hours. It’s incredibly useful for travelers or anyone who works with people in different parts of the world.
  • Moonphase: A beautiful and poetic complication that displays the current phase of the moon in an aperture on the dial. While not the most practical feature for modern life, it’s a classic display of watchmaking artistry.

Icons on the Wrist: Legendary Luxury Men’s Watches Through History

Some watches are so perfectly designed that they transcend time and trends to become true icons. These are the models that have shaped the industry and are instantly recognizable on the wrist. As the team at Collars & Co noted on Instagram, on Wall Street, a watch is about status and silent signals, and these models are the ones that send the loudest message.

  • Rolex Submariner: Originally launched in 1953, it’s the archetypal dive watch. Its robust build, timeless design, and versatility make it arguably the most famous and influential watch ever made.
  • Omega Speedmaster Professional: The legendary “Moonwatch.” It was flight-qualified by NASA for all manned space missions and became the first watch worn on the moon. Its history is simply unmatched.
  • Audemars Piguet Royal Oak: The watch that created the luxury steel sports watch category in 1972. Its iconic octagonal bezel and integrated bracelet were revolutionary at the time and remain incredibly influential today.
  • Patek Philippe Nautilus: Another Gérald Genta design from the 1970s, the Nautilus is the epitome of sporty elegance. Its porthole-inspired case and incredible rarity have made it one of the most sought-after watches in the world.
  • Cartier Tank: Designed in 1917, the Tank’s rectangular case was inspired by the Renault tanks of WWI. It is the definition of a classic dress watch, worn by artists, presidents, and style icons for over a century.

The Long Game: Are Luxury Watches a Good Investment?

This is a question many first-time buyers ask. The simple answer is: it’s complicated. While some specific models from brands like Rolex, Patek Philippe, and Audemars Piguet have shown incredible appreciation in value, it’s crucial to distinguish between buying a watch as a passion purchase versus a financial instrument.

The vast majority of luxury watches will depreciate in value once you buy them, just like a new car. However, high-quality timepieces from respected brands tend to hold their value far better than other luxury goods. The key is to buy what you love first and foremost. If it happens to maintain or increase in value, consider that a fantastic bonus.

Certain factors contribute to a watch’s investment potential: brand recognition (Rolex is king here), rarity (limited editions or discontinued models), historical significance, and condition. Stainless steel sports models from top-tier brands are currently the hottest segment of the market. But chasing trends can be risky. The best strategy is to buy a classic, timeless piece from an established brand that you will enjoy wearing for years to come.

Keeping Time Perfectly: Essential Maintenance and Care Tips

A fine mechanical watch is a high-precision machine that requires regular care to perform its best for generations. Proper maintenance is not difficult, but it is essential for protecting your investment and ensuring its longevity.

First, understand service intervals. Just like a car, a mechanical watch needs a periodic overhaul. Most brands recommend a full service every 5 to 10 years. During a service, a certified watchmaker will completely disassemble the movement, clean every part, replace any worn components, lubricate it, and reassemble it, ensuring it runs accurately and stays water-resistant.

For daily care, simple habits go a long way. Keep your watch clean by wiping it down with a soft microfiber cloth to remove dust and smudges. If it’s a water-resistant steel watch, you can gently wash it with mild soap and warm water, using a soft brush to clean the bracelet. Always make sure the crown is screwed down tightly before getting it wet!

Finally, be mindful of magnetism. Strong magnetic fields from speakers, laptops, and other electronics can affect the accuracy of a mechanical watch. If you notice your watch suddenly running very fast or slow, it may have become magnetized. A watchmaker can demagnetize it for you in just a few minutes.

The Finishing Touches: Essential Luxury Watch Accessories

Once you have your watch, a few key accessories can enhance your ownership experience and help you care for your timepiece. These aren’t necessities, but they add a layer of enjoyment and practicality to the hobby.

  • A Quality Watch Box or Roll: When you’re not wearing your watches, you need a safe place to store them. A watch box with individual soft cushions protects them from scratches and dust at home. For travel, a leather watch roll is a stylish and secure way to carry one or more timepieces.
  • High-Quality Straps: Changing the strap is the easiest way to completely transform the look of your watch. A dive watch on a rubber strap is perfect for summer, while putting it on a leather strap makes it ready for the office. Investing in a few different straps is like having multiple watches in one.
  • A Spring Bar Tool: If you plan on changing straps yourself, a good spring bar tool is a must-have. This small, inexpensive tool allows you to safely remove and install the spring bars that hold the strap to the watch case. Just be sure to watch a tutorial and practice on an inexpensive watch first!
  • A Watch Winder: For automatic watches, a watch winder is a box that gently rotates the watch to keep the mainspring wound when you’re not wearing it. This is particularly useful if you have multiple automatic watches with complications like a date or calendar, as it saves you from having to reset them every time you pick them up.

Pro Tip: When buying straps, pay close attention to the lug width of your watch (the distance between the horns where the strap attaches). This is measured in millimeters and must match the strap width for a proper fit.

Frequently Asked Questions (FAQ)

What is considered a luxury watch?

A luxury watch is typically defined by its high-quality materials (like stainless steel, titanium, or precious metals), superior craftsmanship, in-house or high-end mechanical movement, and brand heritage. It’s less about price and more about the artistry, engineering, and attention to detail that goes into its creation. Brands with a long history of horological innovation are usually considered luxury.

How much should I spend on my first luxury watch?

There’s no magic number, and it’s entirely personal. A great starting point for a quality Swiss-made mechanical watch is often in the $1,000 to $5,000 range. In this bracket, you can find incredible timepieces from brands like Tudor, Longines, Oris, and TAG Heuer that offer fantastic history, build quality, and design. The most important rule is to spend an amount you are comfortable with.

Which luxury watch holds its value best?

Historically, stainless steel sports models from Rolex have the strongest value retention and are the most likely to appreciate over time. Certain models from Patek Philippe and Audemars Piguet are also incredibly strong performers on the secondary market. However, this is not a guarantee, and the market can be volatile. It’s always best to buy a watch because you love it, not purely as a financial asset.

Is it okay to wear a luxury watch every day?

Absolutely! Most high-end men’s watches, especially sports models made from stainless steel, are built to be worn and enjoyed daily. They are durable, often water-resistant, and designed to handle the rigors of everyday life. Wearing your watch regularly is the best way to appreciate the craftsmanship and make it a part of your personal story.

Final Thoughts

Embarking on the journey into the world of men’s luxury watches is an incredibly rewarding experience. It’s a chance to connect with history, appreciate mechanical artistry, and find a piece that reflects your personality and achievements. A great watch is more than an accessory; it’s a companion that will be with you through life’s most important moments.

Remember to take your time, do your research, and most importantly, choose the watch that truly speaks to you. Whether it’s a legendary icon or a modern marvel, the right timepiece will bring you joy every time you glance at your wrist. For those starting their collection with a focus on bold, modern design and robust Swiss engineering, brands like LIV Swiss Watches offer an exciting and accessible entry point into this amazing hobby.

Happy hunting, and wear it in good health!

Fitness Gear Pro Half Rack Review: Is It Right for Your Home Gym?

Bestseller #1
  • Transform your home workouts with the P43 Multifunctional Power Cage: Made from heavy-duty steel, this upgraded squat ra…
  • 1500LB Pro Weight Bench: Engineered with a wobble-free one-piece steel frame, 8+3 swift-adjust settings for any lift, pl…
  • Maximize your training with our workout cage, which includes over 20 free attachments: 2 J hooks, 2 Safety Spotter Arms,…
$1,599.99
Bestseller #2
  • Heavy Duty Squat Rack: One of the strongest racks you will find. Rated for 750 lb, constructed with a 3″ x 3″, 11-gauge …
  • Multi-Grip Pull Up Tower: Features a multi-grip pull up bar with multiple hand grips so you can perform pull ups or chin…
  • Versatile Training: In addition to pull ups, use the Squat Rack to perform your heavy squat workout with the help of the…
$1,338.98
Bestseller #3
  • Commercial-Grade Durability: Built with 50x70mm commercial steel tubing (40% thicker than standard 50x50mm racks), suppo…
  • Compact Space-Saving Design: Designed for tight spaces, this wall-mounted rack extends only 21.5 inches from the wall, m…
  • All-in-One Training System: Equipped with a dual cable crossover system, multi-grip pull-up bar, and landmine attachment…
$1,349.99

Fitness Gear Pro Half Rack Review: Is It Right for Your Home Gym?

Building a home gym is one of the most exciting steps you can take on your fitness journey. No more commutes, no more waiting for equipment, just pure, unadulterated gains. If you’re serious about strength training, the centerpiece of that gym is often a power rack. Our comprehensive Fitness Gear Pro Half Rack review will show you why this piece of equipment might be the perfect foundation for your setup, offering a fantastic balance of functionality, size, and value.

This isn’t just another piece of metal; it’s a gateway to unlocking your strength potential right from the comfort of your home. Whether you’re a seasoned lifter or just starting, a reliable rack is essential for safely pushing your limits on foundational exercises like squats, bench presses, and overhead presses. We’re going to break down everything you need to know about this popular piece of half rack gym equipment.

What You’ll Learn

  • Core Features: The Fitness Gear Pro Half Rack is built with heavy-duty steel, featuring adjustable J-hooks, long safety spotter arms, and an integrated multi-grip pull-up bar for maximum versatility.
  • Space-Saving Design: Its half-rack footprint is a major advantage for home gyms, offering the core safety and functionality of a full rack without dominating your entire room.
  • Safety is Key: With a typical weight capacity around 600 lbs and robust safety arms, it provides a secure environment for lifting heavy, even when you’re training solo.
  • Workout Versatility: This rack is a powerhouse for compound movements. It’s ideal for squats, bench presses, overhead presses, pull-ups, and can be expanded with attachments for even more exercises.
  • Value Proposition: It offers an excellent entry point into serious strength training, providing essential features at a price point that is often more accessible than larger, commercial-grade full racks.

An In-Depth Look at the Fitness Gear Pro Half Rack

The Fitness Gear Pro Half Rack is designed specifically for the home and garage gym enthusiast. It aims to provide the stability and safety of a commercial rack but in a more compact and affordable package. It’s a popular choice found at major retailers like Dick’s Sporting Goods, making it accessible to a wide audience of fitness lovers looking to elevate their training.

The fundamental idea behind a fitness half rack is to give you the most critical functions of a power rack—namely, holding a barbell for squats and presses and providing safety catches—without the larger cage structure. This open design feels less claustrophobic for some users and makes it easier to move the bench in and out for different exercises. It’s the perfect middle ground between a simple squat stand and a full-blown power cage.

This rack is built to handle serious weight, empowering you to chase new personal records with confidence. Let’s get into the specifics of what makes this piece of equipment tick.

Key Features and Specifications Explored

When you’re investing in a piece of half rack gym equipment, the details matter. The features determine its versatility, safety, and longevity. The Fitness Gear Pro Half Rack comes packed with essentials that form a solid foundation for any strength program.

Key Specifications:

  • Construction: Typically built from 2″ x 2″ or similar heavy-gauge steel uprights, providing a solid and stable frame. The powder-coat finish helps resist scratches and rust, keeping it looking great for years. * Weight Capacity: Most models, like the popular HR-600, are rated for up to 600 lbs. This is more than enough for the vast majority of beginner and intermediate lifters and even many advanced athletes.

  • Dimensions: A key selling point is its compact footprint. While exact dimensions vary slightly by model, they generally stand around 83-85 inches tall, 45-50 inches wide, and 45-50 inches deep. This height fits comfortably in most rooms with standard 8-foot ceilings. * Hole Spacing: The uprights feature numerous adjustment holes, often with Westside spacing (1-inch increments) through the bench press zone and wider spacing (2-inch increments) elsewhere.

This allows for precise placement of J-hooks and safety arms to match your body and lift.

Core Features:

  • Adjustable J-Hooks: These are the hooks that hold your barbell. They are easily moved up and down the uprights to set the perfect starting height for squats, bench presses, and more. They typically have a plastic or rubber lining to protect your barbell’s knurling. * Long Safety Spotter Arms: These are arguably the most important safety feature.

These long steel arms catch the barbell if you fail a lift, preventing injury. Their length gives you confidence to push for that extra rep when training alone. * Multi-Grip Pull-Up Bar: At the top of the rack, you’ll find a pull-up bar, often with multiple grip options (neutral, wide, narrow). This adds a huge amount of versatility, allowing for pull-ups, chin-ups, and hanging leg raises without needing separate equipment.

  • Weight Plate Storage Pegs: Most models include 2 to 4 storage pegs on the rear of the unit. This not only keeps your gym tidy but also adds extra weight and stability to the base of the rack, making it even more solid during heavy lifts.

The Awesome Benefits of a Half Rack for Home Workouts

So, why choose a half rack over other options? The benefits are significant, especially for the home gym user. It’s not just about lifting weights; it’s about creating an efficient, safe, and motivating workout environment. The pro half rack fitness setup delivers on all fronts.

First and foremost is the balance of footprint and function. A full power cage can be massive, taking up a huge amount of floor space and visual real estate in a room. A half rack gives you the essential safety features—the spotter arms—in a much smaller package. This is a massive win for anyone working with a limited space like a spare bedroom, basement corner, or a section of a garage.

Second is safety for the solo lifter. This cannot be overstated. The ability to set the safety spotter arms just below your range of motion on a bench press or squat is liberating. It means you can push yourself to near-failure without the fear of getting pinned under a heavy barbell.

This confidence is crucial for making consistent progress in strength training.

Third, the versatility is incredible. A half rack is a central hub for the most effective compound exercises in existence. Squats, bench presses, overhead presses, rack pulls, and pull-ups all become accessible and safe. Add an adjustable bench and a barbell set, and you have the foundation to train your entire body effectively for years to come.

It’s a minimalist setup with maximalist results.

Finally, there’s the cost-effectiveness. While it’s a significant investment, a quality fitness half rack is often more affordable than a full power cage of similar quality. It provides the core functionality needed for serious lifting at a price point that makes a powerful home gym accessible to more people. You get professional-level safety and utility without the professional-level price tag.

Half Rack vs. Full Rack vs. Squat Stand: What’s the Difference?

Navigating the world of strength equipment can be confusing. When you see terms like half rack, full rack (or power cage), and squat stand, they might seem interchangeable, but they have key differences. Choosing the right one depends on your space, budget, and training style.

Feature Squat Stand Fitness Gear Pro Half Rack Full Power Rack (Cage)
Footprint Smallest Medium Largest
Safety Limited (some have spotters) Excellent (long spotter arms) Maximum (4-post cage)
Versatility Good (squats, presses) Excellent (adds pull-ups, storage) Excellent (same as half rack)
Feeling Open Open Enclosed (cage feel)
Price Lowest Moderate Highest
Best For Budget/space constraints Most home gyms Maximum safety, commercial feel

Squat Stands

These are the most basic option, consisting of two independent uprights or a single connected unit. They are great for saving space and are very budget-friendly. However, many lack robust safety spotter arms, making them less ideal for pushing your limits when training alone. They are perfect for lifters on a tight budget or with extremely limited space who prioritize squats and presses.

Full Power Racks (Power Cages)

This is the big brother of the half rack. A full rack has four uprights, creating a full cage you lift inside of. This offers the absolute maximum level of safety, as the barbell is contained within the structure. The trade-off is a much larger footprint and a higher cost.

They are fantastic but can be overkill for many home gym setups where space is a premium.

The Fitness Half Rack: The Sweet Spot

The Fitness Gear Pro Half Rack sits perfectly in the middle. It provides the open, non-claustrophobic feel of a squat stand but incorporates the crucial long safety arms of a full rack. With the added pull-up bar and plate storage, it offers nearly all the functional benefits of a full cage in a much more space-efficient design. For the vast majority of home gym owners, the fitness half rack is the ideal solution, providing the best of both worlds.

Assembly and Setup: A Step-by-Step Guide

Getting your new Fitness Gear Pro Half Rack is exciting, but the thought of assembly can be a little daunting. Don’t worry! With a bit of planning and a helper, it’s a straightforward process. Most racks can be assembled in 1-2 hours.

Before You Begin:

  1. Check Your Parts: Open the box and lay everything out. Cross-reference the parts list in the manual with what you have. It’s better to know if you’re missing a bolt now than halfway through the build.

  2. Gather Your Tools: You’ll typically need two wrenches or socket wrenches of the correct size (check the manual). Having two allows you to hold one side of a bolt while tightening the nut on the other. 3.

Find a Helper: While you can assemble it alone, having a second person to help hold the large uprights and crossmembers makes the process much faster, safer, and easier.

Assembly Steps:

  1. Build the Base: Start by constructing the base frame. This usually involves connecting the two side floor pieces with one or two crossmembers. Don’t fully tighten the bolts yet; leave them slightly loose to allow for adjustments.
  2. Attach the Uprights: With your helper holding one upright steady, attach it to the base. Secure it with the provided bolts, but again, keep them just hand-tight for now. Repeat for the other upright.
  3. Install the Top Crossmember/Pull-Up Bar: This is the piece that connects the two uprights at the top. Lift it into place and secure it. This step is where a helper is almost essential. Once the pull-up bar is in place, the rack will be much more stable.
  4. Add the Finishing Touches: Attach the weight storage pegs to the back of the unit. Now, go back and systematically tighten every single bolt. Ensure the rack is on level ground and doesn’t wobble before the final tightening. A level can be helpful here.
  5. Install J-Hooks and Safety Arms: The final step is to slide the J-hooks and safety spotter arms into the uprights at your desired height. Your rack is now ready for action!

Pro Tip: When tightening the bolts, work in a crisscross pattern, similar to changing a tire. This helps ensure the frame settles evenly and remains square. A final check of all nuts and bolts after your first workout is also a great idea.

Unpacking the Safety and Stability Features

When you’re pushing heavy weight, safety is not a feature—it’s a necessity. The Fitness Gear Pro Half Rack is designed with this in mind. Understanding its safety components will give you the confidence to train hard and effectively.

The primary safety system is the pair of long steel spotter arms. These are your lifeline. Before every set of squats or bench presses, you should set these arms to a height that is just below the bottom of your range of motion. For a squat, this means they will catch the bar if you can’t stand back up from the bottom position.

For a bench press, it means they will catch the bar just above your chest, allowing you to safely slide out from under it.

Another key aspect is the weight capacity. A 600 lb rating provides a huge buffer for most lifters. This rating is typically for the J-hooks (dynamic load) and the spotter arms (static load). It’s a testament to the heavy-gauge steel and solid construction.

As one user on a Reddit discussion noted, while commercial racks might be rated for 1000+ lbs, a 600 lb capacity is more than sufficient and safe for its intended home use.

Stability is further enhanced by the wide base and rear support. The design prevents the rack from tipping forward or backward during use. Adding weight plates to the built-in storage pegs dramatically increases this stability by anchoring the rear of the unit to the floor. Even during explosive pull-ups or re-racking heavy squats, a properly assembled and weighted rack feels incredibly solid.

Top Exercises to Supercharge Your Workouts

A pro half rack fitness setup is your playground for building raw strength. It excels at the big, compound movements that deliver the most bang for your buck. Here are some of the essential exercises you can perform.

  1. Barbell Back Squats: The king of all leg exercises. Set the J-hooks so the barbell is just below your shoulder height. Set the safety arms so they would catch the bar if you fail at the bottom of your squat. This is the safest way to progressively overload your squats.
  2. Barbell Bench Press: The ultimate chest builder. Roll an adjustable bench into the rack. Set the J-hooks at a height where you can unrack the bar with a slight extension of your arms. The safety arms should be set just above your chest when you have a slight arch in your back. This allows you to train to failure safely.
  3. Overhead Press (OHP): A phenomenal shoulder and upper body strength builder. Set the J-hooks at about collarbone height. You can perform this standing inside the rack, with the safety arms set to catch the bar in front of you if needed.
  4. Pull-Ups & Chin-Ups: Use the multi-grip pull-up bar to build a powerful back and biceps. You can vary your grip (wide, narrow, neutral) to target different muscles. If you can’t do a full pull-up yet, you can use resistance bands looped around the bar for assistance.
  5. Rack Pulls: A great accessory for building deadlift strength and a thick upper back. Set the safety arms to your desired height (e.g., just below the knee) and pull the barbell from there. This allows you to handle heavier weight and focus on the top portion of the deadlift.

To get the most out of these workouts, consider tracking your performance. Monitoring metrics like heart rate and intensity can help you optimize your training zones. A device like the Wahoo Fitness TICKR is perfect for this, providing accurate, real-time data that syncs with your favorite fitness apps. It helps ensure every rep on your new rack is pushing you closer to your goals.

User Reviews and Real-World Testimonials

Lab specs and features are great, but what do real users think? Across fitness forums and retailer sites, the feedback for the Fitness Gear Pro Half Rack is consistently positive, especially regarding its value and suitability for home gyms.

Many users praise its sturdiness and stability for the price. They often report that it feels much more solid than they expected, easily handling 300-400 lb lifts without any wobble, especially when weight plates are added to the storage pegs. This real-world performance is what gives lifters the confidence they need.

A common theme is how it transformed their home workout capabilities. People who previously relied on dumbbells or bodyweight exercises find that the rack opens up a whole new world of heavy compound lifting that was previously impossible at home. The safety features are frequently highlighted as a key benefit, with many solo lifters expressing how the spotter arms have been crucial for their progress.

Of course, no product is perfect. A few users mention that the paint can chip or scratch during assembly or use, which is common for powder-coated equipment in this price range. Others note that the J-hooks might not have the premium plastic lining of more expensive brands, but this is often seen as a minor issue. The overwhelming consensus is that for the money, the Fitness Gear Pro Half Rack delivers exceptional performance and is a cornerstone of a great home gym.

Maintenance and Long-Term Care

Your half rack is a durable piece of equipment, but a little bit of care will ensure it stays safe and functional for a lifetime of workouts. Maintenance is simple and doesn’t require much time.

Regular Checks (Monthly):

  • Inspect All Hardware: Take a few minutes each month to go around the rack and check that all nuts and bolts are tight. The vibrations from re-racking heavy weights can sometimes cause them to loosen slightly over time. A quick check with your wrench is all it takes. * Check for Wear and Tear: Look over the J-hooks and safety arms.

Make sure the welds are solid and there are no cracks or signs of extreme stress. This is unlikely with normal use but is a good safety habit.

Cleaning:

  • Wipe Down Regularly: After a sweaty workout, wipe down the pull-up bar and any parts of the frame you touched with a simple cloth and a mild cleaner. This prevents grime buildup and keeps the finish looking good.
  • Address Scratches: If you get a deep scratch that goes through the powder coat to the bare metal, you might want to touch it up with some matching paint (like a black automotive touch-up paint) to prevent any potential rust, especially if your gym is in a humid environment like a garage or basement.

By following these simple steps, your half rack gym equipment will remain a reliable and safe centerpiece of your training space for many years.

Pricing and Where to Find It

The Fitness Gear Pro Half Rack is known for its excellent value. While prices can fluctuate based on sales and the specific retailer, it generally falls into a very accessible price range for such a crucial piece of strength equipment.

Typically, you can expect to find this rack at major sporting goods stores, with Dick’s Sporting Goods being one of the primary sellers. It’s also frequently available on platforms like eBay or Amazon from various sellers. Pricing can vary, so it’s always a good idea to shop around.

When considering the cost, remember what you’re getting: a safe, versatile, and durable hub for countless workouts. Compared to the ongoing cost of a commercial gym membership, a half rack pays for itself over time while offering unparalleled convenience. For the most up-to-date pricing and availability, it’s best to check the websites of major retailers directly.

Frequently Asked Questions (FAQ)

Here are answers to some of the most common questions people have about half racks and the Fitness Gear Pro model specifically.

Are half racks worth it?

Absolutely. For most home gym owners, a half rack is one of the best investments you can make. It provides the essential safety features and versatility of a much larger and more expensive full power rack but in a compact, space-saving design. It allows you to safely perform the most effective strength-building exercises, making it completely worth it.

How big is the Fitness Gear Pro Half Rack?

While exact dimensions can vary slightly between models, a typical Fitness Gear Pro Half Rack has a footprint of about 4-5 feet in width and 4-5 feet in depth. The height is usually around 83-85 inches, which is designed to fit comfortably under standard 8-foot (96-inch) ceilings, leaving enough clearance for pull-ups.

What is the advantage of a full rack over a half rack?

The main advantage of a full rack (power cage) is an added layer of safety and stability. Because you lift inside a four-post cage, it’s virtually impossible for a dropped barbell to escape the structure. They also tend to have higher weight capacities and feel incredibly planted. However, they take up more space and cost more, making the half rack a more practical choice for many.

Is a half rack safe?

Yes, a half rack is very safe when used correctly. The key is the long safety spotter arms. As long as you set them at the proper height for each lift, they will reliably catch the barbell in case of a failed rep. The robust steel construction and stable base are designed to handle heavy loads securely.

Can you do dips on a half rack?

Many half racks, including some versions or attachments for the Fitness Gear Pro, can accommodate dip bars. These are attachments that slide onto the uprights or safety arms, providing handles for performing dips. If this exercise is important to you, check if the specific model you’re buying has compatible dip attachments available.

Can you bench press on a half rack?

Yes, bench pressing is one of the primary exercises a half rack is designed for. You simply roll an adjustable bench into the open area of the rack, set the J-hooks to the correct starting height, and position the safety spotter arms just above your chest. It’s one of the safest ways to bench press at home.

Can you squat on a half rack?

Definitely. Squatting is a core function of any half rack. The adjustable J-hooks allow you to set the barbell at the perfect height to unrack it, and the safety arms provide the confidence to push your limits, knowing you have a backup if you can’t complete a rep.

Final Thoughts: Is This the Rack for You?

The Fitness Gear Pro Half Rack stands out as a fantastic choice for anyone serious about building a powerful and effective home gym. It masterfully balances functionality, safety, and size, delivering the core benefits of a commercial-grade setup in a package that’s perfectly suited for a garage or spare room.

Its sturdy construction, essential safety features like long spotter arms, and versatile additions like a multi-grip pull-up bar make it a true workout centerpiece. You can confidently tackle the most important strength-building exercises, from heavy squats to bench presses, knowing you have a reliable and secure station.

If you have the space and the drive to take your training to the next level, this rack is an investment that will pay dividends in strength and health for years to come. It’s a powerful, practical, and accessible solution that earns a strong recommendation for home gym heroes everywhere.

5 Best Beginner Photography Cameras (2025): A Starter’s Guide

Bestseller #1
  • 【2025 8K UHD 88MP Autofocus Camera】2025 upgraded digital camera captures up to 88MP high-resolution photos and records 8…
  • 【Dual-Lens & Touchscreen Control】Equipped with both front and rear lenses, this cameras for photography makes it easy to…
  • 【Wi-Fi Sharing & HDMI Output】Easily transfer photos and videos to your smartphone via built-in Wi-Fi for quick sharing o…
Bestseller #2
  • 【2025 Latest 4K Digital Camera: 56MP for Photography & Vlogging】As a top-tier digital camera for 2025, this 4k digital c…
  • 【Smart Autofocus & Webcam Function】This versatile video camera features Smart Autofocus that keeps your subjects sharp, …
  • 【16X Zoom & 3″ Flip Screen】Master every shot with the 16X digital zoom and the versatile 3-inch flip screen. This point …
Bestseller #3
  • Items Included: Canon EOS Rebel T7 DSLR Camera with 18-55mm Lens, Canon LP-E10 Battery (860mAh), Canon LC-E10 Battery Ch…
  • Exceptional Image Quality for All Levels: Capture stunning, true-to-life photos with the Canon EOS Rebel T7’s 24.1MP APS…
  • Seamless Sharing with Built-In Wi-Fi & NFC: Enjoy effortless connectivity with the Rebel T7’s built-in Wi-Fi and NFC fun…

5 Best Beginner Photography Cameras (2025): A Starter’s Guide

That incredible feeling of seeing a perfect sunset, a candid laugh, or a stunning landscape and wishing you could capture it forever is what pulls so many of us into photography. Your smartphone is great, but you know there’s another level of quality and creativity waiting. Finding the best beginner photography cameras can feel like the first big step into a larger world, and it’s an exciting one! This guide is here to cut through the noise, explain what matters, and help you find the perfect camera to start your creative journey.

Choosing your first real camera isn’t just about buying a piece of tech; it’s about investing in a new passion. The right camera will feel like an extension of your own eyes, making it easy and fun to learn the ropes. We’ll break down everything from mirrorless and DSLR options to the essential features that will help you grow from a complete novice to a confident photographer. Let’s get started!

Quick Summary

  • Mirrorless is the Modern Choice: For most beginners, mirrorless cameras offer the best combination of size, features, and future-proof technology. Their electronic viewfinders show you exactly what your photo will look like before you press the shutter.
  • Don’t Ignore DSLRs: Digital SLRs offer fantastic value, especially on the used market. They are a proven, reliable way to learn the fundamentals of photography with a massive selection of affordable lenses.
  • Start with a Kit Lens: The lens that comes bundled with your camera (usually an 18-55mm or similar) is incredibly versatile and perfect for learning composition, zoom, and basic settings before you invest in more specialized glass.
  • Features Matter More Than Megapixels: Focus on features that make learning easier, like a user-friendly menu system, a flip-out screen for creative angles, and fast, reliable autofocus. High megapixel counts are less important for a beginner.
  • Budget for Accessories: Your camera is just the start. Remember to set aside a portion of your budget for essential accessories like a memory card, an extra battery, and a comfortable camera bag.

What to Look For: Key Features in a Beginner Camera

Navigating the technical specifications of a camera can be overwhelming. Let’s simplify it by focusing on the features that truly impact the learning experience for new photographers. Understanding these core concepts will empower you to make a choice that fits your style and goals perfectly.

Mirrorless vs. DSLR: Which is Better for Beginners?

This is the biggest question for anyone buying a camera today. For years, the DSLR (Digital Single-Lens Reflex) was the standard. It uses a mirror to bounce light up into an optical viewfinder, showing you a direct, unfiltered view through the lens. When you take a picture, the mirror flips up, and the light hits the sensor.

Mirrorless cameras, as the name suggests, have no mirror. The light goes directly onto the sensor, which then displays a live preview on the rear screen or in an electronic viewfinder (EVF). For beginners, the EVF is a massive advantage. It shows you a real-time preview of your exposure, white balance, and color settings.

What you see is exactly what you get, which dramatically shortens the learning curve. Mirrorless cameras are also typically smaller and lighter.

While DSLRs are being phased out by most manufacturers, they remain one of the top cameras for beginners due to their incredible value. You can find excellent DSLR bodies and lenses for a fraction of the cost of their mirrorless counterparts. They also often have superior battery life. For most people starting in 2025, a mirrorless camera is the more forward-thinking choice, but a DSLR is a fantastic, budget-friendly way to master the craft.

Sensor Size Explained: APS-C vs. Full-Frame

You’ll hear a lot about sensor size. The two most common types in beginner photography cameras are APS-C (also called a crop sensor) and Full-Frame. A full-frame sensor is the same size as a 35mm film negative, while an APS-C sensor is smaller. This size difference has a few key implications.

Full-frame cameras generally perform better in low light and can achieve a shallower depth of field (that blurry background effect in portraits). However, they are significantly more expensive, and their lenses are larger and costlier too. For a beginner, this is often overkill.

APS-C sensors are the sweet spot. They provide excellent image quality, are much more affordable, and allow for smaller, lighter camera bodies and lenses. The vast majority of the best cameras for new photographers use APS-C sensors because they offer the perfect balance of performance, cost, and portability. Don’t get caught up in the hype—start with APS-C and you’ll have an amazing tool to learn with.

The Importance of a Good Lens System

When you buy a camera, you’re not just buying a body; you’re investing in a lens ecosystem. The camera body is temporary, but good lenses can last for decades. Canon, Sony, Nikon, and Fujifilm all have extensive lines of lenses, but their offerings for their newer mirrorless systems can vary.

Before you buy, look at the selection of lenses available for that camera’s mount. Are there affordable prime lenses (lenses that don’t zoom, like a 50mm f/1.8) that you can buy later to practice with? Are there versatile zoom lenses for travel? Starting with a camera that has a robust and affordable selection of lenses will save you a lot of money and frustration down the road.

The Best Beginner Photography Cameras of 2025: Our Top Picks

Alright, let’s get to the fun part! We’ve tested and researched the market to find the absolute best options for those just starting. These cameras are chosen for their user-friendliness, image quality, and overall value.

1. Canon EOS R50: The Best All-Arounder for New Photographers

The Canon EOS R50 is practically designed from the ground up for beginners. It takes the power of Canon’s advanced mirrorless systems and packs it into a simple, compact, and incredibly intuitive package. Its guided menu system is a standout feature, explaining what settings like ‘Aperture Priority’ actually do as you select them.

Beyond its helpful interface, the R50 boasts a fantastic 24.2MP APS-C sensor and Canon’s Dual Pixel autofocus, which is famously fast and accurate at tracking subjects, including people’s eyes. This means more of your shots will be sharp and in focus, even when your subject is moving. It also shoots excellent 4K video, making it a great hybrid for photos and content creation.

Pros

  • Excellent Guided UI: The camera actively teaches you photography concepts as you use it.
  • Superb Autofocus: Class-leading subject tracking makes it easy to get sharp photos.
  • Compact and Lightweight: Easy to carry around all day without feeling weighed down.

Cons

  • Limited Lens Selection (for now): The RF-S lens lineup for its sensor size is still growing.
  • Single Control Dial: More advanced users might miss having a second dial for faster adjustments.

2. Sony a6100: The Autofocus Powerhouse

While it’s an older model, the Sony a6100 remains one of the top cameras for beginners because of one key feature: its phenomenal autofocus. Sony’s Real-time Eye AF and tracking are legendary, and the a6100 brings that technology to an affordable price point. It locks onto a person’s or animal’s eye and refuses to let go, which is a massive confidence booster when you’re starting out.

The image quality from its 24.2MP APS-C sensor is crisp and detailed. The camera is tiny, making it a great travel companion. It also features a flip-up screen that’s perfect for selfies or vlogging. The biggest advantage, however, is Sony’s mature E-mount lens system, which has a massive variety of affordable, high-quality lenses from both Sony and third-party makers like Sigma and Tamron.

Pros

  • World-Class Autofocus: Incredible eye-tracking for both humans and animals.
  • Massive Lens Selection: Access to a huge range of affordable and professional lenses.
  • Great Image Quality: Proven sensor that delivers sharp, vibrant images.

Cons

  • Dated Menu System: The menus can be confusing to navigate compared to newer cameras.
  • Poor Battery Life: You will absolutely need to buy at least one extra battery.

3. Nikon Z fc: Style Meets Substance

If the process and feel of taking photos are as important to you as the result, the Nikon Z fc is a fantastic choice. It’s designed to look like a classic film camera from the 1980s, complete with physical dials for ISO, shutter speed, and exposure compensation. This tactile approach makes learning the exposure triangle incredibly intuitive and fun.

Beneath its retro exterior, the Z fc is a thoroughly modern mirrorless camera. It has a 20.9MP APS-C sensor that produces beautiful images, a fully articulating flip-out screen, and a solid autofocus system with eye detection. It’s a camera that begs to be picked up and used, making it a wonderful tool for inspiring you to go out and shoot more often.

Pros

  • Engaging Manual Dials: A fantastic, hands-on way to learn core photography settings.
  • Beautiful Retro Design: A stylish camera that’s a joy to use and be seen with.
  • Excellent Image Quality: Nikon’s color science produces pleasing, natural-looking photos.

Cons

  • No In-Body Image Stabilization: You’ll need to rely on lenses with vibration reduction (VR).
  • Ergonomics Aren’t for Everyone: The lack of a deep grip can be uncomfortable for some users.

4. Fujifilm X-T30 II: For the Creative Soul

Fujifilm cameras have a devoted following for a reason. The X-T30 II offers a unique shooting experience centered around creativity. Its biggest draw is Fujifilm’s renowned Film Simulations, which are color profiles based on their classic film stocks like Velvia and Acros. These allow you to get beautiful, stylized images straight out of the camera with no editing required.

Like the Nikon Z fc, it features tactile dials that encourage manual control. It packs a high-resolution 26.1MP X-Trans sensor, which is known for its incredible detail and color rendition. The autofocus is fast and reliable, and the camera body is compact and beautifully built. It’s one of the best cameras for new photographers who want to develop a strong artistic style from day one.

Pros

  • Stunning Film Simulations: Create beautiful, unique images directly in-camera.
  • Superb Image Quality: The X-Trans sensor is famous for its sharpness and color.
  • Tactile, Engaging Controls: A fun and rewarding camera to learn on.

Cons

  • Tilting Screen, Not Fully Articulating: Less flexible for vlogging or low-angle vertical shots.
  • Menu System Can Be Dense: Takes some time to learn where all the settings are.

5. Canon EOS Rebel T8i (EOS 850D): The Classic DSLR Choice

In a world dominated by mirrorless, the Canon Rebel T8i stands as a testament to why DSLRs are still amazing for learning. It offers a refined, comfortable shooting experience with an optical viewfinder that many photographers still prefer for its clear, lag-free view. The ergonomics are fantastic, with a chunky grip that feels secure in the hand.

The Rebel T8i has a 24.1MP APS-C sensor, a fully articulating touchscreen, and a very capable autofocus system, especially when shooting through the rear screen (Live View). The biggest reason to consider this camera is value. The body is affordable, and Canon’s EF/EF-S lens mount has an enormous catalog of inexpensive, high-quality lenses available both new and used. It’s a workhorse system that is perfect for a beginner on a budget.

Pros

  • Incredible Value: Get a lot of camera and lens options for your money.
  • Excellent Ergonomics: Comfortable to hold and use for long periods.
  • Optical Viewfinder: A clear, lag-free view of your subject.

Cons

  • Bulkier Than Mirrorless: Larger and heavier than the other cameras on this list.
  • Autofocus Through Viewfinder is Dated: The Live View AF is great, but the viewfinder AF has fewer points.

Budgeting for Your New Hobby: Price Ranges Explained

One of the most important first steps is setting a realistic budget. It’s easy to get carried away, but you don’t need the most expensive gear to take amazing photos. The price of beginner photography cameras can be broken down into a few key tiers.

Entry-Level Budget ($400 – $700)

This is the sweet spot for most people starting out. In this range, you can find fantastic older mirrorless models like the Sony a6100 or excellent DSLRs like the Canon Rebel series. These cameras come bundled with a versatile kit lens (like an 18-55mm) that covers a wide range of situations. This budget gets you everything you need to learn the fundamentals and start taking high-quality photos immediately.

Mid-Range Investment ($700 – $1200)

Stepping up into this price range gets you the latest technology and features. Cameras like the Canon EOS R50 and Nikon Z fc fall into this category. You’ll typically find faster autofocus, better video capabilities (like 4K), more modern processors, and more refined user interfaces. If you’re serious about photography and want a camera that you can grow with for many years, this is a fantastic investment.

Pro Tip: Always check for camera bundles! Many retailers offer packages that include a camera body, one or two lenses, a memory card, and a bag for a discounted price. This can be a great way to get all the essentials at once and save some money.

Is it Worth Buying Used?

Absolutely. The used market is a goldmine for beginner photographers. You can often find a camera that was top-of-the-line just a few years ago for the price of a new entry-level model today. Reputable online retailers like KEH and MPB inspect and grade all their gear and offer warranties, making it a safe and smart way to maximize your budget.

This is especially true for lenses, which often hold their value and performance for years.

Choosing Your First Camera: A Step-by-Step Guide

With all this information, how do you make the final call? Follow these simple steps to narrow down your options and choose with confidence.

  1. Define Your Photography Goals: What do you want to shoot? If you’re interested in fast-action sports, you’ll need great autofocus. If you love travel, a compact and lightweight camera is key. If you’re passionate about portraits, look for a system with affordable prime lenses. Having a clear idea of your interests will help you prioritize features.

  2. Set a Realistic Budget (Camera + Accessories): Decide on a total amount you’re comfortable spending. Remember to leave about 15-20% of your budget for the essentials: a good memory card, an extra battery, and a camera bag. There’s nothing worse than getting your new camera and realizing you can’t afford a card to actually take pictures with it!

  3. Hold Them in Your Hands: This is the most underrated tip. If possible, go to a local camera store and hold the models you’re considering. How does the grip feel? Can you reach all the buttons comfortably? A camera that feels good in your hands is one you’ll want to use more often. This is what photographers call “ergonomics,” and it’s incredibly important.

  4. Consider the Lens Ecosystem: As we mentioned earlier, you’re buying into a system. Do a quick search for the lenses available for the cameras on your shortlist. Are there options that fit your future goals and budget? A camera with a clear and affordable upgrade path is always a smart choice.

The Exposure Triangle: A Beginner’s Guide to Camera Settings

Your new camera will have an “Auto” mode, but the real fun begins when you switch to Manual (M), Aperture Priority (A/Av), or Shutter Priority (S/Tv). These modes give you control over the three pillars of photography: the exposure triangle.

Aperture (f-stop)

Aperture is the opening in the lens that lets light in. It’s measured in f-stops (e.g., f/1.8, f/4, f/11). A smaller f-number (like f/1.8) means a wider opening, which lets in more light and creates a shallow depth of field (blurry background). A larger f-number (like f/11) means a smaller opening, letting in less light and creating a deep depth of field where everything from front to back is sharp.

Use a wide aperture for portraits and a narrow one for landscapes.

Shutter Speed

Shutter speed is how long the camera’s sensor is exposed to light, measured in seconds or fractions of a second (e.g., 1/1000s, 1/60s, 2s). A fast shutter speed (like 1/1000s) freezes motion, perfect for capturing sports or a bird in flight. A slow shutter speed (like 1s) creates motion blur, which can be used creatively to smooth out waterfalls or capture light trails from cars at night. To avoid blurry photos from handshake, a general rule is to use a shutter speed at least as fast as your lens’s focal length (e.g., for a 50mm lens, use 1/50s or faster).

ISO

ISO is your camera’s sensitivity to light. A low ISO (like 100 or 200) is used in bright light and produces the cleanest, highest-quality images. As the light gets darker, you can increase the ISO (to 1600, 3200, or higher) to make the sensor more sensitive and get a proper exposure. The trade-off is that higher ISOs introduce digital noise or “grain” into your photos.

Modern cameras handle high ISOs very well, but the goal is always to keep it as low as possible for the given lighting conditions.

Don’t Forget the Gear! Essential Accessories for Beginners

Your camera is the star of the show, but a few key accessories will make your life much easier and protect your investment. You don’t need to buy everything at once, but these are the items you should consider first.

  • A Sturdy Camera Bag: This is non-negotiable. A dedicated camera bag has padded compartments to protect your camera body, lenses, and other gear from bumps and scratches. Choose one that fits your gear comfortably with a little room to grow.
  • Extra Batteries and a Memory Card: A single battery rarely lasts a full day of shooting. Always have at least one fully charged spare. You’ll also need a fast, reliable SD card. A 64GB or 128GB card with a V30 or higher speed rating is a great starting point for both photos and video.
  • A Versatile Tripod: A tripod opens up a whole new world of photography, allowing you to shoot long exposures, night skies, and sharp landscapes. You don’t need an expensive carbon fiber model to start; a good quality aluminum tripod will serve you well.
  • Basic Lens Filters: A UV filter can live on your lens to protect the front element from scratches and dust. A Circular Polarizer (CPL) filter is also fantastic for beginners; it reduces glare and reflections and makes blue skies and green foliage pop with color.
  • Cleaning Kit: Dust is the enemy of digital sensors. A simple kit with a rocket blower, a microfiber cloth, and a lens pen will help you keep your gear spotless and your images clean.

Frequently Asked Questions About Beginner Cameras

Let’s answer some of the most common questions that pop up when searching for a first camera.

How much should a beginner pay for a camera?

A beginner should expect to pay between $500 and $900 for a great new camera kit, which includes the body and a versatile starter lens. This price range includes excellent options like the Canon EOS R50 or Sony a6100. If you explore the used market, you can often find a comparable setup for $400-$600, offering even better value.

Is mirrorless or DSLR better for beginners?

For most beginners in 2025, a mirrorless camera is the better choice. The electronic viewfinder (EVF) provides a real-time preview of your final image, which makes learning exposure much easier. They are also typically smaller, lighter, and have more advanced autofocus and video features. However, DSLRs offer incredible value and are a fantastic, budget-friendly way to learn photography fundamentals.

Is Nikon better or Sony? Or Canon?

There is no single “best” brand. Canon is often praised for its user-friendly menus and excellent color science. Sony is known for its cutting-edge autofocus technology and vast third-party lens support. Nikon is renowned for its comfortable ergonomics and robust build quality.

All three make fantastic beginner photography cameras. The best brand for you is the one that makes a camera that feels good in your hands and fits your budget.

What is the best budget camera for photography?

The best budget camera is often a slightly older but still very capable model. The Canon EOS Rebel T7 DSLR is an incredibly affordable entry point that teaches you all the basics. In the mirrorless world, the Sony a6100 offers phenomenal features for its price, especially if you prioritize autofocus performance. Buying used is also a great way to get a top-tier camera on a tight budget.

Why are DSLRs being discontinued?

Major camera manufacturers like Canon and Nikon have shifted their research and development focus almost entirely to mirrorless technology. Mirrorless cameras have fewer mechanical parts, allowing for faster shooting speeds, more advanced autofocus systems that cover the entire sensor, and silent shooting capabilities. While DSLRs are no longer the focus of innovation, the existing models and their extensive lens libraries will remain excellent tools for photographers for many years to come.

Final Thoughts: Your Photography Journey Starts Now

Choosing from the best beginner photography cameras is an exciting first step, but remember that the camera is just a tool. The best camera in the world is the one you have with you, the one that inspires you to get out and shoot. Whether you choose a modern mirrorless marvel like the Canon EOS R50 or a value-packed DSLR like the Rebel T8i, you’re giving yourself the gift of a new creative outlet.

Don’t get bogged down by specs or worry about having the “perfect” gear. Pick a camera that feels right, learn the basics of the exposure triangle, and start capturing the world as you see it. Your passion and your perspective are what will truly make your photos special. Now go have some fun!

Exit mobile version