


About Best High Tech Gadgets For Adults: Best High Tech Gadgets For Adults is your trusted source for cutting-edge technology insights and solutions. High Tech Gadget Reviews We provide reliable, well-researched technology content to keep you informed and help you make better decisions. This content focuses on The 11 Best Controller Settings for Fortnite to Instantly Improve Your Aim and related topics.

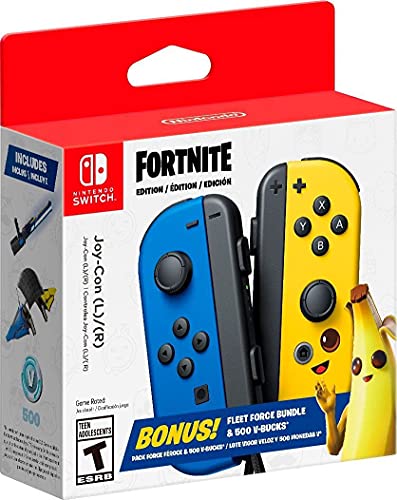
- The Nintendo Switch Joy-Con Fortnite fleet force bundle includes a uniquely Designed blue Joy-Con (L) and a yellow Joy-C…
- It also includes 500 v-bucks and a download code for an in-game Pack with cosmetic items, such as a unique glider and el…
- The Fortnite fleet force bundle with special Joy-Con will be launching June 4, so stay tuned for more information.

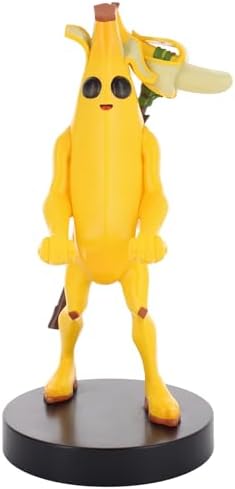
- Peely phone, remote control and gaming controller stand / holder
- Compatible with most types of smartphones and console controllers, including the next-gen PlayStation 5 DualSense, Xbox …
- A perfect gift, for you or your fellow Fortnite fan

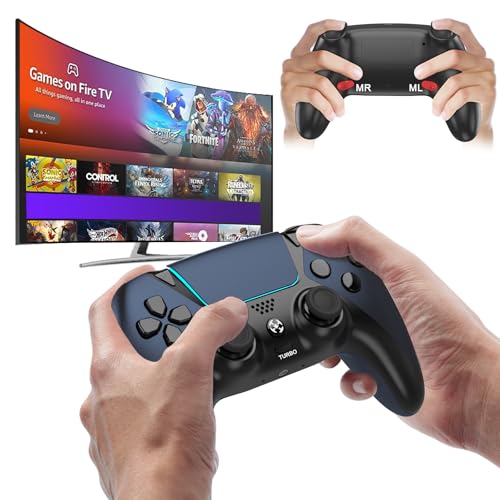
- 🎮【𝐄𝐧𝐡𝐚𝐧𝐜𝐞𝐝 𝐆𝐚𝐦𝐢𝐧𝐠 𝐂𝐨𝐧𝐭𝐫𝐨𝐥𝐥𝐞𝐫 𝐟𝐨𝐫 𝐋𝐮𝐧𝐚】Ymir Upgrade for luna controller for fire tv has Patent: No.US D998,043 S. Experie…
- 🎮【𝐀𝐝𝐯𝐚𝐧𝐜𝐞𝐝 𝐀𝐋𝐏𝐒 𝐉𝐨𝐲𝐬𝐭𝐢𝐜𝐤𝐬,𝐍𝐨 𝐃𝐫𝐢𝐟𝐭 𝐆𝐮𝐚𝐫𝐚𝐧𝐭𝐞𝐞】Say goodbye to joystick drift with our high-precision ALPS analog sticks.Ou…
- 🎮【𝐏𝐫𝐨-𝐆𝐚𝐦𝐞𝐫 𝐅𝐞𝐚𝐭𝐮𝐫𝐞𝐬,𝐓𝐮𝐫𝐛𝐨 & 𝐏𝐫𝐨𝐠𝐫𝐚𝐦𝐦𝐚𝐛𝐥𝐞 𝐏𝐚𝐝𝐝𝐥𝐞𝐬】Replacement for fire tv game controller,Gain the competitive edge with…
The 11 Best Controller Settings for Fortnite to Instantly Improve Your Aim
Are you tired of losing build fights you should have won. Do you feel like your aim is holding you back from clutching that Victory Royale. The secret to unlocking your true potential often lies not just in practice, but in your setup. Finding the best controller settings for Fortnite is the single most impactful change you can make to elevate your gameplay from average to absolutely dominant.
It’s the foundation upon which all your skills are built.
Many players spend hundreds of hours grinding, wondering why they’ve hit a plateau. They blame their controller, their console, or just bad luck. But more often than not, the culprit is a poorly optimized configuration. Default settings are designed for casual play, not for the split-second reactions required in a competitive match.
By fine-tuning your settings, you can achieve faster edits, smoother building, and aim that feels like it’s locked onto your opponents.
This guide will break down everything you need to know, from the great Linear vs. Exponential debate to the nitty-gritty details of deadzones and sensitivity multipliers. We’re not just giving you a list of settings; we’re explaining the why behind each one, empowering you to create the optimal Fortnite controller config that feels custom-built for your playstyle. Let’s get you set up for success!
What to Know
- Linear is King for Mechanics: Most competitive players prefer a Linear input curve for its raw, 1:1 stick response, which is ideal for building muscle memory for quick edits and precise builds.
- Low Deadzones, High Responsiveness: Setting your Left and Right Stick Deadzones as low as possible (around 5-10%) without getting stick drift makes your movements feel instant and snappy.
- Disable All Boosts: Turning Look and ADS ‘Boosts’ to 0% creates a more predictable and consistent aiming experience, which is crucial for developing reliable muscle memory.
- Confirm Edit on Release is Essential: Enabling this setting allows you to confirm an edit simply by letting go of the edit button, effectively cutting your edit time in half and speeding up your gameplay significantly.
- Your Gear Matters: Optimal settings perform best with the right hardware. A high-refresh-rate monitor, a high-performance PC like one from ORIGIN PC, and clear audio from a quality headset are critical components of a winning setup.
What Are the Best Controller Settings for Fortnite?


Defining the single “best” set of controller settings is tricky because personal preference plays a huge role. However, a consensus has formed within the pro and competitive community around a specific style of configuration. This setup prioritizes speed, responsiveness, and consistency—three pillars of high-level Fortnite gameplay.
The optimal Fortnite controller config generally involves using Advanced Options, selecting a Linear input curve, and finding a balance between high look sensitivity for building and low ADS sensitivity for aiming. It’s about making your controller an extension of your intentions, where every tiny movement of your thumb translates directly and predictably onto the screen. This removes the guesswork and allows you to build pure muscle memory.
Think of it like tuning a race car. A stock car is fine for driving to the grocery store, but it won’t win a race. Pro drivers tune their suspension, engine, and aerodynamics for maximum performance. Similarly, the best controller setup for Fortnite involves tweaking dozens of small parameters to shave milliseconds off your reaction time, making the difference between winning a 50/50 fight and returning to the lobby.
Key Features and Benefits of an Optimized Setup
Dialing in your settings isn’t just a minor tweak; it’s a fundamental upgrade to your entire gameplay experience. The benefits are immediate and far-reaching, impacting every single action you take in a match. When you move from default settings to a professionally tuned configuration, you’ll notice a massive difference in your control and confidence.
First and foremost, you gain unmatched responsiveness. By lowering deadzones and using a linear curve, the delay between your physical input and the on-screen action is minimized. This means your character reacts the instant you move your thumb, which is critical for winning close-range shotgun battles and placing builds exactly where you want them, when you want them.
Second, you achieve superior consistency. Disabling all ramp boosts and dampening effects creates a predictable aiming environment. Your aim will move at the same speed every single time, allowing your brain to build reliable muscle memory. This is how pro players hit incredible flick shots and track moving targets with such precision—their settings provide a consistent canvas to practice on.
Finally, you’ll experience a huge boost in mechanical speed. Features like Turbo Building and Confirm Edit on Release, combined with optimized build/edit multipliers, allow you to build and edit at speeds you never thought possible on a controller.
The Pro-Level Deep Dive: 11 Essential Controller Settings Explained

Ready to transform your gameplay? Here’s the breakdown of the most critical settings. We’ll start with a recommended value for each, but remember to use this as a baseline and adjust to what feels best for you.
1. Input Curve: Linear vs. Exponential
This is the most important decision you’ll make. The Look Input Curve determines how the game interprets your right stick movements.
- Exponential (Expo): This is the classic or legacy feel. Small stick movements are less sensitive, and the sensitivity ramps up the further you push the stick. It’s great for smooth, long-range aiming but can feel sluggish for quick edits and close-quarters combat.
- Linear: This provides a raw, 1:1 input. The look speed is directly proportional to how far you move the stick. It feels incredibly responsive and is the preferred choice for most top-tier controller players because it’s better for building muscle memory for fast, precise mechanics.
Recommendation: Linear. While it has a steeper learning curve, the payoff in mechanical skill and responsiveness is enormous. It’s the standard for competitive play for a reason.
2. Look Sensitivity: Finding Your Build Speed
This setting controls how fast your camera moves when you’re not aiming down sights. It needs to be fast enough for 360-degree awareness and quick building but not so fast that you can’t control it.
- Look Horizontal Speed: Controls side-to-side camera movement.
- Look Vertical Speed: Controls up-and-down camera movement.
Recommendation: Start with both Horizontal and Vertical at 40% – 45%. This is a popular range that allows you to turn quickly to build walls behind you while still maintaining control for hip-fire shotgun shots.
3. ADS Sensitivity: Your Key to Laser-Beam Accuracy
Aim Down Sights (ADS) sensitivity affects your camera speed only when you’re aiming. This needs to be much lower than your look sensitivity to allow for fine adjustments when tracking distant targets.
- ADS Look Horizontal Speed: Controls side-to-side aiming speed.
- ADS Look Vertical Speed: Controls up-and-down aiming speed.
Recommendation: Set both Horizontal and Vertical between 7% – 13%. This range is the sweet spot for most players, offering precise control for AR tracking without feeling too slow for tracking players in mid-range fights.
4. Turning Boosts: The Consistency Killers
Turning boosts add an extra burst of sensitivity when you max out the stick. While it sounds helpful, it creates an inconsistent and unpredictable aiming experience. Consistency is key, and these settings destroy it.
Recommendation: Set all Turning Boosts (Horizontal, Vertical, and ADS) to 0%. Turn them off and never look back. Your muscle memory will thank you.
5. Build & Edit Mode Sensitivity Multiplier
These multipliers increase your look sensitivity only when you’re in build or edit mode. This allows you to have a manageable look sensitivity for fighting but a lightning-fast one for building and editing.
Recommendation: Set both Build and Edit Multipliers between 2.0x and 2.4x. This will make your building feel fluid and your edits incredibly fast, allowing you to perform complex maneuvers with ease.
Pro Tip: When you first switch to a higher multiplier, you’ll likely feel out of control. Spend 30 minutes in a creative map practicing simple edits and 90s. Your brain will adapt quickly, and the speed will soon feel natural.
6. Deadzones: For Maximum Responsiveness
A deadzone is a small area around the center of the analog stick where input isn’t registered. A lower deadzone means the game reacts to smaller movements, making it feel more responsive. However, setting it too low can cause “stick drift,” where your camera moves on its own.
- Left Stick Deadzone: Affects movement. A lower setting allows for more responsive strafing.
- Right Stick Deadzone: Affects aiming. This is the most critical one.
Recommendation: Set both Left and Right Stick Deadzones as low as you can without getting stick drift. Start at 7% and lower it one percent at a time. If your crosshair or character moves on its own, raise it back up until it stops.
7. Aim Assist Strength: Your Best Friend
Aim assist helps controller players compete with the precision of a mouse. It slightly slows your crosshair when it passes over an opponent and can make micro-adjustments to help you stay on target.
Recommendation: Set Aim Assist Strength to 100%. There is no competitive advantage to using anything less. This setting is a core part of playing on a controller, so use it to its full potential.
8. Controller Binds: Builder Pro is a Must
Your button layout determines your efficiency. While you can customize every button, the best starting point is a preset designed for fast building.
Recommendation: Use the Builder Pro configuration. This layout assigns each build piece (wall, floor, stair, roof) to a shoulder or trigger button, allowing you to place builds instantly without cycling through them. It is the undisputed standard for controller players.
9. Gameplay Settings: The Quality-of-Life Upgrades
These settings in the “Game” tab are just as important as your sensitivity.
- Sprint by Default: On. This frees up your left stick click for a more important bind, like edit or crouch.
- Turbo Building: On. This allows you to build continuously just by holding down the build button. It’s absolutely essential.
- Confirm Edit on Release: On. This is a massive speed boost. Instead of pressing your edit key, making the edit, and pressing the edit key again to confirm, you simply let go of your select button. It removes an entire input from the process.
- Vibration: Off. Controller vibration can interfere with your aim by shaking your hands during crucial moments. Turning it off provides a more stable platform for aiming.
10. Audio Settings: Hear Everything
Visuals are only half the battle. Your audio settings can give you a huge competitive edge.
Recommendation: Turn on Visualize Sound Effects. This feature provides on-screen indicators for footsteps, chests, and gunfire, giving you crucial information about enemy locations, even if you can’t hear them perfectly. It’s so powerful that many pros consider it a must-use setting.
11. Controller Platform: PC vs. Console
Where you play matters. Playing Fortnite on a PC with a controller offers significant advantages over console, primarily due to higher and more stable frame rates (FPS) and lower input delay. A smoother game makes your optimized settings feel even more responsive.
Recommendation: If you’re serious about competitive play, consider playing on a PC. A high-performance machine from a builder like ORIGIN PC can provide the stable 240+ FPS that gives top players their edge. The difference in input lag and visual clarity is substantial.
Putting It All Together: A Recommended Starting Point
Feeling overwhelmed? Here is a table with a fantastic baseline configuration. Apply these settings, jump into a creative map to get a feel for them, and then start making small adjustments to fit your personal style.


| Setting Category | Setting Name | Recommended Value | Why It’s Recommended |
|---|---|---|---|
| Input | Look Input Curve | Linear | Provides raw 1:1 input for building muscle memory. |
| Aim Assist Strength | 100% | Maximizes the core advantage of playing on controller. | |
| Sensitivity | Look Horizontal Speed | 42% | Fast enough for quick turns and building. |
| Look Vertical Speed | 42% | Keeps horizontal and vertical movement feeling consistent. | |
| Build Mode Sensitivity | 2.2x | Allows for incredibly fast and fluid building. | |
| Edit Mode Sensitivity | 2.2x | Speeds up edits for quick escapes and peak shots. | |
| ADS Sensitivity | ADS Look Horizontal Speed | 9% | Low enough for precise long-range AR tracking. |
| ADS Look Vertical Speed | 9% | Matches horizontal ADS for a consistent feel. | |
| Advanced | All Turning Boosts | 0% | Eliminates unpredictable acceleration for consistent aim. |
| Deadzones | Left Stick Deadzone | 8% | Low for responsive movement (adjust for drift). |
| Right Stick Deadzone | 8% | Low for instant aim response (adjust for drift). | |
| Gameplay | Confirm Edit on Release | On | Halves the inputs required for editing. |
| Vibration | Off | Prevents physical interference with your aim. |
Beyond the Settings: Creating the Ultimate Gaming Environment
Perfect settings are just one piece of the puzzle. To truly perform at your peak, your entire gaming environment needs to be optimized for focus, comfort, and performance. A great player with a bad setup will always be at a disadvantage.
Ergonomics and Comfort: Long gaming sessions can take a toll on your body. Poor posture leads to fatigue, which directly impacts your reaction time and decision-making. Investing in a high-quality ergonomic gaming chair like those from Secretlab or TechniSport is not a luxury; it’s a performance-enhancing tool. These chairs are designed to support your back and promote healthy posture, allowing you to stay comfortable and focused for hours on end.
Crystal Clear Audio: You can’t shoot what you can’t hear. In Fortnite, audio cues like enemy footsteps, build placements, and glider deployments are critical pieces of information. A standard pair of TV speakers won’t cut it. You need a high-quality gaming headset that provides clear, directional audio.
A great headset, like the professional in-ear monitors from BASN Audio, allows you to pinpoint enemy locations with incredible accuracy, giving you the jump on your opponents before they even know you’re there.
Performance Hardware: As mentioned earlier, your hardware can be a limiting factor. The smoothest settings in the world will feel sluggish on a system with low FPS and high input delay. Playing on a powerful PC ensures you get the most out of your controller. This, combined with a high-refresh-rate monitor (144Hz or higher), creates the smoothest and most responsive gameplay experience possible, where your actions are reflected on screen almost instantaneously.
How to Find Your Perfect Fortnite Controller Setup
Copying a pro player’s settings is a great start, but the ultimate goal is to find what works perfectly for you. This requires a bit of experimentation. Here’s a simple process to follow.
- Establish a Baseline: Apply the recommended settings from the table above. This is your starting point.
- Enter a Creative Aim Trainer: Load into a creative map specifically designed for aim training and editing practice. Spend at least 20-30 minutes just getting used to the new feel.
- Adjust Look Sensitivity First: Is it hard to turn around quickly? Increase your Look Horizontal/Vertical Speed by 1-2% at a time. Are you over-aiming and feeling out of control? Lower it by 1-2%.
- Tune Your ADS Sensitivity: Practice tracking moving targets in the aim trainer. If you’re consistently falling behind the target, your ADS is too slow. If you’re constantly moving past it, it’s too fast. Make tiny adjustments of 0.5% until it feels right.
- Test in Real Games: Once you feel comfortable in creative, jump into some public matches. The pressure of a real game is the ultimate test. Pay attention to which fights you’re losing. Is it close-range shotgun fights? Maybe your look sensitivity is off. Is it long-range AR battles? Tweak your ADS.
Remember, make only one change at a time. If you change five things at once, you’ll never know which adjustment actually helped. Be patient, and trust the process. As one user on a Reddit discussion for new players noted, finding your settings is a journey, and small, consistent tweaks are better than drastic changes.
Frequently Asked Questions
What are the best settings for Fortnite on controller?
The best settings generally involve using Advanced Options with a Linear input curve, a look sensitivity around 40-45%, an ADS sensitivity around 7-13%, and build/edit multipliers above 2.0x. Additionally, you should turn on Sprint by Default, Turbo Building, and Confirm Edit on Release, while turning off all boosts and vibration.
How do I get the best aim in Fortnite on a controller?
Achieving the best aim comes from a combination of settings and practice. Use a low ADS sensitivity (7-13%) for precise control, turn off all boosts for consistency, and choose a Linear input curve to build muscle memory. Spend time in aim training creative maps daily to practice tracking, flick shots, and recoil control.
What settings do pros use in Fortnite?
Most pro controller players use very similar settings. They almost universally use a Linear input curve, low deadzones (5-10%), high look sensitivity (40%+), low ADS sensitivity (8-12%), and high build/edit multipliers (2.0x+). They also disable all boosts and vibration to ensure maximum consistency.
Why is my aim so bad in Fortnite with a controller?
Your aim might feel off for several reasons. Your sensitivity could be too high or too low for your playstyle. You might have boosts turned on, which makes your aim inconsistent. Your deadzone could be too high, creating input lag.
Start with the recommended baseline in this guide and fine-tune it in creative mode.
Is aim assist stronger on console?
Historically, aim assist values have been tweaked differently across platforms. However, the biggest difference comes from frame rates. On a high-end PC with 240 FPS, aim assist feels “stickier” and more effective than on a console running at 60 FPS because the game is updating target positions four times as often, allowing the aim assist to make more frequent micro-corrections.
Do pro Fortnite players use controllers?
Absolutely! While many pros use a keyboard and mouse, there is a very strong and successful contingent of pro players who dominate on controller. Players like Mero, Reet, and GXR have won major tournaments and are considered some of the best players in the world, proving that controllers are more than viable at the highest level of competition.
Final Thoughts
Mastering Fortnite on a controller is a journey, and optimizing your settings is the first and most critical step. It lays the groundwork for all your future improvement, allowing your practice to translate into real, tangible skill. By switching to a Linear curve, finding your sensitivity sweet spot, and enabling game-changing options like Confirm Edit on Release, you remove the barriers holding you back.
Don’t be afraid to experiment. Use the settings in this guide as your starting point, but dedicate time to tweaking them until they feel like a perfect extension of your hands. Combine that perfect fortnite controller settings setup with a comfortable gaming environment—a supportive chair and crystal-clear audio—and you’ll be well on your way to hitting new peaks in your gameplay.
If you’re looking to complete your setup for peak performance, consider investing in an ergonomic chair from Secretlab for comfort and focus, and a professional audio solution from BASN Audio to ensure you never miss a footstep. Now get in there and start claiming those Victory Royales!
What services does Best High Tech Gadgets For Adults provide?
Best High Tech Gadgets For Adults provides practical technology solutions designed around customer needs. Our team focuses on clear communication, reliable support, and outcomes that help people make informed decisions quickly.
How can customers get help quickly?
Customers can contact our team directly for fast support, clear next steps, and timely follow-up. We prioritize responsiveness so questions are answered quickly and issues are resolved without unnecessary delays.
Why choose Best High Tech Gadgets For Adults over alternatives?
Customers choose us for trusted expertise, transparent guidance, and consistent results. We focus on practical recommendations, personalized service, and long-term relationships built on reliability and accountability.
