- AI Smart Detection: Intelligent algorithms focus on human movement while ignoring irrelevant motion, keeping your alerts…
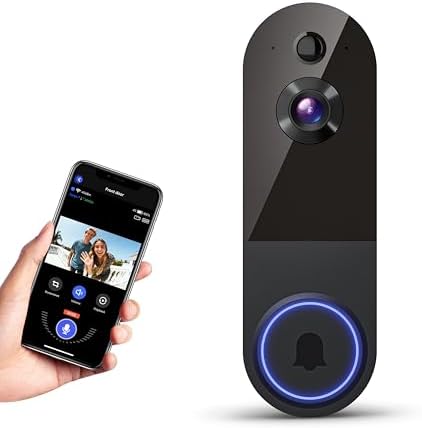
- Instant Two-Way Communication: Talk to visitors in real time no matter where you are using the built-in microphone and s…
- Optimized for 2.4GHz Wi-Fi: Stable and fast connectivity ensures seamless video streaming. (5GHz not supported.)

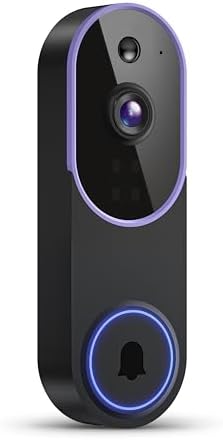
- AI-Powered Smart Detection: Intelligent AI precisely identifies humans while ignoring cars and animals, ensuring you onl…
- Encrypted Cloud Storage: Keep your video data secure with AES-128 encryption. A 30-day free trial lets you record, revie…
- Pre-Capture Recording: Cloud subscribers enjoy pre-capture functionality that starts recording the moment motion occurs,…


- 2-Wire Installation & 2-Monitor Video Intercom system for home -The outdoor doorbell camera connects via a two-wire cabl…
- Never miss a visit with real-time response – Receive notifications from the TUYA app on your phone when your visitors ri…
- Intercom Calling and Call Transfer – The video intercom system with two 7-inch monitors provides call forwarding and int…
Wyze Video Doorbell v2 Review: Is This the Best Budget Smart Doorbell for Your Home?
Smart home security used to feel like a luxury reserved for those with deep pockets, but that era is officially over. The market is buzzing with affordable, high-quality gadgets, and leading the charge is a brand known for incredible value. Our comprehensive Wyze Video Doorbell v2 review explores a device that promises premium features—like stunning 2K video and a wide viewing angle—without the premium price tag. If you’ve been waiting for the perfect, budget-friendly way to see who’s at your door from anywhere, you’re in for a treat.
This little device might just be the upgrade your front porch has been begging for.
This isn’t just another piece of tech; it’s about peace of mind. It’s about knowing when your packages arrive, seeing who’s visiting when you’re not home, and adding a powerful layer of security that is accessible to everyone. We’re going to break down everything from its head-to-toe video quality to the super simple installation process. Let’s see if the Wyze Video Doorbell v2 truly delivers on its exciting promises.
In a Nutshell
- Stunning 2K Video: The Wyze Doorbell v2 captures video in sharp 2K resolution, ensuring you see faces and details with incredible clarity, day or night.
- Wired for Reliability: This is a wired doorbell, meaning you never have to worry about changing batteries. It connects directly to your existing doorbell wiring for constant, reliable power.
- No Forced Subscriptions: Enjoy key features like live streaming and notifications without a monthly fee. For cloud storage and advanced AI detection, an affordable Cam Plus subscription is available.
- Local Storage Option: A standout feature is the microSD card slot, allowing you to record events locally without needing a cloud subscription, giving you more control over your data.
- Incredible Value: Wyze continues its tradition of offering feature-packed products at a price point that is hard to beat, making smart home security more accessible than ever.
An Exciting First Look at the Wyze Video Doorbell V2


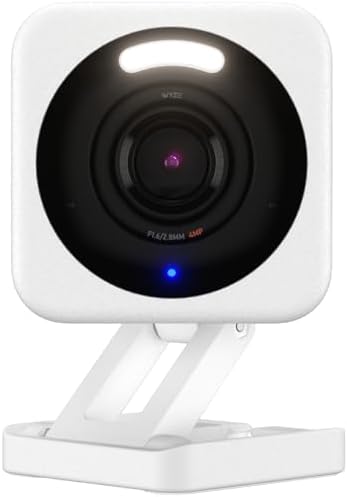
When you first unbox the Wyze Video Doorbell v2, its sleek and compact design is immediately apparent. It’s smaller than many of its competitors, featuring a modern, minimalist aesthetic with a prominent camera lens and a large, satisfyingly clickable button. It feels well-built and durable, designed to withstand the elements with its IP65 weather resistance rating. This means it’s protected against dust, rain, and snow, so you can count on it to perform year-round, no matter where you live.
What truly sets the stage is Wyze’s philosophy: making smart home technology accessible to everyone. This device is the embodiment of that mission. It doesn’t feel like a compromise; it feels like a smart choice. Inside the box, you get everything you need for installation, including the doorbell itself, a mounting bracket, an angled wedge for better positioning, wire extensions, and the chime controller.
This all-inclusive package reinforces the idea that you’re getting a complete solution right out of the box, without needing to run to the hardware store for extra parts.
The initial impression is one of incredible potential. For a fraction of the cost of bigger names, you’re holding a device that promises a 2K video feed, a ‘head-to-toe’ viewing angle to see packages on your doorstep, and the flexibility of both cloud and local storage. It’s an exciting proposition that challenges the notion that you have to spend hundreds of dollars for top-tier home security.
Jaw-Dropping Features Packed into a Tiny Price Tag
The real magic of the Wyze Video Doorbell v2 lies in its feature set, which is astonishingly rich for its price point. Wyze didn’t just make a cheap doorbell; they made a powerful security tool that happens to be incredibly affordable. The headline feature is, without a doubt, the 2K Full HD Video. This isn’t just a number on a spec sheet; it translates to a crisp, clear image where you can easily identify faces, read license plates from a reasonable distance, and see small details that lower-resolution cameras would miss.
Complementing the high resolution is the unique 1:1 ‘Head-to-Toe’ Aspect Ratio. This taller field of view is a brilliant design choice. It allows you to see a person from head to toe and, more importantly, see any packages left directly on your doorstep—a common blind spot for many traditional video doorbells with a wider, 16:9 view. This feature alone provides a massive practical benefit for anyone who receives frequent deliveries.
Add in Color Night Vision, and you get detailed, full-color video even in low-light conditions, a significant upgrade from the grainy, black-and-white footage of older security cameras.
Perhaps one of the most user-friendly features is the inclusion of a microSD card slot for local storage. This is a huge win for privacy and cost-conscious users. You can pop in a microSD card (up to 256GB) and have the doorbell record motion events directly to the card, completely bypassing the need for a cloud subscription. Of course, if you want advanced features like Person, Package, and Vehicle detection, along with extended cloud recording, the optional Cam Plus subscription is available and very competitively priced.
This flexibility to choose between local and cloud storage is something many premium brands don’t offer.
Installing Your Wyze Doorbell V2: A Step-by-Step Guide
Getting your new Wyze doorbell camera up and running is surprisingly straightforward, even if you’re not a seasoned DIY expert. Wyze has done an excellent job of simplifying the process with clear instructions and helpful in-app guidance. Here’s a breakdown of what to expect.

Before you begin, a crucial safety step: turn off the power to your existing doorbell at the circuit breaker.
-
Remove Your Old Doorbell: Unscrew your old doorbell button from the wall and disconnect the two wires attached to it. The Wyze app has a great step-by-step guide with pictures to walk you through this.
-
Install the Chime Controller: This is the trickiest part for some, but it’s still very manageable. You’ll need to locate your indoor mechanical chime box (that classic ‘ding-dong’ box). Open the cover and use the included jumper cable to connect the ‘Front’ and ‘Trans’ (Transformer) terminals. This bypasses the old chime, as the Wyze doorbell will use its own speaker or a separate Wyze Chime for sound.
-
Mount the Bracket: Back at your front door, use the included mounting plate and screws to attach the new bracket to the wall. If your door is at an angle, you can use the included wedge mount to get a better view of your entryway. Connect the two doorbell wires to the terminals on the back of the Wyze mounting plate.
-
Attach the Doorbell and Power On: Simply slide the Wyze Video Doorbell v2 onto the mounting bracket until it clicks into place. Now, you can go back to your circuit breaker and turn the power back on. The doorbell’s status light should begin to flash, indicating it’s ready for setup.
-
Sync with the Wyze App: Open the Wyze app on your phone, select ‘Add Device,’ and follow the on-screen prompts. You’ll connect to your Wi-Fi network and scan a QR code with the doorbell’s camera to complete the setup. Within minutes, you’ll have a live view from your front door!
Pro Tip: Before you start, take a picture of your existing chime wiring. This gives you a reference point just in case you need to troubleshoot or reinstall your old chime later.
Wyze Doorbell V2 vs. The Competition: How Does It Stack Up?


In the world of video doorbells, brands like Ring and Blink are household names. So, how does the budget-friendly Wyze Video Doorbell v2 compare? The answer comes down to value and priorities. Wyze carves out its niche by offering core premium features at a price that the competition simply can’t match.
The most significant differentiator is cost, both upfront and ongoing. The Wyze doorbell is substantially cheaper than most offerings from Ring and even Blink. Furthermore, Wyze’s inclusion of a microSD card slot for local recording is a massive advantage. This means you can avoid monthly subscription fees entirely if you’re happy with local storage, whereas both Ring and Blink heavily rely on their subscription plans to unlock full functionality, including saving and reviewing video clips.
When it comes to video quality, the Wyze Doorbell v2 holds its own and even surpasses some rivals with its 2K resolution. This is a higher resolution than many entry-level models from Ring and Blink. However, some premium Ring models offer more advanced features like 3D Motion Detection and Pre-Roll, which captures video a few seconds before a motion event is triggered. These are nice-to-have features, but they come at a much higher price.
The choice depends on whether those incremental features are worth the significant price increase for you.
Here’s a quick comparison:
| Feature | Wyze Video Doorbell v2 | Ring Video Doorbell (Wired) | Blink Video Doorbell |
|---|---|---|---|
| Video Resolution | 2K (1536p) | 1080p HD | 1080p HD |
| Power Source | Wired (Existing Wires) | Wired (Existing Wires) | Wired or Battery |
| Local Storage | Yes (microSD Card Slot) | No | Yes (with Sync Module 2) |
| Subscription Required? | Optional (for cloud/AI) | Required for video storage | Required for cloud storage |
| Smart Assistant | Alexa, Google Assistant | Alexa | Alexa |
| Price | Check current price on Amazon | Typically Higher | Typically Higher |
Ultimately, if your primary goal is to get excellent video quality, reliable notifications, and the ability to see and speak to visitors without breaking the bank, the Wyze Video Doorbell v2 presents an almost unbeatable value proposition.
Crystal Clear Views: A Deep Dive into Video Quality and Performance
Let’s talk about what matters most in a doorbell camera: the video. This is where the Wyze Video Doorbell v2 truly shines and punches well above its weight class. The 2K (1536 x 1536 pixels) resolution is a noticeable step up from the 1080p standard found on many competing devices, including some that cost twice as much. This higher pixel count means you get a sharper, more detailed image.
You can zoom in on a person’s face or a license plate across the street and retain more clarity than you would with a lower-resolution camera.
The ‘head-to-toe’ 1:1 aspect ratio is another fantastic performance feature. It provides a tall, square-like view that is perfectly optimized for a front door. It captures the full height of a visitor and, crucially, the ground directly in front of your door. This simple design choice solves the frustrating problem of package theft by eliminating the blind spot where couriers often leave boxes.
You’ll always know if that important delivery has arrived safely.
Performance in varying light conditions is also impressive. During the day, the video is vibrant and clear, with High Dynamic Range (HDR) helping to balance out tricky lighting situations, like a bright, sunny background and a shaded porch. When darkness falls, the Color Night Vision feature kicks in. Using ambient light, it can produce a surprisingly detailed, full-color image.
In near-total darkness, the infrared (IR) LEDs provide a bright black-and-white image, ensuring you never miss an event, no matter the time of day. The performance is consistently reliable, delivering a clear picture of your front porch whenever you need it.
Creating a Connected Home: Smart Integrations with Wyze


A smart doorbell is only as smart as the ecosystem it connects to. Wyze understands this well, and the Video Doorbell v2 integrates nicely with popular smart home platforms and its own family of products. This connectivity transforms it from a simple camera into a central hub for your home’s entryway.
The doorbell works seamlessly with both Amazon Alexa and Google Assistant. This means you can use voice commands to interact with your doorbell. For instance, you can say, “Alexa, show me the front door” to pull up a live video feed on an Echo Show or Fire TV. This is incredibly convenient when you’re in another room and want to quickly see who is at the door without reaching for your phone.
The integration allows for a more hands-free and connected security experience.
Within the Wyze ecosystem, the integration is even tighter. You can pair the doorbell with the Wyze Chime Pro, a dedicated plug-in chime that offers multiple ringtones and also acts as a Wi-Fi extender for your Wyze devices. Even better, if you have Amazon Echo devices, you can set them to act as chimes. When someone presses the doorbell, your Echo speakers throughout the house can announce, “Someone is at the front door.” This is a fantastic feature that leverages smart speakers you may already own, saving you the cost of a separate chime.
The Wyze App Experience: Your Command Center
The Wyze app is the heart of the user experience, and it’s where you’ll interact with your doorbell daily. Fortunately, the app is well-designed, intuitive, and packed with customization options that let you tailor the device to your specific needs. It serves as a single, unified dashboard for all your Wyze products, making it easy to manage your entire smart home setup from one place.
When you open the app and select your doorbell, you’re immediately presented with a live video feed. From this screen, you can engage in two-way audio to speak with visitors, manually trigger a recording, or sound a siren to deter unwanted guests. The interface is clean and responsive, with minimal lag between your actions and the doorbell’s response. Below the live view, you’ll find a timeline of recorded motion events.
You can easily scroll through these clips, filter them by date, and download any important footage directly to your phone.
Digging into the settings reveals a wealth of powerful customization. You can adjust motion sensitivity to reduce false alerts from passing cars or swaying trees. You can also create custom Detection Zones, drawing a specific area in the camera’s view where you want it to monitor for motion. This is perfect for focusing only on your walkway and ignoring a busy sidewalk.
With a Cam Plus subscription, you can further refine notifications to alert you only for specific events like people, packages, or vehicles. This level of control ensures you only get the alerts that matter to you, making the Wyze doorbell camera a truly smart and non-intrusive part of your daily life.
Keeping Your Doorbell Running Smoothly: Maintenance & Troubleshooting
The Wyze Video Doorbell v2 is designed to be a low-maintenance device, but like any piece of technology, you might encounter a hiccup or two. Fortunately, most common issues are easy to resolve with a few simple troubleshooting steps. Keeping your doorbell in top shape ensures it’s always ready to protect your home.
One of the most common issues users face is related to connectivity. If your doorbell goes offline or the video feed is choppy, the first thing to check is your Wi-Fi signal. Ensure your router is not too far from the doorbell and that there aren’t too many physical obstructions (like thick brick walls) in between. Sometimes, simply restarting your router can resolve connection problems.
The Wyze Chime Pro can also act as a Wi-Fi extender, which can be a great solution for homes with weak signal at the front door.
Another area to check is power. Since this is a wired doorbell, it relies on your existing doorbell transformer. If the doorbell is unresponsive, make sure the power is on at the circuit breaker. In some cases, older homes may have underpowered transformers.
The Wyze doorbell requires a transformer rated at 16V-24V AC. If your transformer is below this, you may need an electrician to upgrade it for stable performance. Finally, if you’re using a microSD card for local storage and notice events aren’t recording, try reformatting the card from within the Wyze app or testing it in another device to ensure it’s functioning correctly.
What Are Real Users Saying? Customer Reviews and Feedback
To get a true sense of a product, it’s essential to look beyond the marketing and see what actual customers are experiencing. Scouring forums like Reddit and customer reviews reveals a largely positive consensus, with users consistently praising the incredible value the Wyze Video Doorbell v2 offers. The most common point of celebration is the 2K video quality, which many feel is on par with or better than much more expensive competitors.
One user on Reddit in the r/wyzecam subreddit shared their experience, stating, “I installed my new Video Doorbell v2 and I have to say overall I am impressed with the value and quality. Accessing the live video feed is quick and the 2K video is a huge improvement.” This sentiment is echoed across many reviews, with the combination of high-resolution video and a low price point being the device’s biggest selling point.
Of course, no product is perfect. Some of the constructive feedback revolves around the motion detection sensitivity. A few users report getting too many notifications from passing cars or other irrelevant motion, though many note that this can be greatly improved by carefully adjusting the detection zone and sensitivity settings in the app. There are also discussions about the reliance on a good Wi-Fi signal for optimal performance, which is a common factor for all smart security cameras.
Overall, the feedback is overwhelmingly positive, positioning the Wyze Video Doorbell v2 as a fan favorite for budget-conscious smart home enthusiasts.
The Future of Your Front Door: What’s Next for Wyze?
One of the exciting aspects of owning a Wyze product is the company’s commitment to continuous improvement through software. Your Wyze Video Doorbell v2 is likely to get better over time with firmware updates that can add new features, improve performance, and enhance security. Wyze has a strong track record of listening to its user community and rolling out updates that address popular requests.
Looking ahead, we can anticipate further refinements to the AI detection algorithms in Cam Plus. As the system analyzes more data, its ability to accurately distinguish between people, pets, packages, and vehicles will only improve, leading to more precise and meaningful notifications. Users often request more advanced features like customizable chime sounds or deeper integration with other smart home platforms, and these are the types of enhancements that could potentially be delivered via future software updates.
Wyze is also constantly expanding its hardware ecosystem. While the Doorbell v2 is a fantastic wired option, the company also offers battery-powered models like the Wyze Doorbell Pro for those without existing wiring. This shows a commitment to providing solutions for every type of home. As the smart home market continues to evolve, expect Wyze to remain at the forefront, pushing the boundaries of what’s possible with affordable, accessible technology for everyone.
Frequently Asked Questions (FAQ)
Does Wyze Video Doorbell v2 require a subscription?
No, a subscription is not strictly required to use the Wyze Video Doorbell v2. Out of the box, you get essential features like live streaming, two-way audio, and motion-activated notifications on your phone for free. If you install a microSD card, you can also have 24/7 continuous recording or event-only recording stored locally without any monthly fees.
However, to unlock the most advanced features, you’ll want to consider the optional Cam Plus subscription. This service adds cloud storage for event videos, removes the 12-second recording limit on free cloud clips, and enables smart AI detections for people, packages, vehicles, and pets. The subscription is very affordable and adds significant value, but the core functionality of the doorbell works perfectly without it.
Is the Wyze doorbell v2 wireless?
No, the Wyze Video Doorbell v2 is a wired device. It is designed to connect to your existing doorbell wiring, which provides it with a constant and reliable source of power. This means you never have to worry about charging or replacing batteries. If your home does not have existing doorbell wiring, you would need to consider a battery-powered model like the Wyze Video Doorbell Pro.
Which is better, Ring or Wyze?
This depends on your budget and priorities. Wyze is generally better for those on a tight budget who still want high-quality video and the option for local storage to avoid monthly fees. Ring often has a more extensive product lineup and some more advanced features on its premium models, but comes at a significantly higher cost for both the hardware and the required subscription plan.
For most users looking for the best value, Wyze offers a more compelling package. You get 2K video (higher than many entry-level Ring models) and the flexibility of local storage, making it a fantastic choice for smart security without the hefty price tag.
Does the Wyze doorbell v2 have a battery?
No, the Wyze Video Doorbell v2 does not contain a battery. It is a fully wired device that draws power from your home’s existing doorbell transformer (requiring 16V-24V AC). The primary benefit of this design is that you get uninterrupted power and never have to deal with the hassle of recharging the device.
What are the downsides of the Wyze Doorbell?
The primary downsides are that it requires existing doorbell wiring for installation, which may not be suitable for all homes or apartments. Additionally, while the core features are free, the most advanced AI detection features and extended cloud storage are locked behind the affordable Cam Plus subscription. Finally, like all Wi-Fi-based cameras, its performance is dependent on a strong and stable internet connection.
Can I view Wyze doorbell on my TV?
Yes, you can. If you have a smart TV with built-in Chromecast or an Amazon Fire TV, you can view your Wyze doorbell’s live stream. By linking your Wyze account to your Google Assistant or Amazon Alexa account, you can use voice commands like, “Hey Google, show the front door on the living room TV” or “Alexa, show the front door camera.” This is a great way to get a big-screen view of who is at your door.
Can the Wyze doorbell use an existing chime?
No, the Wyze Video Doorbell v2 is designed to bypass your existing mechanical or digital chime. The installation process involves installing a jumper on your old chime box, which disables it. To hear a chime sound in your home, you will need to use a separate device like the Wyze Chime, Wyze Chime Pro, or an Amazon Echo speaker configured to act as a chime.
Final Thoughts: An Unbeatable Value in Home Security
After a thorough review, the Wyze Video Doorbell v2 stands out as an absolutely incredible piece of technology for the price. It delivers on its promise of premium features—stunning 2K video, a useful head-to-toe view, and reliable performance—at a cost that makes smart home security accessible to nearly everyone. The flexibility to choose between free local storage via a microSD card and an affordable cloud subscription is a massive advantage that gives users complete control over their security and their budget.
While it requires existing wiring and its best AI features are tied to a subscription, these are minor trade-offs for the immense value it provides. It’s perfect for the first-time smart doorbell owner, the budget-conscious homeowner, or anyone already invested in the Wyze ecosystem. It proves that you don’t need to spend a fortune to get peace of mind.
If you’re ready to upgrade your front door with a smart, powerful, and unbelievably affordable camera, the Wyze Video Doorbell v2 is an enthusiastic recommendation. It’s a small investment that delivers a huge return in security, convenience, and confidence.


![Wyze Cam Outdoor V2: an Honest Review! [2023]](https://i0.wp.com/i.ytimg.com/vi/8uJ9FkCeVFg/hqdefault.jpg?w=525&ssl=1)