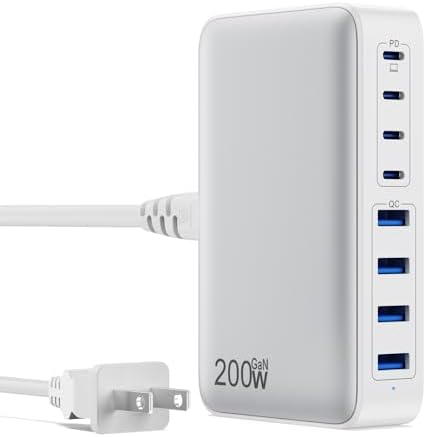
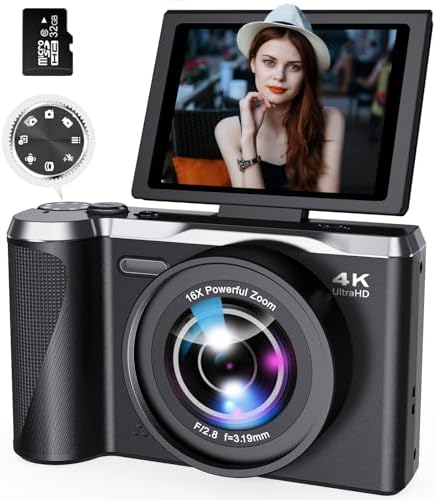
Flip phones are gone; welcome to a world where your pocket high tech gear can summon satellites, translate languages in real time, and juggle three operating systems without breaking a sweat. Today’s cutting-edge cellphones blur lines between phone, camera, and AI assistant. Foldables and rollables expand screen real estate for bingeing or editing on the go. Phones with built-in satellite messaging offer peace of mind for hikers and travelers. And on the audio front, next-gen headphones pair active noise cancellation with spatial audio, head-tracking, and even biometric sensors that monitor stress and guide breathing. Bone-conduction models keep ears open to the world while delivering crisp sound, and true wireless buds now aim for lossless audio over new codecs—because fidelity matters to the discerning listener.
If you care about capturing life as it happens, cameras and computers have never been more exciting. Mirrorless bodies with full-frame sensors have shrunk while gaining baffling amounts of dynamic range. Computational photography—once the reserve of smartphones—now enhances mirrorless stills with multi-frame stacking, on-sensor HDR, and AI-powered subject separation. Tiny action cams and compact drones deliver cinema-grade stabilization and high bit-rate codecs in devices that fit in a pocket. Meanwhile computers are transforming: ultraportable laptops with ARM-based chips promise all-day battery life and instant wake; convertible tablets stretch into drawing pads for creators; and desktop GPUs are giving way to dedicated AI accelerators that speed up video editing, photoreal rendering, and realtime upscaling. Add a secondary e-ink screen for focused reading, or a modular PC you can repair and upgrade yourself—tech for people who like to tinker.
Your home is evolving into a smart, secure ecosystem rather than a collection of clever gadgets. Modern home security goes beyond doorbells with motion alerts. Cameras now run local AI to distinguish pets from strangers, reducing false alarms and keeping footage private. Mesh routers paired with smart home hubs mean every camera, sensor, and smart bulb remains responsive even when your internet goes out. For early adopters, privacy-forward systems that store encrypted data locally are particularly appealing. Sensors detect leaks, monitor air quality, and even measure fridge contents to reduce food waste.
Appliances have joined the party with practical smarts. Robotic vacuums equipped with LIDAR and room-mapping easily learn your home’s layout, while emerging robot mops combine cleaning modes for predictable results. Smart ovens preheat via voice, recommend recipes based on what’s inside, and adjust temperature curves for perfect crust and sear. Refrigerators scan barcodes or learn from receipts to suggest meals and reduce spoilage. And laundry machines now have fabric-care sensors that tailor wash cycles to protect colors and fibers. Energy-conscious tech ties it all together: smart thermostats learn patterns to save power, appliances communicate to avoid overloading circuits, and many devices include low-power modes or solar-friendly scheduling.
For the true early adopter, the attraction isn’t just shiny hardware—it’s systems that anticipate needs, respect privacy, and remain upgradeable. From pocket AI to home automation that actually simplifies life, the latest gadgets are about making daily routines smarter, smoother, and a little more delightful. Ready to step beyond the basics? The future’s already on your countertop.
Camera Lenses Focal Length: A Beginner's Guide to Choosing the Right Lens
Have you ever wondered how professional photographers capture those breathtaking, wide-open landscapes or those incredibly detailed, up-close shots of wildlife. The secret isn't just a fancy camera body; it's all about the lens. Specifically, it’s about understanding the magic number on that lens: the camera lenses focal length. This single specification, measured in millimeters (mm), is one of the most powerful creative tools you have.
It dictates not just how “zoomed in” your photo is, but also its entire mood, perspective, and emotional impact. Getting a handle on this concept is the first giant leap from taking simple snapshots to creating truly compelling photographs.
This guide is your roadmap to mastering lens focal length. We're going to break down what it is, how it works, and most importantly, how you can use it to transform your images. By the end, you'll know exactly which focal lengths are best for portraits, landscapes, street photography, and more. You'll be ready to choose your next lens with confidence and start shooting with incredible intention.
Let's get started.
What You'll Learn
What Focal Length Means: We'll demystify the technical definition and explain in simple terms how the focal length of camera lenses affects your angle of view and magnification.
Creative Control: Discover how different focal lengths can dramatically alter perspective, compress backgrounds, and control depth of field to achieve professional-looking results.
Choosing the Right Lens: Learn the key differences between wide-angle, standard, and telephoto lenses, and find out which camera lens focal lengths are perfect for your specific photography style.
Prime vs. Zoom Lenses: Understand the pros and cons of fixed focal length (prime) lenses versus variable (zoom) lenses to decide which type is the best fit for your needs and budget.
Practical Recommendations: Get clear, actionable advice on the best focal lengths for common scenarios like portraits, landscapes, sports, and everyday shooting.
What Exactly Is Camera Lenses Focal Length?
At its core, the focal length of a camera lens is a technical measurement. It's the distance in millimeters from the optical center of the lens (where light rays converge to form a sharp image) to the camera's sensor when the lens is focused at infinity. But don't get bogged down by the physics. What you really need to know is what this number does to your photos.
It's much more exciting than it sounds, I promise.
Think of it this way: focal length controls two key things: angle of view and magnification.
Angle of View: This is how much of the scene your camera can see and capture. A short focal length (like 18mm) has a wide angle of view, capturing a broad, panoramic scene. A long focal length (like 200mm) has a narrow angle of view, focusing on a small, specific part of the scene far away.
Magnification: This is how large subjects will appear in your frame. Short focal lengths make objects appear smaller and farther away. Long focal lengths magnify distant subjects, making them appear much larger and closer.
So, a small number (e.g., 24mm) means a wide view with low magnification, perfect for capturing an entire mountain range. A large number (e.g., 300mm) means a narrow view with high magnification, perfect for capturing a bird on a distant branch. This single number completely changes how you frame your world.
Don't Forget About Crop Factor!
A crucial concept related to lens focal length is the camera's sensor size. The focal lengths printed on lenses (e.g., 50mm) are based on a traditional 35mm "full-frame" sensor. However, many popular DSLRs and mirrorless cameras for beginners and enthusiasts have smaller "crop sensors" (often called APS-C).
When you put a lens on a crop sensor camera, it effectively crops the image, making the field of view narrower. This gives the illusion of a longer focal length. This is known as the "crop factor." For example, a Nikon APS-C camera has a 1.5x crop factor. This means a 50mm lens on that camera will behave like a 75mm lens (50mm x 1.5 = 75mm) would on a full-frame camera.
It's essential to know your camera's crop factor to understand how your lenses will truly perform.
The Magic of Millimeters: How Focal Length Transforms Your Photos
Understanding the technical definition is one thing, but seeing how camera lens focal lengths creatively impact your images is where the real fun begins. This isn't just about zooming in and out; it's about shaping the very fabric of your photograph. Let's explore the four most powerful creative effects of focal length.
Angle of View: Capturing the Whole Scene or Zeroing In
As we touched on, this is the most direct effect of focal length. A wide-angle lens (like a 16mm or 24mm) is your go-to for capturing expansive scenes. Think of vast landscapes, towering cityscapes, or tight interior spaces where you need to fit everything in. It pulls the viewer into the scene, creating a sense of presence and scale.
On the other end, a telephoto lens (like a 135mm or 400mm) does the opposite. It has a very narrow angle of view, allowing you to isolate a single subject from a busy environment. This is perfect for wildlife photography where you can't get physically close, sports events where you're far from the action, or even portraits where you want to focus solely on your subject without distracting surroundings.
Magnification: Getting Closer Without Moving Your Feet
This is directly tied to the angle of view. Long focal lengths provide high magnification, which is the defining feature of telephoto lenses. A 300mm lens can make a subject that's 100 feet away look as if it's right in front of you. This is invaluable for subjects that are inaccessible, dangerous, or easily spooked.
Conversely, wide-angle lenses have low magnification. They actually make things in the distance appear even smaller and farther away than they do to our own eyes. This can be used creatively to emphasize the vastness of a space or the distance between a foreground element and the background.
Perspective and Compression: The Creative Effect
This is a more advanced, but incredibly powerful, concept. Focal length changes the apparent distance between objects in your frame. Wide-angle lenses tend to exaggerate perspective. They make foreground objects look huge and background objects look tiny and distant.
This creates a dramatic sense of depth and can make your photos feel very three-dimensional.
Telephoto lenses do the exact opposite; they create an effect called "compression." They make objects at different distances appear to be stacked right on top of each other. A long lens can make a mountain 10 miles behind a person look like it's looming just over their shoulder. This compression effect is fantastic for creating visually dense, layered images and is often used in portraits to flatten features in a flattering way.
Depth of Field: Blurring the Background
Depth of field (DoF) refers to how much of your image is in sharp focus, from front to back. While aperture is the primary controller of DoF, focal length plays a huge role too. Longer focal lengths (telephoto lenses) produce a much shallower depth of field than wide-angle lenses at the same aperture setting.
This means a 200mm lens can easily create that beautiful, creamy, out-of-focus background (known as bokeh) that makes your subject pop. It's why portrait photographers love lenses like the 85mm and 135mm. Wide-angle lenses, by contrast, tend to have a very deep depth of field, keeping almost everything from the foreground to the background in sharp focus, which is ideal for landscape photography.
Pro Tip: To maximize background blur for portraits, use a long focal length (85mm or more), select the widest aperture your lens allows (e.g., f/1.8), and get as close to your subject as you can while maintaining your desired framing. This combination creates a stunningly shallow depth of field.
Choosing Your Perfect Lens: A Guide to Camera Lens Focal Lengths
Now that you know the how and why, let's get practical. The world of lenses is vast, but we can break down camera lens focal lengths into three main categories. Understanding these groups will make it so much easier to choose the right tool for the job.
Wide-Angle Lenses (Under 35mm): For Epic Landscapes and Architecture
Wide-angle lenses are your window to the world. Anything with a focal length of 35mm or less (on a full-frame camera) falls into this category. Lenses from 24mm to 35mm are considered moderately wide, while anything below 24mm (like 16mm or 20mm) is considered ultra-wide.
Best For: Landscape photography, architecture, real estate interiors, large group shots, and astrophotography.
Creative Effect: They create a sense of vastness and depth, making scenes feel grand and immersive. They can also introduce distortion, especially at the edges, which can be used for creative effect or corrected in post-processing.
Keep in Mind: They aren't typically flattering for close-up portraits, as the perspective distortion can make features like noses appear larger than they are.
Standard Lenses (35mm to 70mm): The "Human Eye" Perspective
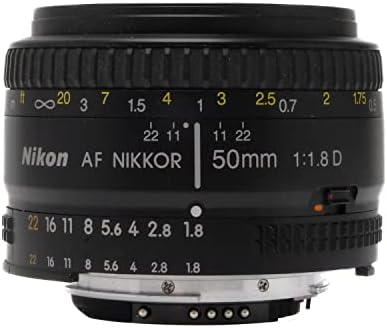
Often called "normal" lenses, this range provides a field of view that closely mimics what the human eye sees naturally. This makes them incredibly versatile and a favorite for many photographers. The classic 50mm lens is the most famous example in this category.
Best For: Street photography, documentary, travel, environmental portraits, and general everyday shooting.
Creative Effect: Photos taken with a standard lens feel natural, honest, and relatable. The lack of extreme distortion or compression gives them a timeless, true-to-life quality.
Why It's a Favorite: A 50mm prime lens is often recommended as the first lens a new photographer should buy after their kit lens. They are typically affordable, have wide apertures for low-light shooting, and force you to "zoom with your feet," which is a great way to learn composition.
Telephoto Lenses (70mm and Up): For Wildlife, Sports, and Portraits
Telephoto lenses bring the distant world to you. This category starts around 70mm and can go all the way up to 800mm and beyond! Short telephotos (70mm-135mm) are amazing for portraits, while long telephotos (200mm+) are the domain of sports and wildlife photographers.
Best For: Wildlife, sports, portraits, concert photography, and any situation where you can't get physically close to your subject.
Creative Effect: They excel at isolating subjects, compressing backgrounds for a layered look, and creating beautiful background blur (bokeh). The compression is also very flattering for portraits.
Keep in Mind: They are typically larger, heavier, and more expensive. Because they magnify everything, they also magnify camera shake, so a fast shutter speed, a tripod, or a lens with image stabilization is often necessary to get sharp shots.
Prime vs. Zoom Lenses: The Great Debate
Within these categories, you'll find two types of lenses: prime and zoom.
Prime Lenses: Have a single, fixed focal length (e.g., 50mm). You cannot zoom in or out. To change your composition, you have to physically move. They are generally sharper, have wider maximum apertures (letting in more light), and are smaller and lighter than zooms.
Zoom Lenses: Offer a range of focal lengths in one lens (e.g., 24-70mm). They are incredibly versatile and convenient, allowing you to reframe a shot without moving. The trade-off is that they are often larger, heavier, and have smaller maximum apertures compared to prime lenses at a similar price point.
There's no right or wrong answer here. Many pros carry a mix of both. A zoom lens is fantastic for events or travel where you need flexibility, while a prime lens is perfect when you want the best possible image quality and low-light performance for a specific type of shot, like a portrait.
Top Focal Length Recommendations for Every Photographer
Feeling overwhelmed by the options? Don't be! While every photographer's needs are different, certain focal lengths have become classics for a reason. Here’s a breakdown of the most popular choices and what they do best.
The Best Everyday Lens: 35mm or 50mm?
This is one of the biggest debates in photography, and the truth is, you can't go wrong with either. A 50mm lens on a full-frame camera is considered the classic "normal" lens, closely replicating the human eye's perspective. It's fantastic for portraits, everyday snapshots, and learning composition. It gives just enough separation from the background without feeling too tight.
A 35mm lens is a bit wider, making it a favorite for street and documentary photographers. It allows you to capture more of the environment around your subject, telling a richer story. It's an incredibly versatile focal length that works for everything from landscapes to environmental portraits. If you find 50mm a bit too restrictive, 35mm is your answer.
The Portrait Pro's Choice: 85mm
Ask any professional portrait photographer their favorite lens, and you'll likely hear "85mm." This short telephoto focal length is the gold standard for portraiture. It offers the perfect combination of flattering compression (which slims faces and features) and working distance.
You can be close enough to your subject to direct them easily, but far enough away that they don't feel crowded. An 85mm lens, especially one with a wide aperture like f/1.8 or f/1.4, will absolutely melt backgrounds into a creamy, dreamy blur, making your subject the undeniable star of the show.
The Sports and Wildlife Champion: 200mm and Beyond
When your subject is on the other side of a field or across a river, you need reach. Lenses in the 70-200mm range are the workhorses for event and sports photographers, offering flexibility and great image quality. The 70-200mm f/2.8 is one of the most iconic and versatile professional lenses ever made.
For serious wildlife or bird photography, you'll want to look at focal lengths of 300mm, 400mm, or even 600mm. These are often called super-telephoto lenses. They are specialized, large, and expensive tools, but they are the only way to get those frame-filling shots of distant and elusive animals without disturbing them.
The Landscape Legend: 16-35mm
To capture the grandeur of nature, you need to go wide. A zoom lens in the 16-35mm range is the quintessential tool for landscape photographers. This range gives you incredible flexibility, allowing you to go ultra-wide at 16mm to capture the entire scene, or zoom in slightly to 35mm for a more controlled composition.
These lenses allow you to use foreground elements—like rocks, flowers, or a river—to lead the viewer's eye into the vast background. The deep depth of field ensures that everything from the immediate foreground to the distant mountains can be rendered in tack-sharp detail, creating images with stunning clarity and impact.
Understanding Lens Costs: Pricing Across Different Focal Lengths
As you explore different camera lens focal lengths, you'll notice a massive range in pricing. A 50mm f/1.8 prime lens might cost just over $100, while a 400mm f/2.8 super-telephoto lens can cost over $12,000. What gives? The price of a lens is determined by a complex combination of factors far beyond just its focal length.
Why Do Some Lenses Cost So Much?
Several key elements contribute to a lens's price tag:
Maximum Aperture: Lenses with a wider maximum aperture (a smaller f-number like f/1.4 or f/2.8) are much more expensive to manufacture. They require larger, more precisely ground glass elements to let in all that light, which dramatically increases complexity and cost.
Image Quality: Professional-grade lenses use exotic glass elements (like aspherical, fluorite, or extra-low dispersion glass) to correct for optical imperfections like chromatic aberration, distortion, and vignetting. This results in sharper, clearer images from edge to edge, but comes at a premium.
Build Quality and Weather Sealing: Expensive lenses are built to last. They often feature metal barrels, durable construction, and extensive weather sealing (gaskets and seals) to protect against dust and moisture. This is essential for professionals who shoot in challenging conditions.
Specialized Features: Features like fast, silent autofocus motors (e.g., Ultrasonic Motors) and advanced optical image stabilization systems add significant cost to a lens.
Focal Length Extremes: Lenses at the extreme ends of the spectrum—ultra-wide-angle and super-telephoto—are inherently more complex and costly to design and build than standard lenses.
Budget-Friendly Options for Beginners
The good news is you don't need to spend a fortune to get fantastic lenses. For beginners, the best value is almost always found in prime lenses with a moderately wide aperture. The classic "nifty fifty" (50mm f/1.8) is the perfect example. It's affordable, sharp, and its wide aperture will teach you all about depth of field and low-light shooting.
Another great starting point is a versatile kit lens, like an 18-55mm on a crop sensor camera. While it may not have the widest aperture, it gives you a range from wide-angle to short telephoto, allowing you to experiment and discover which focal lengths you enjoy using the most before investing in more expensive, specialized glass.
Pros and Cons of Different Focal Length Ranges
No single focal length is perfect for everything. Each range comes with its own set of strengths and weaknesses. Knowing these will help you make informed decisions when you're out shooting.
The Good and Bad of Going Wide (Under 35mm)
Pros: Can capture vast, epic scenes. Creates a strong sense of depth and immersion. Great for tight spaces. Deep depth of field keeps everything in focus.
Cons: Can suffer from perspective distortion, especially at the edges (lines can appear curved). Not flattering for close-up portraits. Can make distant elements in a landscape feel small and insignificant if not composed carefully.
The Strengths and Weaknesses of Standard Lenses (35mm-70mm)
Pros: Natural, true-to-life perspective that is very relatable. Extremely versatile for many types of photography. Often available as affordable, high-quality prime lenses. Lack of distortion makes them great for documentary and street work.
Cons: Can sometimes feel a bit "boring" because they lack the dramatic effect of wide or telephoto lenses. They don't have the reach for distant subjects or the expansive view for grand landscapes. You have to physically move to change your framing significantly.
The Power and Pitfalls of Telephoto Lenses (70mm+)
Pros: Excellent for bringing distant subjects close. Creates beautiful background compression and shallow depth of field. Flattering for portraits. Allows you to shoot subjects discreetly from a distance.
Cons: Can be large, heavy, and expensive. More susceptible to camera shake, often requiring faster shutter speeds or a tripod. The narrow field of view can be challenging to work with in tight spaces. The compression effect can sometimes make scenes feel flat if not used intentionally.
Frequently Asked Questions About Lens Focal Length
Let's tackle some of the most common questions new photographers have about the focal length of camera lenses. These answers will help solidify your understanding and guide your purchasing decisions.
What is the best focal length for a camera lens?
There is no single "best" focal length; the best one is the one that suits what you are shooting. For landscapes, a wide-angle like 16-35mm is fantastic. For portraits, an 85mm is a classic choice. For an all-around, versatile lens that's great for travel and everyday life, a standard zoom like a 24-70mm or a prime lens like a 35mm or 50mm is an excellent option.
Is a 35mm or 50mm lens better?
This is a matter of personal preference and shooting style. A 50mm lens offers a tighter, more "normal" view that's great for isolating subjects and creating classic portraits. A 35mm lens is wider, allowing you to capture more of the surrounding environment, which is why it's beloved by street and documentary photographers for storytelling. If you like to include context, choose 35mm.
If you prefer to focus more on the subject itself, 50mm is a great choice.
What does 400mm focal length mean?
A 400mm focal length means you are using a super-telephoto lens. This lens has a very narrow angle of view and very high magnification. It's designed to make subjects that are extremely far away appear large in the frame. This is a specialized focal length used primarily by professional sports photographers to capture action from the sidelines and by wildlife photographers to capture animals from a safe and respectful distance.
Is 50mm or 85mm better for headshots?
For tight headshots, an 85mm lens is generally considered superior. The longer focal length allows you to stand further back from your subject, which creates more flattering compression and avoids any potential distortion that can occur when you get too close with a shorter lens. A 50mm lens is great for half-body or full-body portraits, but for classic, tightly-cropped headshots, the 85mm is the professional's tool of choice.
What lens is closest to the human eye?
On a full-frame camera, a 50mm lens is widely considered to have a field of view and perspective that most closely matches the human eye. This is why it's called a "normal" or "standard" lens. It produces images that feel natural and undistorted. On a crop sensor camera (like APS-C), a 35mm lens will give you a field of view that is equivalent to about 50mm, providing that same natural perspective.
Is a 50mm lens good for beginners?
Absolutely. A 50mm prime lens (especially an affordable f/1.8 version) is one of the best investments a beginner can make. It's a huge step up in image quality from a standard kit lens. Its wide aperture is fantastic for shooting in low light and for learning about depth of field.
Because it can't zoom, it forces you to move your body to compose your shots, which is one of the best ways to improve your photographic eye.
Final Thoughts: Your Next Step in Photography
Understanding camera lenses focal length is like learning a new language—the language of visual storytelling. It's the tool that allows you to decide whether to shout with a wide, expansive landscape or whisper with an intimate, compressed portrait. You now have the knowledge to look at the numbers on a lens and know exactly how it will shape your vision.
Don't feel pressured to go out and buy every lens at once. The best approach is to start with a versatile lens, like a 50mm prime or a standard zoom, and practice. Pay attention to what you love to shoot. Do you find yourself constantly wishing you could get wider.
Or are you always trying to get closer to distant subjects. Your own shooting habits will be the best guide to choosing your next lens.
Now, the most important step is to pick up your camera and experiment. See for yourself how a wide-angle shot feels different from a telephoto shot of the same subject. Play with perspective, compression, and depth of field. The more you shoot, the more intuitive this will all become, and the more powerful your photography will be.
Tomorrow’s high tech innovations are arriving faster than ever, and the line between science fiction and everyday life keeps getting blurrier. From pocket-sized powerhouses that anticipate your needs to home systems that protect and simplify, these high-tech innovations aren’t just optional extras — they’re the kind of tools you’ll want to adopt now to make life smoother, safer, and more creative.
Cellphones and headphones have evolved into a symbiotic duo. Modern phones are less about calling and more about being a portable AI hub: blazing-fast 5G (and early 6G trials) deliver streaming, cloud gaming, and instant collaboration, while on-device machine learning tailors experiences without constantly phoning home. Foldables have matured from fragile novelties into durable, multi-tasking canvases that replace tablets on the go. Battery tech and fast charging continue to improve, meaning less downtime and more living.
Complementing these phones, headphones have become an immersive sanctuary. Active noise cancelling is smarter, adapting to environments and even predicting your commute. Spatial audio and head-tracking create realistic soundscapes for music, movies, and AR experiences, while low-latency wireless codecs keep gaming and calls crisp. For audiophiles and commuters alike, gadgets now blend high-fidelity sound with practical life: transparency modes let you have a conversation without taking earbuds out, and long battery cycles paired with lightweight designs mean comfort and endurance.
Cameras and computers are undergoing a convergence of creativity and computation. Mirrorless cameras keep pushing sensor sizes and dynamic range, while computational photography on phones bridges the gap by combining multiple exposures, AI-driven noise reduction, and astonishing HDR. The result: professional-looking images from devices that fit in your pocket. Drones and action cameras add perspectives once reserved for expensive rigs, democratizing cinematic shots for creators.
On the computing side, laptops and desktops are being rethought around performance-per-watt and AI acceleration. Energy-efficient chips deliver desktop-class productivity in ultraportable bodies, and dedicated neural engines accelerate tasks from photo editing to real-time language translation. Graphics cards are not only for gamers anymore; creators leverage CUDA and other APIs for rendering, video production, and machine learning. Edge computing brings reduced latency and privacy benefits, letting applications run locally rather than relying on distant servers.
Home security and appliances are where convenience meets peace of mind. Smart locks, doorbells, and connected cameras give you control and visibility whether you’re down the street or across the world. Modern systems use encryption, local storage options, and face-recognition (optional) to balance utility and privacy. Mesh Wi‑Fi and IoT standards are making networks more reliable, so your cameras, thermostats, and smart lights all stay connected.
Appliances have also become intelligent: refrigerators with internal cameras and inventory alerts, ovens that auto-adjust cooking profiles, and robotic vacuum cleaners that map rooms and learn schedules. Smart thermostats save energy by adapting to habits, and whole-home hubs let disparate devices communicate, creating routines that wake your coffee maker when your alarm goes off or dim lights when a movie starts.
These gadgets of tomorrow are not just flashy toys — they’re practical upgrades that improve daily life. The key is choosing devices that prioritize interoperability, security, and upgrades. Adopt a few thoughtfully, and you’ll discover that tomorrow’s tech makes today feel a little more magical.
Camera Lenses for Canon: The Definitive Buyer’s Guide for 2026
Stepping into the world of interchangeable lenses is one of the most exciting moments in any photographer’s journey! You’ve got your Canon camera, and now you’re ready to move beyond the kit lens and capture the world in stunning new ways. The sheer number of camera lenses for Canon can feel overwhelming at first, but don’t worry—that’s where the fun begins. Each lens is a new key, a new perspective, and a new tool to bring your creative vision to life.
Whether you dream of capturing creamy, out-of-focus backgrounds in portraits, sweeping epic landscapes, or the fast-paced action of a sporting event, there is a perfect lens waiting for you. This guide is your roadmap. We’ll break down the technical jargon into simple terms, show you exactly what to look for, and help you choose the best lenses for canon that will not just fit your camera, but will also fit your budget and your passion. Let’s get you set up for some incredible photos!
What to Know
Compatibility Is King: Your camera’s mount is the most important factor. Canon’s modern mirrorless cameras use the RF mount, while their DSLRs use EF (full-frame) and EF-S (crop-sensor) mounts. You can adapt EF lenses to RF cameras, but not the other way around.
Focal Length & Aperture: These are the two most critical specs. Focal length (measured in mm) determines your field of view (wide vs. telephoto), while aperture (the f-number) controls how much light enters and the depth of field (blurry backgrounds).
Prime vs. Zoom: Prime lenses have a fixed focal length (like 50mm) and typically offer sharper images and wider apertures for a lower price. Zoom lenses offer the incredible versatility of multiple focal lengths in one package.
Third-Party Power: Don’t overlook brands like Sigma, Tamron, and Rokinon. They often provide amazing quality and unique features, sometimes at a fraction of the cost of native Canon lenses.
Your Best First Upgrade: For most new photographers, a 50mm f/1.8 lens (the “nifty fifty”) is the best first purchase. It’s affordable, fantastic in low light, and teaches you so much about composition.
The Ultimate Guide to Canon Lens Mounts: Are All Lenses Compatible?
One of the first and most critical questions every new Canon owner asks is, “Will this lens fit my camera?” It’s a fantastic question because compatibility is everything. Canon has produced several lens mounts over the years, and understanding them is the key to building your kit. Let’s break down the main players you’ll encounter today.
The Modern Marvel: Canon RF Mount
If you have a newer Canon mirrorless camera like an EOS R5, R6, R7, or R10, you’re using the RF mount. This is Canon’s latest and most advanced system. RF lenses are designed specifically for mirrorless bodies, offering incredible optical quality, faster communication between the lens and camera, and innovative features like the customizable control ring. If you’re investing in the Canon system for the long term, the RF mount is the future.
The DSLR Workhorse: Canon EF Mount
The EF (Electro-Focus) mount has been Canon’s standard for its full-frame DSLR cameras (like the 5D and 6D series) since 1987. This means there is a massive, incredible catalog of EF lenses available, both new and used. They are known for their robust build and professional-grade quality, especially the prestigious L-series lenses marked with a red ring.
The Crop-Sensor Specialist: Canon EF-S Mount
Designed for Canon’s APS-C sensor DSLRs (like the Rebel series and the 80D/90D), EF-S lenses are typically smaller, lighter, and more affordable than their EF counterparts. They project a smaller image circle that’s perfectly sized for the smaller sensor. You can’t use EF-S lenses on a full-frame EF-mount camera, but you can use EF lenses on an EF-S camera, which is a great bonus!
Using Adapters: Bridging the Gap Between DSLR and Mirrorless
Here’s the best part. Canon knew that many photographers had a beloved collection of EF and EF-S lenses. So, they created an official EF-to-RF mount adapter. This little piece of magic allows you to use virtually any EF or EF-S lens on your new RF-mount mirrorless camera with no loss in quality, autofocus speed, or functionality.
It makes the transition from DSLR to mirrorless incredibly smooth and cost-effective.
Decoding the Specs: Key Features of Canon Camera Lenses
When you look at a lens, you’ll see a string of letters and numbers that look like a secret code. But once you know what they mean, you’ll be able to understand a lens’s capabilities at a glance. Let’s decode the most important features that define what a lens can do for your photography.
Focal Length: Your Creative Viewpoint
Focal length, measured in millimeters (mm), is the first number you’ll usually see. It tells you the lens’s angle of view and magnification. Lower numbers mean a wider view, while higher numbers mean a more magnified, telephoto view.
Wide-Angle (e.g., 16-35mm): Perfect for capturing vast landscapes, architecture, and large group shots. They make spaces feel bigger and more dramatic.
Standard (e.g., 35-85mm): This range closely mimics what the human eye sees, making it incredibly versatile for portraits, street photography, and everyday moments. The classic 50mm lens falls right in this sweet spot.
Telephoto (e.g., 70-200mm and beyond): These lenses bring distant subjects right to you. They are the go-to choice for sports, wildlife, and capturing details from afar. They also create beautiful compression, making backgrounds appear closer to the subject.
Aperture (f-stop): Mastering Light and Depth of Field
Aperture, represented by an “f-number” (like f/1.8, f/4, f/11), controls two fundamental things: the amount of light hitting your sensor and the depth of field. A lower f-number (e.g., f/1.4) means a wider opening, which lets in more light. This is amazing for shooting in dark conditions and creating that beautiful, blurry background (called ‘bokeh’) that makes your subject pop.
A higher f-number (e.g., f/16) means a smaller opening, letting in less light. This is ideal for landscape photography where you want everything from the foreground to the distant mountains to be in sharp focus. A lens with a wide maximum aperture (like f/1.8 or f/2.8) is considered a “fast” lens and is highly sought after.
Image Stabilization (IS): Your Secret to Sharp Handheld Shots
Canon’s Image Stabilization (IS) technology is a lifesaver. It uses tiny internal gyroscopes to counteract the natural shake from your hands. This allows you to shoot at much slower shutter speeds without getting motion blur, which is incredibly useful in low-light situations or when using long telephoto lenses. If you see “IS” in the lens name, you know it’s built to help you get sharper photos when shooting handheld.
Prime vs. Zoom Lenses: The Classic Debate
This is one of the biggest choices you’ll make. A prime lens has a single, fixed focal length (e.g., 50mm). A zoom lens covers a range of focal lengths (e.g., 24-70mm). Neither is better; they are just different tools for different jobs.
Primes: Generally offer sharper images, wider maximum apertures, and are lighter and smaller. They force you to “zoom with your feet,” which many photographers believe is a great way to improve your composition skills.
Zooms: Offer incredible versatility. You can go from a wide shot to a tight close-up without moving an inch or changing lenses. This is perfect for events, travel, and situations where you can’t predict what will happen next.
Pro Tip: Many professional photographers build their kit with a mix of both. They might use a high-quality zoom lens for event coverage and then switch to a prime lens for a dedicated portrait session where image quality and bokeh are the top priorities.
How to Choose the Perfect Lens for Your Canon Camera
Okay, you understand the specs, you know the mounts, but how do you actually pick the right one from all the canon lens options? It’s all about matching the tool to your creative goals. Let’s walk through a simple, step-by-step process to find your perfect lens.
Step 1: Identify Your Photography Style
What do you LOVE to shoot? The answer to this question will guide your lens choice more than anything else. Different styles of photography have very different needs.
Portraits: Look for a prime lens in the 50mm to 135mm range with a wide aperture (f/1.8 or f/1.4) to create that gorgeous background blur.
Landscapes: A wide-angle zoom lens (like a 16-35mm) is your best friend. It will allow you to capture the full scale and drama of a scene.
Sports/Wildlife: You need reach! A telephoto zoom lens (like a 70-200mm or 100-400mm) is essential to get close to the action.
Travel: Versatility is key. A great all-in-one “walkaround” zoom lens (like a 24-105mm) can cover almost any situation you’ll encounter on your trip.
Street Photography: A small, discreet prime lens (like a 35mm or 50mm) is perfect for capturing candid moments without drawing too much attention.
Step 2: Set Your Budget
Lenses can range from a couple of hundred dollars to many thousands. It’s important to have a realistic budget in mind. The good news is that you don’t need to spend a fortune to get incredible results. Canon’s more affordable lenses, like the 50mm f/1.8, are optically fantastic.
Think of your lens purchase as an investment. Good glass will last for years, often outliving several camera bodies. It’s often wiser to invest in a better lens than a slightly better camera body, as the lens has a much greater impact on the final image quality.
Step 3: Consider Your Camera Body (Full-Frame vs. APS-C)
Remember the mount compatibility we talked about. This is where it comes into play. Also, remember that an APS-C (crop-sensor) camera has a “crop factor” of 1.6x. This means a 50mm lens on an APS-C camera will give you the field of view of an 80mm lens (50 x 1.6 = 80).
This can be a huge advantage for sports and wildlife photographers (more reach for free!) but a disadvantage for landscape shooters who want to go as wide as possible.
Step 4: Create a Decision Checklist
Still feeling stuck? Use a simple checklist to narrow down your options. Answer these questions for any lens you’re considering:
Question
Your Answer
Notes
Is it compatible with my camera mount?
(RF, EF, EF-S)
Check your camera model.
Does the focal length match my style?
(Wide, Standard, Telephoto)
What do you shoot most?
Is the aperture fast enough for me?
(e.g., f/1.8, f/2.8, f/4)
Do you shoot in low light?
Does it have Image Stabilization (IS)?
Yes / No
Will you be shooting handheld often?
Does it fit within my budget?
Yes / No
Consider new and used options.
Top Recommendations: The Best Lenses for Canon Shooters in 2026
Ready for some specific suggestions? Here are some of the most popular and highly-regarded canon camera lenses for various needs and budgets. We’ll include options for both modern RF mirrorless systems and classic EF DSLR systems.
The Must-Have First Lens: Canon RF 50mm f/1.8 STM / EF 50mm f/1.8 STM
Often called the “nifty fifty,” this lens is the single best upgrade you can make from a kit lens. It’s incredibly affordable, lightweight, and its wide f/1.8 aperture is a revelation in low light. It will teach you more about light and composition than any other lens, and it produces beautifully sharp images with creamy bokeh. Every Canon shooter should own one.
The Best All-Around Zoom: Canon RF 24-105mm f/4L IS USM
If you could only have one lens for travel or general-purpose shooting, this would be it. The 24-105mm focal range is incredibly versatile, covering everything from wide landscapes to pleasing portraits. The constant f/4 aperture, excellent image stabilization, and professional L-series build quality make it a true workhorse that delivers consistently beautiful results.
The Ultimate Portrait Lens: Canon RF 85mm f/1.2L USM / Sigma 85mm f/1.4 DG HSM Art
For portrait photographers, the 85mm focal length is legendary. It provides a flattering perspective without distorting features. The Canon RF 85mm f/1.2L is an optical masterpiece, delivering breathtaking sharpness and the smoothest bokeh imaginable. For those on a more modest budget, the Sigma 85mm f/1.4 Art lens (available for the EF mount) offers 95% of the performance for a fraction of the price and is a favorite among professionals.
The Landscape Photographer’s Dream: Canon RF 15-35mm f/2.8L IS USM
To capture the grand scale of nature, you need to go wide. This lens is part of Canon’s professional “holy trinity” of zooms. It’s incredibly sharp from corner to corner, and the fast f/2.8 aperture is a huge bonus for astrophotography. Its wide perspective allows you to create dramatic, immersive images that pull the viewer into the scene.
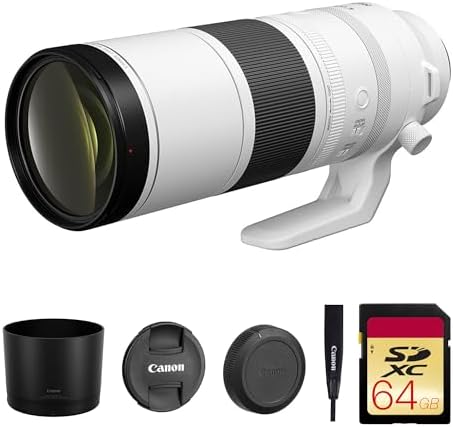
The Wildlife and Sports Champion: Canon RF 100-500mm f/4.5-7.1L IS USM / Tamron 150-600mm G2
When your subject is far away, you need reach. The Canon RF 100-500mm is a modern marvel of lens design, offering a huge zoom range in a relatively compact and lightweight package. For DSLR shooters or those adapting, the Tamron 150-600mm G2 has been a long-time favorite, providing incredible telephoto power at a very accessible price point.
Canon vs. The World: Pros and Cons of Third-Party Lenses
For decades, the only real choice was to buy lenses made by your camera’s manufacturer. Not anymore! Companies like Sigma, Tamron, Rokinon, and Tokina now produce some of the most exciting and high-performing lenses for Canon cameras. But should you stick with native Canon glass or explore these other options?
The Case for Native Canon Lenses
There’s a certain peace of mind that comes with buying a Canon lens for your Canon camera. You are guaranteed perfect compatibility.
Pros:
Flawless Compatibility: The autofocus, image stabilization, and all in-camera lens corrections will work perfectly, every time.
Top-Tier Performance: Canon’s high-end L-series lenses are legendary for their optical quality, weather sealing, and durable construction.
Resale Value: Native Canon lenses, especially L-series glass, tend to hold their value very well over time.
Cons:
The Price Tag: The biggest drawback is cost. Canon’s best lenses often come with a premium price tag that can be prohibitive for hobbyists or those just starting out.
The Appeal of Third-Party Options
Third-party manufacturers have become serious contenders, often pushing the boundaries of lens design and offering incredible value.
Pros:
Exceptional Value: This is the number one reason to look at third-party lenses. You can often get a lens with similar or even better performance than a Canon equivalent for significantly less money.
Unique Offerings: Companies like Sigma, with their “Art” series, have become known for producing incredibly sharp, fast-aperture prime lenses that Canon doesn’t even offer.
Innovation: Third-party brands are often quicker to innovate and fill niche gaps in a lens lineup.
Cons:
Occasional Quirks: While rare, there can sometimes be minor autofocus inconsistencies or a need for firmware updates to ensure perfect compatibility with new camera bodies.
Budgeting for Glass: A Look at Canon Lens Pricing
Navigating the cost of canon lens options is a key part of building your kit. The price is determined by factors like the maximum aperture, build quality, included technology like IS, and whether it’s a prime or zoom. Here’s a general breakdown of what you can expect.
Entry-Level Lenses (Under $500)
This is the sweet spot for beginners and hobbyists. You can find some absolutely fantastic lenses here that will produce professional-quality images. This category is dominated by prime lenses with f/1.8 apertures, like the famous 50mm f/1.8, and consumer-grade zoom lenses. Don’t let the low price fool you; the image quality from these lenses can be outstanding.
Mid-Range Enthusiast Lenses ($500 – $1500)
In this range, you start to see more advanced features. This includes higher-quality zoom lenses with constant apertures (like f/4), specialized macro lenses, and premium third-party lenses from Sigma’s Art line or Tamron’s SP series. The build quality improves, with more metal components and better weather sealing. This is where many serious hobbyists and even some professionals find the perfect balance of price and performance.
Professional L-Series Lenses ($1500+)
This is the top of the line. Canon’s L-series lenses, marked by the iconic red ring, are built for the rigors of professional use. They feature the best optics, the most durable construction, extensive weather sealing, and the fastest apertures (like f/2.8 zooms and f/1.2 or f/1.4 primes). These are significant investments, but for working pros who demand the absolute best in reliability and image quality, they are essential tools.
Pro Tip: Don’t forget the used market! You can often find professional-grade EF lenses in excellent condition for 40-60% of their original price from reputable retailers like MPB or KEH. This is one of the smartest ways to build a high-quality lens collection on a budget.
Frequently Asked Questions About Lenses for Canon
Let’s tackle some of the most common questions photographers have when choosing a lens for their Canon camera. These are the queries that pop up time and time again in forums and camera clubs.
What are the top 3 lenses every photographer should have?
While it depends on your style, a classic three-lens kit that covers most situations would be: 1) A standard prime lens (like a 50mm f/1.8) for its versatility and low-light ability. 2) A wide-angle zoom (like a 16-35mm or 17-40mm) for landscapes and architecture. 3) A telephoto zoom (like a 70-200mm) for portraits, sports, and distant subjects.
What is the “Holy Trinity” of Canon lenses?
The “Holy Trinity” refers to three professional-grade f/2.8 zoom lenses that together cover a massive focal range from ultra-wide to telephoto. For the RF mount, this is the RF 15-35mm f/2.8L, the RF 24-70mm f/2.8L, and the RF 70-200mm f/2.8L. Owning these three lenses means you are prepared for virtually any professional shooting scenario.
Is it still worth buying EF lenses in 2026?
Absolutely! Canon is focusing its development on the new RF mount, but the EF lens system has over 30 years of incredible lenses. The used market is fantastic, and with the official Canon adapter, they work flawlessly on new mirrorless bodies. Buying high-quality used EF lenses is one of the most cost-effective ways to build a professional kit.
Which lens is better, EF or RF?
Technically, RF lenses are more advanced. They have a newer optical design and faster communication with the camera body. However, the best EF L-series lenses are still optically superb and will produce stunning images for years to come. The best lens is the one that fits your budget and helps you create the photos you want to make.
Can I use non-Canon lenses on my Canon camera?
Yes! As we discussed, brands like Sigma, Tamron, Tokina, and Rokinon make lenses in Canon’s RF and EF mounts. They are a fantastic way to get high-quality glass, often with unique features or at a lower price point than the Canon-branded equivalent.
Is a 35mm or 50mm lens better?
This is a classic debate! A 50mm lens provides a very natural, “normal” field of view that’s excellent for portraits and isolating subjects. A 35mm lens is slightly wider, making it better for environmental portraits (showing the subject in their surroundings), street photography, and general-purpose use. Many photographers find 35mm to be a more versatile “storytelling” focal length.
Final Thoughts: Your Next Step to Amazing Photos
Choosing a new lens is an incredible step forward in your photography. It opens up a universe of creative possibilities that simply aren’t possible with a smartphone or a basic kit lens. Remember, the goal isn’t to own every lens, but to find the one or two camera lenses for Canon that truly inspire you and match the stories you want to tell.
Start with your passion. Are you drawn to people, places, or action. Let that guide you. Whether you begin with the affordable and brilliant “nifty fifty” or invest in a versatile zoom, you’re making a fantastic choice.
The most important thing is to get out there, shoot, experiment, and see the world through your new perspective. Happy shooting.
Types of Camera Lenses: A Beginner’s Guide to Nailing the Perfect Shot
So you’ve got a fantastic new camera, and you’re buzzing with excitement to start shooting. You unbox it, charge the battery, and then you see it. the lens. Or maybe you’re looking to buy your first lens beyond the one that came in the box.
Suddenly, you’re hit with a tidal wave of numbers, letters, and jargon: 50mm, f/1.8, 70-200mm, IS, VR, prime, zoom. It can feel overwhelming, but don’t worry. Understanding the different types of camera lenses is the single most important step you can take to unlock your creative potential. Your lens is the eye of your camera, and choosing the right one is how you transform a simple snapshot into a breathtaking photograph.
This guide is here to be your friendly, energetic co-pilot on this journey. We’re going to break down all the camera lens categories in a simple, fun way. By the end, you’ll not only understand what all those terms mean, but you’ll also know exactly which lens you need to capture those creamy, blurry backgrounds, those epic, sweeping landscapes, or those up-close shots of wildlife. Let’s get started!
What You’ll Learn
Prime vs. Zoom Lenses: Discover the two fundamental camera lens types and learn the key differences in image quality, versatility, and performance to decide which is right for you.
The Main Lens Categories: We’ll explore the core types based on focal length—standard, wide-angle, and telephoto—and explain what kind of photography each one is perfect for.
Specialty Lenses Demystified: Get a clear understanding of creative lenses like macro, fisheye, and tilt-shift that open up entirely new photographic possibilities.
Key Features Explained: Learn what aperture (f-stop) and image stabilization mean in practical terms and why they are critical features to consider when making a purchase.
How to Choose Your Perfect Lens: Get specific, actionable recommendations for different photography styles, whether you’re into portraits, landscapes, sports, or travel.
The Two Fundamental Camera Lens Categories: Prime vs. Zoom
Before we dive into specific focal lengths, every lens falls into one of two main families: prime or zoom. This is the first and most important distinction to understand, as it shapes how you’ll approach your photography. Think of it as choosing between a specialist and a generalist—both are incredibly useful, but for different tasks!
What are Prime Lenses?
A prime lens has a single, fixed focal length. That’s it. If you have a 50mm prime lens, it only shoots at 50mm. You can’t twist a ring to zoom in or out.
To change your composition, you have to physically move your feet, a technique photographers affectionately call “zoom with your feet.”.
While this might sound limiting, it comes with some incredible advantages. Because they have fewer moving parts and simpler optical construction, prime lenses are generally sharper and produce higher-quality images than zoom lenses in the same price range. Their biggest superpower, however, is their wide maximum aperture (like f/1.8 or even f/1.4), which lets in a massive amount of light. This makes them absolute rockstars in low-light situations and allows you to create that gorgeous, professional-looking background blur (known as “bokeh”).
Prime lenses are also typically smaller and lighter than their zoom counterparts, making them a joy to carry around. They force you to be more intentional with your framing, which many photographers find helps them become better at composition.
What are Zoom Lenses?
A zoom lens offers a range of focal lengths in a single package. A lens labeled 24-70mm allows you to shoot at 24mm, 70mm, and every single focal length in between, all with a simple twist of the lens barrel. This incredible versatility is their main selling point.
Imagine you’re at a wedding. With a zoom lens, you can capture a wide shot of the entire venue and then instantly zoom in to get a tight shot of the couple exchanging rings, all without moving an inch. This convenience is unbeatable for fast-paced events, travel photography, or any situation where you can’t easily change your position.
Modern zoom lenses have become exceptionally good, with professional-grade models offering fantastic image quality. However, they are generally larger, heavier, and more expensive than prime lenses. They also tend to have a smaller maximum aperture (like f/2.8 or f/4), meaning they aren’t always as strong in low-light conditions as a fast prime.
Pros and Cons: Which One is for You?
Choosing between a prime and a zoom lens depends entirely on your needs and shooting style. There’s no single “better” option—only what’s better for a specific situation. Many professional photographers carry both in their bags!
Feature
Prime Lenses
Zoom Lenses
Focal Length
Fixed (e.g., 50mm)
Variable (e.g., 24-70mm)
Best For
Portraits, low light, street photography
Events, travel, sports, versatility
Image Quality
Generally sharper for the price
Excellent in pro models, but can be softer in budget models
Aperture
Wide (f/1.8, f/1.4) – great for bokeh & low light
Narrower (f/2.8, f/4) – less background blur
Size & Weight
Smaller and lighter
Larger and heavier
Convenience
Less convenient; requires moving
Extremely convenient and versatile
If you’re a beginner, a great strategy is to start with a versatile zoom lens (like the 18-55mm kit lens that often comes with cameras) to figure out which focal lengths you enjoy using most. Then, you can invest in a prime lens at that focal length to get a boost in image quality and low-light performance.
Decoding Focal Length: The Main Types of Camera Lenses
Focal length, measured in millimeters (mm), is the number one factor that determines what your lens “sees.” It dictates the angle of view (how much of the scene is captured) and the magnification (how close subjects appear). Let’s break down the main camera lens categories based on this crucial number!
Standard Lenses (35mm – 70mm): The “Normal” View
A standard lens, often called a “normal” lens, offers a field of view that closely mimics what the human eye sees naturally. This makes the resulting photos feel familiar, balanced, and true-to-life. The most iconic standard lens is the 50mm prime, affectionately known as the “nifty fifty.”
Because they don’t distort the scene by making it look wider or more compressed, standard lenses are incredibly versatile. They are perfect for a huge range of subjects, including street photography, travel, documentary work, and environmental portraits where you want to show a person in their surroundings. The 50mm f/1.8 is often the first lens a new photographer buys after their kit lens, and for good reason! It’s affordable, sharp, fantastic in low light, and teaches you so much about composition.
Best For: Everyday shooting, street photography, travel, portraits.
Key Characteristic: A natural perspective that looks like real life.
Wide-Angle Lenses (14mm – 35mm): Capturing the Big Picture
When you want to fit more into your frame, you need a wide-angle lens! These lenses have a shorter focal length, which gives them a much wider angle of view than a standard lens. This allows you to capture expansive landscapes, towering skyscrapers, and large groups of people with ease.
Wide-angle lenses are the go-to choice for landscape, architecture, and real estate photography. They create a sense of scale and drama, making scenes feel vast and immersive. They’re also essential for shooting in tight indoor spaces where you can’t back up any further. One thing to be aware of is that wide-angle lenses can cause distortion, especially at the edges of the frame.
This can be used for creative effect but can also be unflattering for portraits if you get too close to your subject.
Best For: Landscapes, architecture, real estate interiors, large group photos.
Key Characteristic: A wide field of view that captures more of the scene.
Telephoto Lenses (70mm+): Bringing the Action to You
A telephoto lens is like having a pair of binoculars for your camera. With a long focal length (anything from 70mm to 600mm and beyond), these lenses magnify distant subjects, making them appear much closer in your photo. This is absolutely essential for subjects you can’t physically get close to.
This makes them the undisputed champions of wildlife and sports photography. A telephoto lens lets you fill the frame with a bird on a branch or a player on the field from a safe and respectful distance. They are also fantastic for portrait photography! The long focal length creates a beautiful effect called “compression,” which flattens the perspective and makes backgrounds appear closer and creamier, creating incredibly flattering portraits that really pop.
Best For: Wildlife, sports, concerts, and flattering portraits.
Key Characteristic: High magnification to bring distant subjects close.
Macro Lenses: Revealing the Tiny World
Have you ever wanted to capture the intricate details of a flower petal or the compound eye of a fly? That’s where a macro lens comes in! While telephoto lenses make distant things look big, macro lenses are specially designed for extreme close-up photography of tiny subjects.
Their defining feature is a 1:1 (or 1x) magnification ratio. This means the lens can project an image of the subject onto the camera’s sensor at its actual, life-size scale. This allows you to capture a world of detail that is invisible to the naked eye. Macro lenses are perfect for nature photography (insects, flowers, water droplets) as well as product photography for small items like jewelry or watches.
Best For: Insects, flowers, product details, any extreme close-up work.
Key Characteristic: 1:1 life-size magnification for incredible detail.
Specialty Lenses: The Creative Powerhouses
Beyond the main categories, there are a few specialty lenses designed for very specific creative purposes. While not essential for most beginners, they are incredibly fun and can produce unique results!
Fisheye Lenses: These are ultra-wide-angle lenses (typically 8mm to 15mm) that produce a heavily distorted, hemispherical image. They create a surreal, bubble-like view of the world, perfect for abstract shots, action sports, or unique cityscapes.
Tilt-Shift Lenses: Originally designed for architectural photography to correct perspective distortion (making buildings look straight instead of leaning backwards), these lenses can also be used to create a “miniature faking” effect. By tilting the plane of focus, you can make a real-life city scene look like a tiny model railroad set!
Key Features to Understand Before You Buy
Beyond the type of lens, a few key features have a massive impact on performance and price. Understanding these will help you read a lens’s description and know exactly what you’re getting.
Aperture (The F-Stop): Controlling Light and Depth
Aperture is one of the most important and creative controls in all of photography. It refers to the opening inside the lens that lets light pass through to the camera sensor. You can think of it like the pupil of your eye—it can open wide in the dark to let more light in or shrink down in bright sunlight.
Aperture is measured in “f-stops,” written as f/1.8, f/4, f/11, etc. Here’s the tricky part: a smaller f-number means a wider opening, which lets in more light. A lens with a maximum aperture of f/1.8 is considered “fast” because it can gather a lot of light, allowing you to use a faster shutter speed to freeze motion in dim conditions. This is also the secret to creating that beautiful background blur (bokeh) that makes portraits look so professional.
A larger f-number means a smaller opening. An aperture of f/16 lets in very little light but keeps almost everything in the scene, from foreground to background, tack sharp. This is ideal for landscape photography where you want maximum depth of field.
Image Stabilization (IS/VR/OS): Your Secret Weapon Against Blur
Have you ever taken a photo in low light, only to find it’s blurry from your hands shaking? That’s where image stabilization comes in! Different brands have different names for it—Canon calls it Image Stabilization (IS), Nikon calls it Vibration Reduction (VR), and Sigma calls it Optical Stabilization (OS)—but they all do the same thing.
Tiny gyroscopes inside the lens detect the motion of your hands and move a group of lens elements to counteract the shake. This allows you to shoot at much slower shutter speeds than you normally could without getting a blurry photo. It’s an incredibly useful feature, especially for telephoto lenses where even the tiniest shake is magnified, and for any handheld shooting in less-than-ideal light.
Pro Tip: Image stabilization only corrects for camera shake from your hands. It does not freeze a moving subject. To freeze a running person or a flying bird, you still need to use a fast shutter speed.
Lens Mounts and Compatibility: A Critical Check
This is a crucial but often overlooked detail. You can’t just put any lens on any camera! Every camera manufacturer (Canon, Nikon, Sony, Fujifilm, etc.) has its own proprietary lens mount. A Canon lens will not fit on a Nikon camera without a special adapter, and vice versa.
To make things even more complex, you also need to consider the camera’s sensor size. Cameras come in two main sensor sizes: Full-Frame and APS-C (or crop sensor). Lenses are designed for one or the other. While you can often use a full-frame lens on an APS-C camera, using an APS-C lens on a full-frame camera will usually result in a heavy black vignette around your image.
Always double-check that the lens you’re buying is compatible with your specific camera’s mount and sensor size.
How to Choose the Right Camera Lens for Your Needs
Okay, theory is great, but let’s get practical! You want to know which lens to buy for the photos you want to take. Here are some top recommendations for different camera lenses based on popular photography styles.
For the Aspiring Portrait Photographer
If you love taking pictures of people, your goal is to make your subject the star of the show. You want a lens that can create a flattering perspective and melt the background away into a beautiful blur. The undisputed king for this is a prime lens.
Top Recommendation: An 85mm f/1.8 or a 50mm f/1.8 prime lens. The 85mm is considered the classic portrait focal length because it provides beautiful compression without requiring you to stand too far away. The 50mm is a more versatile and affordable option that’s also fantastic for portraits.
For the Landscape and Architecture Enthusiast
To capture the grandeur of nature or the scale of a city, you need to go wide. You want a lens that can drink in the entire scene and keep everything sharp from the flowers at your feet to the mountains in the distance.
Top Recommendation: A wide-angle zoom lens, like a 16-35mm or 10-24mm (depending on your sensor size). The zoom gives you the flexibility to frame your shot perfectly, whether you want an ultra-wide, dramatic view or a slightly tighter composition.
For the Sports and Wildlife Shooter
Your subjects are fast, far away, and often unpredictable. Your number one priority is “reach”—the ability to magnify your subject and fill the frame. This is telephoto territory, no question about it.
Top Recommendation: A telephoto zoom lens, such as a 70-200mm or a 100-400mm. The 70-200mm is a versatile workhorse for field sports and larger animals. For birds and more distant wildlife, the extra reach of a 100-400mm is invaluable.
For the All-in-One Traveler
When you’re exploring a new city or hiking a trail, you want to be prepared for anything without carrying a heavy bag full of lenses. Versatility is the name of the game. You need a lens that can go from wide-angle to telephoto in an instant.
Top Recommendation: A standard zoom like a 24-70mm or 24-105mm offers a great balance of quality and range. For maximum convenience, a “superzoom” like an 18-200mm covers nearly every situation, though often with a small trade-off in image quality and aperture performance.
Pricing and Cost: What to Expect from Different Camera Lens Types
Camera lenses can range in price from under a hundred dollars to many thousands. The cost is generally determined by the complexity of the optics, the maximum aperture, build quality, and features like weather sealing and image stabilization.
Budget-Friendly “Nifty Fifty” Lenses
The best value in all of photography is almost always the 50mm f/1.8 prime lens. Nearly every brand offers one, and they typically cost between $125 and $250. For that small investment, you get a lens that is drastically sharper and better in low light than any standard kit lens. It’s the perfect first upgrade for any new photographer.
Mid-Range Zooms and Primes
This is where most hobbyists and enthusiasts find their sweet spot. In the $500 to $1,500 range, you can find high-quality zoom lenses with a constant aperture (like an f/4 throughout the zoom range) and excellent prime lenses with even wider apertures (like an 85mm f/1.8 or 35mm f/1.4). These lenses offer a significant step up in build quality and optical performance.
Professional “Holy Trinity” Lenses
For working professionals, there’s a set of three lenses often referred to as the “Holy Trinity.” These are three f/2.8 zoom lenses that cover a huge range of focal lengths: a 16-35mm f/2.8 (wide-angle), a 24-70mm f/2.8 (standard), and a 70-200mm f/2.8 (telephoto). These lenses offer the best possible combination of image quality, wide aperture, and versatility, but they come with a hefty price tag, often costing $2,000 or more per lens.
Frequently Asked Questions
Let’s tackle some of the most common questions new photographers have about camera lens types. Getting clear answers to these can save you a lot of time and confusion!
What are the three essential camera lenses?
For a professional, the “three essential lenses” often refers to the “Holy Trinity” of f/2.8 zooms: 16-35mm, 24-70mm, and 70-200mm. However, for a beginner or hobbyist, a more practical and affordable trio would be:
A standard kit zoom (e.g., 18-55mm): To learn the basics and discover what focal lengths you like.
A fast prime (e.g., 50mm f/1.8): For portraits, low-light shooting, and learning composition.
A telephoto zoom (e.g., 55-200mm): To explore sports, wildlife, and bring distant subjects closer.
What lens should a beginner photographer use?
The best lens for a beginner is the one that came with their camera, usually an 18-55mm kit lens. It’s designed to be a versatile learning tool. Use it to experiment with wide, standard, and short telephoto perspectives. Once you find yourself constantly wishing you could get a blurrier background or shoot better in the dark, your first upgrade should absolutely be a 50mm f/1.8 prime lens.
It’s affordable and will teach you more about photography than any other piece of gear.
What lens do most photographers use?
This completely depends on their specialty! A landscape photographer will live on their wide-angle lens, while a wildlife photographer won’t leave home without their telephoto. However, if there’s one lens that is arguably the most common workhorse across many genres, it’s the 24-70mm f/2.8. Its versatile range and fast aperture make it the go-to choice for wedding, event, and photojournalism professionals.
What two lenses should every photographer have?
A fantastic and highly capable two-lens kit for almost any situation would be a versatile standard zoom (like a 24-70mm or 24-105mm) and a fast prime lens (like a 50mm f/1.8 or 35mm f/1.8). The zoom covers you for convenience and flexibility, while the prime gives you superior low-light capability and creative control over depth of field.
What is the most flattering lens for portraits?
The most universally flattering focal length for portraits is typically considered to be 85mm. An 85mm prime lens provides beautiful compression that slims features slightly and allows you to maintain a comfortable working distance from your subject. Other excellent choices include a 50mm for a more natural look and a 70-200mm zoom at the longer end (135mm-200mm) for stunning headshots with maximum background blur.
Final Thoughts
Choosing a camera lens is an incredibly exciting part of photography! It’s where you get to decide exactly how you want to see and capture the world. While the camera body is the brain of the operation, the lens is its heart and soul. It has a far greater impact on the final look and feel of your images than any other piece of equipment.
Don’t feel pressured to buy every type of lens at once. The best approach is to start with one or two versatile options, practice relentlessly, and pay attention to what you love to shoot. As you discover your passion—whether it’s tiny insects, grand mountains, or candid moments—you’ll know exactly which lens to add to your bag next.
Now that you’re armed with this knowledge, you can look at the different types of camera lenses not with confusion, but with excitement for the creative possibilities they hold. Go out there, experiment, and have an absolute blast capturing amazing photos!
Pocket-sized smart gadgets computers and whisper-quiet earbuds have quietly reengineered the rhythm of our days. Cellphones are no longer just phones; they’re compact orchestras of sensors, processors, and cameras that anticipate needs before we type a word. Overnight battery optimizations, on-device AI, and lightning-fast 5G mean streaming, gaming, remote work, and health tracking happen seamlessly—often concurrently. Headphones have kept pace, transforming from simple audio accessories into personal soundscapes. Active noise cancellation chops away city noise; spatial audio surrounds your head with movie-theater depth. Smart earbuds can translate languages in near real time, monitor heart rate, and switch automatically between devices. In short, what we carry in our pockets now shapes how we communicate, commute, and even concentrate.
Cameras and computers have similarly converged and exploded with creativity. Mirrorless cameras capture cinematic depth with lightweight bodies, while smartphone cameras use computational techniques—stacked exposures, AI scene recognition, and depth mapping—to produce images that would have stunned pros a decade ago. Videographers and everyday storytellers alike enjoy stabilization that smooths out a bumpy bike ride, and optical zooms that pull faraway moments close without losing detail. On the computing side, thin laptops and desktop beasts coexist. Ultrabooks flex portability and battery life; desktop GPUs drive machine learning and photoreal rendering. Foldables and convertible designs blur the lines between tablet and laptop, catering to artists, students, and multitaskers. More importantly, edge AI inside both cameras and computers lets devices process sensitive data locally—faster responses, lower latency, and fewer privacy leaks.
At home, security and appliances have evolved from isolated utilities into a cohesive, responsive environment. Smart locks and doorbell cameras mean you can greet a delivery from across the globe, grant temporary access to a neighbor, or replay suspicious activity in crisp night vision. Home security systems now use behavioral analytics to reduce false alarms, while local processing helps preserve privacy. Appliances have shed dials for intelligence: refrigerators track expiration dates and suggest recipes; ovens preheat on commute; washers optimize cycles to save water and energy. Robot vacuums map rooms with surgical precision, and air purifiers adapt to pollen counts. Voice assistants act as choreographers, weaving routines that dim lights, brew coffee, and cue the morning news — all triggered by a single phrase.
Of course, this golden era of gadgets comes with trade-offs. Convenience invites dependency; connectivity introduces new vectors for attack. Interoperability remains uneven: not every device speaks the same language, and ecosystems can lock you in. Yet the overall trajectory is clear. Miniature processors, smarter sensors, and thoughtful software are turning mundane objects into collaborators—tools that free time, amplify creativity, and sharpen our senses.
We live in an age where the extraordinary fits in a pocket, rests on a wrist, or automates a chore. These high-tech gadgets don’t just add features; they reshape expectations and remake the ordinary into something quietly spectacular.
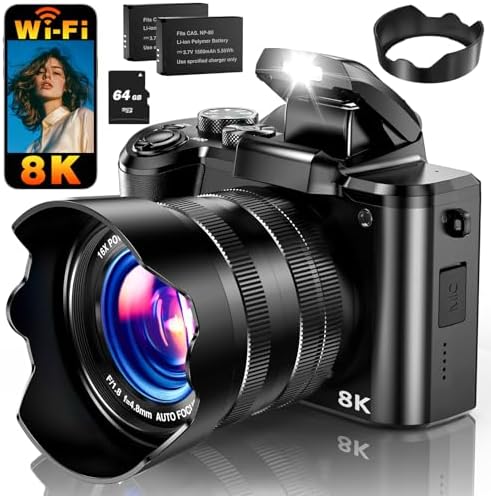
11 Best Action Photography Cameras in 2024 (For Pros & Enthusiasts)
There’s nothing more frustrating than watching the perfect action shot—a bird taking flight, a game-winning goal, a surfer carving a wave—and seeing a blurry, out-of-focus mess on your camera’s screen. Capturing fast-moving subjects is one of the biggest challenges in photography, and your gear can be the difference between a legendary photo and a deleted file. Finding the best action photography cameras isn’t just about buying the most expensive model; it’s about matching incredible technology with your specific needs to freeze motion with stunning clarity.
Whether you’re a professional sports photographer on the sidelines or an enthusiast capturing your kids’ soccer games, the right camera will feel like a superpower. Modern cameras have lightning-fast autofocus, incredible burst speeds, and intelligent tracking that can lock onto a subject’s eye and never let go. This guide breaks down the top contenders for 2024, from professional mirrorless powerhouses to rugged, pocket-sized action cams, so you can finally start capturing those jaw-dropping moments you’ve been missing.
Quick Summary
Speed is King: The most critical features for action photography are a high burst rate (frames per second or FPS) and a sophisticated autofocus (AF) system with subject tracking. Look for cameras that offer at least 20 FPS and AI-powered subject detection.
Two Main Categories: Your choice will likely fall into one of two groups. High-end mirrorless cameras (like those from Sony, Canon, and Nikon) offer the best image quality and control, while compact action cams (like GoPro and DJI) provide unmatched portability and durability for point-of-view shots.
Top Pro & Enthusiast Picks: For ultimate performance, the Canon EOS R3 and Nikon Z9 are leaders in the professional space. For incredible value and performance, the Canon EOS R7 is a standout. In the compact category, the GoPro HERO12 Black remains the benchmark.
The Ecosystem Matters: Your action photography gear is more than just the camera body. Fast lenses (like a 70-200mm f/2.8) and high-speed memory cards (like CFexpress Type B) are essential to unlock your camera’s full potential.
What Makes a Camera Great for Action Photography?
Before we jump into the top models, it’s crucial to understand what features truly define the best cameras for action shots. It’s not just about megapixels or brand names. The magic lies in a combination of speed, intelligence, and endurance that allows the camera to keep up with unpredictable moments. When you see these specs, you’ll know you’re looking at a true action-ready machine.
Blazing Fast Burst Rate (FPS)
Frames Per Second (FPS) refers to how many photos a camera can take in one second when you hold down the shutter button. For a portrait, 1 FPS is fine. For a bird in flight, you need way more. A higher FPS gives you more frames to choose from, dramatically increasing your chances of capturing the single instant where the action, expression, and composition are perfect.
Look for cameras with at least 15-20 FPS using the electronic shutter. Top-tier professional models can hit an astonishing 30, 40, or even 120 FPS. This is the difference between getting a shot and getting the shot.
Intelligent Autofocus (AF) with Subject Tracking
Modern autofocus systems are nothing short of incredible. Gone are the days of just a single focus point in the center. The best action photography cameras use advanced AI and deep learning algorithms to identify and track subjects. They can recognize humans, animals (even specific birds), and vehicles, then lock onto them and follow them across the frame.
Eye AF is particularly important, as it ensures the most critical part of your subject is tack-sharp. A camera that can maintain focus on a sprinter’s eye as they move towards you at full speed is a powerful tool. This intelligent tracking frees you up to focus on composition, knowing the camera is handling the critical task of focusing.
Deep Buffer Depth
What good is a 30 FPS burst rate if the camera can only sustain it for one second before it slows down to a crawl? That’s where buffer depth comes in. The buffer is the camera’s internal, short-term memory that holds images before they’re written to the memory card. A deep buffer allows you to shoot long bursts without interruption.
This is measured in the number of shots you can take before the buffer fills up (e.g., 150 RAW images). For sports or wildlife, where the action can be sustained for several seconds, a deep buffer is non-negotiable. It ensures you don’t miss the peak moment because your camera was busy saving earlier photos.
Stacked Sensor and Electronic Shutter
Traditionally, cameras used a mechanical shutter, a physical curtain moving in front of the sensor. While reliable, it has speed limitations. The electronic shutter uses the sensor itself to capture the image, allowing for much faster and completely silent shooting.
However, on standard sensors, this can cause a “rolling shutter” effect, where fast-moving vertical lines appear skewed. A stacked CMOS sensor is the solution. It has a much faster readout speed that virtually eliminates this distortion, making the electronic shutter perfect for freezing fast action without compromise. Cameras with stacked sensors represent the pinnacle of action photography technology.
How to Choose the Right Action Camera for You
With so many options, picking the perfect camera can feel overwhelming. The best approach is to start with your own needs and work backward. Ask yourself these three questions to narrow down the field and find the ideal tool for the job.
1. What’s Your Budget?
This is the most practical starting point. Action photography gear can range from a few hundred dollars to well over $10,000 for a professional setup. Be honest about what you’re willing to spend, and remember to factor in the cost of lenses and memory cards.
Budget-Friendly ($300 – $800): This range is dominated by compact action cams like GoPro and DJI. They are fantastic for video and offer good photo quality in a durable, go-anywhere package.
Enthusiast / Mid-Range ($1,000 – $2,500): Here you’ll find powerful APS-C mirrorless cameras like the Canon R7 or Fujifilm X-H2S. These offer a huge step up in image quality and performance from action cams and are perfect for serious hobbyists.
Professional ($4,000+): This is the realm of full-frame mirrorless flagships like the Nikon Z9 and Canon R3. These cameras have the best autofocus, fastest burst speeds, and most robust build quality, designed for professionals who can’t afford to miss a shot.
2. What Are You Shooting?
The subject of your photography heavily influences your choice. A camera that excels at capturing a wide-angle mountain biking video might not be the best for shooting birds from a distance.
Sports & Wildlife: You need reach and speed. A mirrorless camera with interchangeable lenses is almost essential. The ability to use a long telephoto lens, combined with a fast frame rate and elite AF tracking, is key.
Vlogging & Travel: Portability and video features are paramount. A compact action cam or a small 360 camera is ideal. Features like excellent image stabilization and a front-facing screen are huge benefits.
General Family & Kids’ Sports: You want a versatile all-rounder. A mid-range mirrorless camera offers a great balance of performance, image quality, and ease of use without the professional price tag.
3. Do You Prioritize Photos, Video, or Both?
While most modern cameras are hybrids, they often excel in one area more than the other. Understanding your primary goal will help you choose a camera with the right strengths.
If your main output is still photos for print or web, focus on cameras with higher resolution, excellent RAW file quality, and a deep buffer for stills. If you’re primarily creating video content for YouTube or social media, prioritize video specs like 4K/120p recording, advanced stabilization, and good audio options. If you need the best of both worlds, the high-end mirrorless cameras are designed to do both exceptionally well.
The Best Action Photography Cameras: Our Top Picks for 2024
Ready to see the contenders? We’ve broken down our top picks into two categories: the best mirrorless cameras for those who demand ultimate image quality and control, and the top action cameras for those who need portability, durability, and amazing video.
Best Mirrorless Cameras for Action Shots
These are the powerhouses. They combine large sensors, interchangeable lenses, and cutting-edge technology to deliver professional-grade results for the most demanding situations.
1. Canon EOS R3: The Speed & Autofocus King
The Canon EOS R3 is an absolute speed demon built for professionals. Its standout feature is the mind-blowing Eye Control AF, which allows you to select a focus point simply by looking at it through the viewfinder. Combined with its 24MP stacked sensor, 30 FPS blackout-free shooting, and world-class vehicle and animal tracking, this camera feels like it’s from the future.
It’s built like a tank with an integrated vertical grip, making it comfortable for long days of shooting. While its resolution isn’t the highest, it’s optimized for speed and low-light performance, making it a favorite among sports and news photographers who need to deliver clean files, fast.
Pros:
Revolutionary Eye Control AF system.
Blazing 30 FPS burst shooting with no viewfinder blackout.
Superb subject tracking for people, animals, and motorsports.
Excellent low-light performance and image quality.
Cons:
Lower resolution (24MP) compared to some rivals.
High price point puts it out of reach for most hobbyists.
2. Nikon Z9: The High-Resolution Powerhouse
The Nikon Z9 is a triumph of engineering that proves you don’t have to choose between resolution and speed. It packs a 45.7MP stacked sensor that delivers incredible detail, while still offering a blistering 20 FPS in RAW and up to 120 FPS for lower-resolution JPEGs. It was also the first professional camera to launch without a mechanical shutter, showing total confidence in its stacked sensor’s ability to eliminate rolling shutter.
Its 3D-tracking autofocus is tenacious, and its video capabilities are top-of-the-line, with internal 8K/60p recording. The Z9 is arguably the best all-around professional camera on the market, equally at home shooting Olympic sports, detailed wildlife portraits, or cinematic video.
Pros:
Fantastic balance of high resolution (45.7MP) and high speed (20 FPS RAW).
No rolling shutter distortion thanks to its fast stacked sensor.
Class-leading video features, including 8K/60p internal recording.
Extremely rugged, professional-grade body.
Cons:
It’s a large and heavy camera, especially with telephoto lenses.
The learning curve can be steep for those new to Nikon’s pro systems.
3. Sony a9 III: The Global Shutter Revolution
The Sony a9 III changes the game with the world’s first full-frame global shutter sensor in a consumer camera. What does that mean. It reads the entire sensor at the exact same instant, completely eliminating rolling shutter distortion. This allows for perfectly distortion-free images of things like golf swings or helicopter blades.
It also enables flash sync at any shutter speed, up to an insane 1/80,000s.
This camera can shoot at an incredible 120 FPS in full-resolution RAW with full AF/AE tracking. Its AI-powered autofocus is arguably the best in the business, with a dedicated chip for processing subject recognition. For photographers who need to freeze the absolute fastest motion with perfect clarity, the a9 III is in a class of its own.
Pros:
Global shutter provides zero distortion and flash sync at any speed.
Unbelievable 120 FPS burst shooting with no blackout.
Sony’s industry-leading autofocus with a dedicated AI processor.
Pre-Capture feature ensures you never miss the moment.
Cons:
The global shutter technology results in a slightly higher base ISO and less dynamic range in some situations.
The most expensive camera on this list.
4. Canon EOS R7: The Best Value for Enthusiasts
Bringing professional-level features to a much more accessible price point, the Canon EOS R7 is a dream for aspiring action photographers. It uses a 32.5MP APS-C sensor, which gives you extra “reach” with your lenses due to its 1.6x crop factor—a huge advantage for wildlife and sports. It inherits the incredible Dual Pixel CMOS AF II system from its more expensive siblings, offering fantastic subject tracking.
With 15 FPS using the mechanical shutter and 30 FPS with the electronic shutter, the R7 has the speed to keep up with almost any subject. It also includes in-body image stabilization and dual card slots, features often reserved for more expensive models. For the price, its performance is simply unmatched.
Pros:
Pro-level autofocus and burst speeds at an enthusiast price.
APS-C sensor provides extra telephoto reach.
High-resolution 32.5MP sensor for detailed images.
Excellent ergonomics and dual card slots.
Cons:
Can exhibit some rolling shutter with the electronic shutter.
The buffer can fill quickly when shooting at 30 FPS in RAW.
5. Fujifilm X-H2S: The APS-C Speed Specialist
Fujifilm’s X-H2S is a speed-focused marvel built around the company’s first-ever stacked APS-C sensor. This 26.1MP sensor allows for an incredible 40 FPS blackout-free burst mode with the electronic shutter, all while minimizing rolling shutter. It’s a compact and powerful system designed for photographers who need speed without the bulk of a full-frame setup.
Fujifilm is renowned for its color science and beautiful JPEG processing, and the X-H2S is no exception. Its improved autofocus can now track animals and vehicles effectively, making it a serious contender for wildlife and motorsports. It’s a fantastic choice for those who want top-tier speed in a more portable package.
Pros:
Blazing 40 FPS burst shooting with no viewfinder blackout.
Stacked APS-C sensor minimizes rolling shutter.
Fantastic Fujifilm color science and film simulations.
Robust video features and excellent build quality.
Cons:
Autofocus tracking, while much improved, can still lag slightly behind the best from Canon and Sony.
The 26.1MP resolution is lower than some competitors.
Top Action Cameras for POV & Video
These cameras are small, tough, and designed to be mounted anywhere. They excel at capturing immersive video and are more than capable of snapping great photos in the middle of the action.
6. GoPro HERO12 Black: The Gold Standard
The name GoPro is synonymous with action cameras, and the HERO12 Black shows why. It builds on a proven formula with incredible HyperSmooth 6.0 stabilization, which delivers gimbal-like smooth footage in even the shakiest conditions. It can shoot stunning 5.3K video at up to 60 FPS and offers a unique 8:7 aspect ratio sensor that allows for incredible reframing flexibility.
For photos, you can pull high-quality 24.7MP stills directly from your video or shoot in a dedicated photo mode. It’s waterproof, incredibly durable, and supported by a massive ecosystem of mounts and accessories. For all-around action capture, it’s still the one to beat.
Pros:
Best-in-class image stabilization with HyperSmooth 6.0.
High-quality 5.3K video and flexible 8:7 sensor.
Extremely durable and waterproof without a case.
Huge ecosystem of available mounts and accessories.
Cons:
Low-light performance is still a weakness compared to larger cameras.
Battery life can be a challenge when shooting at the highest settings.
7. DJI Osmo Action 4: The Low-Light Champion
DJI’s Osmo Action 4 comes out swinging with a key advantage: a larger 1/1.3-inch sensor. This gives it a significant edge in low-light situations, producing cleaner and more detailed footage at dusk or indoors compared to its main rival. It also features an excellent magnetic quick-release mounting system that makes swapping mounts incredibly fast and easy.
It matches the GoPro in many areas, with fantastic RockSteady 3.0 stabilization, 4K/120p video, and a rugged, waterproof design. The dual front and rear touchscreens are bright and responsive. If your adventures often happen after the sun starts to set, the Action 4 is an outstanding choice.
Pros:
Larger sensor provides superior low-light video quality.
Brilliant magnetic mounting system is fast and convenient.
Excellent image stabilization and color performance.
Long-lasting battery with impressive cold-weather performance.
Cons:
Still photos are limited to 10MP.
The user interface isn’t quite as refined as GoPro’s.
8. Insta360 X4: Capture Everything, Reframe Later
Why worry about pointing the camera in the right direction? The Insta360 X4 is a 360-degree camera that captures everything around you in stunning 8K resolution. After you’re done shooting, you can use the powerful mobile or desktop app to “reframe” your video, essentially acting as a virtual camera operator to create a traditional flat video, choosing the best angles after the fact.
This makes it incredibly powerful for action sports where you can’t predict where the best shot will be. It also features class-leading FlowState stabilization and creative effects like the “Invisible Selfie Stick,” where the stick is automatically erased from your footage. It’s a completely different way to think about capturing action.
Pros:
Shoots 360-degree video in 8K, offering incredible reframing flexibility.
Invisible Selfie Stick effect is a fantastic feature.
Powerful and easy-to-use editing software.
Can also be used as a standard single-lens action camera.
Cons:
The dual lenses are more exposed and vulnerable to scratches.
The workflow of reframing footage takes more time than a traditional camera.
Action Photography Gear: It’s More Than Just the Camera
Choosing one of the top action cameras is a huge step, but to truly get the most out of it, you need the right accessories. The camera body is the brain, but the lenses and memory cards are just as critical to the operation. Investing in quality action photography gear ensures you aren’t creating a bottleneck in your system.
The Right Lens is Crucial
A fast lens (one with a wide maximum aperture like f/2.8 or f/4) allows more light to hit the sensor. This lets you use a faster shutter speed to freeze motion without cranking up the ISO and introducing noise. For field sports and wildlife, a telephoto zoom lens like a 70-200mm f/2.8 is considered the industry standard. For motorsports, you might need something even longer, like a 100-400mm or 200-600mm lens.
Don’t Skimp on Memory Cards
Your camera’s deep buffer is useless if your memory card can’t keep up. When the buffer is full, images need to be written to the card, and a slow card will bring your shooting to a halt. For high-end mirrorless cameras shooting at 20+ FPS, you absolutely need a CFexpress Type B card. These cards have incredibly fast write speeds that can clear the buffer almost instantly, letting you shoot burst after burst without interruption.
Pro Tip: Always format your memory card in the camera before a big shoot. This ensures the card’s file structure is perfectly matched to the camera, reducing the risk of errors or data corruption at a critical moment.
Cost Comparison: What to Expect When Buying an Action Camera
Navigating the price points of action cameras can be tricky. Here’s a simple breakdown of what you get for your money across the different tiers. Remember, these prices are for the camera body only; lenses for mirrorless systems are a separate and significant investment.
Camera Category
Price Range (Body Only)
Best For
Key Features
Example Models
Compact Action Cams
$300 – $550
Vlogging, POV, Travel
Portability, Durability, Video-centric
GoPro HERO12, DJI Action 4
Enthusiast APS-C
$1,200 – $2,500
Serious Hobbyists, Amateurs
Great performance for the price, telephoto reach
Canon R7, Fujifilm X-H2S
Professional Full-Frame
$4,000 – $6,500
Pro Sports, Wildlife, Journalism
Unmatched AF, speed, and reliability
Canon R3, Nikon Z9, Sony a9 III
As you can see, there’s a significant jump between categories. The key is to buy the camera that meets your current needs and offers a little room to grow, without overspending on professional features you may never use.
Frequently Asked Questions About Action Photography Cameras
Here are answers to some of the most common questions photographers have when choosing gear for capturing fast-moving subjects.
Are mirrorless cameras better for action shots?
Yes, overwhelmingly so. Modern mirrorless cameras have surpassed DSLRs for action photography in almost every meaningful way. Their on-sensor phase-detect autofocus systems are faster and more accurate, covering nearly the entire frame. Their electronic shutters enable silent shooting at speeds far beyond what any mechanical shutter can achieve.
The ability to see your exposure in real-time through the electronic viewfinder is another huge advantage.
What lens is best for action photography?
The 70-200mm f/2.8 lens is widely considered the most versatile and essential lens for action and sports photography. It offers a great range for most field sports, and the constant f/2.8 aperture is excellent for low light and creating subject separation. For wildlife or sports that are further away, a super-telephoto zoom like a 100-400mm, 150-600mm, or 200-600mm is often necessary.
What cameras do NFL photographers use?
NFL sidelines are dominated by the flagship professional bodies from Canon and Sony. You will see a sea of Canon EOS R3 and Sony a1 or a9 series cameras. These are chosen for their uncompromising speed, autofocus reliability, and robust build quality that can withstand the rigors of professional use. They are almost always paired with large, fast telephoto prime lenses like a 400mm f/2.8.
What is better, DJI or GoPro?
This is a very close race, and the best choice depends on your priorities. GoPro, with the HERO12 Black, generally has a slight edge in its best-in-class stabilization (HyperSmooth) and a more refined user experience. DJI, with the Osmo Action 4, has a larger sensor that gives it a clear advantage in low-light video quality and a very convenient magnetic mounting system. You can’t go wrong with either, but if you shoot a lot at dawn or dusk, lean towards DJI.
Should I worry about megapixels for action photography?
Not as much as you might think. For action photography, speed and autofocus performance are far more important than megapixel count. A 24MP camera that can shoot at 30 FPS and never misses focus is infinitely more useful than a 60MP camera that shoots at 8 FPS with a slow buffer. Higher megapixels can be useful for cropping, but don’t prioritize it over the core speed-related features.
Final Thoughts: Capturing the Perfect Moment
Choosing from the best action photography cameras of 2024 is an exciting process. The technology available today, from AI-powered autofocus that tracks an athlete’s eye across a field to global shutters that freeze motion with zero distortion, is truly incredible. It has never been easier to capture clean, sharp, and impactful images of fast-moving subjects.
Your final decision should come down to your specific needs and budget. If you are a professional or a serious enthusiast who demands the absolute best, the performance of the Nikon Z9 or Canon R3 will never let you down. If you’re an aspiring photographer looking for the best bang for your buck, the Canon EOS R7 offers an unbelievable amount of performance for its price.
And for those whose adventures are all about immersive video, portability, and durability, the GoPro HERO12 Black and DJI Osmo Action 4 are fantastic tools that you can take anywhere. No matter which camera you choose, the most important thing is to get out there and start shooting. The perfect moment is waiting for you to capture it!
7 Best Professional Photography Cameras in 2026 (For Every Pro)
Choosing your next professional camera is one of the most exciting decisions you can make! It’s more than just a tool; it’s your partner in creativity, the device that translates your vision into stunning, tangible art. Finding the best professional photography cameras on the market can feel overwhelming with so many incredible options, but that’s where the fun begins. Whether you’re a seasoned pro looking for an upgrade or an aspiring photographer ready to invest in serious gear, the right camera will elevate your work to breathtaking new heights.
This guide is here to cut through the noise. We’re going to break down the absolute top-tier cameras available today, exploring what makes them tick and who they’re perfect for. Get ready to discover the technology that will empower your photography and help you capture images you’ve only dreamed of!
What to Know
The “Best” is Subjective: The perfect camera depends entirely on your specialty. A sports photographer needs blistering speed (Sony A1, Nikon Z8), while a landscape artist prioritizes maximum resolution (Sony a7R V, Fujifilm GFX 100S).
Mirrorless is King: While legendary DSLRs still perform beautifully, the professional market has overwhelmingly shifted to mirrorless cameras for their superior autofocus, electronic viewfinders, and advanced video features.
Sensors and Lenses Matter Most: A full-frame or medium format sensor is the standard for professional quality, delivering exceptional detail and low-light performance. Your investment in high-quality lenses is just as, if not more, important than the camera body itself.
Resolution Isn’t Everything: Megapixels are great for large prints and cropping, but autofocus speed, dynamic range, and high ISO performance are often more critical for professional results in dynamic situations.
What Makes a Camera “Professional”?
What exactly separates a consumer-grade camera from the best cameras for pros? It’s not just a higher price tag. Professional cameras are defined by a suite of features designed for reliability, performance, and uncompromising image quality under demanding conditions. When you see a camera in the hands of a pro at a wedding, sporting event, or on a commercial set, it likely has these core characteristics.
First and foremost is the sensor. Most professional cameras use a full-frame sensor (36x24mm), which is the digital equivalent of classic 35mm film. This large sensor size allows for incredible detail, superior performance in low light with less digital noise, and a shallow depth of field that creates that beautiful background blur (bokeh). Some specialized pros even step up to medium format, which offers an even larger sensor for unparalleled image quality.
Next is build quality and durability. Professional cameras are built like tanks. They feature robust magnesium-alloy bodies with extensive weather sealing to protect against dust, moisture, and freezing temperatures. This means a pro can keep shooting in the rain or a dusty desert without worrying about their gear failing.
They also feature dual memory card slots, a non-negotiable feature for pros. This allows for instant backups, ensuring that a once-in-a-lifetime shot is never lost to a corrupted card.
Finally, performance and control are paramount. This includes lightning-fast and highly intelligent autofocus systems that can track a subject’s eye with pinpoint accuracy, high continuous shooting speeds (burst rates) for capturing action, and a huge buffer to handle all that data. The physical controls are also extensive, with customizable buttons and dials that allow a photographer to change settings instantly without ever taking their eye off the viewfinder. It’s this combination of image quality, reliability, and speed that truly defines a professional camera.
Mirrorless vs. DSLR: What Do Pros Use in 2026?
For years, the DSLR (Digital Single-Lens Reflex) was the undisputed champion of professional photography. Its optical viewfinder and time-tested performance made it the go-to for nearly every working pro. However, the landscape has dramatically shifted. Today, in 2026, mirrorless cameras dominate the professional market, and the answer to “Do professional photographers use DSLR or mirrorless?” is overwhelmingly mirrorless.
A DSLR uses a complex mirror and prism system to bounce light from the lens into an optical viewfinder (OVF). When you press the shutter, the mirror flips up, and the light hits the sensor. A mirrorless camera, as the name implies, removes the mirror entirely. The light goes directly from the lens to the sensor, and the image is displayed on a high-resolution electronic viewfinder (EVF) or the rear LCD screen.
This fundamental difference is the source of all of mirrorless’s advantages.
The EVF is a huge benefit. It shows you a real-time preview of exactly what your final image will look like, including exposure, white balance, and depth of field. What you see is what you get. Furthermore, removing the mirror mechanism allows for more sophisticated and faster autofocus systems that cover the entire sensor.
It also enables completely silent shooting and faster burst rates, as there’s no mirror physically flapping up and down. While we’ve included a legendary DSLR on our list, the innovation, performance, and future of lens development are firmly in the mirrorless camp.
How to Choose from the Top Photography Cameras
Navigating the world of high-end cameras can be thrilling, but it’s essential to match the camera’s strengths to your specific needs. The best camera for a studio portrait photographer is different from the ideal choice for a wildlife photographer. Here’s a breakdown of the key factors to consider when making your choice.
Sensor Size and Resolution
The heart of any camera is its sensor. For professional work, a full-frame sensor is the baseline, offering a fantastic balance of resolution, low-light capability, and dynamic range. If your work involves creating massive prints for galleries or billboards, or if you need extreme cropping flexibility, a high-resolution model (45MP and above) is ideal. For the ultimate in detail, medium format cameras like the Fujifilm GFX series provide a larger sensor and breathtaking image quality, though often at the cost of speed and autofocus performance.
Autofocus Performance
Modern autofocus (AF) systems are nothing short of magic. The best professional photography cameras use sophisticated AI and deep learning to not just find a subject, but to identify and track it with incredible tenacity. Look for features like Eye AF (for humans, animals, and even birds) and subject detection for things like cars and airplanes. A top-tier AF system is what allows you to nail a fast-moving subject, ensuring your focus is perfect shot after shot.
This is absolutely critical for wedding, sports, and wildlife photographers.
Video Capabilities
Even if you’re primarily a stills photographer, strong video features are becoming increasingly important. Clients often request short video clips for social media, and having a hybrid camera that excels at both can open up new revenue streams. Key specs to look for include 4K and 8K resolution, high frame rates (like 120p for slow motion), and professional recording formats like 10-bit color and Log profiles, which give you maximum flexibility when color grading your footage in post-production.
Ergonomics and Build Quality
Never underestimate how a camera feels in your hands. This is a tool you’ll be holding for hours on end, so it needs to be comfortable and intuitive. Consider the grip, the placement of buttons and dials, and how easy it is to customize the controls to your liking. As mentioned earlier, robust weather sealing is a must for any professional who shoots outdoors.
You need a camera that can handle the elements as well as you can.
The 7 Best Professional Photography Cameras of 2026
Alright, let’s get to the main event! After extensive research and analysis of professional camera reviews, we’ve compiled the definitive list of the best cameras for pros. Each one of these is an absolute beast, ready to tackle any assignment you throw at it.
1. Sony A1: The All-Around Powerhouse
The Sony A1 is the camera that truly does it all, without compromise. It’s an engineering marvel that combines a high-resolution 50MP full-frame sensor with an unbelievable 30 frames-per-second blackout-free burst shooting speed. This means you get massive, detailed files at a speed that can keep up with the fastest action on the planet. It’s a dream for professionals who need to switch between high-res commercial work and high-speed sports or wildlife photography on a dime.
Its autofocus is legendary, with Sony’s best-in-class Real-time Tracking and Eye AF for humans, animals, and birds. It also shoots stunning 8K video, making it a true hybrid monster. The A1 is the definition of a flagship camera, built for the professional who demands the absolute best of everything in a single body.
Pros
Unmatched Versatility: High resolution (50MP) and high speed (30fps) in one body.
Phenomenal Autofocus: Industry-leading subject tracking and eye detection.
Incredible Video: Shoots 8K/30p and 4K/120p video with professional features.
Cons
Premium Price: This level of performance comes with a very high cost.
Complex Menu System: Can be intimidating for those new to the Sony ecosystem.
Best for: Professionals who shoot a wide variety of subjects and need one camera that can excel at everything, from high-fashion to high-speed sports.
2. Canon EOS R5: The High-Resolution Hybrid Hero
The Canon EOS R5 made waves when it was released, and it remains one of the top photography cameras for professionals who need a perfect blend of stills and video. Its 45MP full-frame sensor delivers gorgeous, detailed images with Canon’s renowned color science. The images straight out of this camera are simply beautiful, requiring minimal editing.
Where the R5 truly shines is its Dual Pixel CMOS AF II system, which is incredibly fast, accurate, and intuitive to use, covering nearly 100% of the frame. It was also one of the first mirrorless cameras to bring 8K RAW video to the masses, making it a favorite among hybrid shooters who need to deliver both world-class photos and cinema-quality video. Its ergonomics are classic Canon—comfortable, familiar, and built for long shooting days.
Superb Autofocus: Fast, reliable, and intelligent subject tracking.
Powerful Video Features: Capable of internal 8K RAW video recording.
Cons
Video Record Limits: Can overheat during extended 8K recording sessions, though this has been improved with firmware updates.
Best for: Wedding, portrait, and commercial photographers who need high-resolution stills and top-tier video capabilities in one package.
3. Nikon Z8: The Flagship Performer, Perfected
Imagine taking all the groundbreaking power of Nikon’s flagship Z9 and putting it into a smaller, lighter, and more affordable body. That’s the Nikon Z8. It’s an absolute triumph and arguably one of the best value propositions in the professional camera market today. It shares the same 45.7MP stacked sensor and EXPEED 7 processor as its bigger sibling, delivering incredible speed and image quality.
The Z8 has no mechanical shutter, which means it can shoot completely silently at up to 20fps in RAW and has an incredibly fast sensor readout that virtually eliminates rolling shutter distortion. Its 3D-tracking autofocus is phenomenal, with subject detection for people, animals, and vehicles that sticks to targets like glue. It’s a rugged, powerful, and responsive tool that feels incredible to use.
Pros
Z9 Power in a Smaller Body: Flagship performance without the integrated grip and weight.
No Mechanical Shutter: Enables silent shooting and incredible speed.
Advanced Video: Shoots 8K/60p and internal ProRes RAW.
Cons
Battery Life: Smaller battery than the Z9 means you’ll want to carry spares for long shoots.
Best for: Action, wildlife, and event photographers who want the speed and AF of a flagship camera in a more compact and agile form factor.
4. Sony a7R V: The Resolution King with an AI Brain
For photographers where detail is everything, the Sony a7R V is the reigning champion. It boasts a massive 61MP full-frame sensor that captures an astonishing amount of information, perfect for landscape, architecture, and studio photographers who produce large-scale prints. But this camera is more than just megapixels.
The a7R V introduces a dedicated AI processing unit that takes its autofocus to a new level. It can recognize subjects with incredible precision, even predicting a subject’s pose and movements. This makes it shockingly good at tracking subjects, a feat previously difficult for ultra-high-resolution cameras. It also features a unique 4-axis multi-angle LCD screen that is a dream for shooting at awkward angles.
Pros
Stunning 61MP Resolution: Unbelievable detail and cropping potential.
AI-Powered Autofocus: The most advanced subject recognition and tracking available.
Incredible Image Stabilization: Up to 8 stops of compensation for sharp handheld shots.
Cons
Massive File Sizes: The 61MP sensor produces very large files that require significant storage and processing power.
Slower Burst Rate: Not designed for high-speed action compared to the A1 or Z8.
Best for: Landscape, studio, and commercial photographers who require the highest possible resolution without sacrificing modern autofocus performance.
Pro Tip: Before investing thousands, consider renting your top 2-3 camera choices for a weekend. Real-world use is the only way to know if a camera’s ergonomics, menu system, and performance truly fit your shooting style. It’s a small expense that can prevent a very costly mistake.
5. Fujifilm GFX 100S: Approachable Medium Format
Ready to step up to the next level of image quality? The Fujifilm GFX 100S packs a colossal 102MP medium format sensor—which is 1.7x larger than a full-frame sensor—into a body that is surprisingly compact, not much larger than a professional DSLR. The result is images with a depth, dimensionality, and level of detail that is simply breathtaking.
Medium format was once the exclusive domain of slow, methodical studio work, but the GFX 100S changes that. It has effective in-body image stabilization and a capable phase-detect autofocus system, making it viable for handheld shooting and even some location portraiture. For fine art, landscape, and high-end commercial photographers, the GFX 100S offers a look that full-frame cameras just can’t replicate.
Pros
Unparalleled Image Quality: The 102MP medium format sensor is in a class of its own.
Relatively Compact: Brings medium format power into a portable, DSLR-sized body.
Excellent In-Body Stabilization: Makes handheld medium format shooting practical.
Cons
Slower Operation: Autofocus and burst shooting are not as fast as top-tier full-frame cameras.
Expensive Lenses: The G-mount lens ecosystem is professional-grade and priced accordingly.
Best for: Fine art, landscape, and high-end commercial photographers for whom ultimate image quality is the number one priority.
6. Nikon D850: The Legendary DSLR That Still Shines
In a list dominated by mirrorless marvels, the Nikon D850 stands tall as a testament to the peak of DSLR technology. For years, this was considered by many to be the best all-around camera ever made, and it remains an incredible tool for professional work. Its 45.7MP sensor produces files with amazing dynamic range and detail, and its optical viewfinder offers a pure, lag-free connection to your subject.
The D850 is a workhorse, renowned for its rugged build and phenomenal battery life—often lasting for thousands of shots on a single charge. While its autofocus isn’t as advanced as the latest mirrorless systems, it’s still fast and reliable. For photographers who love the feel of a DSLR and have an investment in Nikon’s F-mount lenses, the D850 is still one of the best cameras for pros available.
Pros
Exceptional Image Quality: A fantastic 45.7MP sensor with superb dynamic range.
Incredible Battery Life: Can shoot all day without needing a battery swap.
Optical Viewfinder: Preferred by some photographers for its clarity and lag-free view.
Cons
Bulkier and Heavier: Larger than its mirrorless counterparts.
Live View AF is Slow: Autofocus through the LCD screen is not as fast as a mirrorless camera.
Best for: Photographers with an investment in F-mount lenses, or those who simply prefer the feel, battery life, and optical viewfinder of a traditional DSLR.
7. Panasonic Lumix S5 IIX: The Video-First Hybrid
While every camera on this list has great video, the Panasonic Lumix S5 IIX is built for creators who prioritize motion just as much as stills. It was a huge step forward for Panasonic, as it was their first camera to incorporate phase-detection autofocus, making its tracking capabilities fast and reliable for both photos and video.
The S5 IIX is a video powerhouse, offering features usually found on much more expensive cinema cameras. It can record ProRes RAW and Blackmagic RAW externally, offers open gate recording (using the full sensor), and has an incredible suite of tools like waveform monitors and real-time LUTs. Its 24MP full-frame sensor also produces beautiful, clean still images, making it a fantastic and affordable choice for the modern hybrid creator.
Pros
Cinema-Level Video Features: Unmatched video capabilities at its price point.
Great Autofocus: The first Lumix with reliable phase-detect AF.
Excellent Value: Offers professional hybrid features for less than many competitors.
Cons
Lower Stills Resolution: 24MP is plenty for most work but less than other cameras on this list.
Best for: YouTubers, filmmakers, and hybrid creators who need a reliable, professional video camera that can also capture high-quality photos.
Professional Camera Reviews: A Head-to-Head Comparison
To help you visualize the differences between the top contenders, here’s a quick comparison of their key specifications. This table focuses on the top mirrorless powerhouses that represent the cutting edge of camera technology.
Feature
Sony A1
Canon EOS R5
Nikon Z8
Sensor
50MP Full-Frame Stacked CMOS
45MP Full-Frame CMOS
45.7MP Full-Frame Stacked CMOS
Max Burst (RAW)
30 fps
20 fps
20 fps
Autofocus
759-point Phase-Detect
1053-point Dual Pixel AF II
493-point Phase-Detect
Max Video
8K/30p
8K/30p RAW
8K/60p RAW
Viewfinder
9.44m-dot OLED
5.76m-dot OLED
3.69m-dot OLED
Card Slots
Dual CFexpress Type A / SD
1x CFexpress Type B, 1x SD
1x CFexpress Type B, 1x SD
Best For
Speed & Versatility
Hybrid Photo/Video
Flagship Value
Understanding the Cost: Pricing for the Best Cameras for Pros
Investing in a professional camera system is a significant financial commitment, and the camera body is only the beginning of the story. The prices for the bodies on this list can range from around $2,000 for a fantastic value like the Lumix S5 IIX to well over $6,000 for a flagship like the Sony A1. It’s crucial to budget for the entire ecosystem, not just the camera itself.
High-quality lenses are the most important part of the equation and often cost as much or more than the camera body. A professional will typically need a “trinity” of zoom lenses (e.g., 16-35mm, 24-70mm, and 70-200mm at f/2.8) and several prime lenses for specific tasks. Beyond lenses, you’ll need to factor in the cost of professional-grade memory cards (CFexpress cards are fast but expensive), extra batteries, a reliable camera bag, and post-processing software like Adobe Lightroom and Photoshop.
When you add it all up, a complete professional kit can easily cost between $5,000 and $15,000 or more. While this is a major investment, this gear is built to last for years and is the essential tool that allows a professional to create high-quality, sellable work for their clients.
Frequently Asked Questions
What camera do most professional photographers use?
While it varies by specialty, the most popular systems among professionals today are from Sony, Canon, and Nikon. You’ll frequently see wedding photographers using the Canon EOS R5 or Sony a7 series, while sports and wildlife shooters often gravitate towards the high-speed Sony A1 and Nikon Z8/Z9. The specific model changes, but these three brands dominate the professional landscape.
What is the best quality camera for photography?
For pure, technical image quality in terms of detail and color depth, medium format cameras like the Fujifilm GFX 100S are the best. Their larger sensors capture more information, resulting in stunning files. However, for most professional applications, high-resolution full-frame cameras like the Sony a7R V or Nikon Z8 offer a more practical balance of image quality, speed, and versatility.
Do professional photographers use DSLR or mirrorless?
As of 2026, the vast majority of professional photographers have switched to or are actively using mirrorless cameras. The advantages in autofocus, silent shooting, and what-you-see-is-what-you-get electronic viewfinders are too significant to ignore. While many pros still own and love their DSLRs like the Nikon D850, almost all new gear purchases and technological innovation are happening in the mirrorless space.
What camera does Taylor Swift use?
This is a fun one! While she’s a musician and not a professional photographer, Taylor Swift has often been photographed using high-end Leica cameras, particularly from the M-series and Q-series. Leicas are legendary rangefinder-style cameras known for their incredible build quality, minimalist design, and exceptional lenses. They are a statement piece as much as a camera, favored by many artists and street photographers for their unique shooting experience.
Final Thoughts
Wow, what an incredible time to be a photographer! The technology packed into modern cameras is simply astounding, giving us the power to capture images that were once impossible. Choosing from the best professional photography cameras is a personal journey that depends on your budget, your style, and the stories you want to tell. Whether you need the blazing speed of the Nikon Z8, the hybrid power of the Canon EOS R5, or the absolute resolution of the Sony a7R V, there is a perfect tool out there waiting for you.
Remember that the camera is just one part of the creative process. The most important element is always you—your eye, your passion, and your vision. This gear is designed to remove technical barriers and let your creativity flow freely. So, do your research, trust your instincts, and get ready to create your best work yet.
Top 7 Best Affordable Photography Cameras for Beginners in 2026
Ready to jump into the incredible world of photography but worried about the high price tag. You’re not alone. The great news is that you don’t need to spend thousands of dollars to get a fantastic camera. Finding the best affordable photography cameras is easier than ever, with amazing options that deliver stunning image quality without emptying your wallet.
Whether you’re a complete beginner or upgrading from your smartphone, this guide is your ticket to capturing beautiful moments.
We’re about to explore the top models that give you the most bang for your buck. We’ll break down what features truly matter, how to choose the right one for your style, and reveal our top picks for 2026. Get excited, because your photography adventure starts right now!
Quick Summary
Mirrorless is King: For most beginners, modern mirrorless cameras offer the best combination of performance, size, and user-friendly features in the affordable category.
Sensor Size Matters: Look for cameras with an APS-C sensor. It’s the sweet spot for budget models, providing excellent image quality that’s a huge leap from a smartphone.
Lenses are Your Next Big Investment: The camera body is just the start. A good lens can make a bigger difference in your photos than a more expensive camera body, so budget accordingly!
Don’t Overlook Used Gear: You can often get a more powerful, higher-end camera for the same price as a new entry-level model by looking at the used market. It’s a fantastic way to maximize value.
Key Features to Prioritize: Focus on a camera with at least 24 megapixels, a reliable autofocus system, and good manual controls to help you learn and grow.
What Makes a Photography Camera Truly “Affordable”?
When we talk about “affordable photography cameras,” we’re not just talking about the absolute cheapest models you can find. An affordable camera is one that provides incredible value, packing powerful features and excellent image quality into a body that won’t force you to live on ramen for a year. Typically, this sweet spot falls in the $500 to $1,000 range for a new camera body with a basic kit lens.
This price point represents a massive leap in quality and creative control compared to a smartphone. You get a larger sensor for better low-light performance and that beautiful blurry background (called ‘bokeh’), the ability to change lenses for different creative effects, and full manual controls that allow you to grow as a photographer. These are tools designed to teach you the art of photography from the ground up.
Of course, there are trade-offs. The best budget cameras for photography might not have the lightning-fast burst speeds, advanced video features, or rugged weather-sealing of their professional counterparts that cost three or four times as much. But for 95% of aspiring photographers, these high-end features are unnecessary. The goal is to find a camera that empowers your creativity without overwhelming you with features you don’t need or a price you can’t justify.
Key Features to Look for in Budget-Friendly Cameras
Navigating camera specs can feel like learning a new language. Let’s cut through the noise and focus on what actually matters when you’re looking for an affordable camera that will serve you well.
Sensor Size: The Heart of Your Camera
The sensor is the digital equivalent of film; it’s what captures the light to create your image. For budget cameras, the most common and recommended sensor size is APS-C. It’s significantly larger than a smartphone sensor, which means better performance in dim lighting and greater potential for that professional-looking background blur. While full-frame sensors are the professional standard, they come with a much higher price tag for both the camera and the lenses.
APS-C is the perfect balance of quality and cost for beginners.
Megapixels: More Isn’t Always Better
Don’t get caught up in the megapixel race! While manufacturers love to advertise huge numbers, almost any modern camera with 24 megapixels is more than enough for most photographers. This resolution allows you to make large prints, crop your images without losing significant quality, and have plenty of detail for social media and web use. Focusing on other features like autofocus and sensor quality will have a much bigger impact on your photos than chasing a higher megapixel count.
Autofocus (AF) System: Your Secret Weapon
A great photo is a sharp photo. A camera’s autofocus system is what locks onto your subject and ensures it’s in focus. A good AF system, especially one with reliable eye-detection for people and animals, is a massive help for beginners. It lets you focus on your composition and creativity, trusting that the camera will nail the focus where it counts.
Look for cameras with a good number of focus points and positive reviews about their AF speed and accuracy.
Lens Options: The Gateway to Creativity
The camera body is only half the equation. The ability to change lenses is what truly separates a dedicated camera from a phone. When choosing a camera, you’re also buying into a lens system. Brands like Canon, Sony, and Nikon have extensive ecosystems with plenty of affordable lens options to help you explore different types of photography, from portraits to landscapes.
A camera with a wide selection of budget-friendly lenses gives you a clear path to grow and experiment in the future.
How to Choose the Right Affordable Camera For You
Feeling overwhelmed by the options? Don’t worry! Choosing the right camera is a personal decision, but you can narrow it down by asking yourself a few key questions. This simple process will help you find the perfect match for your creative goals.
Step 1: What Do You Love to Shoot?
First, think about what kind of photos you’re most excited to take. Your primary interest will guide your choice. For example:
Travel & Street Photography: You’ll want something small, lightweight, and discreet. A compact mirrorless camera is perfect here.
Portraits of Family & Friends: A camera with excellent eye-autofocus and access to affordable prime lenses (like a 50mm f/1.8) will be your best friend.
Landscapes & Nature: While any camera can work, one with good dynamic range (the ability to capture detail in both bright and dark areas) will help you capture those epic scenes.
Action & Sports: You’ll need a camera with a faster burst rate (frames per second) and a capable autofocus tracking system to keep up with moving subjects.
Step 2: Set Your TOTAL Budget
Remember, you’re not just buying a camera body. Your total budget should include the camera, at least one lens, a memory card, and maybe a camera bag. A common mistake is spending the entire budget on the body, leaving nothing for a good lens. It’s often smarter to get a slightly cheaper body and invest the savings into a better lens, as this will have a greater impact on your final images.
Step 3: Mirrorless vs. DSLR: The Modern Choice
For years, DSLRs were the standard. However, mirrorless cameras are now the top choice for most people, especially beginners. They are generally smaller, lighter, and offer helpful features like electronic viewfinders that show you exactly what your photo will look like before you take it. While there are still some fantastic cheap photography cameras in the DSLR world (like the Canon Rebel series), the industry’s focus and innovation are almost entirely on mirrorless.
Step 4: Seriously Consider the Used Market
This is one of the best-kept secrets for getting incredible value! You can often find a previous-generation, higher-tier camera in excellent condition for the same price as a brand-new entry-level model. Reputable online retailers like KEH and MPB inspect and grade all their gear and offer warranties, making it a safe and smart way to get more performance for your money. A used Sony a6400 or Fujifilm X-T3 can be a powerhouse for a beginner.
Pro Tip: No matter which camera you buy, start shooting in RAW format as soon as possible. A RAW file captures all the data from the camera’s sensor, giving you much more flexibility to edit your photos later. It’s like having a digital negative and is a key step to unlocking your creative potential.
The Top 7 Best Affordable Photography Cameras of 2026
Alright, let’s get to the fun part! We’ve tested, researched, and analyzed the market to bring you the best affordable options available today. These cameras offer the perfect blend of performance, features, and price to get you started on the right foot.
1. Canon EOS R50
The Canon EOS R50 is, without a doubt, one of the best all-around cameras for beginners right now. It takes the powerful autofocus system from Canon’s more expensive models and packs it into a tiny, user-friendly body. Its subject detection is fantastic, automatically finding and focusing on the eyes of people, animals, and even vehicles. This lets you worry less about focus and more about framing the perfect shot.
It also has excellent out-of-camera color, meaning your JPEGs look vibrant and beautiful straight away. With a simple interface and helpful guide modes, it’s designed to help you learn the ropes of photography without feeling intimidating. It’s a fantastic starting point that you won’t outgrow too quickly.
Pros
Class-leading autofocus with excellent subject tracking.
Compact, lightweight, and perfect for travel.
User-friendly interface with helpful guide modes for beginners.
Great video features, including uncropped 4K video.
Cons
The native RF-S lens selection is still growing.
The single control dial can be limiting as you become more advanced.
2. Sony a6400
Even though it’s been around for a few years, the Sony a6400 remains a top contender because its core features are just that good. Its autofocus system was legendary at launch and still competes with newer cameras. The real-time tracking and eye-AF are incredibly fast and reliable, making it a fantastic choice for capturing photos of kids, pets, or any subject that won’t sit still.
The Sony E-mount has a massive library of both Sony and third-party lenses available, giving you endless options to expand your kit affordably. It has a more robust, weather-sealed body than many competitors in this price range, making it a durable choice for outdoor adventures.
Pros
Blazing-fast and highly reliable autofocus system.
Huge selection of affordable lenses from Sony and third-party makers.
Solid build quality with some weather sealing.
Excellent image quality from its 24MP APS-C sensor.
Cons
The menu system can be confusing for new users.
The screen only flips up, which isn’t ideal for vertical shooting or vlogging.
3. Nikon Z50
Nikon is known for its fantastic ergonomics, and the Z50 is no exception. It just feels great in the hand, with a deep, comfortable grip that inspires confidence. This might seem like a small thing, but a camera that feels good to hold is a camera you’ll want to take out and use more often. The control layout is intuitive, making it easy to change settings on the fly.
The Z50 produces beautiful, detailed images and has a solid autofocus system that performs well in most situations. It’s a well-built, reliable camera that feels more premium than its price tag suggests. It’s an excellent choice for someone who wants to learn the fundamentals on a camera that feels like a serious tool.
Pros
Superb ergonomics and handling with a deep grip.
Intuitive controls and a clean menu system.
Excellent build quality for its class.
Produces sharp, high-quality images.
Cons
The native APS-C (DX) lens lineup is more limited than Sony’s.
The screen flips down for selfies, which can be blocked by a tripod.
4. Canon EOS Rebel SL3 (250D)
If you prefer the traditional feel of a DSLR with its optical viewfinder, the Canon Rebel SL3 is the best budget option around. It’s one of the smallest and lightest DSLRs ever made, offering the classic shooting experience without the bulk. The optical viewfinder gives you a clear, lag-free view of your scene, which many photographers still prefer.
It also boasts Canon’s fantastic Dual Pixel Autofocus when shooting in live view (using the back screen), which is fast and accurate. The fully articulating screen is perfect for shooting at creative angles, and the battery life is phenomenal, easily lasting all day. Plus, it has access to decades of affordable Canon EF and EF-S lenses.
Pros
Excellent battery life that can last for over 1,000 shots.
Fully articulating touchscreen is great for vlogging and high/low angles.
Access to a massive and affordable range of EF-S lenses.
Very compact and lightweight for a DSLR.
Cons
The 9-point autofocus system through the viewfinder is dated.
4K video is heavily cropped and lacks good autofocus.
5. Sony ZV-E10
While marketed primarily as a vlogging camera, the Sony ZV-E10 is also a fantastic and affordable photography camera, especially for hybrid shooters who do both. It shares the same great 24MP sensor and powerful autofocus system as the a6400 but in a body designed for content creators. This includes a fully articulating screen, a high-quality built-in microphone, and features like Product Showcase mode.
For photography, you get the same incredible image quality and access to the vast E-mount lens lineup. If you plan on shooting any video alongside your photos—whether for YouTube, social media, or just family memories—the ZV-E10 is arguably the most versatile and value-packed option on this list.
Pros
Excellent for both stills and video (hybrid shooting).
Top-tier autofocus and image quality.
Fully articulating screen is perfect for all angles.
Great built-in microphone and audio options.
Cons
No built-in viewfinder, which can be difficult in bright sunlight.
Can be prone to overheating during long 4K video recordings.
6. Fujifilm X-T30 II
Fujifilm cameras are beloved for two main reasons: their beautiful retro design and their incredible color science. The X-T30 II is a joy to use, with physical dials for shutter speed, exposure compensation, and aperture (on many lenses). This hands-on, tactile experience is fantastic for learning the exposure triangle and feeling connected to the process of photography.
Beyond its looks, the X-T30 II packs a powerful punch with a superb 26.1MP X-Trans sensor that delivers stunning image quality. Fujifilm’s Film Simulations allow you to get gorgeous, stylized looks straight out of the camera, mimicking classic film stocks. It’s a camera that inspires you to go out and shoot.
Pros
Beautiful, classic design with tactile manual dials.
Best-in-class JPEG image quality with amazing Film Simulations.
Fast and capable autofocus system.
Compact and stylish body.
Cons
The button layout can feel a bit cramped for some users.
Lacks in-body image stabilization.
7. Sony a6000
The Sony a6000 is the legend of the budget camera world. Though it’s an older model, it remains one of the best ultra-cheap photography cameras you can buy, especially on the used market. It was a groundbreaking camera when it was released, and its 24MP sensor still produces excellent images that are a world away from a smartphone.
Its autofocus system, while not as advanced as the a6400’s, is still impressively fast for the price. For someone on a very tight budget who wants to get into a system with a huge selection of lenses, a used Sony a6000 is an unbeatable starting point. It proves you don’t need the latest and greatest gear to take incredible photos.
Pros
Incredible value, especially when purchased used.
Still produces excellent 24MP images.
Fast autofocus for its age and price point.
Access to the massive Sony E-mount lens library.
Cons
Low-light performance and AF are weaker than modern cameras.
The menu system is dated and the screen resolution is low.
Cost Comparison: What to Expect at Different Price Points
Understanding the market can help you set realistic expectations. Here’s a quick breakdown of what your money gets you in the world of affordable cameras. Note that prices are for a camera body with a standard kit lens.
Camera Model
Type
Sensor
Price Range (New)
Best For
Sony a6000
Mirrorless
APS-C
~$350-500 (Used)
The Ultimate Tight Budget
Canon Rebel SL3
DSLR
APS-C
~$600-750
DSLR Fans & Long Battery Life
Sony ZV-E10
Mirrorless
APS-C
~$700-800
Hybrid Photo/Video Shooters
Canon EOS R50
Mirrorless
APS-C
~$750-850
Overall Beginner Experience
Nikon Z50
Mirrorless
APS-C
~$900-1,000
Excellent Ergonomics
Sony a6400
Mirrorless
APS-C
~$900-1,000
Best-in-Class Autofocus
Fujifilm X-T30 II
Mirrorless
APS-C
~$950-1,050
Style & Image Quality
Remember to factor in the “hidden costs.” You’ll need to buy at least one SD memory card (a 64GB or 128GB V60 card is a good start), and a camera bag is essential for protecting your gear. Over time, you’ll likely want to add another lens, like an affordable 50mm f/1.8 prime lens, which is perfect for portraits.
Frequently Asked Questions (FAQ)
Let’s answer some of the most common questions aspiring photographers have when looking for their first camera.
What is the best cheap camera for photography for a beginner?
For most beginners in 2026, the Canon EOS R50 is the best choice. Its combination of a powerful, easy-to-use autofocus system, compact size, and user-friendly interface makes it the perfect learning tool. It takes the guesswork out of getting sharp photos, allowing you to focus on learning composition and lighting. It delivers fantastic results without a steep learning curve.
Is a 10-year-old DSLR still good?
Yes, a 10-year-old DSLR, especially a semi-pro or pro model from that era, can still be a very capable camera for photography. A camera like a Canon 5D Mark II or a Nikon D700 has a full-frame sensor and can produce beautiful images that still hold up today. However, you will miss out on modern conveniences like advanced autofocus, high-ISO performance, and video features. For a beginner on a shoestring budget, it can be a viable option if you’re willing to work around its limitations.
Should I buy a new entry-level camera or a used high-end one?
This is a great question that depends on your priorities. A new entry-level camera (like the Canon R50) will have the latest technology, a warranty, and user-friendly features designed for beginners. A used higher-end camera (like a Sony A7 III or Fujifilm X-T3) will offer better build quality, more professional controls, and potentially better image quality, but it will have a steeper learning curve and no warranty. For most beginners, starting new is the safer and easier path, but if you’re ambitious and love to tinker, a used model offers incredible value.
How many megapixels is good enough for photography?
For almost all photography, 24 megapixels is the gold standard and more than enough. This resolution allows you to print photos up to 16×20 inches or even larger with excellent quality. It also gives you plenty of room to crop your images in post-processing. Unless you are a professional landscape or commercial photographer who needs to make enormous prints, you do not need to worry about getting a camera with 40, 50, or 60 megapixels.
Final Thoughts: Your Perfect Camera Awaits
Diving into photography is an exciting journey, and choosing your first real camera is a huge first step. The most important thing to remember is that you don’t need the most expensive gear to create beautiful, meaningful images. All of the cameras on this list are incredibly capable tools that can produce professional-quality results in the right hands.
The best affordable photography cameras are the ones that get you excited to go out and shoot. Whether it’s the user-friendly brilliance of the Canon EOS R50, the autofocus powerhouse that is the Sony a6400, or the tactile joy of the Fujifilm X-T30 II, your perfect match is out there.
Focus on the features that matter to you, set a realistic budget that includes lenses and accessories, and most importantly, have fun! The best camera is the one you have with you. Now go start capturing your world!
Camera Lenses for Nikon: A Beginner’s Buying Guide to Choosing Perfectly
Stepping into the world of interchangeable lenses is one of the most exciting moments in any photographer’s journey. Suddenly, a universe of creative possibilities opens up. But it can also feel a little overwhelming. When you start searching for camera lenses for Nikon, you’re met with a dizzying array of numbers, acronyms, and options.
What’s the difference between a prime and a zoom. What does f/1.8 even mean. And which lens is the right one for you.
Don’t worry, you’re in the right place! This guide is designed to cut through the confusion and get you excited about the incredible power a new lens puts in your hands. We’ll break down everything you need to know, from understanding the core concepts to picking the perfect piece of glass for the photos you dream of taking. Get ready to transform your photography!
What to Know
Compatibility is #1: The most important factor is your camera’s lens mount. Nikon has two: the older F-mount for DSLR cameras and the newer, larger Z-mount for modern mirrorless cameras.
Prime vs. Zoom Lenses: Prime lenses have a fixed focal length (like 50mm) and typically offer sharper images and better low-light performance. Zoom lenses offer the versatility of multiple focal lengths in one package, which is great for travel and events.
Focal Length Defines Your View: A lens’s focal length (measured in mm) determines how much of the scene you capture. Wide-angle (e.g., 16-35mm) is for landscapes, standard (e.g., 50mm) is for portraits, and telephoto (e.g., 70-200mm) is for sports and wildlife.
Aperture is Your Creative Control: The aperture (or f-stop, like f/1.8) controls how much light enters the lens. A lower f-number means better performance in the dark and the ability to create that beautiful, blurry background (bokeh) in portraits.
Third-Party Options Offer Great Value: Don’t overlook lenses for Nikon from brands like Sigma and Tamron. They often provide amazing quality at a more accessible price point, giving you more Nikon lens options to consider.
The First Big Question: F-Mount vs. Z-Mount Lenses
Before you even think about focal length or aperture, you have to know which lenses will actually fit on your camera. This is the most critical step! For decades, Nikon’s legendary F-mount was the standard for all their DSLR cameras, from beginner models to professional workhorses. This means there’s a massive catalog of incredible F-mount lenses available, both new and used.
However, with the rise of mirrorless technology, Nikon introduced the Z-mount. This is the new standard for all their mirrorless cameras, like the Z6, Z7, Z50, and Zf. The Z-mount is physically larger, which allows Nikon’s engineers to design lenses that are optically superior, often sharper and brighter than their older counterparts. So, the first rule is simple: if you have a Nikon DSLR, you need F-mount lenses.
If you have a Nikon mirrorless camera, you need Z-mount lenses.
But what if you’re upgrading from a DSLR to a mirrorless camera and already have a collection of F-mount glass? That’s where the Nikon FTZ (F to Z) adapter comes in. This brilliant piece of tech allows you to mount almost any F-mount lens onto a Z-mount camera body with virtually no loss in quality or autofocus speed. It’s a fantastic way to ease into the new system without having to replace all your lenses at once.
Decoding the Language: Key Features of Nikon Camera Lenses
Walking into the world of Nikon camera lenses can feel like learning a new language. You’ll see codes like “AF-S NIKKOR 50mm f/1.8G ED VR.” It looks complex, but each part tells you something important about what the lens can do. Let’s break down the most important features you need to understand.
Focal Length Explained (The #1 Factor)
Focal length, measured in millimeters (mm), is the most fundamental characteristic of a lens. It determines the angle of view and magnification. Simply put, it controls how much of the scene you can fit into your frame.
Wide-Angle (e.g., 14-35mm): These lenses capture a very wide field of view, making them perfect for sweeping landscapes, grand architecture, and dramatic interior shots. They can create a sense of vastness and are a favorite for astrophotography.
Standard (e.g., 35mm, 50mm, 85mm): These lenses offer a perspective that’s very similar to the human eye. They are incredibly versatile and are the go-to choice for portraits, street photography, and everyday documentation. The 50mm lens is famously called the “nifty fifty” because it’s an affordable, high-quality, and flexible option for almost any situation.
Telephoto (e.g., 70-200mm, 200-500mm): These lenses bring distant subjects right up close. They are essential for sports photography, wildlife, and capturing candid moments at events without being intrusive. They compress the background, which can create very flattering portraits.
Aperture (Your Creative Superpower)
Aperture, represented by an f-number (like f/1.4, f/2.8, or f/5.6), controls the size of the opening inside the lens that lets light pass through to the camera’s sensor. It’s one of your most powerful creative tools, and understanding it is a huge step forward in your photography.
A lower f-number (e.g., f/1.8) means the opening is wider, letting in more light. This is fantastic for two reasons. First, it allows you to shoot in low-light conditions (like indoors or at dusk) without needing a flash. Second, it creates a very shallow depth of field, which is what produces that beautiful, creamy, out-of-focus background known as “bokeh.” This is the secret to professional-looking portraits where your subject pops!
A higher f-number (e.g., f/11) means the opening is smaller, letting in less light. This is used when you want everything in your scene to be sharp and in focus, from the foreground to the background, which is ideal for landscape photography.
Prime vs. Zoom Lenses: The Eternal Debate
This is one of the biggest decisions you’ll make. A prime lens has a single, fixed focal length (like 85mm). A zoom lens covers a range of focal lengths (like 24-70mm). Neither is better; they’re just different tools for different jobs.
Prime lenses are often favored for their superior image quality. Because their optics are designed for just one focal length, they are typically sharper and have wider maximum apertures (like f/1.4 or f/1.8) than zooms. This makes them low-light champions and bokeh machines. They’re also usually smaller and lighter.
The “limitation” of a fixed focal length can also be a creative benefit, forcing you to move your feet and think more carefully about your composition.
Zoom lenses are the masters of versatility. With a single lens, like a 24-120mm, you can capture a wide landscape, a standard portrait, and a close-up detail without ever swapping lenses. This convenience is unbeatable for travel, events, or any situation where things are happening fast. The trade-off is that they are typically larger, heavier, and have smaller maximum apertures compared to primes.
Feature
Prime Lenses
Zoom Lenses
Versatility
Low (Fixed Focal Length)
High (Variable Focal Length)
Max Aperture
Wide (e.g., f/1.4, f/1.8)
Narrower (e.g., f/2.8, f/4-6.3)
Image Quality
Generally Sharper
Very Good to Excellent
Size & Weight
Smaller & Lighter
Larger & Heavier
Best For
Portraits, Low Light, Street
Travel, Events, General Purpose
Understanding Nikon’s Lens Acronyms
Nikon loves its acronyms, but they’re easy to learn. Here are the most common ones you’ll see:
VR (Vibration Reduction): This is Nikon’s image stabilization technology. Tiny gyros inside the lens detect camera shake and move lens elements to counteract it. It’s incredibly useful for getting sharp photos when shooting handheld, especially with longer telephoto lenses or in low light.
ED (Extra-low Dispersion): This refers to a special type of high-quality glass used in the lens. ED glass helps correct for chromatic aberration, which is that ugly purple or green fringing you can sometimes see around high-contrast edges. It leads to sharper, cleaner images.
AF-S (Silent Wave Motor): This indicates the lens has a fast and quiet autofocus motor built into it. It’s the modern standard for Nikon lenses and provides snappy performance that’s also great for video recording where you don’t want to hear the lens focusing.
S-Line: This is a designation for Nikon’s premium Z-mount lenses. It signifies the highest level of optical performance, build quality, and weather sealing. If you see an ‘S’ on a Z-mount lens, you know it’s top-tier.
How to Choose the Right Lenses for Nikon Based on What You Shoot
The best lens isn’t the most expensive one; it’s the one that best fits your creative vision. The perfect lens for a landscape photographer is completely different from the perfect lens for a sports photographer. Let’s find the right Nikon lens options for your passion.
For the Landscape & Travel Photographer
If you love capturing epic vistas, cityscapes, and the beauty of your travels, you’ll want a lens that can go wide. A wide-angle zoom is often the perfect tool. Look for something in the 14-30mm or 16-35mm range. This allows you to capture the full scale of a mountain range or the grandeur of an ancient cathedral.
For travel, versatility is key. An all-in-one “superzoom” like the NIKKOR Z 24-200mm f/4-6.3 VR can be an amazing choice. It lets you go from wide-angle to telephoto without changing lenses, so you never miss a shot while exploring a new city. The trade-off is slightly less sharpness and a smaller aperture, but the convenience is often worth it.
For the Portrait Perfectionist
To make people look their best, you want a lens that can create that dreamy, blurred background. This means you need a lens with a wide aperture (a low f-number). Fast prime lenses are the king of portraits. An 85mm f/1.8 is a classic choice, offering a flattering perspective and incredible subject separation.
A 50mm f/1.8 is another fantastic and affordable option that’s great for full-body or half-body portraits. For ultimate versatility, the 70-200mm f/2.8 zoom is a favorite among professional wedding and portrait photographers. It allows you to capture beautiful portraits from a distance, creating very natural and candid-looking images.
For the Sports & Wildlife Enthusiast
When your subjects are fast-moving and far away, you need one thing: reach. A telephoto zoom lens is non-negotiable for sports and wildlife. A 70-200mm is a good starting point for field sports, but for birds and more distant wildlife, you’ll want something even longer, like a 100-400mm or a 200-500mm.
When choosing a telephoto lens, pay close attention to two features: Vibration Reduction (VR) and autofocus speed. VR is essential for keeping your shots steady when you’re zoomed all the way in, and a fast autofocus motor (like Nikon’s AF-S) is critical for tracking fast-moving subjects like a bird in flight or a player on the field.
For the Everyday & Street Photographer
Street and everyday photography is all about capturing life as it happens. For this, you want a lens that is small, discreet, and versatile. A small prime lens, like a 35mm f/1.8 or a compact 40mm f/2, is a fantastic choice. These lenses are lightweight and don’t draw much attention, allowing you to blend in and capture candid moments.
A standard zoom lens like a 24-70mm is another excellent option, offering the flexibility to capture both wider street scenes and tighter details. The key is to find a lens that feels comfortable on your camera and doesn’t weigh you down as you walk around all day.
Top Nikon Lens Options: Our Recommendations for 2026
Ready for some specific recommendations? While there are dozens of amazing lenses for Nikon, some stand out as true game-changers. Here are a few top-tier choices for both Z-mount and F-mount systems that photographers absolutely love.
The “Holy Trinity”: The Professional’s Go-To Kit
In the photography world, the “Holy Trinity” refers to a set of three professional f/2.8 zoom lenses that cover a massive range of focal lengths. For Nikon’s Z-mount, this consists of the NIKKOR Z 14-24mm f/2.8 S, the NIKKOR Z 24-70mm f/2.8 S, and the NIKKOR Z 70-200mm f/2.8 VR S. Together, these three lenses can handle virtually any assignment, from ultra-wide landscapes to tight portraits to distant action, all with incredible sharpness and a constant fast aperture. They are a significant investment, but for a working professional, they are the ultimate toolkit.
Best Budget-Friendly Prime Lens: The “Nifty Fifty”
Every Nikon shooter should own a 50mm prime lens. It’s that simple. The NIKKOR Z 50mm f/1.8 S is optically breathtaking, delivering sharpness that rivals lenses costing thousands more. For DSLR users, the AF-S 50mm f/1.8G is an absolute bargain that produces beautiful images.
This lens teaches you about composition and light, and its wide aperture will instantly elevate your portrait and low-light photography. It is, without a doubt, the best bang-for-your-buck upgrade you can make from a standard kit lens.
The Ultimate All-in-One Travel Lens
For the photographer who wants maximum convenience without carrying a heavy bag, a superzoom is the answer. The NIKKOR Z 24-200mm f/4-6.3 VR is a marvel of engineering, offering a huge 8.3x zoom range in a relatively compact and lightweight package. It’s the perfect single-lens solution for vacations and family outings, ensuring you’re ready for any photo opportunity that comes your way. While it doesn’t have the wide aperture of a prime, its versatility is unmatched.
Pro Tip: When using a superzoom lens, remember that the aperture changes as you zoom. It will be wider (e.g., f/4) at the wide end and narrower (e.g., f/6.3) at the telephoto end. To get the sharpest results, try to shoot in good light, especially when zoomed in.
For a long time, the only option was first-party Nikon lenses. Not anymore! Brands like Sigma and Tamron have become serious contenders, producing lenses that often match or even exceed the quality of NIKKOR lenses, usually at a much more attractive price. Sigma’s “Art” series of prime lenses, for example, are legendary for their incredible sharpness and beautiful rendering.
Tamron also produces some fantastic zoom lenses that offer unique focal ranges and features. When you’re looking at your Nikon lens options, it’s always worth checking to see what these third-party manufacturers offer. They provide incredible value and can help you build out your lens kit much more affordably.
Pricing and Budget: How Much Should You Spend?
Camera lenses for Nikon can range from a couple of hundred dollars to well over ten thousand. So, how much should you budget? It’s helpful to think of lenses in three main tiers.
Entry-Level / Kit Lenses ($100 – $500): These are typically the lenses that come bundled with a camera, like an 18-55mm zoom. They are a great starting point, but they are often built with more plastic components and have variable apertures that can be limiting in low light.
Enthusiast / Prosumer Lenses ($500 – $1500): This is the sweet spot for most photographers. In this range, you’ll find fantastic prime lenses (like the 50mm f/1.8 and 85mm f/1.8) and high-quality f/4 zoom lenses. These lenses offer a massive jump in image quality, build, and performance over kit lenses.
Professional Lenses ($1500+): This tier includes the f/2.8 “Holy Trinity” zooms and exotic telephoto primes. These lenses feature the best optics, fastest autofocus, most durable construction, and extensive weather sealing. They are built for professionals who demand the absolute best performance in the toughest conditions.
A wise piece of advice in photography is to “date your camera bodies, but marry your lenses.” A good lens will last you for many years and through multiple camera upgrades. It’s almost always a better investment to put your money into high-quality glass rather than the newest camera body.
Pros and Cons of Investing in the Nikon Ecosystem
Choosing a camera system is a big commitment. While Nikon is one of the most respected names in photography, it’s good to have a balanced view of its strengths and weaknesses.
Pros
Outstanding Optical Quality: Nikon’s NIKKOR lenses, especially the new Z-mount S-Line, are renowned for their sharpness, color, and clarity. They are some of the best-performing optics on the market.
Massive Lens Selection: Between the new Z-mount lineup and the enormous back-catalog of F-mount lenses (accessible via the FTZ adapter), you have hundreds of lens options to choose from.
Excellent Ergonomics and Build: Nikon cameras and lenses are known for their comfortable handling and robust, durable construction. They feel like professional tools designed to last.
Cons
Premium Pricing: Generally, Nikon’s high-end lenses can be more expensive than comparable lenses from some competitors.
Developing Z-Mount System: While growing incredibly fast, the native Z-mount lens lineup is still younger and not quite as extensive as Sony’s E-mount system, particularly in third-party options.
Video Autofocus: While Nikon’s video capabilities have improved dramatically, some users still find the video autofocus in certain situations to be a step behind the competition.
Frequently Asked Questions
Let’s tackle some of the most common questions photographers have when choosing lenses for their Nikon camera.
What is the best lens for a Nikon camera?
There’s no single “best” lens. The best lens for you depends entirely on what you love to shoot. For portraits, an 85mm f/1.8 prime is fantastic. For landscapes, a 14-30mm wide-angle zoom is a top choice.
For an all-arounder, a 24-70mm or a 50mm prime is incredibly versatile. The key is to match the focal length and aperture to your specific needs.
What 3 lenses does every photographer need?
Many photographers build their kit around three core lenses: a wide-angle zoom (like 16-35mm), a standard zoom (like 24-70mm), and a telephoto zoom (like 70-200mm). This combination covers a huge range of possibilities. For a more budget-friendly and lightweight prime lens kit, a 35mm, 50mm, and 85mm would be an equally powerful trio.
Do Nikon lenses fit on all Nikon cameras?
No, and this is crucial to understand. Nikon has two main mounts. F-mount lenses are for Nikon DSLR cameras. Z-mount lenses are for Nikon mirrorless cameras.
You can use F-mount lenses on a Z-mount camera with the FTZ adapter, but you cannot use Z-mount lenses on a DSLR camera. Additionally, you need to be aware of DX (for crop-sensor cameras) and FX (for full-frame cameras) lenses, though they are cross-compatible with some limitations.
What’s the difference between Nikon and NIKKOR?
This is a simple one! Nikon is the name of the company that makes the cameras, flashes, and other accessories. NIKKOR is the brand name that Nikon uses for its line of lenses. So, while you have a Nikon camera, you shoot with NIKKOR lenses.
What is the Holy Trinity of camera lenses?
The “Holy Trinity” refers to a set of three professional-grade, constant f/2.8 aperture zoom lenses: an ultra-wide (e.g., 14-24mm), a standard zoom (e.g., 24-70mm), and a telephoto zoom (e.g., 70-200mm). This set gives a photographer incredible versatility and performance across a vast range of focal lengths.
What lens is best for beginners?
The absolute best first lens to buy after a kit lens is a 50mm f/1.8 prime. It’s affordable, incredibly sharp, and its wide aperture will teach you all about depth of field and shooting in low light. It will fundamentally change the look of your photos and is a lens that even seasoned professionals keep in their bags.
Final Thoughts
Choosing a new lens is the start of a new creative chapter. It’s an investment not just in gear, but in your ability to bring your vision to life. By understanding the fundamentals of mount compatibility, focal length, and aperture, you can move past the technical jargon and start thinking about what you want to create.
Don’t feel pressured to buy the most expensive gear right away. Start with a versatile prime like a 50mm f/1.8 or a flexible zoom that matches your favorite type of photography. The most important thing is to get a lens that excites you and makes you want to go out and shoot.
Your camera is a tool, but your lens is your paintbrush. It shapes how you see the world and how you share that vision with others. Now that you’re armed with this knowledge, you’re ready to choose the perfect camera lenses for your Nikon and start capturing the world in a whole new way. Happy shooting!
To provide the best experiences, we use technologies like cookies to store and/or access device information. Consenting to these technologies will allow us to process data such as browsing behavior or unique IDs on this site. Not consenting or withdrawing consent, may adversely affect certain features and functions.
Functional
Always active
The technical storage or access is strictly necessary for the legitimate purpose of enabling the use of a specific service explicitly requested by the subscriber or user, or for the sole purpose of carrying out the transmission of a communication over an electronic communications network.
Preferences
The technical storage or access is necessary for the legitimate purpose of storing preferences that are not requested by the subscriber or user.
Statistics
The technical storage or access that is used exclusively for statistical purposes.The technical storage or access that is used exclusively for anonymous statistical purposes. Without a subpoena, voluntary compliance on the part of your Internet Service Provider, or additional records from a third party, information stored or retrieved for this purpose alone cannot usually be used to identify you.
Marketing
The technical storage or access is required to create user profiles to send advertising, or to track the user on a website or across several websites for similar marketing purposes.
To provide the best experiences, we use technologies like cookies to store and/or access device information. Consenting to these technologies will allow us to process data such as browsing behavior or unique IDs on this site. Not consenting or withdrawing consent, may adversely affect certain features and functions.