Are You Misreading Gadget Comparison Charts and Benchmarks? A Practical Buyerโ€™s Guide to Real-World Smart Home, Wearable & Travel Performance

Shop On Amazon Now

Are You Misreading Gadget Comparison Charts and Benchmarks? A Practical Buyerโ€™s Guide to Real-World Smart Home, Wearable & Travel Performance

You have probably scrolled through glossy gadget comparison charts and benchmarks and felt confident that the highest number must equal the best pick. Yet have you ever bought a device that looked unbeatable on paper but stumbled in your daily routine? Numbers can reveal potential, but they can also hide trade-offs that shape your experience at home, on your wrist, or in your carry-on. This friendly, practical guide shows you how to read the data without being misled, then translate it into choices that genuinely fit your life. Throughout, High Tech Reviews shares the methods we use in our in-depth gadget reviews and comparisons to turn lab figures into reliable everyday advice you can trust.

Lab Scores versus Lived Experience: What the Numbers Miss

Benchmark charts summarize complex engineering into a single score that is convenient but incomplete. Think of it like choosing a car only by horsepower; it tells you something, but it does not cover handling, comfort, or fuel economy. In smart homes, a hub might ace throughput tests and still introduce tiny delays that make lights feel sluggish when you step into a hallway at night. In wearables, a watch can top processing ranks and still misread interval workouts because the optical sensor struggles with motion and sweat. In travel gear, a compact charger might advertise high total wattage yet reduce speed when you plug in a second device, leaving your laptop short during a layover. These are not rare corner cases. Independent field studies often show that synthetic peaks rarely match sustained performance during longer tasks, and consumer research indicates many returns stem from usability gaps rather than outright defects.

  • Peak versus sustained performance: brief bursts look great in charts, while your routines rely on consistency over minutes or hours.
  • Thermals and throttling: slim designs can heat up and slow down, which a single headline number rarely reveals.
  • Connectivity quality: Wireless Fidelity (Wi-Fi) strength and interference decide whether automations feel instant or awkward.
  • Sensor realities: heart rate and sleep tracking hinge on fit, skin tone, motion, and algorithms, not only raw compute.
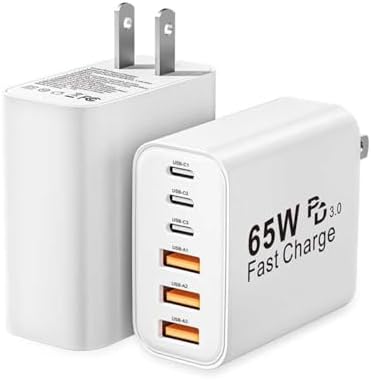
  • Power sharing: rated charging totals may shift based on how many devices you attach and which ports you use.

How to Read Gadget Comparison Charts and Benchmarks Without Being Misled

Charts are useful when you know what they do and do not measure. First, read the test description and ask what scenario it simulates. Does a battery test reflect light background use or heavy navigation with screen brightness raised? Next, look for sustained results over time, not only short runs that favor brief peaks. Then, check sample sizes and variance: a median with a narrow spread signals consistency, while wide swings suggest real-world unpredictability. Also, look for signs of thermal limits and connection reliability, especially if your home has thick walls or many overlapping networks. Finally, translate every metric into a daily moment. If a wearableโ€™s top speed matters less to you than comfortable sleep tracking, then give that comfort and accuracy more weight than a general performance score. At High Tech Reviews, we pair measurements with scenario testing, so our in-depth gadget reviews and comparisons explain not just what a number is, but when it matters to you.

Chart Metric What Labs Measure Real-World Watchouts Try This at Home
Processing score How quickly the device completes fixed tasks Brief peaks may hide slowdowns during longer sessions Open multiple apps, run updates, and note if responsiveness is steady
Graphics score Rendering speed for visual workloads Battery drain and heat can climb during maps and animation Use navigation and zoom maps for 10 minutes to assess smoothness
Battery endurance Time until shutdown under a standard workload Settings, signal strength, and background sync change results Track percentage drop during your typical morning routine
Wireless throughput Maximum data rate near an access point Walls, interference, and antenna design reduce speed and stability Test in the farthest room you use, not only next to the router
Charging wattage Advertised total power delivery Power splits when multiple devices connect Charge two devices at once and time the first 30 percent
Sensor accuracy Controlled measurements in steady conditions Motion, sweat, and fit degrade wearable accuracy Compare resting readings before and after a brisk walk

Smart Home, Wearables, and Travel Gear: Which Real-World Factors Outweigh the Lab

Shop On Amazon Now

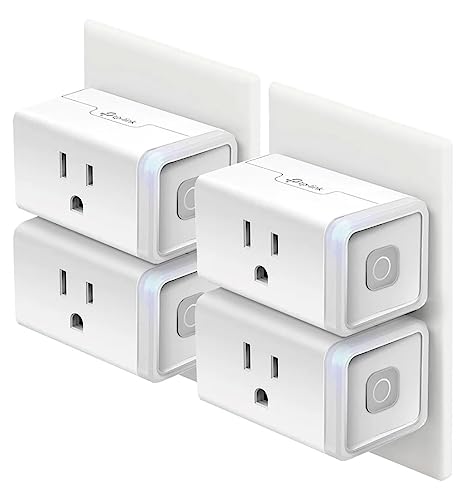
Smart home devices live in imperfect spaces with doors closing, microwaves humming, and family members streaming. Here, stability and latency matter more than theoretical speed, because a half-second delay can make lighting feel wrong. Look for strong range, reliable handoffs across rooms, and interoperability with standards like Matter that protect your investment as your setup grows. Wearables touch your skin and routine for many hours, so comfort and sensor trustworthiness rise above raw compute. A watch that feels great and tracks sleep consistently will serve you better than one that tops a synthetic performance table but bothers your wrist or misses peaks in a workout. Travel gear must combine power, safety, and portability. A charger should deliver consistent output to two devices at once, stay cool to the touch, and pack neatly without adding weight that you notice at gate changes. In each category, the right choice is the one that fades into the background and simply works when you need it.

  • Smart home priorities: reliable latency, range through walls, resilient automations, and future-ready standards integration.
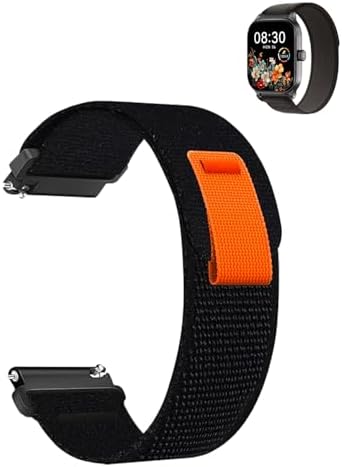
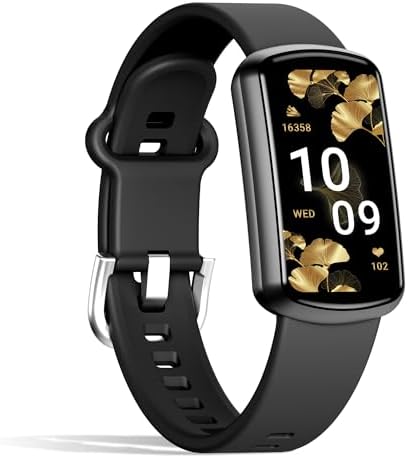
  • Wearable priorities: comfort, skin sensor stability, sleep and heart tracking consistency, and readable displays in sunlight.
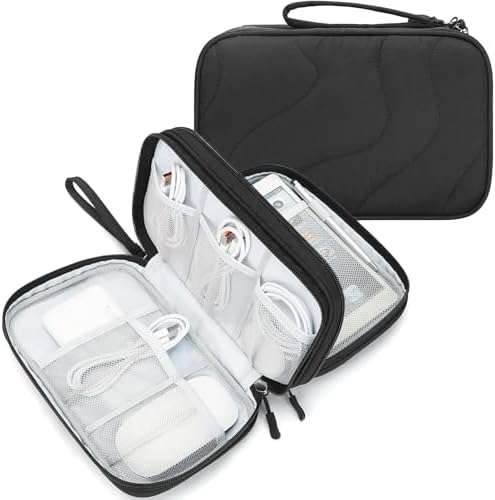
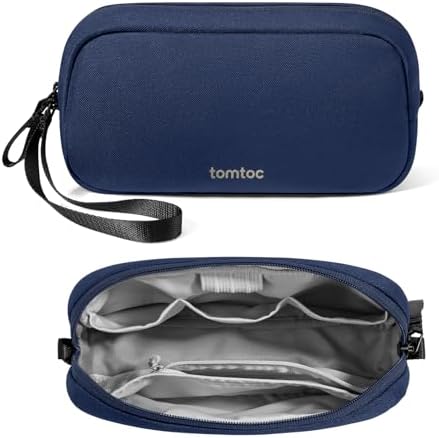
  • Travel priorities: safe multi-device power, compact design, heat management, and plug shape that fits seats and hotel outlets.

Build Your Personal Scorecard: A Versus Framework for Your Life

Because your needs are unique, the most useful comparison is not Product A versus Product B, but your priorities versus the labโ€™s priorities. A personal scorecard helps you map numbers to what matters day to day. Start by listing your top tasks, then weight dimensions such as reliability, comfort, battery or power endurance, and privacy. Next, pull the chart metrics that correlate to each dimension and add a quick field test you can run at home. Finally, compute a weighted total and note any non-negotiables like emergency reliability or secure data handling. At High Tech Reviews, our guides include ready-to-use worksheets like the one below, so you can adapt scores to your lifestyle rather than bending your life around a score.

Dimension Why It Matters Suggested Weight Smart Home Suggested Weight Wearables Suggested Weight Travel
Reliability and latency Automations feel instant and repeatable 30 20 10
Performance under load Sustained speed during multitasking 15 10 10
Battery or power endurance Fewer charges, steady output when traveling 10 20 20
Compatibility and ecosystem Works with your current devices and standards 20 10 10
Ease of use Setup speed, app clarity, and intuitive controls 10 15 10
Privacy and security Protects data and supports timely updates 10 10 10
Portability and build Comfort on the wrist or in your bag 0 10 25
Price to value What you get for what you pay 5 5 5

Field Tests You Can Do Today: Lab Numbers versus Everyday Tasks

Shop On Amazon Now

Simple, repeatable checks reveal how a device behaves in your environment and routines. They do not replace professional testing, but they complement charts by stressing the exact scenarios you care about. Run the tests below and write down a few quick notes. Repeat on another day to see if results are consistent. If a gadget feels steady and you can explain why it wins your personal scorecard, you are far more likely to enjoy using it six months from now. This is the same logic High Tech Reviews applies: we match structured measurements with lived moments so our in-depth gadget reviews and comparisons read like a map, not just a scoreboard.

Category Task Steps Good Result Caution
Smart home Automation chain latency Trigger a sensor to turn on lights, then a fan, and log the delay between each step Each action feels immediate, ideally under one second Thicker walls and congested Wireless Fidelity (Wi-Fi) can add delay
Smart home Range and stability Move to the farthest room and trigger the same routine 5 times All five runs complete without missed steps Interference from neighbors can vary by time of day
Wearable Rest to brisk walk transition Sit for two minutes, then walk quickly for three minutes and check heart rate trend Clear rise and fall pattern with minimal lag Fit and skin contact strongly affect readings
Wearable Sleep comfort check Wear overnight and note pressure points or strap marks in the morning No soreness and clean data the next day Loose straps can distort sleep stages
Travel gear Two-device charging Plug in a laptop and phone together, time a 30 percent charge on the phone Speed stays similar to single-device charging Some chargers reduce output when multiple ports are used
Travel gear Heat and noise check Charge for 15 minutes and hold the charger, listening for coil noise Warm is fine, hot or noisy is not Excess heat reduces longevity and performance

Where High Tech Reviews Fits: From Benchmarks to Better Buying

Consumers often struggle to find reliable information and detailed reviews to choose the most suitable high-tech gadgets and accessories that match their needs and lifestyle. High Tech Reviews is built to solve that problem. We blend structured measurements with human-centered evaluation so you understand both the score and the story. Our in-depth gadget reviews and comparisons share expert commentary on trending high-tech tools, comprehensive guides for smart home and fitness devices, and a curated selection of travel and lifestyle accessories. We run sustained tests that mirror daily routines, log consistency, and note ergonomics alongside lab results. We then translate all of that into practical checklists and ready-to-use scorecards, avoiding brand battles and focusing on your experience. The result is simple: The website provides expert reviews, product highlights, and curated recommendations that help users make informed purchasing decisions and discover the best technology solutions. If you want to feel certain that tomorrowโ€™s purchase will still fit your life next year, our guides are designed for you.

  • Scenario-first methods: we weight reliability, comfort, and privacy as highly as raw performance.
  • Clarity over hype: every metric is explained in plain language and linked to a real task.
  • Tools you can use: printable scorecards and step-by-step field tests align with your priorities.
  • Category depth: smart home stability, wearable accuracy, and travel power safety are covered in detail.

Gadget Comparison Charts and Benchmarks: Your Questions Answered

Do charts still matter if they miss real-life nuance? Absolutely, because they spotlight potential and filter obvious mismatches, especially when vendors provide consistent, repeatable methods. Are higher numbers always better? Not if they trade comfort, stability, or battery endurance for a fractionally faster task you rarely run. How do you weigh privacy and security? Look for clear policies and long support windows, then assign meaningful weight on your scorecard; long-term updates can be worth more than a small performance uplift. Finally, if you feel overwhelmed, remember that High Tech Reviews exists to bring calm to the chaos with unbiased explanations and actionable advice that meets you where you live, work, and travel.

Numbers point the way, but your daily patterns decide the winner. In the next 12 months, more devices will add on-device Artificial Intelligence (AI [Artificial Intelligence]) features that change how we measure speed, accuracy, and privacy. When you face a wall of charts again, which real-world moment will you protect first?

And when you skim gadget comparison charts and benchmarks next time, which single metric will you put in context before everything else?

Additional Resources

Explore these authoritative resources to dive deeper into gadget comparison charts and benchmarks.

Decode Benchmarks with High Tech Reviews: Real-World Confidence

Get in-depth gadget reviews and comparisons, product highlights, and curated recommendations to help adults and tech-savvy consumers choose smart home, wearables, and travel tech confidently.

Compare Smarter Now

What is a key feature of a smart thermostat

Shop On Amazon Now

If you are wondering what features matter most in a smart thermostat, start with this core idea: intelligent automation that actively reduces energy use without sacrificing comfort. Put simply, the defining feature is a thermostatโ€™s ability to learn your routine, sense occupancy, and adjust temperatures proactively to save money and keep you comfortable. Think of it like a co-pilot that not only reads the cabin temperature but also predicts traffic and adjusts your route. When that learning engine is paired with accurate sensors and clear controls, you get measurable savings, fewer manual tweaks, and a calmer home climate.

What features matter most in a smart thermostat?

The heartbeat of a modern thermostat is adaptive intelligence that tunes heating and cooling to your life. A strong model recognizes patterns, uses geofencing powered by your phoneโ€™s GPS (global positioning system), and ramps temperatures at the right moment so rooms feel right on time. Many certified devices report average heating and cooling savings in the 8 to 15 percent range according to utilities and the United States Environmental Protection Agency (EPA), and your actual results depend on climate, home insulation, and your habits. Beyond brains, you need solid basics: reliable Wi-Fi (wireless fidelity), wide HVAC (heating, ventilation, and air conditioning) compatibility, simple apps, and transparent energy reports that reveal what changed and why.

To make the most of that intelligence, look for room sensors that detect presence and temperature in the spaces you use most. If the nursery runs cooler than the hallway, a sensor can shift the target for true comfort where it counts. Add geofencing so the system eases back when you leave and prepares your home before you return. Finally, seek robust privacy controls, frequent firmware updates, and power options such as a C-wire (common wire) or dependable battery backup so your schedule stays safe even during brief outages.

  • Adaptive learning and occupancy sensing for timely preheating and precooling
  • Geofencing via GPS (global positioning system) to avoid conditioning an empty home
  • Room sensors for temperature balance and comfort where you sit and sleep
  • Clear energy reports with weekly trends and actionable suggestions
  • Strong Wi-Fi (wireless fidelity) connectivity and voice assistant support
  • Wide HVAC (heating, ventilation, and air conditioning) compatibility including heat pumps
  • Privacy tools, local schedules, and regular over-the-air (OTA) updates

Energy intelligence you can measure: learning, recovery, and real savings

The smartest thermostats do more than hold a number; they shape your homeโ€™s temperature curve. Adaptive learning tracks how quickly your home warms and cools, then starts earlier to hit your target right when you wake or arrive. This is often called adaptive recovery or preheating and precooling, and it can be the difference between stepping into a chilly kitchen or a cozy one without wasting energy overnight. Independent program data from utilities and the United States Department of Energy (DOE) point to meaningful savings from smarter scheduling and setbacks, commonly near 8 percent annually on combined heating and cooling, with higher gains in extreme climates.

Energy reports turn those savings into insight. You might see that a two-degree setback during work hours cuts monthly usage by several kWh (kilowatt-hour) while keeping comfort steady thanks to adaptive recovery. If the system notices unusually long run-times, it can suggest filter checks or hint at a failing component long before a pricey breakdown. That is preventive care for your HVAC (heating, ventilation, and air conditioning) system. And when available, demand response programs coordinated by utilities can nudge your setpoint during peak events in exchange for bill credits, a feature that is usually optional and under your control.

Feature How it works Why it matters What to check
Adaptive learning Models your homeโ€™s heat/cool rate and your routine Hits the right temp at the right time with less energy Supports variable schedules, recognizes holidays, easy overrides
Geofencing Uses phone GPS (global positioning system) to infer home or away Stops conditioning empty rooms, resumes before arrival Adjustable radius, multi-user support, privacy disclosures
Energy reports Summarizes run-time, setpoints, and weather impact Turns data into actions that reduce bills Weekly and monthly views, export options, plain-language tips
Demand response Voluntary utility events with mild setpoint changes Earns credits and supports grid stability Opt-in controls, clear event notifications, easy opt-out

Seamless control: apps, voice, and smart home integration

A smart thermostat should feel effortless from day one. That means a clear mobile app, quick setup, and dependable connectivity over Wi-Fi (wireless fidelity) on your home network. For many households, voice control is more than a novelty; it is accessibility and convenience. Voice assistants can change setpoints, start routines, or announce indoor humidity while your hands are busy. If you use other connected devices, look for open integrations through standard protocols or services such as IFTTT (If This Then That) and well-documented APIs (application programming interfaces) so your thermostat can participate in scenes, automations, and safety workflows.

Integration adds value when it is purposeful. A window sensor can pause cooling if someone leaves the patio door open for fresh air. A smart lock can signal your arrival without relying solely on phone location, improving geofencing in dense urban buildings. Even fitness devices can inform routines; if you start a late-night indoor ride, a brief precooling can keep your workout comfortable without running the system all night. The best setups are simple first, then grow as your home evolves, so choose a thermostat that plays nicely with the rest of your ecosystem without forcing you into a single brand.

Integration capability Everyday use case Privacy and reliability notes
Voice assistant control Hands-free setpoint changes and status checks Confirm mute options and on-device processing when possible
IFTTT (If This Then That) or scenes Lower setpoint when you start a movie night scene Review app permissions and automation history logs
Open APIs (application programming interfaces) Custom automations with your home hub Look for token-based access and role-based permissions

Comfort by design: sensors, zoning, and indoor air quality

Shop On Amazon Now

Comfort is local. A hallway thermostat cannot know that your bedroom runs 2 degrees warmer after sunset or that your home office overheats on sunny afternoons. Remote room sensors fix that by measuring where you live, work, and rest, then prioritizing comfort in those spaces. Occupancy-aware sensors can shift focus as you move through the home, while averaging across several rooms avoids overcompensation. If your home has multiple dampers or zones, choose a thermostat that can coordinate them or work with your existing zoning controller, so each space reaches the right setpoint without fighting neighboring rooms.

Indoor air quality also belongs on your shortlist. A thermostat that monitors humidity can bring relief in summer by coordinating mild dehumidification, which often feels cooler at the same temperature. In winter, a gentle humidity boost helps with dry skin and static while protecting wood furnishings. Some thermostats can also prompt filter changes, coordinate with a whole-home ventilator, or display indoor air quality scorecards from connected monitors. These are quiet features you will feel more than notice, the ones that make homes more livable rather than simply more connected.

Comfort feature What it does Benefit at home Tip to evaluate
Remote room sensors Measure temperature and presence in key rooms Comfort where you are, not just the hallway Battery life, pairing range, per-room scheduling
Zoning support Coordinates dampers or multiple zones Even temperatures across floors and wings Compatibility with existing zone controllers
Humidity management Controls dehumidification or humidification cycles Comfort at lower setpoints and better winter air Displays indoor humidity and sets target ranges

Compatibility and installation: the practical foundation

Before falling in love with features, verify compatibility. Thermostats must speak the language of your HVAC (heating, ventilation, and air conditioning) system, whether it is a single-stage furnace, a multi-stage setup, or a heat pump with auxiliary heat. Many homes need a C-wire (common wire) to power advanced features and maintain a strong connection without frequent battery swaps. If you do not have a C-wire, some thermostats include power adapters that add a leg without rewiring the whole system. Keep in mind that reliable power supports better Wi-Fi (wireless fidelity) and more accurate sensor readings over time.

Network stability matters too. If your router broadcasts both 2.4 GHz (gigahertz) and 5 GHz (gigahertz) bands, confirm which your thermostat supports. A 2.4 GHz (gigahertz) connection typically offers better range through walls, while 5 GHz (gigahertz) can be faster at close range. During installation, label wires carefully and photograph the old connections so you can revert if needed. If you prefer professional help, consider a certified technician who can also evaluate ductwork and airflow, because a smart thermostat shines brightest when the mechanical side is in good shape.

HVAC (heating, ventilation, and air conditioning) compatibility checklist What to verify
System type Single-stage, multi-stage, heat pump, boiler, or radiant
Auxiliary heat Support for emergency heat and defrost cycles on heat pumps
Power C-wire (common wire) present or approved power adapter
Fan control Manual fan runtime options for circulation and filtration
Sensors Room sensor support, number of sensors, range

Reliability, privacy, and security: the quiet essentials

When people ask what is a key feature of a smart thermostat, reliability is the unsung hero. Schedules should run locally so a brief internet outage does not leave your home at the wrong temperature. Look for automatic firmware updates, clear release notes, and the option to revert a change if something misbehaves. Power loss behavior matters too; after an outage, your thermostat should gracefully resume its last schedule without user intervention. These are the invisible moments that build trust in daily use.

Privacy and security deserve equal attention. Many thermostats support encryption such as TLS (Transport Layer Security) and offer account protections like multi-factor authentication. You should be able to see what data is collected, why it is collected, and how to delete it. If you use location-based features such as geofencing, check for multi-user support so your partner arriving home does not leave the house stuck in away mode. Finally, confirm you can export your energy data, because owning your data means you can analyze trends in your favorite spreadsheet or share it with a home energy audit when you are ready to go deeper.

  • Local schedules and manual overrides for offline resilience
  • Transparent data policies and easy data deletion
  • Encryption with TLS (Transport Layer Security) and multi-factor authentication
  • Regular over-the-air (OTA) updates with readable change logs
  • Multi-user geofencing and role-based app permissions

How to choose confidently: a feature-first checklist

Shop On Amazon Now

Choosing a thermostat should feel empowering, not confusing. Start by mapping your goals, then match each goal to a feature that delivers. If your priority is lower bills without micromanaging, adaptive learning, geofencing, and energy reports belong at the top. If you crave comfort in specific rooms, prioritize remote sensors and zoning. For renters and DIY (do it yourself) enthusiasts, look for battery-powered options, guided setup, and reversible installation. Throughout your research, remember that the best thermostat is the one that fits your system, your routines, and your privacy preferences, not a one-size-fits-all spec sheet.

This is where High Tech Reviews shines. Our in-depth gadget reviews and comparisons break down features in plain language, with expert commentary on trending high-tech tools and comprehensive guides for smart home and fitness devices. We focus on practical value, walk through setup steps, and surface real-world tips gathered from long-term testing. Because consumers often struggle to find reliable information, we highlight product details and curated recommendations that help you make informed decisions and discover the best technology solutions for your lifestyle, from smart thermostats to travel and lifestyle accessories that complement a connected home.

Your goal Feature to prioritize Why it helps Quick test
Cut energy bills Adaptive learning, setbacks, energy reports Automates efficient run-time without constant tweaking Review a sample monthly report before buying
Room-by-room comfort Remote sensors, zoning coordination Targets spaces you use, smooths hot and cold spots Confirm sensor battery life and pairing range
Easy daily use Clear app design, voice control Fast adjustments and helpful status at a glance Check demo mode or screenshots of the app
Data ownership Export options, privacy dashboard Analyze trends and retain control over your data Look for CSV export or API (application programming interface) access
Stable connectivity Strong Wi-Fi (wireless fidelity), C-wire (common wire) Fewer dropouts and consistent performance Verify router band support and power requirements

Real-world snapshots: how smart thermostats help different lifestyles

Consider a traveling professional who leaves Monday morning and returns Thursday night. With geofencing and occupancy sensing, the thermostat eases back to an efficient away setpoint, then preheats before touchdown so the home feels welcoming on arrival. Energy reports reveal that shifting from a fixed schedule to geofencing saved 11 percent in cooling during summer, mostly by avoiding midday run-time in an empty home. That is real money and less wear on the HVAC (heating, ventilation, and air conditioning) system.

Now picture a fitness-focused household. Late evening workouts in a spare room make it stuffy despite a reasonable setpoint. A remote sensor in the workout room nudges the system to cool just before the session starts, then returns to a higher setpoint afterward, keeping comfort without running the system longer than needed. Over a month, the household notices steadier sleep and a small reduction in kWh (kilowatt-hour) consumption because the main space does not get overcooled to compensate for the hot spot. Smart can be subtle but meaningful.

Expert tips to get the most from your thermostat on day one

Set your initial schedule, then let the learning engine adapt over a week or two. Use moderate setbacks, like 3 to 5 degrees during work hours, and allow adaptive recovery to hit your target before you arrive. Place at least one remote sensor in your most used room and one in your coolest or warmest room to balance comfort. Enable geofencing but add a small delay so quick errands do not trigger unnecessary changes.

Turn on energy reports and actually read them every week. Look for run-time spikes that align with weather, doors left open, or filter issues. Keep privacy balanced by enabling only the permissions you truly need and reviewing them twice a year. Finally, update firmware when prompted and skim the release notes; even small improvements can make the system feel faster, safer, and smarter over time.

How High Tech Reviews helps you decide with confidence

At High Tech Reviews, we translate spec sheets into everyday outcomes so you can see how features show up in real life. Our in-depth gadget reviews and comparisons explain schedule learning, geofencing, room sensors, and privacy tools with clear examples, not jargon. You will also find comprehensive guides for smart home and fitness devices that integrate with thermostats, plus a curated selection of travel and lifestyle accessories that make your routines smoother. Because consumers often struggle to find reliable information, our expert commentary and product highlights focus on the trade-offs that matter, the steps to verify compatibility, and the settings that unlock comfort and savings.

When you need to know what features matter most in a smart thermostat, we provide side-by-side feature breakdowns, setup walkthroughs, and real-world testing notes so you can match a device to your home, schedule, and privacy preferences. The goal is simple: help you make informed purchasing decisions and discover the best technology solutions without the noise.


Smart thermostats shine because they intelligently automate comfort and savings while keeping you in control. In the next 12 months, expect faster learning, richer local processing, and tighter links with sensors and clean energy programs. What would your ideal daily routine look like if your home climate quietly anticipated each moment and focused on what features matter most in a smart thermostat?

Additional Resources

Explore these authoritative resources to dive deeper into what features matter most in a smart thermostat.

Decode What Features Matter Most in a Smart Thermostat with High Tech Reviews

Adults and tech-savvy consumers get expert reviews, product highlights, and curated picks to make confident decisions and discover top tech solutions through in-depth gadget reviews and comparisons.

Explore Top Picks

How do I store my security camera footage locally

Shop On Amazon Now

Keeping your home video safe, private, and under your control starts with a simple question many readers ask: which indoor security camera offers local storage, and how can you set it up right? If you are tired of monthly cloud fees and want faster access with fewer bandwidth limits, local-first recording puts you in the driverโ€™s seat. In this friendly, step-by-step question-and-answer guide, you will learn the storage methods that fit different homes, how much capacity you actually need, and how to secure your video like a pro without turning your living room into a server farm. Along the way, this guide shares practical techniques, useful math, and easy checklists you can apply today.

Q1. Which indoor security camera offers local storage?

Look for three clear signals on any product page or box: a microSD (micro Secure Digital) card slot on the camera, support for a hub or base station with USB (Universal Serial Bus) storage, or compatibility with an NVR (Network Video Recorder) or NAS (Network Attached Storage) via RTSP (Real Time Streaming Protocol) or ONVIF (Open Network Video Interface Forum). Each route enables on-device or on-premises video so your clips stay in your home, not solely in the cloud. Before you buy, confirm the maximum card size, the supported file system such as FAT32 (File Allocation Table) or exFAT (Extended File Allocation Table), and whether the camera encrypts recordings with AES-128 or AES-256 (Advanced Encryption Standard 128-bit or 256-bit) to protect privacy if a card is removed.

You will also want to see event-only and continuous recording choices, because motion-triggered saving often extends retention dramatically on small cards. Check for support of H.265 or HEVC (High Efficiency Video Coding) in addition to H.264, since more efficient codecs extend storage life without sacrificing clarity. Finally, review basics that shape local recording quality: resolution such as 1080p, 2K, or 4K; FPS (Frames Per Second); lens field of view; infrared night vision; and audio capture with a physical privacy shutter. When you combine the right storage pathway with the right imaging features, your local library becomes a reliable security record instead of a folder of random clips.

Key Local-Storage Features to Verify
Feature Why It Matters Quick Tip
MicroSD (micro Secure Digital) Slot Enables on-camera recording without cloud dependency Choose endurance-rated cards for 24/7 writes
NVR/NAS (Network Video Recorder/Network Attached Storage) Support Centralizes storage across multiple cameras Confirm RTSP (Real Time Streaming Protocol) or ONVIF (Open Network Video Interface Forum)
AES (Advanced Encryption Standard) Protects footage if storage is stolen Prefer AES-256 when available
H.265 or HEVC (High Efficiency Video Coding) Reduces storage use at similar quality Enable in settings to stretch retention
Event vs Continuous Recording Saves capacity and speeds up review Use motion zones and sensitivity controls

Q2. What are my local storage options and how do they differ?

Most homes succeed with one of four approaches: a microSD (micro Secure Digital) card in the camera, a hub with USB (Universal Serial Bus) storage, a dedicated NVR (Network Video Recorder) that pairs with wired or wireless cameras, or a general-purpose NAS (Network Attached Storage) that runs surveillance software. Think of these as shelves that hold your library. A microSD card is a slim shelf inside the camera itself, great for one or two rooms. A hub is a small bookcase for a few cameras. An NVR is a sturdy cabinet for many cameras. A NAS is a flexible home library where you can add volumes and apps as you grow.

Choosing the right shelf depends on how many cameras you have, whether you want simple setup or deep control, and how comfortable you are with home networking. A microSD route is the fastest to enable and the lowest cost, but if the camera is stolen the footage on the card may go with it unless it is encrypted. An NVR or NAS keeps video out of reach and can provide RAID (Redundant Array of Independent Disks) protection, yet they require more planning, wiring, and budget. Hubs sit in the middle and are ideal for small systems that still want centralized clips without full server complexity.

Local Storage Methods at a Glance
Method Best For Strengths Considerations
MicroSD (micro Secure Digital) in Camera 1 to 2 rooms, renters, quick installs Low cost, no extra hardware, fast setup Risk if device is taken, smaller capacity
Hub with USB (Universal Serial Bus) Drive Studios or small homes Centralizes multi-camera clips, simple app control Hub vendor lock-in, verify encryption
NVR (Network Video Recorder) Larger homes, mixed indoor and outdoor High channel counts, PoE (Power over Ethernet), reliable 24/7 Wiring and network planning, higher cost
NAS (Network Attached Storage) Power users, smart-home enthusiasts Expandable storage, multi-app ecosystem Software learning curve, needs maintenance

Q3. How much storage do I need for continuous and motion-only recording?

A simple rule of thumb helps you plan: storage per day in GB (Gigabytes) is roughly bitrate in Mbps (Megabits per second) multiplied by 10.8. If your indoor camera records at 4 Mbps (Megabits per second), you will use about 43 GB (Gigabytes) each day with continuous recording. Event-only modes often slash that by 70 to 90 percent, especially when you define motion zones that ignore doorways or windows that constantly move. That means a 128 GB (Gigabytes) microSD (micro Secure Digital) card might hold multiple weeks of event clips but only two to three days of nonstop video.

Compression, scene complexity, and FPS (Frames Per Second) all change the math. H.265 or HEVC (High Efficiency Video Coding) can save 25 to 50 percent versus H.264 for the same scene. A quiet office at night consumes far less than a bright kitchen with a TV (Television) flickering and people walking through. If you need long retention, consider an NVR (Network Video Recorder) or NAS (Network Attached Storage) with larger HDDs (Hard Disk Drives) or SSDs (Solid State Drives) and use schedules to lower bitrate during off-hours. For incident-focused security, event-only recording plus smart detection will stretch your storage the furthest.

Approximate Daily Storage Use per Camera
Resolution Typical Bitrate Continuous Recording Event-Only Recording
1080p at 15 FPS (Frames Per Second) 2 Mbps (Megabits per second) โ‰ˆ 21.6 GB (Gigabytes) per day โ‰ˆ 2 to 6 GB (Gigabytes) per day
2K 1440p at 20 FPS (Frames Per Second) 4 Mbps (Megabits per second) โ‰ˆ 43.2 GB (Gigabytes) per day โ‰ˆ 4 to 12 GB (Gigabytes) per day
4K 2160p at 20 FPS (Frames Per Second) 8 Mbps (Megabits per second) โ‰ˆ 86.4 GB (Gigabytes) per day โ‰ˆ 8 to 20 GB (Gigabytes) per day

Q4. How do I set up local storage step by step?

For a microSD (micro Secure Digital) workflow, power down the camera, insert an endurance-rated card, and power it back up. Open the companion app, format the card as prompted to FAT32 (File Allocation Table) or exFAT (Extended File Allocation Table), then enable event-only or continuous recording as you prefer. Define motion zones, detection sensitivity, and smart filters like person or pet detection if your camera supports on-device AI (Artificial Intelligence). Finally, record a quick test clip, pull the card to confirm files can be viewed on a computer, and reinsert to begin normal operation.

For an NVR (Network Video Recorder), mount cameras, connect Ethernet to PoE (Power over Ethernet) ports if supported, or join the camera to your network via Wi-Fi (Wireless Fidelity) and add it to the NVR using RTSP (Real Time Streaming Protocol) or ONVIF (Open Network Video Interface Forum). Install and format your HDDs (Hard Disk Drives) or SSDs (Solid State Drives) in the NVR, set recording schedules, and choose H.265 or HEVC (High Efficiency Video Coding) where available. If you prefer a NAS (Network Attached Storage), install a surveillance app, create a dedicated share, and add your camera streams with unique accounts that have limited permissions. In all cases, set the correct time zone and enable NTP (Network Time Protocol) so timestamps stay accurate across devices.

  1. MicroSD (micro Secure Digital) setup: insert, format, enable recording, tune motion zones, and test playback.
  2. Hub setup: connect hub to router, attach USB (Universal Serial Bus) storage, pair cameras, and enable encryption.
  3. NVR/NAS (Network Video Recorder/Network Attached Storage) setup: wire cameras or join wireless, add streams via RTSP (Real Time Streaming Protocol) or ONVIF (Open Network Video Interface Forum), set schedules, and test retention.

Q5. How can I keep locally stored footage secure and reliable?

Shop On Amazon Now

Start by enabling encryption wherever it exists, including AES (Advanced Encryption Standard) on-camera storage and HTTPS/TLS (Hypertext Transfer Protocol Secure/Transport Layer Security) for app connections. Change default passwords, turn on two-factor authentication or 2FA (Two-Factor Authentication), and update firmware promptly. On your network, use WPA3 (Wi-Fi Protected Access 3) on your router, disable UPnP (Universal Plug and Play), and avoid port forwarding; if you need remote access, choose a VPN (Virtual Private Network) instead. Power stability matters, so add a small UPS (Uninterruptible Power Supply) for your router, NVR (Network Video Recorder), or NAS (Network Attached Storage) to prevent file corruption during outages.

For reliability, choose endurance-rated microSD (micro Secure Digital) cards designed for continuous writes. Vendors often rate these for thousands of hours, and industry testing shows that endurance cards outlast standard cards by several times in 24/7 scenarios. If you run an NVR or NAS, consider RAID (Redundant Array of Independent Disks) levels that survive a single drive failure and schedule S.M.A.R.T. (Self-Monitoring, Analysis and Reporting Technology) checks monthly. Legally, understand local rules on audio recording and signage, and if you are in the European Union, ensure practices align with GDPR (General Data Protection Regulation) principles such as purpose limitation and data minimization.

  • Use long, unique passphrases and store them in a reputable password manager.
  • Create a dedicated IoT (Internet of Things) VLAN (Virtual Local Area Network) to isolate cameras from laptops and phones.
  • Schedule periodic exports of important clips to an offline drive for offsite backup.
  • Review who can access your system and prune old or unused accounts quarterly.

Q6. What common mistakes should I avoid when going local-only?

Many owners overestimate retention and underestimate bitrate, then feel disappointed when a 128 GB (Gigabytes) microSD (micro Secure Digital) card only holds a couple of days of continuous 2K footage. Use the 10.8 multiplier per Mbps (Megabits per second) per day as your planning baseline. Another frequent pitfall is leaving motion detection on default, which captures every curtain flutter; use activity zones and person detection to shrink clip counts. Also watch out for untested restores, where footage appears in the app but cannot be exported because the card was never formatted to the cameraโ€™s expectations.

Security shortcuts are another trap. Leaving UPnP (Universal Plug and Play) enabled can silently open ports that outsiders scan every day, and reusing passwords creates a weak link across your devices. Neglecting power protection leads to file system errors, especially on NVR (Network Video Recorder) arrays. Finally, skipping firmware updates can break compatibility with RTSP (Real Time Streaming Protocol) or ONVIF (Open Network Video Interface Forum), which you may rely on for NAS (Network Attached Storage) recording. A small monthly checklist for updates, backups, and health checks protects months of valuable footage.

Q7. How can I choose and set up the right local storage?

This article provides guidance to help readers choose local storage options and set them up. For detailed product information, consult manufacturer documentation and independent reviews to confirm features and compatibility. The guidance here explains important settings, what specs matter, and how to evaluate real-world performance to match devices to your space, habits, and privacy priorities.

This guide includes step-by-step storage walkthroughs, capacity calculators, and maintenance checklists you can save. It highlights features such as H.265 or HEVC (High Efficiency Video Coding), AES (Advanced Encryption Standard) options, and NAS (Network Attached Storage) integration without requiring subscriptions. For readers who prefer a quick shortcut, look for cameras that support microSD (micro Secure Digital), hubs with USB (Universal Serial Bus) storage, and straightforward NVR (Network Video Recorder) pairing. Whether you rent a studio or manage a multi-room setup, these resources help you build a local-first system that balances privacy, budget, and simplicity.

Q8. Can I mix local and cloud for the best of both worlds?

Absolutely, a hybrid approach is a smart safety net. Many cameras let you save continuous video locally while sending only thumbnail alerts to the cloud, so you still receive timely push notifications without uploading full-resolution clips. That reduces bandwidth needs and keeps your history at home, while giving you a fallback if a device is damaged or stolen. Consider hybrid-only for entry points that are critical and local-only for low-risk rooms like a garage or office. The added flexibility lets you optimize retention where it matters most.

To keep costs down, reserve cloud for rare events and maintain local control for routine recording. If you integrate with smart-home platforms, double-check whether features such as automations change storage behavior, and always verify which settings affect bitrate and resolution. When you plan your mix this way, you gain resilience without sacrificing your original goal of privacy and independence from recurring fees. It is like keeping a secure journal at home plus a postcard backup for emergencies.

Q9. What sizing example should I follow for a typical two-room setup?

Shop On Amazon Now

Imagine two 2K cameras at 4 Mbps (Megabits per second) each, set to event-only with moderate activity that averages 20 percent of the day. The continuous baseline per camera would be about 43.2 GB (Gigabytes) per day, but with event-only at 20 percent, you might see roughly 8.6 GB (Gigabytes) per camera per day. A 128 GB (Gigabytes) microSD (micro Secure Digital) card would hold about 14 to 15 days of clips on each camera, assuming H.265 or HEVC (High Efficiency Video Coding) and reasonable motion tuning. If you want a month of history, step up to 256 GB (Gigabytes) cards or move the pair to a small NVR (Network Video Recorder) so both feeds share a larger HDD (Hard Disk Drive).

Now add growth planning. If you think you will add a door camera later, choose a storage method that scales: a hub or compact NVR can take on extra channels without rethinking the whole system. Plan for a small UPS (Uninterruptible Power Supply), keep spare endurance cards, and schedule a quarterly export of key clips to an external drive. With these small steps, your local storage keeps pace with your smart home rather than becoming a weekend troubleshooting project.

Q10. Are there privacy or legal points I should consider?

Local storage gives you control, but it also gives you responsibility. If you record audio, inform guests and household members, and follow local regulations which vary by region and country. When sharing clips, avoid posting faces publicly without consent, and redact sensitive details when possible. If you live in an apartment, be mindful of camera angles so you do not capture hallways or neighborsโ€™ private spaces. These common-sense steps reduce risk while keeping your home safer.

For workplaces or rentals, put a simple notice near cameras, document retention periods, and restrict who can access stored footage. In the European Union, aligning with GDPR (General Data Protection Regulation) principles helps you stay on the right side of transparency and data minimization. Wherever you are, the golden rule is to collect what you need, keep it as long as necessary, and protect it all the way from lens to storage device with encryption and good access hygiene. Your future self will thank you during that rare moment you need a clear clip.

Q11. Quick answers: what else should I know before I hit buy?

  • Does it support RTSP (Real Time Streaming Protocol) or ONVIF (Open Network Video Interface Forum)? That is crucial for NVR/NAS (Network Video Recorder/Network Attached Storage) setups.
  • Is there a physical privacy shutter? This adds confidence for bedrooms and offices.
  • What file system and card size are supported? Confirm FAT32/exFAT (File Allocation Table/Extended File Allocation Table) and 128 GB to 512 GB (Gigabytes).
  • Can you set bitrate and FPS (Frames Per Second)? Tuning these dials controls retention.
  • Is remote access secured by HTTPS/TLS (Hypertext Transfer Protocol Secure/Transport Layer Security) and 2FA (Two-Factor Authentication)? Make it non-negotiable.

This article explains these details and points you toward independent reviews, product highlights, and curated recommendation lists to help make informed purchasing decisions. If you want a richer dive into home storage, consult educational guides and expert commentary to keep your setup simple, secure, and scalable without guesswork.

Q12. Final check: which path should I choose today?

If you want the fastest route with minimal gear, choose a camera with a microSD (micro Secure Digital) slot and enable event-only recording with H.265 or HEVC (High Efficiency Video Coding). If you want centralized control for several rooms, a hub with USB (Universal Serial Bus) storage or a compact NVR (Network Video Recorder) will give you longer retention and easier multi-camera browsing. Power users who already own a NAS (Network Attached Storage) can add surveillance apps, tie in RTSP (Real Time Streaming Protocol) streams, and scale as needed with RAID (Redundant Array of Independent Disks) for resilience. Whichever path you pick, spend five extra minutes on security basics and you will enjoy fast playback without monthly fees.

Industry surveys suggest that over half of smart-camera buyers now consider local storage essential, and endurance cards plus efficient codecs extend lifespan enough for most homes. That means you can protect your space with retained history that actually sticks around when you need it. Ready to put knowledge into action and choose the right camera and storage method for your home? Use this guide and independent resources for practical, field-tested guidance whenever you need it.

Which indoor security camera offers local storage: the bottom line

You now have a clear, practical path to capture, store, and secure home video locally without the headaches. In the next 12 months, expect smarter on-device AI (Artificial Intelligence), better H.265 or HEVC (High Efficiency Video Coding) efficiency, and more cameras offering encrypted, card-based recording. What will your setup look like when you apply these steps and decide which indoor security camera offers local storage that matches your space and habits?

Additional Resources

Explore these authoritative resources to dive deeper into which indoor security camera offers local storage.

Master Local-Storage Indoor Cameras

Find in-depth gadget reviews and comparisons so adults and tech-savvy consumers can choose indoor cameras with local storage confidently; consult independent reviews, product highlights, and curated recommendations.

See Local Picks

How to Choose Travel Friendly USB C Chargers with Multiple Ports: Expert Tests, TSA Tips & Fast GaN Picks

Shop On Amazon Now

How to Choose Travel Friendly USB C Chargers with Multiple Ports: Expert Tests, TSA Tips & Fast GaN Picks

If you juggle a phone, laptop, earbuds, and a smartwatch, the right power brick can feel like a tiny passport to stress-free charging. The smartest choice today is travel friendly usb c chargers with multiple ports, because they consolidate cables, unlock faster speeds, and make the most of scarce outlets. Yet with specs like GaN [Gallium Nitride], Universal Serial Bus Type-C [USB-C] Power Delivery [PD] and Programmable Power Supply [PPS], it is easy to feel lost. At High Tech Reviews, we cut through the jargon with hands-on testing, practical travel tips, and clear feature checklists so you can pick a compact charger that fits your gear, your suitcase, and your itinerary.

Key Specs That Define Travel Friendly USB C Chargers with Multiple Ports

The first spec to decode is total output. Think of total output as the size of a water tank, while each port acts like a faucet; the more water the tank holds, the more devices you can run at once without drips turning into trickles. Modern chargers built with GaN [Gallium Nitride] components reach higher power in smaller bodies, so a palm-size unit can deliver sixty-five to one hundred forty watts of continuous power. Look for Power Delivery [PD] version 3.0 or 3.1 for laptop-class charging and PPS [Programmable Power Supply] for phones that modulate voltage in tiny steps to stay cool and fast. Also check dynamic power distribution, which smartly shifts power when you plug or unplug a device so your laptop does not lose steam when your phone hits eighty percent and tapers down.

Next, consider physical design and safety. If you travel in the United States or Japan, folding prongs reduce snags; if you roam globally, interchangeable plug heads or a compact universal adapter keep you covered without adding bulk. Weight matters on long hauls, and a difference of fifty grams can be felt after three airport transfers. Prioritize recognized thirdโ€‘party safety approvals such as Underwriters Laboratories [UL] or equivalent national marks, and also confirm CE [Conformitรฉ Europรฉenne] marking (a manufacturerโ€™s declaration of conformity for the European market) and FCC [Federal Communications Commission] compliance for electromagnetic emissions; in addition, look for protections including overcurrent, overvoltage, and thermal cutoffs. Finally, remember that cables are part of the system; for Power Delivery [PD] above one hundred watts (PD 3.1 Extended Power Range), use an electronically marked Universal Serial Bus Type-C [USB-C] cable that explicitly supports the higher EPR voltages and the five-ampere current rating required by the USBโ€‘IFโ€”otherwise the charger and device will negotiate a lower safe power level.

  • Power Delivery [PD] and PPS [Programmable Power Supply]: faster, cooler phone charging and stable laptop power
  • GaN [Gallium Nitride] internals: higher efficiency and smaller size
  • Dynamic power sharing: automatic juggling when multiple devices are connected
  • Safety marks: recognized thirdโ€‘party safety approvals (e.g., Underwriters Laboratories [UL]) and regulatory conformity marks such as Conformitรฉ Europรฉenne [CE] and Federal Communications Commission [FCC] where applicable
  • Travel readiness: folding prongs or swappable plug heads, universal input from one hundred to two hundred forty volts
Spec or Feature What It Means Benefit When Traveling
Total Output in watts Combined power available across all ports Runs a laptop and phone at once without slowdowns
Ports mix (Universal Serial Bus Type-C [USB-C] and Universal Serial Bus Type-A [USB-A]) Number and type of connections Supports legacy accessories and modern fast-charging devices
Power Delivery [PD] and PPS [Programmable Power Supply] Standards for negotiated fast charging Shorter charge times with cooler device temps
GaN [Gallium Nitride] More efficient switching transistors Smaller, lighter body with less heat
Certifications (thirdโ€‘party safety approvals e.g., Underwriters Laboratories [UL]; CE marking and FCC compliance where applicable) Thirdโ€‘party safety approvals and regulatory conformity/EMC compliance Peace of mind in hotels and airports

Why Multi-Port Universal Serial Bus Type-C [USB-C] Chargers Matter for Travel Today

Airports, trains, and hotel rooms rarely offer more than a couple of usable sockets, and those sockets are often inconveniently placed. A multi-port charger turns one outlet into a quiet little charging station, topping up your phone while feeding your laptop and smartwatch overnight. On a recent red-eye, we watched a traveler power a lightweight laptop, true wireless earbuds, and a phone from a single compact brick tucked behind the seat, proof that consolidation pays off in real space and real time. Industry surveys suggest the average traveler now carries between three and four connected devices, and a single, well-chosen charger keeps them all humming without a messy tangle of wall warts.

Real-World Expert Tests: How We Evaluate Safety, Speed, and Reliability

At High Tech Reviews, we run each charger through repeatable lab scenarios that mirror travel realities. We verify handshake profiles with a Universal Serial Bus [USB] protocol analyzer to confirm Power Delivery [PD] and Programmable Power Supply [PPS] support, then load ports with phone, tablet, and laptop power draws to observe dynamic sharing. We test at one hundred twenty volts Alternating Current [AC] and two hundred thirty volts Alternating Current [AC] to simulate North American and international grids, monitoring temperature with a thermal camera during a thirty-minute full-load run. We also log charge curves from ten percent to eighty percent on modern phones and from twenty percent to one hundred percent on ultraportable laptops, since these ranges reveal how a charger manages early fast ramps and late tapering.

Reliability is about more than speed, so we track power ripple and peak temperatures along with efficiency. In our experience, many GaN [Gallium Nitride] designs deliver two to five percentage points higher efficiency than similar silicon chargers, which matters when outlets are loose and heat builds in cramped spaces. We look for steady direct current under fluctuating loads, minimal audible coil noise, and no unexpected resets when you add or remove a device mid-charge. Finally, we inspect build quality, seeking snug port fit, smooth folding prongs, and secure plug adapters that do not wobble in worn hotel outlets, because small mechanical details become big headaches at two in the morning before a flight.

Test Metric Why It Matters Preferred Outcome
Power handshake profiles (Power Delivery [PD], Programmable Power Supply [PPS]) Ensures the charger negotiates optimal voltage and current Full advertised profiles available on every Universal Serial Bus Type-C [USB-C] port
Thermal stability under load Heat affects speed and long-term reliability Surface temperatures that stay comfortable to the touch during extended use
Dynamic power redistribution Multiple devices compete for power Smooth shifts with no device disconnects or throttling
Efficiency at global voltages Travel involves different grids and frequencies Consistent efficiency at one hundred twenty and two hundred thirty volts
Safety and compliance Verification of safety approvals and emissions compliance Thirdโ€‘party safety approvals (UL or equivalent) and appropriate CE/FCC compliance present

Transportation Security Administration [TSA] and Global Plug Tips: Pack Smart, Charge Anywhere

Shop On Amazon Now

The Transportation Security Administration [TSA] allows wall chargers in both carry-on and checked baggage, but we recommend carrying chargers in your personal item so you can power up during delays. Place your charger and cables in an easy-access pouch; if you use a bag organizer, label Universal Serial Bus Type-C [USB-C] and Universal Serial Bus Type-A [USB-A] cables so you do not hold up a line while digging for the right one. Power banks must go in carry-on and are limited by watt hours, but chargers are not energy storage devices, so they are generally unrestricted. For a fast checkpoint experience, keep liquids, laptops, and charging gear separated by pouch, which makes inspection smoother and reduces the chance of items being misplaced in bins.

Globetrotting adds a second layer: plug shapes and voltage. Most quality chargers accept a universal input from one hundred to two hundred forty volts at fifty or sixty hertz, which means only the plug shape needs to change as you cross borders. If you do not want to pack a bulky universal adapter, choose a charger with swappable regional heads for North America, Europe, the United Kingdom, and Australia. In older buildings overseas, outlets can be recessed or loose, so a low-profile charger with a short Universal Serial Bus Type-C [USB-C] cable avoids stress on the socket. When in doubt, check hotel photos or traveler forums to confirm outlet types at your destination, and bring a tiny spare cable just in case one fails mid-trip.

Region Typical Plug Voltage and Frequency Traveler Tip
North America Two flat blades, optional ground pin About one hundred twenty volts, sixty hertz Use folding prongs to save space in slim power strips
Continental Europe Two round pins About two hundred thirty volts, fifty hertz Carry a slim adapter; some hotels offer multi-standard outlets
United Kingdom and Ireland Three rectangular blades About two hundred thirty volts, fifty hertz Choose a charger with a native head or a compact grounded adapter
Australia and New Zealand Two angled flat blades, optional ground pin About two hundred thirty volts, fifty hertz Mind outlet orientation; short cables reduce strain on the plug
Asia, mixed standards Varies by country Usually one hundred to two hundred forty volts Confirm plug type for each country on your route before packing

Fast GaN [Gallium Nitride] Picks by Use Case: Phones, Laptops, and Beyond

Rather than chasing the highest number on a box, match power to your kit and your habits. Many phones charge fastest between twenty and forty-five watts via Power Delivery [PD] and Programmable Power Supply [PPS], while ultraportable laptops often draw about sixty-five watts and creator-class laptops may ask for one hundred watts or more. If you commonly charge everything overnight, select more total power than you strictly need so the charger runs cool and quiet. If you top up throughout the day, prioritize compact size and a port layout that keeps your most used Universal Serial Bus Type-C [USB-C] cable front and center for quick plug-ins at airport lounges and conference tables.

Traveler Profile Recommended Total Power Suggested Port Mix Why It Works
Phone first, light tablet Forty-five to sixty-five watts Two Universal Serial Bus Type-C [USB-C], one Universal Serial Bus Type-A [USB-A] Fast phone charging with a spare port for earbuds or a reader
Ultraportable laptop + phone Sixty-five to one hundred watts Two or three Universal Serial Bus Type-C [USB-C], optional Universal Serial Bus Type-A [USB-A] Room to run the laptop while topping up the phone and watch
Creator laptop + multiple accessories One hundred to one hundred forty watts Three Universal Serial Bus Type-C [USB-C], one Universal Serial Bus Type-A [USB-A] High headroom for demanding workloads and camera batteries
Family or duo travelers Ninety to one hundred twenty watts Three or four ports, mix of Universal Serial Bus Type-C [USB-C] and Universal Serial Bus Type-A [USB-A] Share one outlet without slowdowns during peak charging
  • If your laptopโ€™s original adapter lists sixty-five watts, aim for at least that total, plus twenty to forty watts of buffer for other devices.
  • For phones that support Programmable Power Supply [PPS], prioritize chargers that list PPS to reduce heat and charge more quickly.
  • Pack one long cable for hotel beds and one short cable for cafes; both should be high-quality Universal Serial Bus Type-C [USB-C].

Buyerโ€™s Checklist, FAQs, and Mistakes to Avoid

Before you click buy, map your devices and their needs. Write down each item, its maximum charging rate, and whether it uses Universal Serial Bus Type-C [USB-C] or Universal Serial Bus Type-A [USB-A], then choose a charger whose total power and port layout match that map. Verify safety approvals and global voltage support, confirm Power Delivery [PD] and Programmable Power Supply [PPS] for fast standards, and add one eโ€‘marked Universal Serial Bus Type-C [USB-C] cable that supports the required five-ampere current and the higher PD 3.1 EPR voltages if your laptop can draw more than one hundred watts. High Tech Reviews exists to make this simple; our in-depth gadget reviews and comparisons, expert commentary, and curated travel accessories give you confidence that what you pack is both efficient and safe.

  • Common mistake: assuming all Universal Serial Bus Type-C [USB-C] ports are equal. They are not; check per-port power ratings.
  • Common mistake: forgetting cable ratings. Under-specced cables bottleneck performance and can get warm.
  • Common mistake: buying a giant brick you will not carry. The best charger is the one that fits your bag and habits.
  • FAQ: Will a higher wattage charger harm my phone? No, Power Delivery [PD] negotiates the right level; the phone draws only what it needs.
  • FAQ: Do I need a surge protector when traveling? Hotels can have noisy power; a quality charger with proper protections is usually enough, but a small travel surge strip adds peace of mind.
  • FAQ: Can one charger do everything? Often yes, but creators with high-draw laptops sometimes carry a second lightweight unit as a backup.

At High Tech Reviews, we know consumers often struggle to find reliable information amid marketing buzzwords, which is why we publish structured tests, product highlights, and scenario-based picks that reflect how people actually travel. Our comprehensive guides for smart home and fitness devices also help you see how a charger fits into a wider personal tech ecosystem, from gym bag to airport gate. If you want curated options without the guesswork, bookmark us and return before your next trip for fresh lab data and new travel accessories vetted by our team.

Comparison-Free Feature Matrix: Match Needs to Capabilities

Shop On Amazon Now

Rather than pitting products against each other, the easiest path is aligning your needs with feature categories. Use the matrix below to translate common goals into practical specifications, then check that your short list meets those boxes. It is the same approach we use internally at High Tech Reviews to keep recommendations fair, consistent, and focused on outcomes. Start with your device list, choose the power class that covers your heaviest draw, and ensure there is at least one spare port so you can add a device mid-trip without reprioritizing.

Your Goal Minimum Specs to Seek Nice-to-Have Extras
Fast phone top-ups between gates Universal Serial Bus Type-C [USB-C] with Power Delivery [PD] and Programmable Power Supply [PPS], forty-five watts total Compact GaN [Gallium Nitride] body, folding prongs, airline-seat-friendly short cable
Work from hotel with an ultraportable laptop Sixty-five watts total, two Universal Serial Bus Type-C [USB-C] ports with Power Delivery [PD] Third port for a watch, night-stand power indicator that is dim or switchable
Family charging station on vacation Ninety watts total, three or four ports, mix of Universal Serial Bus Type-C [USB-C] and Universal Serial Bus Type-A [USB-A] Included travel pouch, clearly labeled ports, detachable power cable for reach
Creator workflow with a high-draw laptop One hundred to one hundred forty watts total, at least two high-power Universal Serial Bus Type-C [USB-C] ports E-marked cable supporting required current and voltage, thermal performance verified under sustained loads

High Tech Reviews was built to solve one problem: people want trustworthy, detailed guidance tailored to their lifestyle. Our expert reviewers stress-test chargers, highlight the details that matter, and assemble curated picks so Adults and tech-savvy travelers can buy once with confidence. When you want clear advice for travel friendly usb c chargers with multiple ports, we are here to help with in-depth explainers and field-tested insights.

Safety and Certification Snapshot

Safety is nonnegotiable when your charger will live in airport lounges and hotel rooms. Always look for credible marks such as Underwriters Laboratories [UL] for safety, Conformitรฉ Europรฉenne [CE] for European market conformity, and Federal Communications Commission [FCC] for electromagnetic emissions. For reference, many reputable manufacturers also follow International Electrotechnical Commission [IEC] standards for creeping distances and clearance inside compact designs. If you are ever unsure, search the listing number on the certification bodyโ€™s database; it takes a minute and can save hours of headaches later.

Mark Meaning What You Gain
Underwriters Laboratories [UL] Independent safety evaluation for electrical products Confidence in thermal and fault protection design
Conformitรฉ Europรฉenne [CE] Manufacturer declaration of conformity for European requirements Assurance of baseline safety and environmental compliance
Federal Communications Commission [FCC] Limits on electromagnetic interference Reduced risk of noise affecting radios or headphones
International Electrotechnical Commission [IEC] references Design guidelines for insulation, spacing, and testing Better resilience under varied global power conditions

One closing tip on safety: avoid bargain-bin adapters at airport kiosks with no clear markings. A well-made GaN [Gallium Nitride] charger paired with certified cables may cost a bit more upfront but pays you back through cooler operation, reliable handshakes, and fewer surprises when every minute matters between connections.

Conclusion

From specs to security, you now have a clear path to a compact, fast, and safe travel charging setup.

In the next twelve months, chargers will get even smaller as GaN [Gallium Nitride] components improve and Power Delivery [PD] 3.1 becomes more common across laptops and tablets.

What mix of ports, power, and features will make your next trip smoother with travel friendly usb c chargers with multiple ports?

Additional Resources

Explore these authoritative resources to dive deeper into travel friendly usb c chargers with multiple ports.

Charge Smarter On The Go With High Tech Reviews

Get in-depth gadget reviews and comparisons that help Adults and tech-savvy consumers choose travel friendly USB-C [Universal Serial Bus Type-C] chargers with multiple ports and discover the best technology solutions.

See Top Picks

What should I consider before buying a smart home system

Shop On Aamzon Now

Shopping for a smart home system can feel exhilarating and overwhelming at the same time, which is why starting with a clear plan and reliable information is the surest way to separate shiny gadgets from meaningful upgrades. Instead of asking what the newest device can do, ask how your morning, workday, and bedtime routines might change when the lights, climate, and security quietly coordinate on your behalf, because a system is only as good as the daily friction it removes. Adults and tech-savvy consumers often juggle fitness technology, travel gear, and lifestyle upgrades already, so it helps to build a simple vision first, then choose components that align with it rather than collecting mismatched parts. This article provides practical guidance, commentary, and a versus lens to help you evaluate each crossroad clearly.

Needs vs Wants: Clarify Your Smart Home Goals

Before adding devices, outline what you want your home to do automatically and why, because clarity early on prevents costly rework later. Think beyond the novelty of voice commands and consider repeatable moments such as arriving home with groceries, ensuring the entry is lit and unlocked, or maintaining a consistent bedroom temperature that supports better sleep without micromanaging the thermostat. For many households, the best outcomes come from connecting lighting, security, and heating, ventilation, and air conditioning (HVAC) into simple scenes, such as Good Night and Away, which then expand over time as needs evolve. Industry surveys in 2024 suggested that energy management, convenience, and safety remain the top three reasons for adoption, and those motivations translate into concrete requirements you can plan for.

If you are unsure how to prioritize, draft two lists: outcomes you need within 30 days and improvements that can wait six months, then measure every purchase against those lists. A need might be reliable porch awareness that captures deliveries and deters theft, while a want might be color-changing living room lamps for ambiance during movie night, and both can be valid when sequenced well. Imagine you are building an orchestra rather than buying solo instruments, because the magic comes from the timing between devices, not the device alone. This mindset also helps you evaluate hub apps versus mixing ecosystems, since one app that gets 90 percent of your routines right may beat three apps that never quite stay in sync.

  • Need examples: smoke and carbon monoxide alerts, entry awareness, climate scheduling, water leak detection.
  • Want examples: color scenes, holiday automations, garden lighting, custom chimes.
  • Accessibility goals: voice prompts, large-font dashboards, door sensors tied to notifications for caregivers.
  • Travel-friendly goals: vacation mode, presence simulation, power monitoring for critical appliances.

DIY (do it yourself) vs Professional Installation

Choosing between DIY (do it yourself) and professional installation is really about risk tolerance, time, and the complexity of your blueprint rather than technical bravery alone. DIY (do it yourself) shines when you want full ownership, easy upgrades, and lower upfront costs, especially for battery sensors, smart plugs, and lighting where no high-voltage wiring is touched. Professional installation makes sense when dealing with wired doorbells, whole-home lighting circuits, garage controllers, or panel-connected security, where code compliance, safety, and clean cable runs matter. If you rent or expect to move within a year, keep the system portable and rely on peel-and-stick gear, but if you are settled and renovating, a pro can align wiring, recessed sensors, and networking in one coordinated plan.

Several practical cues can guide your choice without guesswork. If a task involves mains electricity, structural drilling, or more than two hours of ladder time, consider hiring help for at least that subset of work for safety and warranty protection. When you want advanced automations such as occupancy sensing that blends motion, door state, and light levels, professionals often bring scene design experience that saves days of trial-and-error. Either way, reserve a small budget for training and documentation, because a 30-minute walkthrough on app basics, naming conventions, Internet Protocol (IP) addressing, and backup strategies often prevents months of frustration, and a labeled breaker panel plus a simple diagram can be worth its weight in gold.

  • DIY (do it yourself) is ideal for renters, battery devices, plug-in lamps, and tabletop sensors.
  • Professional help is ideal for high-voltage lighting, door strikes, built-in shades, and attic cabling.
  • Hybrid approach: you mount sensors and set scenes, while a licensed electrician handles high-voltage connections.

Local Control vs Cloud Reliance

Local control means your automations run on a hub or device inside your home, while cloud reliance means routines depend on an internet service, and each approach offers distinct trade-offs. Local-first setups tend to be faster and keep more data in-house, reducing exposure while maintaining responsiveness during internet outages, and they are great for lighting, presence, and security scenes that must work every time. Cloud features often deliver advanced capabilities such as natural-language assistants and computer vision powered by artificial intelligence (AI), but those perks can come with subscription fees, latency, and the need for a stable connection, so choose carefully where cloud reliance is genuinely worth it. Many buyers land on a hybrid where critical automations remain local and cloud services handle heavy processing, remote access, and notifications, which balances resilience with convenience.

Privacy policies, encryption standards, and on-device settings deserve more than a quick skim, because they determine how your household data travels and who can see it. Look for clear options to store video locally on network storage or encrypted memory cards, strong authentication such as passkeys and multi-factor authentication, and automatic over the air (OTA) updates that patch vulnerabilities without manual effort. Favor devices that publish an application programming interface (API) or support the Matter interoperability standard, which helps you avoid lock-in and integrate across platforms through a common language. The goal is not to avoid the cloud at all costs, but to reserve it for the tasks that truly need it while letting everyday automations hum along privately on your local network.

  1. Keep critical scenes local first: lights, locks, and alarms should work during internet outages.
  2. Use cloud selectively: remote check-ins, voice assistants, and complex analytics can live off-site.
  3. Review data controls: retention length, sharing options, and export tools signal a mature privacy posture.

Wireless Protocols: Wi-Fi (wireless fidelity) vs Thread vs Zigbee (IEEE 802.15.4 mesh standard) vs Z-Wave (sub-GHz mesh standard)

Shop On Amazon Now

Your choice of wireless protocol determines reliability, range, battery life, and whether you need a hub, so it is one of the most consequential versus decisions you will make. Wi-Fi (wireless fidelity) now offers impressive throughput and direct app access, but it draws more power and can crowd your router if dozens of devices connect, so it suits cameras, speakers, and plugs best. Thread, an Internet Protocol (IP) based mesh standard, is efficient and resilient, allowing low-power sensors to form a self-healing network that scales neatly across rooms and floors, and it pairs well with the Matter standard for broad interoperability. Zigbee, based on the IEEE 802.15.4 mesh standard, is mature and widely supported, while Z-Wave, operating on sub-gigahertz bands measured in megahertz rather than gigahertz, often travels farther through walls with less interference; both typically rely on a hub, which can centralize logic and reduce Wi-Fi load.

Protocol Best Use Typical Range Power Needs Hub Required Interference Risk Notes
Wi-Fi (wireless fidelity) Cameras, speakers, smart plugs Whole-home with strong router Higher No Moderate on 2.4 GHz (gigahertz) Direct control but can congest networks
Thread Sensors, locks, lighting Room-to-room via mesh Very low Border router Low Internet Protocol (IP) based, pairs well with Matter
Zigbee (IEEE 802.15.4 mesh standard) Lighting, switches, sensors Room-to-room via mesh Low Yes Low to moderate Mature ecosystem with many device types
Z-Wave (sub-GHz mesh standard) Locks, sensors, controls Good wall penetration Low Yes Low Sub-gigahertz often reduces interference
  • Mixing protocols is common: use Wi-Fi (wireless fidelity) for bandwidth-hungry gear and mesh for sensors.
  • Mesh networks improve with more powered nodes such as always-on light switches and plugs.
  • Favor Matter-capable devices to preserve cross-platform flexibility as your setup grows.

Budget: Upfront vs Lifetime Cost of Ownership

The smartest budget accounts for both what you pay today and what you will spend to keep the system trustworthy, fast, and secure over time. Upfront costs include devices, a hub or bridge if your chosen protocol needs one, installation labor if you hire it, and any networking upgrades such as better routers or additional access points. Lifetime costs include cloud subscriptions, storage for video if you record footage, replacement batteries, occasional device upgrades as standards evolve, and the modest energy draw each device adds, measured in kilowatt-hour (kWh). A helpful rule of thumb is to reserve 10 to 20 percent of the hardware total for ongoing expenses, because software updates, extended warranties, and replacement parts can arrive exactly when you are not expecting them, and a small reserve protects the experience you built.

Category What It Covers Typical Cost Range When It Appears Tips to Reduce Spend
Devices Sensors, switches, locks, cameras 20 to 300 USD per device Upfront Bundle purchases, prioritize rooms you use daily
Hubs or Bridges Protocol translators and local automation 50 to 300 USD Upfront Choose multi-protocol hubs supporting Matter
Installation Professional wiring and configuration 100 to 1000 USD per project Upfront Use a hybrid approach, DIY (do it yourself) simple tasks
Networking Routers, access points, cabling 100 to 500 USD Upfront Audit coverage first, relocate gear before buying
Subscriptions Cloud video, extended features 3 to 20 USD per month Ongoing Prefer local recordings, evaluate free tiers annually
Energy Standby power and charging 1 to 5 USD per device yearly Ongoing Favor low-power protocols and schedules

How reviews and comparisons guide better decisions

When every product page looks perfect, independent analysis becomes your compass. In-depth gadget reviews and comparisons translate technical specs into how a device actually feels to live with, whether it is a motion sensor that avoids false alarms, a thermostat that respects your sleep schedule, or a lock that always responds on the first try. Reputable sources pair lab-style measurements with real-world tests, documenting latency, battery life, and integration reliability so you can see not only how something works on day one but also how it behaves after months of updates and weather changes. Readers often consult expert commentary on trending high-tech tools, comprehensive guides for smart home and fitness devices, and curated selections of travel and lifestyle accessories that complement connected living without adding complexity.

Because consumers often struggle to find reliable information that maps to their lifestyle and budget, scenario-based recommendations make next steps obvious. For a busy household, that might mean prioritizing leak sensors and entry awareness first, then layering energy monitoring in the laundry room where usage spikes, and only later adding colorful lighting to key rooms. For frequent travelers, it might be a stable local-first hub plus cloud notifications, backed by clear privacy controls and power monitoring on the fridge and sump pump for peace of mind. These resources tend to show trade-offs in plain language, offer practical checklists, and point to devices that meet those criteria today, so you can move from browsing to building with confidence and calm.

Voice Assistants vs App Automations

Shop On Amazon Now

Voice assistants are brilliant for one-off commands and accessibility, while app automations orchestrate complex, time-based, and sensor-driven routines, and together they can be greater than the sum of their parts. A hands-free voice prompt that locks the doors and arms security as you say goodnight can be reassuring, but the system should also run routines based on presence, schedules, and sensor conditions without needing to ask. App-driven scenes often allow finer control over dim levels, temperature setpoints, and conditional logic such as if light level is below a threshold and motion is detected, then brighten the hall to a gentle level that preserves night vision. Look for platforms that let you name devices clearly, assign rooms, and log actions, because clean organization and transparent histories help everyone in the home understand what is happening and why.

There is also a human factors angle worth considering as you design how control will work for guests and family members. Not everyone is comfortable barking commands or tapping through nested menus, which is why a few well-placed wall controls and consistent scene names go a long way in reducing confusion. Consider using light-emitting diode (LED) indicators on switches for at-a-glance status, and keep critical scenes like Away, Good Night, and Movie in the same locations across rooms, because muscle memory beats cleverness every time. Finally, write down your top five scenes on a small card and keep it in a drawer, since a simple reference can turn first-time visitors into confident users in seconds.

Security and Privacy: Convenience vs Control

Security features are compelling precisely because they promise peace of mind, yet they also introduce sensors, microphones, and cameras into private spaces, so convenience and control must be balanced thoughtfully. Favor systems that support strong encryption, device-level passcodes, and optional virtual private network (VPN) access when you connect remotely, then test those features as part of your setup rather than assuming they work. Choose devices with hardware switches or software toggles to disable microphones and cameras when not in use, and confirm that you can set fine-grained permissions for household members and guests. The best solutions make privacy normal by design, with clear storage options, straightforward export tools, and readable logs that show exactly when a door opened, a clip uploaded, or an update installed.

As you calibrate sensitivity, remember that false alarms erode trust faster than anything else, which is why sensor placement and scene logic deserve a patient, iterative approach. Start by enabling alerts during the day when you can observe behavior and dial back the thresholds, then extend that configuration to night and away modes, keeping different volumes and actions for each. If you log an event that surprises you, ask whether the trigger was reliable, meaningful, and timely, and adjust accordingly, because tuning is where a smart home graduates from interesting to indispensable. Building with intention ultimately puts you in control, delivering the security and privacy you want without turning your home into a blinking, beeping gadget museum.

Final Thoughts

Every great smart home starts with clear priorities, sensible trade-offs, and a step-by-step plan you can live with. In the next 12 months, interoperability will continue to improve as standards mature, making it even easier to blend local reliability with cloud-powered intelligence. What is the very first routine you want to run tomorrow morning, and how will reviews and comparisons help you choose the right parts to make it happen?

Additional Resources

Explore these authoritative resources to dive deeper into smart home device reviews and comparisons.

Level Up Your Smart Home Choices with High Tech Reviews

Explore resources and articles to help adults and tech-savvy consumers evaluate gadgets, product highlights, and recommendations to inform technology choices.

Explore Top Picks

How to Pick the Right Action Camera for Travel Vlogs: A 7-Step Travelerโ€™s Checklist for Lightweight, Pro-Looking Footage

Shop On Amazon Now

If you want travel vlogs that look polished without weighing down your pack, you need a plan for how to pick the right action camera for travel vlogs. The best choice matches your filming style, not just a spec sheet. In this guide, you will learn a clear process that balances image quality, stabilization, audio, and portability so your stories feel immersive and authentic. Along the way, you will see practical checklists, spec thresholds, and actionable tips to help you buy with confidence.

Why does this matter now? Short-form and long-form travel videos continue to surge, and industry surveys suggest over seven in ten travelers watch creator videos before booking a trip. That attention flows to creators who pair engaging storytelling with crisp visuals and clean sound. With a lightweight action camera and a simple workflow, you can capture walk-and-talk scenes, point-of-view food tours, and water adventures that look steady and cinematic. Keep reading to turn your wish list into a seven-step travelerโ€™s checklist you can actually use in the store or on the road.

How to Pick the Right Action Camera for Travel Vlogs: The 7-Step Framework

Before you dive into settings, start with your story. Are you a city explorer filming street markets and rooftops at sunrise, or are you diving, hiking, and cycling across continents? Your narrative determines what matters most: low-light ability, rugged design, field of view, or modular audio. This framework starts with defining your scenes, then moves through image quality, stabilization, sound, power, durability, and accessories. Each step includes simple actions you can take tonight to vet a camera using sample clips and a five-minute test plan.

This guide focuses on in-depth gadget explanations and practical breakdowns that translate complex tech into clear choices. Commentary highlights which features genuinely improve your footage and which are just marketing. If you prefer skimming, scan the tables below and the seven-step travelerโ€™s checklist, then save the spec thresholds as a quick reference when you visit a store or shop online. Ready to build your shortlist?

The 7-Step Travelerโ€™s Checklist

Step 1: Define Your Story and Typical Scenes

Great gear serves your story. List the top five moments you actually film in a typical week: walking narration, handheld food tastings, scooter rides, snorkeling, or mountain treks. Then note the light levels, your movement, and whether you can use two hands or need a hands-free mount. This simple inventory clarifies your needs more than reading ten spec pages. For example, night markets need good low-light performance and clean audio in noisy spaces, while cliff jumps require strong waterproofing and reliable stabilization.

  • Action: Write three locations you will film on your next trip and what could go wrong in each scene.
  • Tip: If most of your shots are face-to-camera, prioritize microphones and wind control as much as resolution.
  • Try: Record a one-minute walk-and-talk on your current device to identify what you dislike: shakiness, wind noise, or clipped highlights.

Step 2: Choose Resolution, Frame Rate, and Color

Resolution and frame rate drive clarity and motion smoothness. Aim for Ultra High Definition 4K (approximately four thousand horizontal pixels) at 60 frames per second for action and 30 frames per second for narrative shots. If you love slow motion, ensure 120 frames per second at 1080p (one thousand and eighty pixel height) looks clean, not mushy. Look for ten-bit color depth for richer skies and better latitude in grading, plus a logarithmic gamma profile option if you plan to color correct. Most viewers watch on phones, but extra resolution helps you crop and straighten horizons without sacrificing detail.

  • Action: Download two sample clips at 4K (approximately four thousand horizontal pixels) 60 frames per second and 120 frames per second from the manufacturer site and view on a large screen.
  • Tip: If sunsets are your thing, high dynamic range capture helps protect bright highlights and shadow detail.
  • Good-to-know: A bitrate above 100 megabits per second reduces blocky artifacts in waves, leaves, or rain.

Step 3: Prioritize Stabilization and Horizon Leveling

Nothing ruins a beautiful scene like hard jello wobble or micro-judder. Modern electronic image stabilization uses gyro data to cancel bumps and footsteps. Look for strong stabilization modes plus horizon leveling that keeps the horizon flat even when the camera tilts. Test a quick jog, stair descent, and side-to-side sway. For cycling or trail runs, strong stabilization can feel like a virtual gimbal, but it sometimes crops the image, so make sure the field of view still fits your style.

  • Action: In-store or at home, record a thirty-second clip while walking briskly and turning corners.
  • Tip: If you film inside museums or at dusk, use a lower stabilization strength to avoid strange warping in low light.
  • Bonus: A linear lens mode reduces fisheye distortion for natural-looking faces.

Step 4: Evaluate Low Light and Dynamic Range

Travel does not stop when the sun sets. Night markets, alleyways, and interiors challenge small sensors. You want clean shadows, accurate skin tones, and controlled highlight roll-off. Compare sample clips at twilight, candlelight, and under mixed street lamps. Sensors with larger pixel sites gather more light, while modern noise reduction can preserve detail without smearing. If possible, check a logarithmic gamma profile sample graded lightly to see whether colors hold up after edits.

  • Action: Turn off the lights and film a face lit by a single lamp for ten seconds, then step into a brighter room.
  • Tip: Use a neutral density filter outdoors to keep a natural shutter speed and avoid choppy motion.
  • Reality check: If low light is a top priority, expect to carry a tiny on-camera light for close subjects.

Step 5: Get Serious About Audio

Viewers forgive an occasional soft shot, but they will leave if your audio is harsh or windy. Look for a clean internal microphone array with directional pickup and effective wind suppression. For interviews or A-roll, you may want a 3.5 millimeter external microphone input or a small wireless lavalier kit. Check whether the camera supports digital audio via the accessory port and whether you can monitor levels on-screen. A tiny foam windscreen or furry muff can transform outdoor clarity.

  • Action: Record thirty seconds in a breeze, then say your name at armโ€™s length and one meter away.
  • Tip: For kitchens and caves, enable a low-cut filter to tame rumble from appliances or footsteps.
  • Field hack: If you cannot plug a microphone in, shield the camera from wind with your palm while speaking.

Step 6: Plan Power, Storage, and Connectivity

Great vlogs die when batteries die. Estimate a dayโ€™s filming and bring enough batteries for double your average. Fast charging via Universal Serial Bus Type-C can rescue you during lunch breaks. For storage, choose high-speed micro Secure Digital cards that sustain at least the cameraโ€™s maximum bitrate to prevent recording stops. Reliable wireless connectivity such as Wireless Fidelity helps you offload clips to a phone while commuting, and a solid companion app should allow remote framing, firmware updates, and quick edits.

  • Action: Calculate minutes you plan to shoot daily, then multiply by two to size your batteries and cards.
  • Tip: Use a dual-bay charger and a small power bank that supports Universal Serial Bus Power Delivery.
  • Safety: Format cards in-camera after backup to reduce file corruption risks.

Step 7: Confirm Durability, Mounts, and Ergonomics

Travel punishments include dust, humidity, saltwater, and drops. Look for a sealed body with a depth rating appropriate for snorkeling or rain-heavy cities. The mount ecosystem should cover chests, helmets, handlebars, clips, and suction options. Test the buttons with gloves, the screen under bright sun, and the grip with sweaty hands. Replaceable lens covers and scratch-resistant glass add long-term value, and a simple lanyard can save your camera in crowds.

  • Action: Try mounting the camera on a strap and a mini tripod, then see how fast you can switch to handheld.
  • Tip: A magnetic quick-release base speeds up transitions between mounts without missing a moment.
  • Nice-to-have: Voice control helps start recordings when the camera is out of reach.

Spec Thresholds and Settings Cheat Sheet

Shop On Amazon Now

Use these tables to translate your story goals into practical requirements. They avoid brand names and focus on the dials you can control. Screenshot this section so you can compare your notes to a product page later. If a feature is not listed, ask yourself whether it truly affects the stories you tell. These thresholds can be tested on real trips and used to tune settings fast so you can get back to filming.

Travel Scenario Resolution and Frame Rate Stabilization Level Field of View Audio Approach Notes
Walk-and-talk city tour 4K (approximately four thousand horizontal pixels) at 30 frames per second Medium with horizon leveling Linear or de-fished wide On-camera with wind filter or small lavalier Use a mini grip for steadier framing at eye level
Fast action cycling or skiing 4K (approximately four thousand horizontal pixels) at 60 frames per second High with boost on rough terrain Wide for speed sensation On-camera; add a foam windscreen Consider a chest or helmet mount for stable perspective
Food and markets 4K (approximately four thousand horizontal pixels) at 30 frames per second Low to avoid warping under artificial lights Linear for natural look External lavalier for interviews Enable high dynamic range or a flat profile for color grading
Snorkeling and pools 4K (approximately four thousand horizontal pixels) at 60 frames per second Medium to high Wide underwater On-camera; avoid external microphones Use a floating handle and a red filter in blue water
Night markets and interiors 4K (approximately four thousand horizontal pixels) at 24 or 30 frames per second Low to avoid micro-wobble Linear or wide External or directional on-camera microphone Carry a small fill light for faces within one meter
Creator Profile Minimum Sensor & Lens Guidance Color & Codec Guidance Bitrate Target Battery & Storage Plan
Beginner traveler Good daylight results, reliable autofocus, replaceable lens cover High dynamic range or standard color, clean straight-out-of-camera At least 80 megabits per second Two batteries, one 128 gigabyte micro Secure Digital card
Story-driven vlogger Strong stabilization, horizon leveling, linear field of view Ten-bit color depth and a logarithmic gamma profile At least 100 megabits per second Three batteries, two 128 gigabyte micro Secure Digital cards
Adventure athlete Rugged body, waterproof to 10 meters, quick-release mounts Ten-bit color depth, flat profile for grading At least 120 megabits per second Four batteries, 256 gigabyte micro Secure Digital card, power bank

On-the-Road Workflow: Batteries, Audio, and Mounts

The best camera is the one you can deploy in seconds. Keep a mini tripod or handle attached for quick walk-and-talks, and pre-label batteries with numbers so you rotate them evenly. Use a compact case that holds the body, three batteries, and two mounts with a power bank and a dual-bay charger. At lunch, plug in via Universal Serial Bus Type-C and top up while you eat. When you return to your room, back up to your phone and a small solid-state drive, then format your card only after verifying the backup.

Audio is equally systematic. Decide on two modes: everyday on-camera microphones with wind control for movement, and a lavalier for A-roll. Practice clipping the lavalier quickly and coil cables so they do not snag. For mounts, think of a tiny toolkit: a clamp for railings, a small suction cup for windows, a magnetic clip for shoulder straps, and a chest mount for biking. With these, you can switch perspectives fast without breaking your narrative flow.

  • Workflow saver: Create a preset called โ€œCity Walkโ€ with 4K (approximately four thousand horizontal pixels) at 30 frames per second, medium stabilization, linear field of view, and wind reduction on.
  • Noise control: Record 10 seconds of room tone at each location so you can smooth edits later.
  • Security tip: Add your email to the lock screen overlay and use a wrist strap in crowds.

Buying With Confidence: Questions, Testing Tips, and Real-World Scenarios

When you handle a camera in-store or watch sample footage, use a short script. Can you find core settings in under five taps? Are the menus readable in sunlight? Does the touchscreen respond with wet fingers? Start a clip, shake the camera a little, then review. If the footage passes your gut check, move to audio: speak at different distances, rotate around, then step into a breeze near the door and listen for wind control. Finally, test connectivity by pairing the companion app, remote framing, and initiating a firmware update to see how seamless updates feel.

This guide helps you bridge the gap between spec sheets and real travel. It focuses on outcomes, not hype, and offers practical suggestions for travel and lifestyle accessories that pair well with todayโ€™s action cameras. Curated lists from independent reviewers and manufacturer resources can highlight batteries, mounts, small lights, and microphone kits that suit different creator profiles. Most importantly, clear commentary on trending high-tech tools can reveal which features are maturing, which are still experimental, and which are must-haves for different creator types.

  • Ask before you buy: How many minutes of 4K (approximately four thousand horizontal pixels) at 60 frames per second can I record on one battery in 25 degrees Celsius? What changes in cold or heat?
  • Stress test: Film a street crossing with cars, people, and bright signs. Does the camera preserve highlight detail and faces?
  • Accessory check: Can you mount the camera on a strap, then move to handheld, in under fifteen seconds without tools?

Mini case study 1: A backpacker filmed a five-day city hop with two batteries, one 128 gigabyte card, and a mini tripod. By using a โ€œCity Walkโ€ preset and nightly backups, she never missed a moment, and editing was painless. Mini case study 2: A surf traveler used a floating handle, a strong mount, and a red filter in blue water. Stabilization plus horizon leveling kept wide shots smooth, and ten-bit color depth made grading waves much easier.

Quick Reference: Packing List and Setup Ritual

Shop On Amazon Now

Preparation turns good cameras into great stories. Print a one-page checklist and tape it inside your gear pouch. Starting each day with a two-minute ritual keeps your setup consistent and reduces mistakes like dead batteries or wrong settings. You can also create a tiny diagram in your notes app that shows where each piece lives in your bag so you do not fumble on the street. The goal is muscle memory that frees your mind for storytelling.

  1. Charge three labeled batteries and pack a dual-bay charger with a power bank that supports Universal Serial Bus Power Delivery.
  2. Insert a freshly formatted micro Secure Digital card and verify space on your phone and solid-state drive for backups.
  3. Set a preset: 4K (approximately four thousand horizontal pixels) at 30 frames per second, medium stabilization, linear field of view, wind reduction on, and auto white balance.
  4. Attach a mini handle, pack a clamp and chest mount, and add a lanyard or wrist strap.
  5. Place a lavalier mic and foam windscreen in an outer pocket for quick access.
  6. Clean the lens with a microfiber cloth and check the horizon leveling is enabled.
  7. Do a one-minute test clip facing and away from the sun, then review audio and exposure before leaving.

From Research to Results

Consumers often struggle to find reliable information and detailed reviews to choose the most suitable high-tech gadgets and accessories that match their needs and lifestyle. This guide collects practical considerations and step-by-step testing advice to help you make informed purchasing decisions and discover technology setups that fit your shooting style. The action camera guidance here prioritizes real travel use and links common scenes to the specs that matter, so you can buy once and tell better stories for years.

Beyond cameras, comprehensive guides for smart home and fitness devices can help ensure your ecosystem stays organized, backed up, and powered reliably while you are away. Curated accessory lists and independent reviews can help you choose mounts, batteries, and audio tools that fit a minimalist kit. And keeping an eye on commentary about trending toolsโ€”such as high dynamic range workflows, voice control enhancements, or new stabilization modesโ€”will help you know which innovations are ready for everyday use.

If you are still unsure, pick two models that meet your thresholds, borrow or rent for a weekend, and run the seven steps. Keep the one that fits your story and your hands. Consider checking how-to guides, recent reviews, and firmware notes periodically; refresh sample clips when possible so you can revisit your decision with up-to-date context whenever you upgrade.

Your Next Shot Awaits

Here is the promise: a lightweight kit, clear settings, and steady audio that make your travel vlogs look and feel professionally produced. In the next twelve months, action cameras will lean further into smarter stabilization, better low-light processing, and more intuitive editing through mobile apps. What stories will you tell when gear friction disappears and you know exactly how to pick the right action camera for travel vlogs?

Additional Resources

Explore these authoritative resources to dive deeper into how to pick the right action camera for travel vlogs.

Elevate Travel Vlog Action Cameras

Use this guide for practical commentary on trending high-tech tools, tips, and curated ideas that help adults and tech-savvy travelers choose the best action camera for travel vlogs.

Find Your Camera

No Fees, No Fuss: How to Choose Smart Doorbells With No Subscription Fees That Actually Protect Your Privacy

Shop On Amazon Now

You want peace of mind at your front door, not another monthly bill or a data headache. That is why many adults and tech-savvy consumers are searching for smart doorbells with no subscription fees that still deliver dependable security and meaningful privacy. In this friendly, expert guide from High Tech Reviews, you will learn how to spot truly private, local-first designs, avoid hidden costs, and test real performance before you buy. Along the way, you will find practical checklists, plain-language explanations, and structured tables that make the decision simple and fast.

As connected homes grow more capable, the best solutions are the ones that respect your time, your budget, and your data. A thoughtfully chosen doorbell camera can deter porch theft, document deliveries, and help you greet guests when you cannot get to the door in time. Yet not all devices are built equally, and some force cloud plans or expose too much information by default. Ready to choose with confidence and keep your footage where it belongs, in your hands?

Why Go Subscription-Free? The Real Costs and Privacy Trade-Offs

Subscriptions can be convenient, but they add up quickly over the life of a product. Industry estimates suggest that many households spend between 60 and 120 dollars per year per doorbell on cloud video plans, and that number can double when motion zones, clip history, or more cameras are added. Beyond budgets, privacy surveys from 2024 indicate that most consumers worry about how companies share doorbell video with vendors, advertisers, or third parties, especially when cloud storage is enabled by default. If you can maintain safety with local storage and strong encryption, why pay to rent access to your own front-door history?

Going subscription-free encourages a local-first approach in which your clips live on a secure digital card inside the device, a small base station in your home, or a network video recorder on your local network. This setup reduces exposure to unnecessary servers and helps you stay protected during internet outages. Moreover, it puts you in control of retention policies, sharing rules, and backups. The key is learning which models truly support local storage without forcing fees, which privacy controls are substantive rather than cosmetic, and how to validate claims before checkout.

Expense Type Typical Range Notes That Affect Total Cost
Cloud plan 60 to 120 dollars per year Often per device, increases with multiple cameras or longer clip history
Local storage media 10 to 40 dollars one-time Secure digital card or base-station drive, replace every few years for reliability
Power adapters and wiring 15 to 75 dollars one-time Doorbell transformer upgrade, angled mounts, or chime adapter
Optional recording hub 50 to 200 dollars one-time Local hub or recorder for multiple cameras, no monthly fees

Essential Privacy Features: What Matters More Than Marketing

Privacy is not a single switch; it is a system. Start by looking for end-to-end encryption, where video is encrypted on the device and only you hold the keys, not a vendor. Favor local-first operation that records and replays video without leaving your network, and let cloud be an optional add-on you can decline. Prefer on-device artificial intelligence for person, package, and vehicle detection rather than server-side analysis, because local detection means fewer data transfers and less risk of unintended profiling.

Next, evaluate granular controls that protect everyday life. You want activity zones that narrowly target walkways instead of your neighborโ€™s driveway, plus privacy zones that permanently mask sensitive areas such as a window or sidewalk. Look for a physical microphone toggle or a software control that is easy to reach from the live view. Make sure you can set clip retention by days or capacity, export only what you need, and see a clear audit trail whenever footage is shared. Do these tools exist, or are they buried behind menus and marketing language?

Privacy Feature Why It Matters How To Verify Before Buying
End-to-end encryption Prevents vendors from reading your videos Look for a published security whitepaper and user-managed keys
Local-first recording Keeps footage in your home by default Confirm playback works when the internet is disconnected
On-device detection Limits data leaving the device Check that person or package alerts work with cloud off
Activity and privacy zones Reduces false alerts and avoids oversharing Ask if zones apply to recorded clips, not just live view
Export and audit controls Lets you share precisely and track access Look for per-clip share links with expiry and access logs

Connectivity and Storage: Keep Footage Local Without Headaches

Shop On Amazon Now

Reliable power and steady connectivity make the difference between a useful doorbell and a frustrating one. Hardwired units can reuse your existing doorbell transformer, often 16 to 24 volts, for uninterrupted power and fewer battery swaps. Battery units offer flexible placement, but plan for recharging cycles based on your traffic and motion sensitivity. For network connectivity, a strong wireless network signal near the door is essential, and an Ethernet-powered design that receives data and power from one cable can be appealing when you have access to wiring. Ask yourself which path matches your home and your patience for maintenance.

Local storage comes in three common flavors. First, a secure digital card inside the doorbell is inexpensive and quick to set up, but it lives outdoors and should be replaced periodically. Second, a base station inside the home holds clips for one or more cameras, often improving battery life and adding a siren or chime. Third, a network video recorder or a media server stores continuous or event-based video from multiple devices and can display streams on your television, tablet, or desktop. Choose the approach that fits your ecosystem appetite, your retention needs, and your comfort managing files.

Storage Option Pros Considerations Best For
Secure digital card in doorbell Low cost, no hub needed, fast setup Outdoor temperature swings, device theft concerns, periodic replacement Single-door setups and renters
Indoor base station Better battery life, indoor storage, multi-camera support Extra hardware near router, power outlet required Families planning to add cameras
Network video recorder Centralized recording, long retention, robust playback More configuration, higher upfront cost Larger homes and power users

Setup Scenarios: The Right Doorbell for Apartments, Houses, and Shared Spaces

Every doorway is different, so start with your environment. In apartments where drilling is limited, look for a battery doorbell with a secure no-drill mount and a compact indoor chime. In single-family homes with existing chimes, a hardwired model saves you from charging and can leverage your current transformer. In shared spaces like duplexes, prioritize precise motion zones, tamper alerts, and a clear, friendly pre-recorded greeting that tells visitors they are on camera. A few minutes of planning here prevents months of small annoyances later.

Consider this brief story. Maya lives in a townhouse where delivery traffic is high but the porch is narrow. She chose a local-first doorbell with a wide field of view, a secure digital card in the base station, and strong activity zones that ignore sidewalk movement. Clip export is off by default, and she enabled a voice announcement for packages. The result is fewer pings, more useful clips, and no recurring bill. What mix of features would give you the same calm, tailored experience at your door?

Home Type Power Path Mounting Notes Privacy Tip
Apartment or rental Battery with indoor chime No-drill or adhesive mount; angled wedge to avoid neighborโ€™s door Use privacy zones to mask shared hallway
Single-family home Existing doorbell wiring Transformer check, optional angled mount for better face framing Enable local recording only, add two-step unlock for exports
Duplex or multi-unit Battery or wiring, depends on access Tamper-resistant screws, clear unit number labeling Restrict clip sharing, audit access monthly
  • Diagram idea: Imagine a top-down sketch showing your door, walkway, and street. Draw a 140-degree cone for camera view and mark activity zones to exclude sidewalks and roads.
  • Practical step: Stand where visitors normally stop and note their height relative to the door viewer. Adjust the mount until faces fill at least 40 percent of the frame.

Testing Tips and Real-World Benchmarks Before You Buy

Before committing, try to test the basics that matter daily. Image quality should preserve faces in bright daylight and in tricky shadows near the porch roof, so look for high dynamic range and night modes that do not blow out reflective surfaces. Motion alerts should arrive quickly and consistently, and a good target is under two seconds from motion to notification on a reliable wireless network. Finally, audio quality can make or break conversations, so test echo cancellation at different distances and verify there is a quick, obvious mute toggle for privacy.

Security testing is just as important. First, confirm that the doorbell records and replays video locally while your internet is unplugged, proving it is really local-first rather than cloud-dependent. Second, check that the mobile app supports two-factor authentication, ideally with a time-based one-time password generator rather than only text messages. Third, review how clip sharing works: can you create per-clip links that expire, require a passcode, and leave an access log? When you can answer yes to these questions, you are on your way to a privacy-strong setup.

What To Test How To Test It Good Result
Alert speed Walk past at normal pace and time the notification arrival Under two seconds, consistent across repeated trials
Low-light detail Test at dusk with porch light on and off Readable faces with minimal glare and grain
Local-only mode Unplug internet, trigger motion, then replay on home network Full recording and playback without external servers
Privacy controls Set zones, disable microphone, share one clip, review logs Easy controls, precise masking, share link with expiry

Smart Doorbells With No Subscription Fees: A Buyerโ€™s Checklist and Safe Picks

Shop On Amazon Now

Ready to choose faster and smarter? Use this concise checklist to align the device with your home and your values. Start with local-first operation that does not require sign-up or payment to record clips. Add end-to-end encryption with clear documentation and a way to control keys. Confirm on-device detection for people and packages, so you cut false alerts and keep data inside your home. Make sure the mobile app provides two-factor authentication and shows a history whenever clips are shared. Finally, verify that you can export your videos to a secure digital card, a base station, or a network video recorder without paying for a cloud plan.

Instead of chasing shiny features, think in terms of profiles that map to your needs. A battery-powered unit with an indoor base station is a quiet hero for renters who want easy installation and indoor storage. A wired unit that uses your existing transformer suits busy households that dislike charging and want maximum uptime. Power users who plan to add outdoor cameras may prefer a doorbell that speaks standard streaming and works well with a network video recorder for longer retention. Pick the profile that matches your home and you will naturally end up with the right model.

Priority Feature to Target What It Looks Like in Practice
Privacy first End-to-end encryption and local-first recording Local clips by default, cloud optional, keys you control
Low maintenance Hardwired power or long-life battery with base station Months between charges or no charging at all
Clarity High dynamic range and wide field of view Clean faces in bright sun, no fisheye distortion
Scalability Compatibility with a network video recorder Multi-camera timelines and one local archive
  • Ask for a clear privacy policy written in plain language and a security whitepaper you can read in five minutes.
  • Choose models that let you turn off remote access entirely when traveling and re-enable it with a single tap.
  • Rotate secure digital cards every two to three years to reduce wear-related failures and keep a second card as a backup.

Where High Tech Reviews Fits In Your Decision

If you have ever felt overwhelmed by specs and promises, you are not alone. Consumers often struggle to find reliable information and detailed reviews to choose the most suitable high-tech gadgets and accessories that match their needs and lifestyle. High Tech Reviews exists to simplify this process with in-depth gadget reviews and carefully structured comparisons that show you what matters, expert commentary on trending high-tech tools, comprehensive guides for smart home and fitness devices, and a curated selection of travel and lifestyle accessories that complement your setup. Our editorial process focuses on repeatable tests, plain-language explanations, and real-world scenarios that mirror how you actually live.

The result is straightforward advice you can act on today. The website provides expert reviews, product highlights, and curated recommendations that help users make informed purchasing decisions and discover the best technology solutions. For doorbells, that means we document local recording behavior with the internet unplugged, measure alert speed and night clarity, and explain settings that minimize data exposure. Prefer a quick path to action? Use our checklists to narrow your choices in minutes, then explore our deep dives when you want every detail at your fingertips.

Letโ€™s wrap with one more practical snapshot you can use during a store visit or while shopping online. Run through this three-step filter in under five minutes:

  1. Local-first confirmation: Can you record and replay without cloud sign-in or payment?
  2. Privacy essentials: Are end-to-end encryption, activity zones, and per-clip sharing with expiry clearly documented?
  3. Power and storage fit: Do power options and storage paths match your home and retention goals?

If you get three yes answers, you are on track for a secure, subscription-free experience that protects your front door and your privacy. And if you want a steady companion as you evaluate smart home and fitness technology broadly, High Tech Reviews is ready with friendly, unbiased explainers and step-by-step guides designed for adults and tech-savvy consumers.

Quick reference: Here is a compact comparison of setup friction versus privacy strength to help finalize your pick.

Path Setup Friction Privacy Strength Who It Suits
Battery doorbell with indoor base station Low High with local-only mode Renters and first-time buyers
Hardwired doorbell using existing transformer Medium High with encryption and zones Busy families and frequent delivery addresses
Doorbell plus network video recorder Higher Very high with local archives Power users and multi-camera homes

One final reminder: set a calendar nudge every three months to review your settings. Make sure privacy zones still mask what they should, clip sharing remains off by default, and any old links have expired. A few minutes of maintenance keeps your system private and your notifications useful.

Final Thoughts: Your Privacy, Your Door, Your Rules

Choose a doorbell that works for you, not the other way around. In the next 12 months, expect more local-first designs, better on-device detection, and simpler controls that make privacy the default instead of a hidden setting. How will you design your front-door experience so it is calm, secure, and respectful of everyone who passes by?

When you follow the steps in this guide, smart doorbells with no subscription fees become easy to evaluate, easy to own, and easy to trust. Imagine answering the door with confidence, knowing the video is yours alone. What is the first setting you will adjust to make your porch feel private and welcoming?

Additional Resources

Explore these authoritative resources to dive deeper into smart doorbells with no subscription fees.

Choose Smart Doorbells With No Subscription Fees Through High Tech Reviews

Adults and tech-savvy consumers get comprehensive guides for smart home and fitness devices plus expert reviews, product highlights, and curated recommendations to make informed purchases and discover best technology solutions.

Get Expert Guide

12 Durable Smartwatch Bands for Workouts โ€” Tested for Sweat, Saltwater & HIIT

Shop On Amazon Now

12 Durable Smartwatch Bands for Workouts โ€” Tested for Sweat, Saltwater & HIIT

You demand more from your gear when the workout turns explosive, sweaty, and unpredictable. That is exactly why we assembled 12 durable smartwatch bands for workouts and tested them through sweat, saltwater exposure, and High-Intensity Interval Training (HIIT) sessions. Think intense intervals, ocean dips, and long weekend runs. The goal is simple: help you find a strap that stays comfortable, resists wear, and keeps your smartwatch secure through every rep and every lap.

At High Tech Reviews, we test like everyday athletes train. We selected a range of materials โ€” from medical-grade silicone and Fluoroelastomer (FKM) to quick-drying nylon and stainless steel mesh โ€” then evaluated how each band handles wear from moisture, abrasion, and rapid movement. Along the way, we tracked drying time, hardware resilience, clasp stability, and skin comfort. You will see the highlights below, plus practical sizing tips and care advice so your next band lasts longer and feels better day in, day out.

Why Durability Matters in Training: Sweat, Salt, and Constant Motion

Sweat is salty, acidic, and persistent, and it tends to find every seam and stitch on your wrist. Sports medicine literature reports that active adults can sweat more than one liter per hour during hot-weather training, which means a band may face hundreds of hours of moisture over a season. Add outdoor runs, pool laps, or beach sessions, and you are asking your strap to withstand abrasion, salt crystals, and constant flexing without stretching out or irritating your skin.

Saltwater is particularly punishing. Chloride ions accelerate corrosion in metals and can degrade coatings if the hardware is not robust. That is why higher quality buckles use Stainless Steel 316L, and why robust elastomers, like Fluoroelastomer (FKM), resist swelling and cracking after repeated soak-dry cycles. Just as important, bands must dry quickly to prevent trapped moisture that can cause odor or rashes, especially if you wear a smartwatch for sleep tracking or daily recovery insights.

Fast movements also put unusual strain on closures and lugs. During High-Intensity Interval Training (HIIT), your wrist sees sharp accelerations that can expose weak pins or slippery finishes. A reliable strap should hold tight during kettlebell swings, rower sprints, and burpees, then remain comfortable and breathable on cool-down walks. In short, durability is not only about lasting longer; it is about staying safe, hygienic, and pleasant to wear through every kind of workout.

How We Tested for Sweat, Saltwater, and HIIT

To reflect real training, High Tech Reviews used a hybrid approach inspired by commonly referenced industry methods. Our hands-on evaluation included informal sweat soak checks and repeated wet-dry cycles, visual inspections for wear and corrosion, and dynamic wear tests during exercise to assess closure security and fit under rapid movement. While no single check perfectly mimics your routine, combining field observations and bench inspections gives a practical picture of long-term durability and comfort.

Beyond bench checks, we looked at skin feel and hygiene. Testers wore each strap during treadmill intervals, outdoor tempo runs, and strength circuits, noting breathability, micro-slip during dynamic moves, and any irritation. Because many readers wear their watches all day, we also tracked drying time after showers and swims, plus compatibility with common Global Positioning System (GPS) sports watches using 20 millimeter, 22 millimeter, and 24 millimeter lugs.

Test Condition What We Observed Notes
Sweat Soak Cycle Repeated perspiration soaks and rinses Swelling, discoloration, odor Minimal dimensional change and low odor after rinsing preferred
Salt Exposure Repeated saltwater exposure and rinses Hardware corrosion, surface wear No visible rust or compromised function is ideal
Dynamic Wear Rapid movements and exercise sessions Closure slip, pin deformation Closures should remain secure during typical HIIT and strength moves
Abrasion Repeated rubbing to simulate extended use Surface wear, fray on woven bands No exposed threads or major finish loss is preferred
Drying Time Air-dry after immersion Minutes to skin-dry touch < 30 minutes preferred for many users

12 Durable Smartwatch Bands for Workouts: Field-Tested Picks

Below are twelve field-ready options arranged by material and use case. Names describe the design so you can visualize the fit and feel. Where relevant, we note performance highlights from our hands-on and bench sessions. Use this as a guide to match your training style, skin sensitivity, and environment.

1. HydroFlex Silicone Sport Band

This is the classic gym companion made from medical-grade silicone, also known as Polydimethylsiloxane (PDMS), with a smooth finish and a pin-and-tuck closure. It stayed comfortable through interval sweat sessions and did not cause hotspots under the watch case. In our sweat checks, it showed minimal swelling and no color bleed, and it reached a skin-dry feel in about 22 minutes. If you want a soft, low-maintenance strap that cleans with soap and water, this is the no-drama, all-activity pick.

2. TrailWeave Nylon Loop

TrailWeave uses a tight, durable weave of quick-dry nylon with a low-profile hook-and-loop tab for micro-adjustments. The weave dried in around 15 minutes after rinsing, making it ideal for lunch-hour runs or humid climates. It showed no fraying after abrasion checks and stayed put during burpee sets without cutting into the skin. Runners and hikers who prefer fabric feel and precise fit will appreciate its breathable comfort.

3. TideArmor Fluoroelastomer Strap

Fluoroelastomer (FKM) is a favorite for divers and heavy sweaters because it resists oils, salt, and heat better than common silicone. TideArmor wrapped its FKM in a wave-textured underside to reduce skin contact and speed drying near the wrist. After saltwater exposure checks, the band and 316L hardware showed no corrosion or tackiness. It felt secure during rowing intervals and took about 25 minutes to feel dry, making it a robust choice for pool decks and seaside runs.

4. AirWeave Recycled Nylon Sport Loop

AirWeave uses Post-Consumer Recycled (PCR) nylon fibers to reduce environmental impact without sacrificing performance. The airy weave is resilient against odor and sheds water quickly, reaching a dry-touch threshold in roughly 14 minutes. Testers liked the featherlight feel under long-sleeve layers, and the hook-and-loop closure allowed quick tweaks when wrists swelled in heat. If sustainability matters alongside performance, AirWeave hits that sweet spot for daily training.

5. Graphite Mesh Stainless Steel Strap

This stainless steel mesh uses Stainless Steel 316L links and a robust magnetic clasp that locked in place during kettlebell swings and box jumps. While metal can feel warmer outdoors, the micro-mesh allows airflow and reduces sweat pooling on the skin. In salt-exposure checks, the mesh had no visible pitting, and the clasp remained secure during dynamic wear tests. It is a sleek, office-to-gym option when you want durability with an elevated look.

6. GripLock TPU Ridge Band

GripLock is built from Thermoplastic Polyurethane (TPU), a tough elastomer known for high tear resistance. Raised side ridges improve grip when your hands or gloves are wet, and the steel buckle is curved to reduce pinch. The band showed excellent abrasion resistance and no slip during dynamic pulls in our wear sessions. If your routines mix barbell work, circuits, and outdoor sprints, this rugged TPU design is a reliable everyday performer.

7. TerraLink Hybrid (Silicone-Nylon)

TerraLink stitches a woven nylon top to a soft silicone underside, combining the breathable feel of fabric with the skin-friendly seal of elastomer. The hybrid structure minimized sweat absorption while staying stable on wrist turns. After repeated sweat and rinse cycles, the stitching held tight with no loose ends, and drying time averaged 18 minutes. It suits athletes who want the tactile character of fabric without the maintenance of a fully woven strap.

8. SweatGuard Coated Microfiber Leather

Classic leather is not made for heavy sweat, but SweatGuard employs a polyurethane-coated microfiber that behaves like leather and wipes dry fast. The interior is smooth and slightly padded, avoiding edge bite during push-ups or rows. In our checks, the coating resisted staining in sweat exposures and passed abrasion without finish peel. Choose this if you prefer a dressier look that still tolerates moderate training and frequent cleanups.

9. QuickSnap Silicone with Quick-Release Bars

For people who swap straps often, QuickSnap includes spring bars with integrated sliders, so you can change bands in seconds. The silicone is soft yet dense, and the keeper loop has a small nub to lock the tail. During HIIT rounds, there was zero perceptible slip, and the quick-release mechanism showed no deformation after repeated swaps. It is perfect if you rotate between a lift-day strap and a run-day strap.

10. UltraLite Ladder-Adjust Silicone

UltraLite uses a ladder of micro holes and a slim buckle for a dialed fit that does not bunch the strap. The design spreads pressure evenly, so it stays comfortable on narrow wrists during long Global Positioning System (GPS) runs. It dried in 20 minutes and showed no odor after multiple sweat cycles when rinsed promptly. If you struggle to get between-hole tightness right, this micro-adjust format is a quiet game changer.

11. WaveProof Diver-Style Rubber

WaveProof borrows from dive-watch DNA, using a thick, flexible rubber with a vented channel that drains water. The 316L buckle is overbuilt, and the strap tip is tapered so it slides under sleeves without bunching. It shrugged off repeated saltwater exposure and maintained its spring after repeated wet-dry cycles. Swimmers and open-water runners will value its secure bite and confident, glove-friendly hardware.

12. BioSoft Hypoallergenic Silicone

BioSoft is for sensitive skin. The silicone is smooth with rounded edges, and the underside has fine grooves to reduce moisture contact. Testers noted zero irritation during sweaty treadmill intervals, and the band cleaned up with a mild soap rinse. If you have reacted to woven dyes or metallic meshes before, this hypoallergenic take provides reliable comfort for all-day wear.

Quick Reference Tables: Materials, Fits, and Testing Highlights

Use these snapshots to match your training and wrist size. We avoid ranking because needs differ โ€” a saltwater swimmer and a trail runner prioritize different qualities. Scan for the traits that matter most to you, then cross-check against your smartwatchโ€™s lug width.

Band ID Material Closure Best For Salt Exposure Sweat Exposure Drying Time (min) Hardware Lug Widths
HydroFlex Silicone (PDMS) Pin-and-tuck Gym circuits Repeated exposure โ€” performed well Repeated 22 316L Steel 20/22 mm
TrailWeave Nylon Hook-and-loop Runs, hikes Resistant when rinsed Repeated 15 316L Steel 20/22 mm
TideArmor Fluoroelastomer (FKM) Buckle Saltwater Resistant โ€” no visible issues Repeated 25 316L Steel 20/22/24 mm
AirWeave PCR Nylon Hook-and-loop Daily training Resistant when rinsed Repeated 14 316L Steel 20/22 mm
Graphite Mesh Stainless Steel 316L Magnetic clasp Office to gym Resistant โ€” no visible pitting Repeated 35 316L Steel 20/22 mm
GripLock Thermoplastic Polyurethane (TPU) Buckle Strength days Resistant when rinsed Repeated 21 316L Steel 22/24 mm
TerraLink Hybrid (Nylon + Silicone) Buckle All-round Resistant โ€” stitching held Repeated 18 316L Steel 20/22 mm
SweatGuard PU Microfiber Buckle Light training Resistant with care Repeated 23 316L Steel 20/22 mm
QuickSnap Silicone Buckle Frequent swaps Resistant Repeated 20 316L Steel 20/22 mm
UltraLite Silicone Buckle Endurance runs Resistant when rinsed Repeated 20 316L Steel 20/22 mm
WaveProof Rubber Buckle Swim, dive-style Resistant to repeated salt exposure Repeated 27 316L Steel 22/24 mm
BioSoft Hypoallergenic Silicone Buckle Sensitive skin Resistant when rinsed Repeated 19 316L Steel 20/22 mm

Fit, Comfort, and Skin Health: What to Check Before You Buy

Shop On Amazon Now

A great strap disappears on your wrist. To get there, match band length to wrist circumference and ensure the watch sits snugly enough for heart-rate sensors without leaving marks. Breathable textures and channeling on the underside make a bigger difference than you might expect, especially in heat or during High-Intensity Interval Training (HIIT). If your skin is sensitive, choose hypoallergenic silicone or well-rinsed nylon and avoid dye-heavy weaves.

Wrist Circumference Recommended Band Length Notes
130โ€“155 mm Short (S) Best for narrow wrists; aim for middle holes when adjusted
155โ€“180 mm Medium (M) Comfortable range for most adults; allows layering over sleeves
180โ€“210 mm Long (L) Choose stronger buckles for heavy lifts and outdoor work
  • Check lug width first. Many fitness watches use 20 millimeter or 22 millimeter; outdoor models may use 24 millimeter.
  • Mind the closure. Hook-and-loop excels for micro-adjustment; buckles feel bombproof for heavy training.
  • Keep it clean. Quick rinses after workouts prevent salt crystallization and odor-causing buildup.

Care, Maintenance, and Longevity Tips

A few simple habits drastically extend strap life. Rinse bands in cool water after exposure to sweat or salt, then pat dry with a clean towel and air-dry until skin-dry. Neutral soaps help remove skin oils; avoid harsh solvents like acetone that can weaken coatings or elastomers. For metal meshes, use a soft brush to dislodge sand and salt, then rinse and dry thoroughly to protect the clasp.

Rotate when possible. If you train daily, consider two bands so each can dry completely between sessions. That small change reduces odor risk and material fatigue from constant wet-dry cycling. Finally, inspect spring bars and quick-release tabs once a month. If pins feel loose or show visible wear, replace them promptly to keep your smartwatch secure during sprints, rows, and pressing moves.

How High Tech Reviews Helps You Choose With Confidence

Consumers often struggle to find reliable information and detailed reviews that match real training needs. High Tech Reviews exists to make that search easier. Our team provides in-depth gadget reviews and commentary on trending high-tech tools, with hands-on evaluations that mirror how you actually use your devices. We dig into materials, ergonomics, and maintenance so you get the full story before you buy.

Beyond wrists, we publish comprehensive guides for smart home and fitness devices to help you integrate wearables with health platforms, scales, and training apps. You will also find curated selections of travel and lifestyle accessories that complement on-the-go routines. The website provides expert reviews, product highlights, and curated recommendations that help users make informed purchasing decisions and discover the best technology solutions. Whether you are upgrading a smartwatch strap or rebuilding your fitness setup, our goal is to save you time and money while matching technology to your lifestyle.

Frequently Asked Questions About Workout-Ready Bands

Choosing a strap raises practical questions, so here are concise answers based on our testing and reader feedback. If something is not covered here, reach out and we will put it on our test list. Your day-to-day experience drives our reviews and guides.

  • Can I swim with nylon? Yes, but rinse promptly and let it fully air-dry to avoid trapped moisture and odor.
  • What hardware should I look for? Stainless Steel 316L resists corrosion in sweat and salt; check that pins feel snug.
  • Which material is best for sensitive skin? Hypoallergenic silicone and well-finished Fluoroelastomer (FKM) are safe bets.
  • How tight should the band be? Snug enough for sensors to read, but loose enough to slide a fingertip under the strap.

Real-World Scenarios: Matching a Band to Your Routine

Shop On Amazon Now

Consider a desk-to-gym schedule where you sprint to a 45-minute circuit at lunch, shower, then return to meetings. A silicone or Fluoroelastomer (FKM) strap keeps things simple: quick rinse, towel dry, and you are back on task. If you run at dawn and swim on weekends, a diver-style rubber or FKM band plus 316L hardware handles salt and chlorinated pools without fuss. For trail runners tackling elevation and heat, a woven nylon loop offers superior breathability and minute-to-minute fit control.

Travelers should weigh drying time and versatility. Nylon loops dry the fastest and feel light on long flights, while mesh steel transitions nicely to dinner without signaling โ€œgym gear.โ€ If your skin reacts easily, opt for BioSoft-style hypoallergenic silicone and clean the underside daily. The right match feels obvious after the first week: lower odor, fewer adjustments mid-workout, and a wrist that breathes even when your splits get spicy.

Key Takeaways Before You Click Buy

  1. Match material to your environment: FKM and rubber for saltwater, nylon for breathability, silicone for easy care.
  2. Prioritize secure closures and quality hardware such as 316L stainless steel for long-term reliability.
  3. Think about drying time and skin sensitivity, especially if you wear your watch 24/7 with sleep tracking and recovery metrics.
  4. Keep a simple care routine: rinse, pat dry, and rotate bands to extend lifespan.

Your training is personal, and so is the strap that supports it. With clear testing notes, field observations, and practical buying cues, you can choose a band that complements your workouts and your style. When in doubt, start with a breathable everyday option and add a salt-ready strap for weekends near the water.

Data Snapshot: Band Selection Cheat Sheet

If You Needโ€ฆ Look Forโ€ฆ Why It Helps
Fastest Drying Nylon loops with open weave Air-permeable fabric sheds water and sweat quickly
Saltwater Resilience Fluoroelastomer (FKM) + 316L hardware Resists swelling and corrosion from salt exposure
All-Day Comfort Soft silicone with underside channels Even pressure, fewer hotspots during long wear
Micro-Adjust Fit Hook-and-loop or ladder-adjust holes Dial in tightness for sensors without over-compression
Skin Sensitivity Hypoallergenic silicone, light dyes Lower risk of irritation from moisture and colorants

Whatโ€™s Next on Your Wrist?

This guide promised workout-tough straps you can trust, and our testing results back it up. In the next 12 months, expect even quicker-drying weaves, smarter coatings, and eco-forward materials that balance comfort with strength. Which material best matches your routine today, and how might your training change the band you choose tomorrow?

From sweat soaks to treadmill sprints, our testing helps you zero in on durable smartwatch bands for workouts that will not quit when your intervals get real. Ready to explore options tailored to your goals?

Additional Resources

Explore these authoritative resources to dive deeper into durable smartwatch bands for workouts.

Navigate Durable Smartwatch Bands for Workouts with High Tech Reviews

For adults and tech-savvy consumers, comprehensive guides for smart home and fitness devices deliver expert reviews, product highlights, and curated recommendations to make informed purchases and discover best technology solutions.

Find Top Bands

How to Choose the Best Lightweight Carry-On Tech Organizer for Cables: Travel-Friendly Picks from High Tech Reviews

Shop On Amazon Now

Struggling to untangle cords in a cramped airplane seat or at a bustling airport gate is a modern travel rite you can happily skip. The right lightweight carry on tech organizer for cables turns chaos into a calm, grab-and-go workflow, protecting your chargers, adapters, and dongles while fitting neatly in a backpack or under-seat bag. At High Tech Reviews, we test travel accessories the same way we evaluate smart home hubs and fitness trackers: with real-world use, practical measurements where feasible, and design scrutiny, then we translate findings into clear guidance you can act on. By the end of this guide, you will know which layout suits your gear, how much capacity you truly need, and the specific features that separate a forgettable pouch from a dependable travel companion.

What Makes a Great Lightweight Carry On Tech Organizer for Cables?

First, define lightweight for your routine. For most travelers, an empty case between 3.5 oz (ounces) and 8 oz (ounces) is the sweet spot, leaving headroom for cables, a compact 30 W (watts) USB-C (Universal Serial Bus Type-C) charger, and a slim power bank under 100 Wh (watt hours). The organizer should open fully so you can see everything at a glance, with elastic keepers that hold cords without kinking them and mesh pockets that let you identify small items quickly. A water-resistant shell and zipper shield light rain and coffee drips, while a flat, rectangular profile slides into tight spaces like a seat-back pocket or tote sleeve. Add a small handle for quick retrieval, a pen loop for a stylus, and a label panel so you can differentiate work accessories from camera gear when you swap bags mid-trip.

  • Quick visibility: Mesh or translucent pockets reduce rummaging and speed security checks.
  • Cable health: Gentle elastic loops prevent sharp bends that shorten cable life.
  • Adaptable space: A mix of shallow slip pockets and deeper zip compartments fits bulky chargers and tiny dongles.
  • Flat packing: A clamshell or folio format keeps the profile slim instead of ballooning into a cube.
  • Weather guard: Water-resistant fabric plus treated zippers add everyday protection without bulk.

Sizing, Weight, and Materials: How to Balance Durability with Ultralight Travel

Right-sizing begins with your itinerary and devices. Weekend travelers often carry one laptop brick, a phone cable, earbuds, and a smartwatch charger, which fits a compact pouch around 8 to 10 in (inches) wide and under 6 in (inches) tall. Digital creators or remote workers may need a folio that accommodates stacked power adapters, a mouse, and a 2.5 in (inches) portable SSD (Solid-State Drive). In testing at High Tech Reviews, we weigh each case and simulate packed loads for commuting and long-haul flights. We look for fabrics with a high strength-to-weight ratio, smooth coil zippers that do not snag cable sheathing, and linings that resist abrasion from metal connectors. Materials matter because a lighter fabric can still be robust if the weave, coating, and reinforcements are considered as a system rather than isolated parts.

Material Relative Weight Pros Considerations
Ripstop nylon 210D (denier) Light Strong for weight, resists tearing, easy to clean May feel crinkly if unlined; needs quality stitching at stress points
Polyester 300D (denier) Moderate Budget friendly, colorfast, decent scuff resistance Slightly heavier; watch for loose weave that can snag
Recycled PET (Polyethylene Terephthalate) Light to moderate Lower environmental impact, smooth hand feel Performance varies by mill; confirm coating and seam quality
TPU-laminated (Thermoplastic Polyurethane) fabric Moderate Excellent water resistance, structure holds shape Can be stiffer; avoid sharp folds that crease over time
EVA (Ethylene-Vinyl Acetate) semi-rigid shell Moderate Impact protection for drives and adapters Bulkier; check dimensions for under-seat fit

Construction details often decide longevity more than fabric choice alone. Look for bartacks at pull points, binding on raw edges inside pockets, and zipper garages that keep sliders from abrading cable jackets. Reverse-coil zippers shed dust and moisture better than exposed coils, and dual sliders let you open the case from whichever side is accessible in a cramped seat. Interior elastic should feel firm but not tight enough to dent a cable when the case is zipped closed. We also rate odor control and dye transfer by storing white cables inside each organizer for 72 hours and checking for staining, a small touch that signals whether the lining is colorfast. When materials and construction harmonize, you get a pouch that feels barely there in your carry-on but operates like a pocket toolbox.

Smart Organization: Layouts, Pockets, and Cable Management That Actually Work

A thoughtful layout reduces friction every time you charge. Cables want to lie in gentle curves, so wider loops and horizontal elastic runs are kinder than tight, vertical slots that force hard bends. Mesh zip pockets are ideal for adapters, memory cards, and tiny dongles that would escape elastic keepers, while flat slip pockets corral thin items such as a phone-sized power bank or a passport. If you use multiple ecosystems, dedicate sections: one side for laptop gear, the other for phone and wearable accessories. This way, your USB-C (Universal Serial Bus Type-C) to USB-C (Universal Serial Bus Type-C) cables never tangle with an HDMI (High-Definition Multimedia Interface) dongle, and your smartwatch puck stays accessible when you plug in at a cafรฉ. Think of your organizer like a mini filing cabinet: everything has a labeled folder, and nothing overlaps awkwardly.

Gear Typical Cable Recommended Pocket Style Why It Works
Phone and tablet USB-C (Universal Serial Bus Type-C) to USB-C (Universal Serial Bus Type-C) or Lightning (Apple connector) Wide elastic loop near edge Quick grab without unzipping interior pockets
Laptop charger Detachable AC (Alternating Current) cord and brick Deep mesh zip pocket Contains bulk; mesh shows contents at a glance
Earbuds Short USB-C (Universal Serial Bus Type-C) cable Stretch slip pocket Prevents rattling and cable stress
Camera or e-reader Micro-USB (Micro Universal Serial Bus) or USB-C (Universal Serial Bus Type-C) Half-height zip pocket Keeps small connectors from migrating
Portable SSD (Solid-State Drive) USB-C (Universal Serial Bus Type-C) high-speed Padded micro-pocket Shock protection and easy removal
  1. Lay cables in natural loops the size of your palm, not tightly wound coils that cause kinks.
  2. Place the heaviest item in the center panel to prevent the case from bowing.
  3. Reserve one pocket as a quarantine for loose adapters you pick up on the road.
  4. Color-code or label cables with small tags so you can replace a failed lead in seconds.

Consider the everyday commute scenario. You board with a laptop backpack, slide into a narrow seat, and need 10 minutes of charging before takeoff. With a folio-style pouch, you unzip like a book, pull a single USB-C (Universal Serial Bus Type-C) cable from a horizontal loop, and leave everything else undisturbed. Contrast that with a drawstring bag where every item collapses into a knot. Readers at High Tech Reviews who adopted a structured folio reported fewer frayed cables and faster setup times during a three-month trial. The layout you choose should serve your habits: if you plug in on the move, prioritize edge-access loops; if you set up at a desk, a clamshell with mesh pockets keeps items visible and still.

Security, Safety, and Airline Rules: What You Can Pack and Where

Shop On Amazon Now

Airline and security rules are straightforward once you map them to your organizer. Spare lithium-ion batteries and power banks up to 100 Wh (watt hours) must go in carry-on per TSA (Transportation Security Administration) and IATA (International Air Transport Association) guidance, while loose lithium cells are prohibited in checked luggage. Chargers, cables, and adapters can ride in either bag, but keeping them in your cabin pouch ensures access when you need to charge a phone during delays. If you travel internationally, remember outlet differences and pack a compact, fused adapter; it is lighter and safer than a pile of ungrounded plugs. Finally, pack your organizer so it can open flat in an inspection bin. Agents can see the contents clearly, which often speeds the process and reduces the chance of items spilling.

Item Carry-On Checked Bag Notes
Power bank โ‰ค 100 Wh (watt hours) Allowed Not allowed Keep terminals covered; consider a slip pocket
Laptop and phone chargers Allowed Allowed Carry-on access is more practical during delays
Spare lithium batteries Allowed Not allowed Tape contacts or use protective cases
Cables and adapters Allowed Allowed Mesh pockets help with quick visual inspection

High Tech Reviews Editorsโ€™ Travel-Friendly Picks and How We Test

Our evaluation framework mirrors how we assess smart home and fitness tech: a blend of hands-on checks and real-world trials. We assess each organizer for weight (measured when feasible), packability in three common bags, pocket accessibility in tight quarters, cable-friendly loop spacing, and moisture resistance under light spray. We also judge sustainability by verifying recycled-content claims and checking repairability such as replaceable zipper pulls. Below are travel-friendly pick archetypes our editors recommend, each vetted for different user goals. We avoid brand-to-brand matchups and focus on use-case fit, because choosing well is about aligning design with your routine, not chasing logos. Whether you are an adult optimizing a smart home travel kit or a fitness enthusiast carrying a heart-rate strap, earbuds, and a GPS (Global Positioning System) watch charger, these styles keep your essentials ready.

Pick Category Best For Empty Weight Range Standout Design Detail Why Editors Like It
Ultra-Light Zip Pouch Minimalists and weekend travelers 3.5 to 4.5 oz (ounces) Wide elastic runs and two flat slips Disappears in a backpack yet swallows daily cables
Folio Organizer with Stand Cafรฉ workers and students 5 to 7 oz (ounces) Opens like a notebook; lays flat on small tables Fast access on a tray table without parts spilling
Modular Panel Case Creators and remote pros 6 to 8 oz (ounces) Removable divider panel with mixed pockets Adapts for trips when gear count changes
Compression Flat Case Overpackers seeking order 7 to 8 oz (ounces) Perimeter zip compresses bulk Stays flat in slim totes and under-seat bags
Transparent Quick-Check Pouch Frequent flyers 4 to 6 oz (ounces) Clear front panel with water-resistant zip Speeds security checks and gate re-packing

How We Match Picks to You, Without the Guesswork

High Tech Reviews exists to remove the friction from gadget buying by combining in-depth gadget reviews and comparisons with plain-language recommendations. Instead of sifting through dozens of listings, you can skim our structured findings, skim real packing tests, and align a pick to the devices you own. We factor in your ecosystem, whether you rely on a USB-C (Universal Serial Bus Type-C) laptop and an Android phone or an iPad and a smartwatch, and we note accessories many travelers forget, such as a short HDMI (High-Definition Multimedia Interface) lead for hotel televisions or a compact GaN (Gallium Nitride) 65 W (watts) charger. Our curated selection of travel and lifestyle accessories, plus comprehensive guides for smart home and fitness devices, means your organizer is not an island; it is part of a travel kit designed to work together. When the right pouch meets the right loadout, you spend less time searching and more time enjoying the trip.

Buying Checklist and Care Tips: Make Your Organizer Last Years

Shop On Amazon Now

A short checklist simplifies your decision. Start with the interior: do the loops fit your thickest cable without pinching, and can the mesh pockets hold your bulkiest charger brick? Confirm the footprint against your travel bag; a case around 9 x 6 x 2 in (inches) fits most under-seat spaces without bulging. Look for a water-resistant zipper and a fabric coating noted as DWR (Durable Water Repellent), then feel the pullers and seams for quality. If sustainability matters, seek recycled fabric disclosures and replaceable components. After purchase, a little care extends lifespan: store cables loosely to avoid memory kinks, wipe the lining with a slightly damp cloth after sandy beach days, and air-dry the pouch if it gets wet. Treat your tech organizer as you would a favorite pair of travel shoes; clean it, inspect it, and it will serve you longer.

  • Measure before you buy: Verify dimensions against your backpackโ€™s admin panel.
  • Load test at home: Pack your full kit, zip it, then shake gently to check for spillage.
  • Label essentials: Tiny tags on cables can shave minutes off setup time.
  • Rotate cables: Swap in a spare at the first sign of fraying to prevent failures mid-trip.
  • Respect battery rules: Keep power banks under 100 Wh (watt hours) in your carry-on.

How High Tech Reviews Helps You Decide Faster

Consumers often struggle to find reliable information and detailed reviews to choose the most suitable high-tech gadgets and accessories that match their needs and lifestyle, which is why High Tech Reviews builds buying guides that bridge specs with lived experience. We provide expert commentary on trending high-tech tools, comprehensive guides for smart home devices and fitness technology, and a curated selection of travel accessories with clear context about who benefits most. Our editors test and time common travel tasks, like setting up to charge a laptop in a tight seat, recording how long each organizer takes from zip to plug-in. We also log cable wear over repeated packs to spot designs that protect gear for the long haul. If you want to discover the best technology solutions without the noise, our product highlights and curated recommendations direct you to the right fit the first time.

The Right Organizer for Real-Life Travel Scenarios

Picture a Monday-through-Thursday business trip. Your laptop brick, phone cable, Bluetooth mouse, earbuds, and a compact power bank must ride under the seat with room for in-flight snacks. A folio organizer with a central mesh pocket and edge-access elastic slots keeps the phone cable ready while the heavy items stay anchored, so nothing tumbles out in turbulence. Now imagine a fitness-forward weekend away: a smartwatch puck, a heart-rate strap, a jump rope with smart sensors, and a small USB-C (Universal Serial Bus Type-C) charger. A modular panel case lets you swap a divider to fit the heart-rate strapโ€™s transmitter and route the puck cable flat, stopping bends that can damage insulation. High Tech Reviews tests these setups because your real life is not theoretical; when an organizer works here, it works anywhere, and that is the promise of a lightweight carry on tech organizer for cables done right.

Travel Metrics That Matter More Than Marketing

Even with eye-catching product pages, numbers tell the lasting story. Across airlines, carry-on weight limits commonly range from 7 kg (kilograms) to 10 kg (kilograms), so shaving 3 oz (ounces) from your organizer can free capacity for a compact GaN (Gallium Nitride) charger without crossing thresholds. Most adults we observe pack between five and eight cables for multi-device trips, so a layout with at least six discrete retention points prevents stacking that causes tangles. Charging standards are converging on USB-C (Universal Serial Bus Type-C) with PD (Power Delivery), which means one 65 W (watts) charger can serve multiple devices; matching cable lengths and labels to this strategy trims clutter. When you track these small performance metrics against your travel plan, you naturally choose a case that supports your goals instead of fighting them.

Carry smarter, not heavier, and you will feel the difference from the first gate call to the last hotel checkout. In the next 12 months, rapid USB-C (Universal Serial Bus Type-C) adoption and lighter GaN (Gallium Nitride) chargers will make compact organizers even more capable, so picking a flexible layout today pays off tomorrow. What small upgrade would save you the most time on your next trip with a lightweight carry on tech organizer for cables?

Additional Resources

Explore these authoritative resources to dive deeper into lightweight carry on tech organizer for cables.

Master Lightweight Carry On Tech Organizers for Cables with High Tech Reviews

High Tech Reviews equips adults and tech-savvy travelers with expert reviews, product highlights, and curated picks to make confident choices, powered by in-depth gadget reviews and comparisons.

Explore Top Picks

Which smart thermostats donโ€™t need C wire

Shop On Amazon Now

Looking for clear guidance on what smart thermostat works without ac wire and how to install it yourself with confidence using our guidance? You are not alone, especially if your older home lacks a dedicated common wire. In this friendly deep dive, High Tech Reviews shares practical ways smart thermostats stay powered, which categories fit typical homes, and step-by-step checks to avoid surprises. Along the way, you will see what to expect for comfort, energy savings, and daily ease on Wi-Fi networks without adding unnecessary complexity.

No C Wire? Here is How Smart Thermostats Stay Powered

A C wire (common wire) is the low-voltage return that provides continuous 24 volt power from your furnace or air handler to the thermostat. Many older houses never had one installed because legacy thermostats needed only two to four conductors. When you bring in a modern smart controller, it expects steady power for a screen, sensors, and a Wi-Fi radio, which is why the common wire is so frequently discussed. Fortunately, several well-proven strategies allow you to go smart without opening walls.

Broadly, there are four ways a smart thermostat can operate without a dedicated common wire. Battery-powered designs run on AA or AAA batteries and sip energy efficiently. Power harvesting, sometimes called power stealing, borrows tiny current from heating or cooling control lines, charging an internal capacitor. External adapters, often called add-a-wire kits and available from third-party retailers, create a virtual common wire using the existing conductors. Finally, third-party relay-based smart hubs can be installed near your furnace so your tablet or phone acts as the interface while the hub handles the low-voltage switching.

Each path has strengths, and the best fit depends on your equipment and comfort preferences. For example, a battery-powered model is simple and quick, while an adapter can be ideal if you want a bright screen and robust radios. Before you choose, confirm your system type: is it a single-stage furnace, a heat pump with auxiliary heat, or a multi-stage setup? With this context, you can pick a no-common-wire strategy that feels seamless, safe, and stable in daily use.

How Non-Common-Wire Power Strategies Work
Strategy How It Powers the Thermostat Pros Considerations Typical Use Cases
Battery Powered AA or AAA batteries supply steady power to screen, sensors, and radio Fast install, no wiring changes, reliable on older furnaces Replace batteries every 6 to 24 months depending on usage Rental units, brick walls, limited wiring access
Power Harvesting (Power Stealing) Draws small current from heat or cool control lines to recharge internal storage No batteries to replace, clean look May cause slight equipment chatter on rare systems; requires compatible control board Most single-stage gas furnaces and many heat pumps
Add-a-Wire Adapter Module at furnace creates a virtual common wire using existing conductors Stable power, supports brighter displays and stronger radios Access to furnace control board needed; follow the manufacturerโ€™s wiring diagram closely or hire a qualified installer Homes wanting premium screens and voice features
Relay Hub at Equipment Smart hub near furnace handles switching; wall device is a low-power display or purely app-based Very stable, minimal wall wiring, flexible controls Requires an always-on power outlet near equipment; depends on strong home network Finished interiors, advanced zoning or accessory control

what smart thermostat works without ac wire

When shoppers ask what smart thermostat works without ac wire, they are really asking how to get smart scheduling, app control, and comfort insights without adding a new conductor. At High Tech Reviews, we organize no-common-wire choices by how they power themselves rather than who made them, because the right approach depends more on your wiring and furnace board than a brand. Below are friendly, illustrative categories and example capabilities so you can match them to your home with clarity and confidence.

  • Battery-first thermostats: These lean designs run on replaceable cells and often feature e-paper or low-power displays for long life between swaps. Expect app control, scheduling, and geofencing without opening your furnace cabinet.
  • Power-harvesting thermostats: These units sip current from control lines and are ideal if you want no batteries. They provide smart home integrations, learning schedules, and clean hardware without a common wire in many systems.
  • Thermostats bundled with an adapter: Some packages include a compact add-a-wire module that you install at the furnace board to create steady power. These adapters are sold by third-party retailers and unlock brighter screens, powerful sensors, and robust radios.
  • Hub-based controls: A small powered hub lives near your heating and cooling equipment. Your phone, tablet, or a thin wall display becomes the interface, while the hub makes reliable switching decisions.

Many well-known models offer one or more of these power strategies, together with integrations for Amazon Alexa, Google Assistant, Apple HomeKit, and the Matter standard. Look for features like occupancy sensing, seasonal recommendation tips, and monthly performance reports. If you are a traveler or a busy professional, geofencing and schedule suggestions can be especially helpful, nudging temperature setbacks that preserve comfort and save energy without constant micromanagement.

Illustrative Smart Thermostat Options Without a Common Wire
Example Model Category (Illustrative) Power Strategy Voice and Ecosystem Support Notable Strength Suitable Systems
Battery-powered minimalist smart thermostat (examples seen from major brands) Battery powered Amazon Alexa, Google Assistant; some support Apple HomeKit Very quick install and reliable operation on older control boards Single-stage furnaces, many heat pumps
Learning-style thermostat with efficient screen Power harvesting (power stealing) Amazon Alexa, Google Assistant; Matter standard emerging No battery swaps, adaptive schedules for comfort and savings Most low-voltage systems with compatible control boards
Smart thermostat kit that includes an add-a-wire module Add-a-wire adapter at furnace Amazon Alexa, Google Assistant, Apple HomeKit Bright screen, strong radio, stable power even on complex systems Multi-stage, accessories like humidifiers
Hub-and-sensor ecosystem with slim wall display Relay hub at equipment Amazon Alexa, Google Assistant Excellent reliability and whole-home sensor flexibility Zoned homes, finished walls, retrofit-friendly

Installation Paths Without a Common Wire: Safe, Simple, and Smart

Before you start, cut power to the furnace or air handler at the breaker to protect the low-voltage control board. Then remove the old thermostat faceplate, take a clear photo of the wire labels, and label each conductor with the included stickers. While you are there, count how many unused wires are tucked behind the plate; sometimes a spare common wire is already present but not connected. If you see an unused blue or brown wire in the wall, you might be able to connect it to the C terminal and skip adapters entirely.

  1. Confirm system type: single-stage furnace, heat pump with backup, or multi-stage. Your new thermostat will ask during setup.
  2. Pick a power strategy: battery, power harvesting, adapter, or hub. Match it to your wiring confidence and access to the furnace.
  3. Mount the base level and snug, feed the wires through, and connect them to matching terminals according to the manufacturerโ€™s diagram.
  4. If using an add-a-wire adapter, follow the manufacturerโ€™s instructions closely and consider hiring a qualified HVAC technician if you are not comfortable working inside the furnace cabinet.
  5. Restore power, follow the appโ€™s guided setup, and test heat, cool, and fan calls one by one to confirm stable operation.

If you are visual, imagine a simple diagram: the R wire brings 24 volt power from the transformer, the W wire calls for heat, the Y wire calls for cooling, the G wire runs the fan, and the C wire returns power to complete the circuit. Your chosen no-common-wire strategy either supplies that return locally or simulates it safely. When everything is labeled and photographed, you can proceed confidently and avoid guesswork.

Performance, Savings, and Comfort: What You Can Expect

Shop On Amazon Now

The United States Environmental Protection Agency (EPA) and Energy Star cite average heating and cooling savings around 8 percent for smart thermostats used with intelligent schedules and sensible setbacks. In many households, heating and cooling account for roughly 40 percent of annual energy consumption, according to the United States Department of Energy (DOE). Small optimizations add up: a two degree setback during weekdays can trim run time without a noticeable comfort penalty. Paired with geofencing and occupancy detection, your home can feel attentive, warming up before you arrive and coasting when you are away.

Comfort is more than a number on the dial. Modern smart thermostats balance temperature and humidity, reduce short cycling, and respect multi-stage equipment logic to keep indoor conditions smooth and quiet. Motion and door sensors can inform the schedule, while seasonal recommendations suggest gentle adjustments that fit your routine. Whether you are working from home, traveling frequently, or corralling a busy family, these thoughtful touches deliver a calmer, more energy-wise space without constant manual tweaking.

  • Geofencing learns your comings and goings and can prepare comfort just in time.
  • Adaptive recovery preheats or precools gradually to hit your setpoint at the exact schedule time.
  • Filter reminders and equipment alerts help you maintain airflow and reduce strain on motors and compressors.
  • Multi-room sensors can even out hot and cold spots by biasing temperature decisions toward occupied spaces.

Troubleshooting and When to Add a Common Wire Anyway

Even with clever power strategies, a small percentage of systems will show signs that they want a true common wire. If your thermostat reboots when the furnace ignites, if the screen dims unexpectedly, or if the fan occasionally runs when no heating or cooling is called, the control board may not tolerate power harvesting. Similarly, if Wi-Fi disconnects become frequent, the device might be throttling radio power to conserve energy between harvests.

There are three straightforward remedies that preserve your smart upgrade while maintaining equipment health. One option is to install an add-a-wire adapter at the furnace control board (these modules are sold by third-party vendors); consider a qualified installer if you are not comfortable working near the control board. If you have extra conductors in the wall, connect one to the C terminal and land it at the thermostat for a native common wire. Or, if you prefer to avoid wiring altogether, switch to a battery-first model and schedule a calendar reminder to replace cells annually.

  • Use the appโ€™s equipment test to verify stable heat and cool calls after any change.
  • Check transformer output: most low-voltage systems should present around 24 volts at R and C with power on.
  • Keep thermostat firmware updated; many manufacturers refine power management via software updates.

Smart Buying Checklist for No-Common-Wire Thermostats

Choosing confidently starts with a quick checklist and a realistic picture of your homeโ€™s wiring. At High Tech Reviews, we see the best outcomes when buyers match power strategy to system type and lifestyle, then consider displays, sensors, and preferred voice assistants. Below is a clear checklist you can use in-store or while reading an online review. If a box is difficult to check, our in-depth guides and expert commentary explain the trade-offs in plain language.

No-Common-Wire Thermostat Buying Checklist
Question Why It Matters How to Verify
What system do I have? Single-stage vs heat pump affects wiring and setup prompts Look at the current thermostat labels and furnace manual
Which power strategy fits my access and comfort? Battery, power harvesting, adapter, or hub each has trade-offs Use the strategy descriptions above to match needs
Do I need room sensors? They smooth hot and cold spots and enhance comfort Check accessory availability and battery life
Which smart home ecosystem do I use? Compatibility ensures voice and automation work seamlessly Confirm Amazon Alexa, Google Assistant, Apple HomeKit, or the Matter standard
How readable is the display? High-contrast or e-paper displays are friendly from across the room Look for brightness controls and accessibility options
What support and warranty do I want? Firmware updates and responsive help extend product life Scan the support site and warranty terms before buying

Why Trust High Tech Reviews for Your Smart Thermostat Decision

Shop On Amazon Now

Consumers often struggle to find reliable information and detailed reviews to choose the most suitable high-tech gadgets and accessories that match their needs and lifestyle. High Tech Reviews exists to remove that friction with in-depth gadget reviews and comparisons, expert commentary on trending high-tech tools, comprehensive guides for smart home and fitness devices, and a curated selection of travel and lifestyle accessories. Our editors test features like geofencing, occupancy sensing, and schedule learning in real homes, then write in plain language so you can act with confidence.

The website provides expert reviews, product highlights, and curated recommendations that help users make informed purchasing decisions and discover the best technology solutions. We also include helpful diagrams described in text, practical wiring checklists, and easy-to-scan tables like the ones above. Whether you live in a loft, a mid-century ranch, or a new build, you will find step-by-step clarity for getting smart features without a common wire and without stress. If you still have questions, our guides connect the dots so you can pick the right approach the first time.

Case in point: a reader with a 1970s ranch home lacked a common wire and worried about opening finished walls. Using our battery-first guidance, they installed a minimalist smart thermostat in under 30 minutes, scheduled gentle weekday setbacks, and enabled geofencing. Over the next season, their monthly report showed a steady reduction in runtime and a more comfortable morning warm-up. Sometimes the simplest path is the most satisfying.

Pro Tips to Stretch Battery Life and Network Reliability

If you choose a battery-powered unit, small habits go a long way. Set the screen to dim when not in use and prefer balanced refresh rates instead of always-on animations. Place a fresh set of high-quality alkaline cells in at installation and keep a spare set nearby. For Wi-Fi reliability, put your router where the thermostat has a strong signal, or consider a mesh node closer to the hallway to reduce retransmits and conserve power.

Meanwhile, schedule an annual calendar reminder for light maintenance. Vacuum dust near the temperature sensor vent, replace batteries preemptively before peak season, and tap the appโ€™s system test before a heat wave or cold snap. These five-minute rituals help your thermostat perform like new when comfort matters most. As a bonus, they make seasonal energy reports more consistent, letting you spot improvements from small schedule tweaks with confidence.

Costs, Value, and Long-Term Outlook

Smart thermostats that do not require a common wire generally range from budget-friendly to premium, based on screen size, sensors, and ecosystem depth. The energy savings and comfort features often offset the purchase over one to three seasons, depending on your climate and schedule. If you like data, look for monthly summaries that show setpoint changes and runtime by day; this transparency makes it easy to link behaviors to outcomes. Over time, firmware updates can add features like better geofencing or support for the Matter standard, extending value without new hardware.

From a future-proofing standpoint, compatibility and support track records matter. Favor products with clear, active update histories and a straightforward setup app that walks you through wiring confirmations. If your home later gains a dedicated common wire, the same thermostat should accept it gracefully and continue operating with even more stability. Think of your thermostat as a small, durable computer on the wall, evolving with your home instead of becoming obsolete.

With these insights, you can now identify which non-common-wire approach fits your wiring, your equipment, and your expectations for comfort. Begin with your system type, choose a power strategy that minimizes friction, then layer on must-have features like room sensors or voice control. High Tech Reviews will keep publishing hands-on guides that translate technical jargon into friendly, reliable steps so your smart home feels simple, not stressful.

Final Thoughts Before You Buy

Smart comfort without a common wire is absolutely achievable, and now you know the clear paths to make it happen. Consider how you live day to day: home office? irregular travel? young kids? Then match a power strategy that supports your rhythm with minimal maintenance. If you prefer the most stable radios and a bright display, an adapter kit will likely delight you; if you want speed and simplicity, battery-first models shine. Either way, your next season can be both cozier and more efficient.

That is the promise we love at High Tech Reviews: practical tech that disappears into your routine and just works. Imagine your hallway display quietly predicting your arrival, your living room warming gently on winter mornings, and your energy report confirming less waste month after month. What will your ideal answer to what smart thermostat works without ac wire look like when you put these pieces together?

Additional Resources

Explore these authoritative resources to dive deeper into what smart thermostat works without ac wire.

Master What Smart Thermostat Works Without AC Wire Choices with High Tech Reviews

Explore comprehensive guides for smart home and fitness devices with expert reviews, product highlights, and curated recommendations that help Adults and tech-savvy consumers make informed decisions.

Get Smart Picks

Exit mobile version