


About Best High Tech Gadgets For Adults: Best High Tech Gadgets For Adults is your trusted source for cutting-edge technology insights and solutions. High Tech Gadget Reviews We provide reliable, well-researched technology content to keep you informed and help you make better decisions. This content focuses on How to Choose the Best Weights for Your Weighted Vest: A Tech-Savvy Guide to Smarter Training and related topics.

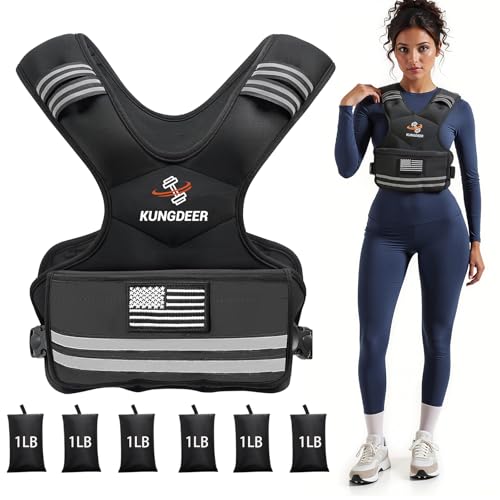
You already know a weighted vest can turn everyday movements into powerful strength and cardio sessions, but choosing the right weights for weighted vest training is where the real gains and comfort come from. The wrong load makes workouts feel clunky, strains your joints, and stalls progress. The right load feels almost invisible at first, then unmistakably effective as your heart rate and muscles respond. In this friendly, data-informed guide, you will learn how to size your load by goal, pick materials that match your routine, use smart tools and apps to interpret intensity, and avoid common mistakes that cost time and motivation.


Note: This article summarizes commonly cited ranges and product features for informational purposes and focuses on product reviews and tech analysis. It is not personalized medical, fitness, or coaching advice.
To make things easier, we translate research into everyday decisions you can apply today, and we put tech to work for you instead of adding complexity. You will get practical tables, formulas, and examples for walking, running, rucking, and calisthenics. You will also learn how to evaluate combinations of wearable devices and training apps, including those that use artificial intelligence (AI), so you can interpret data and adjust in real time. Throughout, High Tech Reviews provides expert analysis and curated product guidance to help you cut through noise when comparing devices and accessories.
Start With Your Goal: How Much Load Is Enough, and When?
Weighted vests shine when the load matches your goal, not the other way around. Think of load as volume on a stereo: you want it just high enough to feel the beat without distortion. The ranges below summarize commonly cited guidance and research findings for informational purposes; they are not a substitute for personalized advice. For low-impact conditioning like brisk walking or rucking, research commonly supports starting at 5 to 10 percent of your body weight, which gently raises energy cost and heart rate without overtaxing the joints. For calisthenics such as push-ups, pull-ups, and lunges, 5 to 20 percent can build strength-endurance while preserving crisp technique, and for short, controlled running intervals or stair climbs, 5 to 10 percent helps preserve gait while nudging intensity.
Because bodies and histories differ, let perceived exertion and data guide you. Pair your vest with a heart rate monitor using Bluetooth [Bluetooth wireless technology] to keep sessions in your intended zone, and use rating of perceived exertion (RPE) [rating of perceived exertion] as a commonly used subjective metric to confirm how hard it feels. Industry data suggests that adding 10 percent of body weight can increase oxygen consumption by roughly 5 to 8 percent during walking, which is just enough to make a meaningful difference without derailing recovery. Start light for two weeks, then progress by small steps, and let your technique stay strict even as the load climbs.
| Activity | Starting Range (% Body Weight) | 70 kg (154 pounds) | 90 kg (198 pounds) | Notes |
|---|---|---|---|---|
| Brisk Walk or Ruck | 5 to 10 percent | 3.5 to 7 kg (7.7 to 15.4 pounds) | 4.5 to 9 kg (9.9 to 19.8 pounds) | Longer duration, low impact, posture is a priority |
| Stair Climb | 5 to 10 percent | 3.5 to 7 kg (7.7 to 15.4 pounds) | 4.5 to 9 kg (9.9 to 19.8 pounds) | Keep steps short, control descent |
| Running Intervals | 4 to 8 percent | 2.8 to 5.6 kg (6.2 to 12.3 pounds) | 3.6 to 7.2 kg (7.9 to 15.9 pounds) | Use short bouts, focus on form |
| Calisthenics (Push-ups, Pull-ups, Squats) | 5 to 20 percent | 3.5 to 14 kg (7.7 to 30.9 pounds) | 4.5 to 18 kg (9.9 to 39.7 pounds) | Scale load to keep reps smooth |
| HIIT (High Intensity Interval Training) [high intensity interval training] | 4 to 10 percent | 2.8 to 7 kg (6.2 to 15.4 pounds) | 3.6 to 9 kg (7.9 to 19.8 pounds) | Prioritize safety and movement quality |
- Rule of thumb: if your cadence and posture degrade within the first third of the set, reduce load by 1 to 2 kilograms (2 to 4 pounds).
- Use shorter sessions for new loads, then extend duration as comfort improves.
- Aim for the minimum effective dose that still challenges you; save margin for recovery.
Types of Weights and What They Mean for Comfort, Adjustability, and Durability
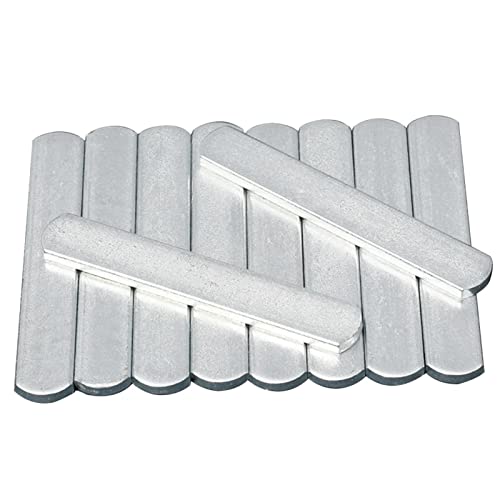
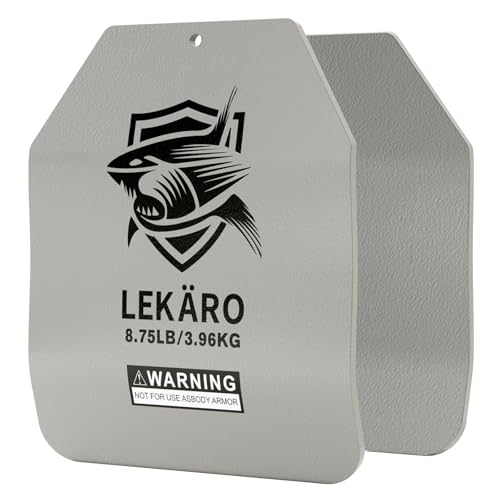
All weights are not created equal, and your experience depends on the material as much as the kilograms and pounds. Common options include steel plates, cast iron bars, and sand or steel shot in small pouches, and each changes how the vest drapes and moves with your body. Denser materials like steel keep the vest sleek and close to your center of mass, which many users find more comfortable for dynamic moves such as jumping jacks or sprints. Meanwhile, sand or steel shot distributes the load more evenly and can feel more forgiving against the torso, especially for longer walks.
Adjustability matters just as much. Look for vests that accept multiple small increments so you can step up by 0.5 to 1 kilogram (1 to 2 pounds) instead of making big leaps. Stitching quality, internal pocket design, and strap layout determine whether weights shift when you lunge or descend stairs. Over time, materials compress and settle, so choose a system that maintains balance and does not sag, especially when you sweat or change pace. Below is a quick guide to materials, density, and when each shines.
| Material | Density and Profile | Adjustability | Comfort Notes | Best Uses |
|---|---|---|---|---|
| Steel Plates | Very dense, low profile | Moderate increments | Stable against torso, minimal bounce | Running intervals, HIIT [high intensity interval training], dynamic drills |
| Cast Iron Bars | Dense, slightly bulkier than steel | Small to moderate increments | Durable, firm feel | Calisthenics strength, stair work |
| Sand Pouches | Less dense, more volume | Fine increments possible | Conforms to body, cushioned feel | Walking, rucking, longer sessions |
| Steel Shot Pouches | More dense than sand, still flexible | Fine increments possible | Balanced blend of comfort and profile | Mixed routines, all-round training |
You can also mix formats for the best outcome. For example, place denser plates along the midline to stabilize the vest and fill side pockets with shot pouches to fine-tune balance. If you sweat heavily or train outdoors, choose corrosion-resistant coatings and moisture-wicking liners, and check whether the pockets fully enclose the weights to prevent chafing. Lastly, quick-release straps are a welcome safety feature for high-intensity sets, allowing fast removal if form falters.
Tech-Savvy Tools: Use Data to Decide Your Next Increment
Technology is your training partner when you want precise control over effort and recovery. Start with a smart scale that records weekly body weight, then use a simple formula to set your vest load as a percentage. Add a heart rate chest strap or armband to capture accurate BPM (beats per minute), pair it with your phone via Bluetooth [Bluetooth wireless technology], and set zone alerts so you do not unknowingly drift too hard or too easy. If you enjoy metrics, a smartwatch can track cadence and vertical oscillation for running, and an accelerometer-equipped phone in your pocket can estimate step consistency on stairs.
Some training apps and platforms now use AI (artificial intelligence) features to analyze metrics. These products may combine heart rate, step rate, and pace to estimate VO2 max (maximum oxygen uptake) and suggest adjustments; High Tech Reviews evaluates the claims and usability of such apps and devices so readers can decide which tools suit their tracking needs. For strength-focused calisthenics, some trackers offer rep velocity estimates or camera-based analysis; we review these features and report on their accuracy and ease of use. The table below shows common tools and the metrics they provide so you can compare without guesswork.
| Tool | Key Metrics | How It Helps | Pro Tip |
|---|---|---|---|
| Heart Rate Monitor | BPM (beats per minute), zones | Confirms intensity, keeps work aerobic or anaerobic as planned | Use zone alerts to cap effort during long walks |
| Smartwatch | Cadence, pace, vertical oscillation | Flags form breakdown at higher loads | Compare cadence unloaded vs loaded |
| Training App with AI (artificial intelligence) | Trend analysis, recovery scores | Suggests micro-load changes over weeks (varies by app) | Sync sleep and stress data for context |
| GPS (Global Positioning System) Run/Walk App | Distance, elevation gain, pace | Quantifies effort on hills with load | Use identical routes to compare |
| Smart Scale | Body weight trend | Auto-calculates percentage load targets | Recalculate vest load after weight changes |
Want a mental picture of how this looks in practice? Imagine a simple dashboard: a timeline of sessions and a color bar that turns from green to amber when your average heart rate rises 5 beats for the same pace and route. That subtle shift suggests you reached a useful training stimulus with your current load. If the bar shifts red and your cadence drops by 5 percent, the dashboard nudges you to reduce 1 to 2 pounds and recover. The goal is a self-correcting system that keeps you productive year-round—High Tech Reviews helps you compare dashboards, alerts, and integrations so you can pick tools that surface meaningful signals.
How to Pick Weights for Weighted Vest by Goal, With Real-World Plans


Let us translate percentages into illustrative weekly plans often cited in the literature. These are example progressions intended to show how small, incremental changes are commonly structured; they are not personalized recommendations. Progress conservatively so your tendons, ligaments, and posture adapt along with your muscles and lungs. For brisk walking or rucking, some sources suggest three weekly sessions of 30 to 45 minutes at 5 percent of body weight, then increasing by small increments if cadence and posture stay steady. For calisthenics, many practitioners add incremental load while maintaining reps in reserve to preserve speed and joint comfort.
Runners often treat vest sessions as a supplemental tool rather than a replacement for regular runs. Keep intervals short, use generous recovery, and keep an eye on metrics like ground contact time where your wearable provides reliable data. Stair sessions are noted for leg endurance and bone loading, but control the descent and avoid racing down with added weight. Using a simple rotation across the week keeps variety and allows recovery between heavier sessions.
| Week | Walk/Ruck | Calisthenics | Intervals/Stairs | Load Adjustment Rule |
|---|---|---|---|---|
| 1 | 2 sessions, 30 min at 5 percent | 2 sessions at 5 to 8 percent | 1 session, 6 x 30 s at 4 percent | Track RPE [rating of perceived exertion] 6 to 7 of 10 |
| 2 | 2 sessions, 35 min at 5 percent | 2 sessions at 6 to 9 percent | 1 session, 8 x 30 s at 4 percent | Increase 0.5 to 1 kg if cadence holds |
| 3 | 2 sessions, 40 min at 6 percent | 2 sessions at 7 to 10 percent | 1 session, 6 x 45 s at 5 percent | Deload if joint soreness lingers 48 hours |
| 4 | 2 sessions, 45 min at 6 to 7 percent | 2 sessions at 8 to 12 percent | 1 session, 8 x 45 s at 5 percent | Hold load, focus on technique |
| 5 | 2 sessions, 45 min at 7 to 8 percent | 2 sessions at 10 to 14 percent | 1 session, 10 x 30 s at 6 percent | Add load only if reps stay snappy |
| 6 | 2 sessions, 50 min at 8 to 10 percent | 2 sessions at 12 to 16 percent | 1 session, 8 x 60 s at 6 to 7 percent | Test a deload week after |
Notice how small changes compound quickly. Across six weeks these illustrative steps can raise time under load, tighten technique, and help you find a practical range for the next block. A simple rule used by many is to increase either duration or load, not both at once, and to schedule one easier week when your average heart rate drifts up for the same route. As systems adapt, everyday tasks such as climbing stairs with groceries or hiking on weekends can feel smoother.
Comfort, Fit, and Safety: Little Details That Unlock Big Results
Fit is the silent partner of performance. A well-fitted vest rides high on the torso, keeps shoulder straps flat, and distributes weight evenly front to back so your center of mass stays aligned with your hips. If the vest sits too low, it can tug on your lower back during marches or runs, and if it lacks lateral stability, it will bounce and rub the ribs. Choose a design with multiple anchor points and a breathable liner, and snug it so you can slide two fingers under the straps without pinching.
Balance the load front to back to maintain posture. If you do mostly push-ups and dips, a slightly rear-biased load can feel more natural, while walking and stair sessions often prefer even distribution. Warm up with unloaded mobility, especially ankle and hip work, and keep your feet quiet on landings to reduce impact. Finally, respect recovery: tissues respond to daily life and sleep, and if your sleep score dips and your legs feel heavy, hold the load steady until those markers rebound.
- Posture check: ears over shoulders, ribcage stacked over pelvis, soft knees.
- Stride check: short, quick steps beat long, pounding strides under load.
- Surface check: start on even ground, then add trails when stable.
- Care check: rinse salt and sweat, dry thoroughly, and inspect stitching monthly.
How High Tech Reviews Helps You Choose Wisely
Choosing the best setup can feel overwhelming because product pages often show glossy photos without the details that matter. High Tech Reviews exists to bridge that gap with in-depth gadget reviews and comparisons, expert commentary on trending high-tech tools, comprehensive guides for smart home and wearable devices, and curated highlights of travel and lifestyle accessories that fit modern routines. We translate specs into sensations you will actually notice across a session, like how a denser plate changes breathing rhythm during intervals, or how a different strap geometry eases collarbone pressure.
Beyond reviews, you will find product highlights mapped to use cases, so you can filter by goal, load range, adjustability, and comfort features without scrolling endlessly. We also include practical checklists so your purchase aligns with your needs and space, not just your budget. Our approach addresses a common problem: consumers often struggle to find reliable information and detailed reviews that match their needs and lifestyle. The website provides expert reviews, product highlights, and curated recommendations that help users make informed purchasing decisions and discover the best technology solutions, and that applies just as much to fitness wearables and accessories as it does to smart thermostats or travel chargers.
- Clear, scenario-based guidance: walking, running, calisthenics, and hybrid routines (illustrative).
- Evidence-informed tips with simple math you can apply instantly.
- Tech integrations explained in plain language for quick wins.
- Curated picks that respect apartment storage, outdoor use, and comfort needs.
Expert Best Practices and Mistakes to Avoid

Small habits compound into big results, so give attention to the basics that protect your joints and keep training enjoyable. First, progress gradually by time under load before jumping load itself, and validate changes with both RPE (rating of perceived exertion) and heart rate trends where available. Second, preserve movement quality by filming a few reps from the side to confirm posture stays tall and knees track over toes. Third, rotate footwear and surfaces to vary stimulus and spread stress. These practices reduce injury risk while keeping motivation high, and they make every gram of added weight work harder for you.
As for pitfalls, avoid ego loading or copying a stranger’s routine, which often backfires when your history, sleep, and schedule differ. Do not let the vest bounce or twist for more than a rep or two, because that friction can irritate skin and break your rhythm. Never stack new variables all at once such as new shoes, new load, and new route on the same day. If you train outdoors at night, add reflective strips and a small front light to stay visible, and remember that heat and humidity magnify effort so adjust expectations in summer conditions.
- Progression cue: if sets feel too easy two sessions in a row, add 0.5 to 1 kilogram (1 to 2 pounds).
- Recovery cue: if soreness persists 48 hours or sleep degrades, hold or reduce load.
- Technique cue: keep your ribs stacked over your pelvis during lunges and climbs.
By treating load, fit, and feedback as a single system, you can build a practice that fits your life and scales with your goals. The payoff is a confident routine where numbers guide choices, comfort stays high, and results speak for themselves.
Buying Checklist: From First Load to Future-Proof Setup
Before you add items to your cart, run through a quick checklist that aligns your training plan, space, and growth. Start with the vest’s base capacity, ensuring it covers your 12-month horizon so you are not capped early. Next, confirm the weight format fits your moves and comfort, with small increments so you can progress smoothly. Check for breathable liners, strong stitching, and secure pockets, and look for quick-release hardware if you plan on high-intensity intervals. If you train outdoors, prioritize corrosion resistance and reflective elements for safety.
Finally, think about how the vest fits your broader tech ecosystem. Will your smartwatch, heart rate monitor, and training app integrate to keep your data tidy, or will you be juggling logins and spreadsheets. Favor simplicity, because smart systems work best when friction is low and feedback is fast. When you want clarity on materials, fit, and real-world comfort, High Tech Reviews provides the deep dives and scenario-based recommendations that make buying less of a gamble and more of a confident step toward your goals.
| Item | What to Look For | Why It Matters |
|---|---|---|
| Capacity | Enough for 12-month progression | Prevents early ceiling on gains |
| Increment Size | 0.5 to 1 kilogram (1 to 2 pounds) steps | Smoother progress, safer joints |
| Material | Steel plates, cast iron, sand, steel shot | Profile, comfort, and durability |
| Fit and Straps | Multi-point adjustments, quick release | Stability and safety under effort |
| Liner and Pockets | Breathable, secure, anti-chafe | Comfort over long sessions |
| Outdoor Readiness | Corrosion resistance, reflectivity | Longevity and visibility |
| Tech Fit | Plays well with your apps and wearables | Easy tracking and auto-adjustments |
When the right choices stack together, you get a vest that disappears when you move and shows up in your results. The process is simple: define your goal, select materials that suit your routine, progress in small steps, and let data guide the next move. With High Tech Reviews in your corner, you get the clarity and confidence to choose the ideal wearable devices and related accessories and keep improving, week after week.
Case Study: Two Adults, Two Goals, One Smart Approach
Consider Jordan, who wants to boost daily energy and bone health without pounding runs. Jordan starts with 5 percent body weight for 30-minute walks, logs sessions with a GPS (Global Positioning System) app, and watches heart rate stay in Zone 2 to Zone 3 for aerobic benefits. After three weeks, cadence holds steady and RPE (rating of perceived exertion) hovers at 6 of 10, so Jordan adds 1 kilogram (2 pounds). Over eight weeks, step-ups feel smoother and weekend hikes feel shorter, and the vest remains comfortable because the weight pouches distribute load evenly across the torso.
Now consider Alex, who wants stronger pull-ups and better sprint mechanics. Alex chooses a denser plate system for a sleek profile, keeps calisthenics at 10 to 12 percent body weight, and uses a training app to flag when rep speed slows more than 10 percent across sets. On sprint days, the app caps load at 6 percent and color-codes sessions to stay crisp, then suggests a deload after a high-stress workweek. High Tech Reviews reviews such apps and devices so readers can understand feature sets and limitations; we do not provide individualized coaching.
Quick Recap: You learned how to pick a goal-driven load, choose materials that match your movements, and use tech to keep intensity right-sized. In the next 12 months, imagine stacking tiny gains that feel effortless while your vest quietly helps you climb higher, move smoother, and recover faster. What is your first step this week toward a smarter, more enjoyable routine using the right weights for weighted vest training?
Additional Resources
Explore these authoritative resources to dive deeper into weights for weighted vest.
Master Wearables & Fitness Accessories With High Tech Reviews
Get comprehensive guides for smart home and wearable devices, giving adults and tech-savvy consumers expert reviews, product highlights, and curated recommendations to make informed purchases and discover technology solutions.

What services does Best High Tech Gadgets For Adults provide?
Best High Tech Gadgets For Adults provides practical technology solutions designed around customer needs. Our team focuses on clear communication, reliable support, and outcomes that help people make informed decisions quickly.
How can customers get help quickly?
Customers can contact our team directly for fast support, clear next steps, and timely follow-up. We prioritize responsiveness so questions are answered quickly and issues are resolved without unnecessary delays.
Why choose Best High Tech Gadgets For Adults over alternatives?
Customers choose us for trusted expertise, transparent guidance, and consistent results. We focus on practical recommendations, personalized service, and long-term relationships built on reliability and accountability.
