


About Best High Tech Gadgets For Adults: Best High Tech Gadgets For Adults is your trusted source for cutting-edge technology insights and solutions. High Tech Gadget Reviews We provide reliable, well-researched technology content to keep you informed and help you make better decisions. This content focuses on How to Master Custom Gaming PC Building: A 10-Step Guide for Beginners and related topics.

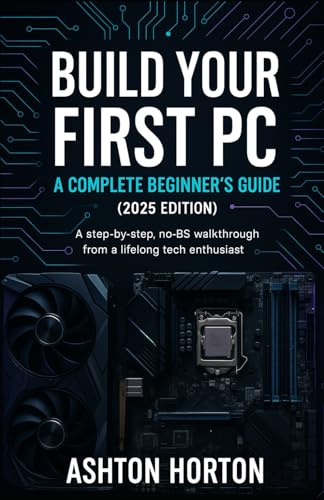


How to Master Custom Gaming PC Building: A 10-Step Guide for Beginners
There’s a unique thrill that comes from playing a game on a machine you built with your own two hands. For many console gamers or those new to the PC world, the idea of custom gaming pc building can feel like a monumental task, full of complex parts and confusing acronyms. But what if I told you it’s more like building with high-tech LEGOs. It’s a rewarding journey that gives you complete control over performance, aesthetics, and your budget.
This guide is your roadmap, designed to take you from a curious beginner to a confident builder, ready to create a powerhouse rig that’s perfectly tailored to you.
Building your own PC isn’t just about saving a few bucks; it’s about understanding the machine that powers your favorite hobby. You get to pick every single component, ensuring there are no weak links or overpriced parts. You’ll learn a valuable skill, and the pride you feel when you press that power button for the first time and see it light up is absolutely unbeatable. Let’s get started on this exciting project!
What You’ll Learn
- Component Selection is King: The heart of any custom PC build is choosing the right parts. We’ll break down the CPU, GPU, RAM, and more so you can make informed decisions that fit your budget and gaming goals.
- Balance is Everything: A high-end GPU paired with a low-end CPU will create a bottleneck. You’ll learn how to create a balanced system where every component works together in harmony for maximum performance.
- The Build is Just the Beginning: Assembling the parts is only half the journey. We’ll cover the crucial post-build steps, including software installation, driver updates, and optimizing your entire gaming PC setup for the ultimate experience.
- Cooling and Power are Crucial: We’ll explain why you should never overlook your cooling system or power supply unit (PSU). These components are vital for the stability, longevity, and performance of your gaming rig.
Step 1: Choosing the Right Components for Your Custom Gaming PC
Welcome to the most exciting—and sometimes overwhelming—part of any custom PC build: picking the parts. This is where your dream machine starts to take shape. Before you add a single item to your cart, the most important thing to do is define your goals and budget. What kind of games do you want to play.
Are you aiming for ultra-settings at 4K resolution, or are you happy with a smooth 1080p experience for competitive esports titles. Your answers will dictate every choice you make.
The core principle to follow is creating a balanced build. This means ensuring that no single component is so powerful that it’s held back by another, a situation known as a “bottleneck.” For example, pairing a top-of-the-line graphics card with an entry-level processor means your CPU won’t be able to keep up, and you won’t get the full performance you paid for from your GPU. Every part, from the processor to the power supply, should be chosen to complement the others.
Think of it like assembling a team. You need a star player (usually the GPU for gaming), but you also need a solid supporting cast (CPU, RAM, storage) to let that star shine. We’re about to go through each team member one by one, explaining their role and helping you pick the perfect one for your rig.
Step 2: The Brains of the Operation: Understanding CPU Options


The Central Processing Unit (CPU), or processor, is the brain of your computer. It executes instructions, performs calculations, and manages the flow of data for your entire system. For gaming, the CPU’s role is critical for things like AI behavior, physics simulations, and managing all the background tasks that make a game world feel alive. A strong CPU ensures a smooth, stutter-free experience, especially in complex, open-world games.
When looking at CPUs, you’ll see two main specs: core count and clock speed. Cores are like individual processors within the CPU, allowing it to handle multiple tasks at once (multitasking). Clock speed, measured in gigahertz (GHz), is how fast each core can perform its tasks. For a long time, higher clock speeds were the most important factor for gaming, but modern games are getting much better at using multiple cores.
Today, a healthy balance of both is ideal.
Your main choice will be between the two giants: Intel (Core i5, i7, i9) and AMD (Ryzen 5, 7, 9). For years, Intel was the undisputed king of gaming, but AMD’s Ryzen series has created fierce competition, often offering more cores for the money. As of 2026, both brands offer fantastic options at every price point. Generally, an Intel Core i5 or AMD Ryzen 5 is the sweet spot for most gamers, offering excellent performance without breaking the bank.
If you’re a streamer or content creator, stepping up to an i7/Ryzen 7 or i9/Ryzen 9 will give you the extra cores needed for those demanding workloads alongside your gaming.


Step 3: The Heart of the Beast: Selecting the Best GPU
If the CPU is the brain, the Graphics Processing Unit (GPU), or graphics card, is the heart and soul of any gaming PC. This is the component that renders the beautiful images you see on screen, from sprawling landscapes to fast-paced action sequences. For a gaming-focused custom PC build, the GPU is typically the single most expensive component and has the biggest impact on your in-game performance.
Choosing a GPU comes down to your target resolution and desired frame rate (frames per second, or FPS). Are you playing on a 1080p, 1440p, or 4K monitor? A higher resolution means the GPU has to push more pixels, requiring more power.
- 1080p Gaming: This is the most common resolution and is the easiest to run. Entry-level to mid-range cards from NVIDIA’s GeForce RTX series or AMD’s Radeon RX series will deliver fantastic, high-FPS experiences.
- 1440p Gaming: This is the current sweet spot for many gamers, offering a significant visual upgrade over 1080p without the extreme demands of 4K. You’ll want a solid mid-range to high-end GPU to maintain high frame rates at this resolution.
- 4K Gaming: This is the pinnacle of visual fidelity but requires a top-tier, high-end GPU to run smoothly, especially if you want to enable features like ray tracing. Be prepared to allocate a significant portion of your budget here.
Key specs to look for include VRAM (video memory), which is crucial for high-resolution textures, and clock speed. The two main players are NVIDIA and AMD. NVIDIA is often praised for its mature feature set, like DLSS (Deep Learning Super Sampling) which uses AI to boost frame rates, and strong ray tracing performance. AMD often competes aggressively on price-to-performance, offering powerful cards that are excellent values.
Watch reviews for the specific games you play, as performance can vary between titles.
Step 4: The Nervous System: How to Pick the Right Motherboard
The motherboard is the central hub that connects every single component in your PC. It’s the nervous system, allowing the CPU, GPU, RAM, and storage to communicate with each other. While it doesn’t directly boost your FPS like a GPU does, choosing the wrong motherboard can limit your future upgrade options, cause compatibility headaches, or lack the features you need.
First, you need to ensure compatibility with your chosen CPU. Intel and AMD use different sockets (the physical slot where the CPU sits), so you must buy a motherboard designed for your processor’s brand and generation. For example, an AMD Ryzen 7000 series CPU needs a motherboard with an AM5 socket. This is non-negotiable!
Next, consider the form factor, which determines the physical size of the board:
- ATX: The standard, full-size motherboard. It offers the most expansion slots for things like extra storage, sound cards, and has the most features.
- Micro-ATX (mATX): A smaller, more compact version of ATX. It’s a great middle ground, fitting in smaller cases while still offering a decent number of slots and features.
- Mini-ITX: The smallest form factor, designed for compact, space-saving builds. It’s more limited in features and usually has only one slot for the GPU, but it’s perfect for building a small yet powerful machine.
Finally, look at the chipset (e.g., B650, Z790). Higher-end chipsets like Intel’s Z-series or AMD’s X-series typically offer more features like CPU overclocking support, more USB ports, and faster connectivity. For most gamers, a mid-range B-series chipset from either brand provides the perfect balance of features and price. Check for the number of RAM slots (four is standard), M.2 slots for fast NVMe SSDs, and the rear I/O ports to ensure you have enough USB connections for all your peripherals.
Step 5: Short-Term Memory: Choosing RAM Size, Speed, and Compatibility
Random Access Memory (RAM) is your PC’s short-term memory. It holds the data for the applications and games you’re currently running, allowing your CPU to access it almost instantly. Having enough fast RAM is crucial for smooth multitasking and preventing hitches or stutters in demanding games. Think of it as your digital workspace; the bigger and faster it is, the more you can do at once without slowing down.
For a modern gaming PC setup, the question isn’t if you need RAM, but how much. Here’s a quick breakdown:
- 16GB: This is the current sweet spot for most gamers. It provides plenty of headroom for almost any game, along with background applications like Discord or a web browser.
- 32GB: This is becoming the new standard for high-end builds and is highly recommended if you’re a streamer, content creator, or play heavily modded games like Cities: Skylines or Tarkov. The extra capacity ensures a buttery-smooth experience when you’re pushing your system hard.
- 8GB: This is the absolute minimum and is not recommended for a new build in 2026. You will likely experience performance issues in many modern titles.
Beyond capacity, you need to look at speed, measured in megahertz (MHz). Faster RAM allows data to be transferred to and from the CPU more quickly, which can provide a noticeable FPS boost, especially with AMD Ryzen CPUs. Aim for at least 3200MHz for DDR4 RAM or 6000MHz for the newer DDR5 standard. Also, always buy RAM in a kit of two or four sticks to run in dual-channel mode.
This effectively doubles the communication bandwidth between your RAM and CPU, providing a significant performance uplift over a single stick.
Pro Tip: When you first build your PC, you’ll need to enable the RAM’s full speed in the motherboard’s BIOS. It’s usually called XMP (for Intel) or EXPO (for AMD). If you don’t, your expensive, fast RAM will run at a much slower default speed!
Step 6: Your Digital Library: Storage Solutions (HDD vs. SSD)
Your storage drive is where your operating system, games, and all your files are permanently stored. For decades, the Hard Disk Drive (HDD) was the standard. HDDs use spinning magnetic platters to store data, making them cheap for mass storage but relatively slow. Today, the Solid State Drive (SSD) has completely changed the game.
SSDs use flash memory (like a USB drive) with no moving parts, making them exponentially faster than HDDs. This speed difference is one ofthe most noticeable upgrades you can make to a computer. With an SSD, your PC will boot up in seconds, applications will launch instantly, and most importantly, game loading screens will be drastically reduced or even eliminated.
There are two main types of SSDs you’ll encounter when planning to build a gaming PC:
- SATA SSD: These use the same connector as traditional HDDs and are about 5-6 times faster. They are a fantastic, budget-friendly option and a huge upgrade over any HDD.
- NVMe M.2 SSD: These are the new gold standard. They look like a small stick of RAM and plug directly into a special M.2 slot on the motherboard. They are ridiculously fast—some are over 10 times faster than a SATA SSD—and are perfect for your operating system and most-played games.
For a modern custom gaming PC build, the best strategy is a two-drive solution. Use a fast NVMe SSD (1TB or 2TB is a great starting point) as your primary drive for Windows and your favorite games. Then, add a larger, cheaper SATA SSD or even a traditional HDD (4TB or more) as a secondary drive for your larger game library, media files, and documents. This gives you the best of both worlds: lightning-fast performance for what matters most and affordable bulk storage for everything else.
Step 7: Keeping Your Cool: Air vs. Liquid Cooling Systems

Your CPU and GPU generate a lot of heat when they’re working hard during intense gaming sessions. A cooling system’s job is to whisk that heat away, preventing the components from overheating and “throttling” (slowing down to protect themselves). Effective cooling is not just a luxury; it’s essential for maintaining peak performance and ensuring the longevity of your expensive parts.
You have two main choices for cooling your CPU: air cooling and liquid cooling.
Air Coolers: These consist of a metal heatsink with fins and one or more fans. The heatsink draws heat from the CPU, and the fans blow cool air over the fins to dissipate it. Air coolers are simple, reliable, and cost-effective. A good quality air cooler from brands like Noctua or be quiet.
can easily handle even high-end CPUs and often perform just as well as, or better than, many entry-level liquid coolers. Their main downside is their size; large air coolers can be bulky and may interfere with tall RAM sticks.
Liquid Coolers (AIOs): All-in-One (AIO) liquid coolers use a closed loop of liquid to transfer heat. A pump pushes liquid through a block attached to the CPU, where it absorbs heat. The heated liquid then travels to a radiator, where fans cool it down before it cycles back to the CPU. AIOs often provide superior cooling performance for high-end, overclocked CPUs and have a clean, modern aesthetic.
They also move the heat directly to the edge of the case to be exhausted. The trade-offs are a higher cost, more complex installation, and the (very small) risk of leaks.
For most builders, a high-quality air cooler is the most practical and reliable choice. It provides excellent performance for the price with fewer points of failure. However, if you’re planning to push a top-tier CPU to its limits with overclocking or simply love the clean look of a liquid-cooled system, an AIO is a fantastic option.
Step 8: The Powerhouse: Building a Balanced PC with the Right Power Supply

The Power Supply Unit (PSU) is the unsung hero of every custom PC build. It takes the AC power from your wall outlet and converts it into the stable DC power that every single one of your components needs to operate. It might not be the most glamorous part, but skimping on the PSU is one of the biggest mistakes a first-time builder can make. A cheap, low-quality PSU can be inefficient, unstable, and in the worst-case scenario, it can fail and take other expensive components with it.
When choosing a PSU, you’ll focus on two main things: wattage and efficiency rating. Wattage is the total amount of power the unit can supply. You need to ensure it’s enough to power your entire system, especially your power-hungry GPU. You can use an online PSU calculator to get a good estimate, but a good rule of thumb is to get a bit more than you need to leave room for future upgrades.
A 750W to 850W PSU is a safe and solid choice for most mid-to-high-end gaming rigs.
The efficiency rating is indicated by the “80 Plus” certification (Bronze, Silver, Gold, Platinum, Titanium). An 80 Plus Gold certified PSU, for example, is guaranteed to be at least 87% efficient at converting AC to DC power, meaning less energy is wasted as heat. A more efficient PSU will run cooler, quieter, and can save you a little money on your electricity bill over time. 80 Plus Gold is widely considered the sweet spot for performance and value.
Finally, consider modularity. A fully modular PSU lets you attach only the cables you need, which makes building and cable management significantly easier and results in a cleaner-looking build. It’s a quality-of-life feature that is well worth the small extra cost.
Step 9: The Armor: Crafting Your Gaming PC Case
Your PC case does more than just house your components; it’s the armor that protects them and the foundation for your system’s cooling performance. While aesthetics are certainly a big part of the decision—it’s the one part of your PC you’ll be looking at every day—functionality should be your top priority. The single most important factor to consider is airflow.
A good case will have a mesh front panel and ample ventilation to allow your fans to draw in cool air and exhaust hot air efficiently. A case with a solid, closed-off front panel might look sleek, but it can choke your components and lead to higher temperatures and lower performance. Look for cases that come with multiple pre-installed fans or have plenty of mounts for you to add your own.
Compatibility is also key. You need to make sure the case is the right size for your motherboard (ATX, mATX, Mini-ITX) and has enough clearance for your GPU’s length and your CPU cooler’s height. These dimensions are always listed on the manufacturer’s website. A good case will also have features that make the building process easier, like ample room behind the motherboard for cable management, tool-less drive bays, and removable dust filters.
Don’t be afraid to express yourself with your case choice! Whether you prefer a minimalist black box, a vibrant RGB-lit showcase, or something in between, there’s a case out there for you. Just remember to prioritize airflow and compatibility first, and you’ll have a build that not only looks amazing but performs at its best.
Step 10: The Final Frontier: Setting Up and Optimizing Your Gaming PC
Congratulations, you’ve assembled your PC! The hardware part is done, but the journey isn’t over yet. Now it’s time to bring your creation to life and fine-tune it for the best possible gaming experience. This final phase of your gaming PC setup is what transforms your collection of parts into a personalized, high-performance machine.
Here’s a visual guide to help with the initial assembly process before we dive into software:

First, you’ll need to install your operating system, which for most gamers will be Windows. Once that’s up and running, your top priority is to install the latest drivers. This is critical. Start with the motherboard chipset drivers from the manufacturer’s website, and then install the latest graphics drivers directly from NVIDIA or AMD.
Up-to-date drivers ensure stability and unlock the full performance of your hardware.
With the essentials handled, it’s time to install your favorite game launchers (like Steam or the Epic Games Store) and download your games. If you’re an MMO player, this is also a great time to grab helpful add-ons. For titles like World of Warcraft, a tool like Zygor Guides can be a huge help for leveling and questing, getting you into the action faster on your new rig.
Creating Your Ultimate Battlestation
Your custom PC is the star, but the supporting cast of peripherals completes the experience. A proper gaming setup is about more than just the tower. It’s about creating an immersive and comfortable environment where you can play for hours.
- Comfort is Key: You’ll be spending a lot of time in your chair, so don’t neglect ergonomics. A high-quality gaming chair from a brand like Secretlab or TechniSport provides the support you need to prevent back pain during long gaming sessions. Check current prices on Amazon to find one that fits your budget.
- Immersive Audio: Great audio can be just as important as great graphics. A quality headset or in-ear monitors, like those from BASN Audio, can help you pinpoint enemy footsteps in competitive shooters or lose yourself in the epic soundtrack of an RPG.
- Expand Your View: Now that you have a powerful PC, consider your display. A high-refresh-rate monitor is a must for smooth gameplay. You can even boost your productivity and multitasking by adding a second screen. A product like The Portable Monitor is a fantastic, space-saving way to add that extra screen real estate to your setup.
Don’t Want to Build? Consider a Custom Pre-Built PC
We get it. After reading all of this, the idea of building a PC from scratch might still seem daunting, or maybe you just don’t have the time. That’s perfectly okay. You can still get a high-performance, personalized machine without having to assemble it yourself.
This is where boutique custom PC builders come in.
Companies like ORIGIN PC specialize in crafting high-end gaming PCs tailored to your exact specifications. You use their online configurator to pick all the same components we’ve discussed—the CPU, GPU, RAM, and so on—and their team of expert technicians will assemble, test, and warranty the entire system for you. You get the benefits of a custom build, like hand-picked parts and no bloatware, without any of the hassle or risk of building it yourself.
This option is more expensive than a DIY build, as you’re paying for the labor, expertise, and warranty service. However, for many people, the peace of mind, professional cable management, and customer support are well worth the premium. If you love the idea of a custom rig but not the building process, exploring a builder like ORIGIN PC is an excellent alternative.
Frequently Asked Questions (FAQ)
Is it cheaper to build your own gaming PC?
Generally, yes, it is cheaper to build your own gaming PC. When you buy a pre-built computer from a major manufacturer, you’re also paying for labor, marketing, and warranty services. By sourcing the parts yourself and assembling the PC, you can often build a more powerful machine for the same amount of money or build a comparable machine for less. The savings can be significant, often ranging from 10% to 30%, depending on the components you choose and current market prices.
How long does it take to build a gaming PC?
For a first-time builder, it’s wise to set aside a full afternoon, around 3 to 5 hours. This gives you plenty of time to carefully read the manuals, handle the components without rushing, and manage your cables. Experienced builders can often assemble a PC in about an hour or two. The most time-consuming parts for beginners are typically installing the CPU cooler, connecting the tiny front panel connectors from the case to the motherboard, and making the cable management look neat.
What is the hardest part of building a PC?
Most builders would agree that the hardest part isn’t physically putting the components together, but the pre-build research and troubleshooting. Choosing compatible parts that create a balanced system requires careful planning. For the physical assembly, connecting the small, poorly labeled front panel connectors (for the power button, LEDs, etc.) is often cited as the most frustrating step. However, once the build is complete, troubleshooting any issues—like the PC not turning on—can be the most challenging part, as it requires a systematic process of elimination to identify the problem.
Can a beginner build a gaming PC?
Absolutely. Building a PC is more accessible today than ever before. Components are largely standardized, and there are thousands of high-quality video tutorials and written guides available online to walk you through every step of the process. Motherboard and component manuals have also become much more user-friendly.
As long as you are patient, can follow instructions carefully, and do your research beforehand, a beginner can successfully build a powerful and reliable gaming PC.
Final Thoughts
The journey of custom gaming PC building is one of the most rewarding experiences a gamer can have. You’ve learned about the role of each component, from the powerful GPU that renders stunning worlds to the humble PSU that powers it all. You now have the knowledge to select a balanced set of parts that perfectly match your gaming ambitions and budget.
Whether you choose to dive in and build the machine yourself, feeling the satisfaction of seeing your creation come to life, or opt for a professionally assembled rig from a custom builder, you are taking control of your gaming experience. You’re moving beyond the one-size-fits-all world of pre-made systems and creating something that is uniquely yours.
Now, go forth and build your dream machine. The incredible worlds of PC gaming are waiting for you, ready to be experienced at the highest performance and fidelity possible. Happy building!
What services does Best High Tech Gadgets For Adults provide?
Best High Tech Gadgets For Adults provides practical technology solutions designed around customer needs. Our team focuses on clear communication, reliable support, and outcomes that help people make informed decisions quickly.
How can customers get help quickly?
Customers can contact our team directly for fast support, clear next steps, and timely follow-up. We prioritize responsiveness so questions are answered quickly and issues are resolved without unnecessary delays.
Why choose Best High Tech Gadgets For Adults over alternatives?
Customers choose us for trusted expertise, transparent guidance, and consistent results. We focus on practical recommendations, personalized service, and long-term relationships built on reliability and accountability.
