About Best High Tech Gadgets For Adults: Best High Tech Gadgets For Adults is your trusted source for cutting-edge technology insights and solutions. High Tech Gadget Reviews We provide reliable, well-researched technology content to keep you informed and help you make better decisions. This content focuses on Wyze Camera Outdoor v2 Review: The Honest Truth for Home Security and related topics.

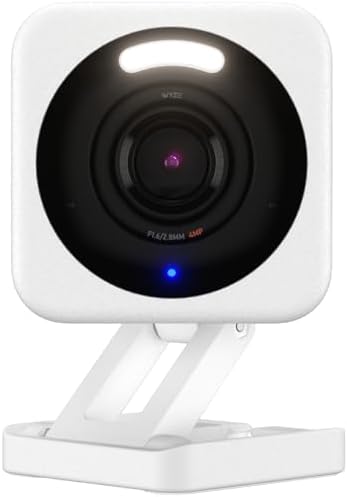
- 【2.5K QHD Resolution Security Camera】 – Elevate your monitoring with our security cameras featuring Quad High-Definition…
- 【Indoor/Outdoor Versatility】 – Engineered for durability with IP65 weather resistance, Wyze Cam v4 is an ideal security …
- 【Enhanced Color Night Vision】 -Whether it’s night or day, see everything in vivid color and clarity with this indoor cam…

- Live Streaming with Color Night Vision – Keep an eye on your home 24/7 with our security cameras, featuring 1080P HD vid…
- Indoor/Outdoor – The OG security camera is designed for both indoor and outdoor use. It is IP65 rate, perfect for monito…
- Instant Motion and Sound Alerts – Stay informed with instant notifications sent to the Wyze app whenever it detects moti…


- 【2.5K QHD Resolution Security Camera】 – Elevate your monitoring with our security cameras featuring Quad High-Definition…
- 【Indoor/Outdoor Versatility】 – Engineered for durability with IP65 weather resistance, Wyze Cam v4 is an ideal security …
- 【Enhanced Color Night Vision】 -Whether it’s night or day, see everything in vivid color and clarity with this indoor cam…
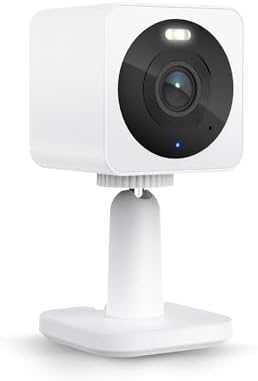
Wyze Camera Outdoor v2 Review: The Honest Truth for Home Security
When it comes to affordable home security, Wyze has been a household name for years, offering feature-packed devices without the premium price tag. The Wyze Camera Outdoor v2 is a perfect example of this philosophy, promising wire-free convenience, color night vision, and smart alerts for a fraction of the cost of its competitors. But with so many options on the market and discussions about its reliability and security, is this budget-friendly camera the right choice for protecting your home in 2025? It’s an amazing piece of tech, and we’re going to break it all down!
This review dives deep into everything you need to know. We’ll cover the standout features, walk you through the surprisingly simple installation, and see how it stacks up against other popular cameras. We’ll also tackle the tough questions about battery life, security concerns, and the real-world user feedback you won’t find on the box. Let’s get into it and see if the Wyze Camera Outdoor v2 is the security upgrade your home has been waiting for.
What to Know
- Wire-Free & Weatherproof: The camera is 100% battery-powered with an IP65 rating, making it easy to install anywhere outside without worrying about wires or weather damage.
- Color Night Vision: A standout feature at this price point is the Starlight Sensor, which allows you to see video in full color in low-light conditions, offering more detail than traditional black-and-white infrared.
- Base Station is Required: Unlike some other Wyze cameras, the Outdoor v2 requires a connection to the Wyze Base Station for operation, which handles the communication between the camera and your Wi-Fi network.
- Battery Life Varies Greatly: While Wyze claims up to 6 months of battery life, real-world performance depends heavily on your settings, the number of motion events, and how often you use live view. Expect to charge it every 2-3 months with average use.
- Security is a Key Consideration: Wyze has faced security challenges in the past. It’s crucial for users to enable two-factor authentication and follow security best practices to protect their devices and privacy.
An In-Depth Look at Wyze Camera Outdoor V2 Features


The Wyze Camera Outdoor v2 packs an impressive set of features, especially when you consider its budget-friendly price. It’s designed to give you peace of mind without requiring a complex setup or a hefty investment. Let’s break down what makes this outdoor Wyze camera tick.
First up is the video quality. It records in crisp 1080p Full HD, which is clear enough to identify faces, read license plates from a reasonable distance, and see important details around your property. While it’s not 2K or 4K, the 1080p resolution is sharp and provides a great balance between video clarity and file size, which is important for both cloud storage and local recording on a microSD card.
The camera’s IP65 weather-resistance rating is another huge plus. This certification means it’s protected against dust ingress and low-pressure water jets from any direction. In simple terms, it can handle rain, snow, and dust, making it a reliable choice for monitoring your home’s exterior year-round. You can mount it on a porch, garage, or fence post without worrying about the elements damaging its internal components.
Two-way audio is also included, allowing you to listen in and speak through the camera using the Wyze app. This is fantastic for greeting visitors, instructing delivery drivers, or even scaring off potential intruders or pesky animals. The audio quality is clear enough for conversations, turning your security camera into a handy outdoor intercom.
Step-by-Step Installation Guide for Your Wyze Camera Outdoor v2
Getting your new Wyze camera up and running is incredibly straightforward, even if you’re not particularly tech-savvy. Wyze designed the process to be quick and painless. Here’s a simple step-by-step guide to get you started.
1. Set Up the Base Station
Before you do anything with the camera itself, you need to set up the included Wyze Base Station. This little box is the brains of the operation, acting as a bridge between your camera and your home’s Wi-Fi network. Plug the base station into your router using the included Ethernet cable and connect the power adapter. Open the Wyze app, tap the ‘+’ icon, select ‘Add Device,’ and follow the on-screen instructions to add the base station to your account.
It usually takes just a couple of minutes.
2. Charge and Sync Your Camera
While the base station is setting up, it’s a great time to charge your Wyze Camera Outdoor v2. Use the included micro-USB cable to fully charge the battery, which can take a few hours. Once it’s fully charged, it’s time to sync it. Bring the camera near the base station, turn it on, and press the sync button on both the camera and the base station.
The app will guide you through this, and you’ll hear voice prompts confirming when the pairing is successful.
3. Mount the Camera
Now for the fun part: deciding where to place your camera! The kit includes a magnetic mount and a screw-in mount, giving you flexibility. For easy installation, the magnetic mount is fantastic—just attach the base to a metal surface or screw it into a wall, and the camera snaps right on. For a more secure, permanent installation, use the standard screw-in mount.
Consider placing the camera about 7-10 feet off the ground and angling it slightly downwards to get the best view and motion detection coverage. Use the live view in the Wyze app to check the camera’s angle and field of view before you finalize the position. That’s it—you’re all set to monitor your property!
Wyze Camera Outdoor V2 vs. The Competition


When you’re shopping for an outdoor security camera, Wyze is far from the only name in the game. Brands like Blink (owned by Amazon) and Ring (also owned by Amazon) are major players. So, how does the outdoor Wyze camera compare? Let’s put them side-by-side.
The biggest advantage the Wyze v2 camera has is its incredible value. It often comes in at a lower price point than comparable cameras from Blink and Ring, especially when you factor in the cost of a hub or base station. Furthermore, Wyze offers free 12-second cloud recordings of motion events and the option for local recording via a microSD card in the base station, which is a feature many competitors lock behind a subscription.
Blink and Ring, on the other hand, heavily push their subscription plans (Blink Subscription Plan and Ring Protect) for cloud storage and advanced features like person detection. While Wyze also has a subscription, Cam Plus, it feels more like an optional upgrade for features like unlimited recording length and AI detection, rather than a necessity. This makes Wyze a more attractive option for those looking to avoid monthly fees.
| Feature | Wyze Camera Outdoor v2 | Blink Outdoor | Ring Stick Up Cam Battery |
|---|---|---|---|
| Video Resolution | 1080p HD | 1080p HD | 1080p HD |
| Field of View | 130° | 110° | 130° |
| Night Vision | Color & Infrared | Infrared | Infrared (Color with lighting) |
| Power Source | Rechargeable Battery | 2 AA Lithium Batteries | Rechargeable Battery Pack |
| Subscription | Optional (Cam Plus) | Required for cloud storage | Required for cloud storage |
| Local Storage | Yes (microSD in Base Station) | Yes (via Sync Module 2) | No |
| Smart Integration | Alexa, Google Assistant | Alexa | Alexa |
In terms of features, the Wyze camera holds its own. Its Color Night Vision via the Starlight Sensor is a significant advantage over the standard infrared night vision on the Blink Outdoor and Ring Stick Up Cam. Seeing in color at night can make a huge difference in identifying details. However, Ring’s ecosystem is more mature, with a wider range of products like doorbells and alarm systems that integrate together.
Blink’s key selling point is its impressive two-year battery life from two AA lithium batteries, which is far longer than what you’ll get from Wyze’s rechargeable battery.
Ultimately, the choice comes down to your priorities. If you want the best bang for your buck, flexible storage options, and excellent night vision without mandatory monthly fees, the Wyze Camera Outdoor v2 is an amazing contender. If you prioritize extremely long battery life or are already invested in the Amazon/Ring ecosystem, Blink or Ring might be a better fit.
Setting Up Motion Detection Like a Pro
One of the most critical features of any security camera is its ability to detect motion accurately. The Wyze Camera Outdoor v2 uses a Passive Infrared (PIR) sensor to detect motion, which is a fantastic choice for a battery-powered device. Unlike cameras that use pixel-based analysis, a PIR sensor detects heat signatures from objects like people and animals. This method is far more energy-efficient and helps reduce false alerts from things like swaying trees or shadows.
Getting the settings just right is key to getting reliable alerts without draining your battery. In the Wyze app, you have several tools at your disposal. First is the Detection Zone. This allows you to draw a specific area within the camera’s field of view where you want it to look for motion.
For example, you can draw a box around your walkway and porch, telling the camera to ignore motion from cars driving on the street. This is essential for preventing a constant stream of useless notifications.
Next, you can adjust the sensitivity of the PIR sensor. This is a slider from low to high. A higher sensitivity will detect motion from further away but may also be triggered by smaller animals. A lower setting is better if you only want to be alerted to larger objects, like people, that are closer to the camera.
It might take a little experimentation to find the sweet spot for your specific environment.
Pro Tip: To maximize both accuracy and battery life, mount your camera so that people will walk across its field of view, not directly towards it. PIR sensors are much better at detecting horizontal movement.
Finally, you can set a ‘cooldown’ period between event recordings, ranging from 1 minute to 5 minutes on the free plan. This prevents the camera from recording back-to-back videos if there’s continuous motion, which can quickly drain the battery. If you subscribe to Cam Plus, you can eliminate the cooldown period and record for as long as motion is detected.
Battery Life and Charging Options Explained
For any wire-free camera, battery life is a top concern. Wyze advertises that the Wyze Camera Outdoor v2 can last up to 6 months on a single charge. While this is possible under ideal conditions, your real-world experience will likely be different. It’s more realistic to expect somewhere between 2 to 4 months of use, depending entirely on your settings and the camera’s activity level.
What drains the battery the fastest? The biggest factors are the number of motion-triggered recordings and the amount of time you spend in Live View. A camera monitoring a quiet backyard will last much longer than one watching a busy front porch with constant deliveries and visitors. High sensitivity settings, long recording clips, and frequent notifications will all contribute to faster battery drain.
When it’s time to recharge, you’ll need to bring the camera inside and connect it to a power source using the included micro-USB cable. A full charge typically takes around 4-5 hours. This is one of the main inconveniences of a battery-powered system, as your property will be unmonitored during this time unless you have other cameras.
To solve this problem, Wyze offers a fantastic accessory: the Wyze Solar Panel. This small panel connects to the camera’s charging port and uses sunlight to continuously trickle-charge the battery. With just a few hours of direct sunlight per day, the solar panel can keep the camera topped off, virtually eliminating the need to ever take it down for manual charging. This is an excellent investment if your camera is mounted in a sunny spot, especially if it’s in a hard-to-reach location.
Exploring the Incredible Night Vision Capabilities


Nighttime is when security is most critical, and the Wyze Camera Outdoor v2 truly shines in the dark—literally! It comes equipped with two different types of night vision, giving you flexibility in how you monitor your property after sundown.
The first is standard infrared (IR) night vision. This is the classic black-and-white view you see on most security cameras. The camera has IR emitters that illuminate the area with infrared light, which is invisible to the human eye but allows the camera to see clearly in complete darkness. This mode is reliable and provides a clear image up to about 25 feet away, perfect for seeing who or what is moving around your yard.
But the real star of the show is the Color Night Vision. This is made possible by the camera’s high-sensitivity Starlight CMOS Sensor. This advanced sensor can capture and process much more light than a standard camera sensor, allowing it to produce a full-color image in very low-light conditions, such as on a moonlit night or in an area with ambient light from streetlights. You can toggle this feature on in the app, and it’s absolutely amazing.
Why is color night vision so important. Details. A color image can help you identify the color of a person’s clothing, the model of a car, or other specific details that would be lost in a monochrome IR image. This can be invaluable for law enforcement if you ever need to provide footage of an incident.
While it requires some ambient light to work effectively (it won’t work in pitch-black conditions), it provides a level of nighttime detail that is rare to find in a camera at this price point.
Integrating Your Wyze Camera with Smart Home Systems
Your Wyze v2 camera doesn’t have to live in isolation. It’s designed to work with the two biggest smart home ecosystems: Amazon Alexa and Google Assistant. This integration allows you to use voice commands and view your camera’s feed on compatible smart displays, making your security system even more convenient.
For Amazon Alexa users, you can link your Wyze account through the Alexa app. Once connected, you can view a live stream from your Wyze Camera Outdoor v2 on devices like the Echo Show or a Fire TV. Simply say, “Alexa, show me the front yard camera,” and the feed will pop up on the screen. This is a fantastic way to quickly check on a noise outside without having to find your phone and open the Wyze app.
Similarly, the integration with Google Assistant allows you to stream the camera’s feed to a Google Nest Hub or a Chromecast-enabled TV. The voice command is just as simple: “Hey Google, show the driveway camera on the living room TV.” This hands-free access is incredibly useful when you’re busy or your hands are full.
Beyond just viewing feeds, you can also incorporate the camera into smart home routines. For example, you could create an Alexa Routine where turning on your Wyze Plug also announces, “Front door camera is active.” While the integration is primarily focused on viewing the live stream, it adds a layer of convenience that makes the camera feel like a true part of your connected home.
Troubleshooting Common Issues with Your Outdoor Wyze Camera
While the Wyze Camera Outdoor v2 is generally reliable, like any piece of technology, you might run into a few hiccups. The good news is that most common problems are easy to fix. Here are some of the issues users report most frequently and how to solve them.
Camera is Offline or Won’t Connect
This is the most common issue. If your camera suddenly appears offline in the app, the first step is to check the connection between the camera and the base station. The camera might be too far away from the base station, or there could be thick walls or other interference blocking the signal. Try moving the base station to a more central location in your home.
If the signal strength is good, try power-cycling both the camera and the base station. Turn the camera off and on again. Unplug the base station from power for 30 seconds and then plug it back in. This simple reboot often resolves connectivity glitches.
Poor Battery Life
If your camera’s battery is draining much faster than expected, it’s almost always due to the settings. Go into the camera’s settings in the Wyze app and check your motion detection sensitivity and detection zone. If the sensitivity is too high or the zone covers a busy area, the camera is recording constantly. Lower the sensitivity and narrow the detection zone to only cover the areas you truly care about.
Also, consider increasing the cooldown period between events to give the camera a break.
Can’t View Event Recordings
Sometimes you might get a notification for a motion event but can’t view the recorded clip. This can happen if the camera’s connection to the base station was interrupted during the upload. It can also be an issue with the microSD card in the base station if you’re using local storage. Try reformatting the microSD card through the Wyze app (this will erase all existing footage) or try a different card to see if that resolves the issue.
User Reviews and Feedback: The Good, The Bad, and The Honest
To get a complete picture of the Wyze Camera Outdoor v2, it’s important to look beyond the spec sheet and see what actual users are saying. The feedback is generally positive, especially regarding the price, but there are some recurring complaints that are important to be aware of.
What Users Love
Overwhelmingly, users praise the camera for its incredible value. You get a feature set—1080p video, color night vision, wire-free design—that is often found in cameras costing two or three times as much. The easy installation process is another frequent point of praise. Many users report having the entire system up and running in under 15 minutes.
The quality of the color night vision also gets a lot of positive mentions. Users are often surprised and delighted by the clarity and detail they can see in low-light conditions. As one user on a Reddit discussion noted, being able to see the color of a car at night is a huge step up from grainy black-and-white footage.
![Wyze Cam Outdoor V2: an Honest Review! [2023]](https://i0.wp.com/i.ytimg.com/vi/8uJ9FkCeVFg/hqdefault.jpg?w=525&ssl=1)
Common Criticisms
On the flip side, the most common complaints revolve around connectivity and reliability. Some users experience issues with the camera going offline intermittently, requiring a manual reset. This can be frustrating, especially if the camera is mounted in a hard-to-reach place. These issues often seem to stem from the distance between the camera and the base station or Wi-Fi interference.
Battery life is another area where user experiences vary. While some get close to the advertised six months, many others report needing to recharge every 2-3 months, which can be a hassle. Finally, some users have expressed frustration with delays in notifications or the time it takes for the live view to load, which can be critical in a security situation.
Security and Privacy: What You Need to Know
When you place a camera in or around your home, security and privacy are paramount. Wyze has, in the past, faced public scrutiny over security vulnerabilities. It’s important to address this head-on and understand both the risks and the steps you can take to protect yourself.
In early 2022, a security firm disclosed vulnerabilities that could have allowed attackers to view camera feeds. Wyze has since patched these issues, but the incidents highlighted the importance of proactive security measures for any smart home device. The company has also had incidents involving users briefly seeing feeds from other people’s cameras, which were attributed to web caching issues during an outage.
So, are Wyze cameras safe to use in 2025. The answer depends heavily on the user. Wyze has improved its security posture and offers crucial security features that you absolutely must use. The single most important step is to enable Two-Factor Authentication (2FA) on your Wyze account.
This adds a second layer of security, requiring a code from your phone in addition to your password to log in, which can prevent unauthorized access to your account and camera feeds.
It’s also critical to use a strong, unique password for your Wyze account—one that you don’t use for any other service. You should also keep your camera’s firmware and the Wyze app updated to ensure you have the latest security patches. For those seeking the highest level of security, it’s wise to follow best practices for IoT devices, such as using a separate guest network for your smart home gadgets, as recommended by security experts like the Federal Trade Commission.
Frequently Asked Questions (FAQ)
Does the Wyze Cam v2 need a subscription?
No, a subscription is not required to use the basic functions of the Wyze Cam Outdoor v2. Out of the box, you get motion-activated 12-second video recordings that are stored in the cloud for 14 days for free. You also have the option to record continuously or on a schedule to a microSD card inserted into the base station.
However, Wyze does offer a subscription service called Cam Plus. This service adds valuable features like unlimited-length event recordings (the camera records for as long as motion is detected), no cooldown period between events, and advanced AI detection for people, packages, vehicles, and pets. While the camera is perfectly functional without it, Cam Plus enhances its capabilities significantly.
What is the difference between Wyze Cam v1 and v2?
The Wyze Cam Outdoor v2 brought several key improvements over the original v1. The most significant upgrade is the Starlight Sensor, which enables the impressive Color Night Vision feature, a capability the v1 lacked. The v2 also boasts a wider 130-degree field of view compared to the 110-degree view of the v1, allowing you to see more of your property.
Additionally, the v2 features a more efficient PIR motion sensor for better accuracy and improved battery performance. The base station was also updated for better connectivity and range. While both are wire-free outdoor cameras, the v2 is a more capable and refined version of the original.
How long will a Wyze Cam v2 record on an SD card?
The recording time on a microSD card depends on the card’s size and the recording quality you select. The base station for the Wyze Cam Outdoor v2 supports microSD cards up to 32GB. If you set the camera to record continuously in SD quality, a 32GB card will hold approximately 7-8 days of footage. If you record in HD quality, that time is reduced to about 2-3 days.
Most users, however, don’t record continuously with a battery-powered camera. If you set it to only record motion events, a 32GB card can last for weeks or even months, depending on how much activity the camera detects. The camera will automatically overwrite the oldest footage when the card is full.
Does the Wyze Cam v2 need Wi-Fi?
Yes, the Wyze Cam Outdoor v2 system requires a Wi-Fi connection to function. Specifically, the Wyze Base Station must be connected to your router via an Ethernet cable. The base station then creates its own secure, low-power wireless connection to the camera itself.
This setup means the camera doesn’t connect directly to your home’s Wi-Fi, which helps conserve its battery life. However, you do need an active internet connection for the base station to communicate with the Wyze cloud, allowing you to view the live feed, receive notifications, and access recordings from your phone anywhere in the world.
Final Thoughts: Is the Wyze Camera Outdoor V2 for You?
After a deep dive into its features, performance, and user feedback, it’s clear that the Wyze Camera Outdoor v2 offers an almost unbelievable amount of value. For a very low entry price, you get a capable, wire-free 1080p security camera with standout features like Color Night Vision and flexible local storage options that help you avoid mandatory monthly fees. It’s an incredibly attractive package for anyone looking to add outdoor security on a budget.
The installation is a breeze, and its integration with Alexa and Google Assistant makes it a welcome addition to any smart home. However, it’s not without its trade-offs. The real-world battery life may not live up to the six-month claim, and some users experience connectivity issues that can be frustrating. Furthermore, the past security concerns mean that prospective buyers must be diligent about using features like two-factor authentication to keep their accounts secure.
So, who is it for. The Wyze Camera Outdoor v2 is perfect for the tech-savvy, budget-conscious homeowner who wants good-enough security without a big investment. It’s ideal for monitoring less critical areas like a backyard, a side gate, or a garage. If you’re willing to occasionally troubleshoot a connection and stay on top of security best practices, the value is simply unbeatable.
If you’re looking for an affordable and feature-rich security solution, you should definitely check out the Wyze Camera Outdoor v2 on Amazon.
What services does Best High Tech Gadgets For Adults provide?
Best High Tech Gadgets For Adults provides practical technology solutions designed around customer needs. Our team focuses on clear communication, reliable support, and outcomes that help people make informed decisions quickly.
How can customers get help quickly?
Customers can contact our team directly for fast support, clear next steps, and timely follow-up. We prioritize responsiveness so questions are answered quickly and issues are resolved without unnecessary delays.
Why choose Best High Tech Gadgets For Adults over alternatives?
Customers choose us for trusted expertise, transparent guidance, and consistent results. We focus on practical recommendations, personalized service, and long-term relationships built on reliability and accountability.