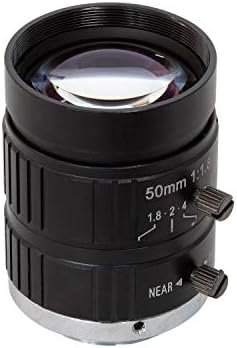
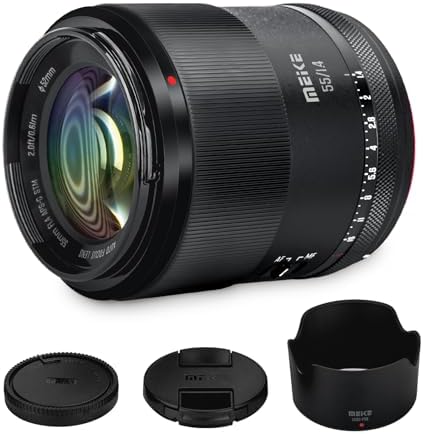
- 50 millimeter focal length and maximum aperture of f/1.8
- Great for portraits, action, and nighttime photography; Angle of view (horizontal, vertical, diagonal): 40º, 27º,46º
- Minimum focusing distance of 1.15 feet (0.35 meter) and a maximum magnification of 0.21x

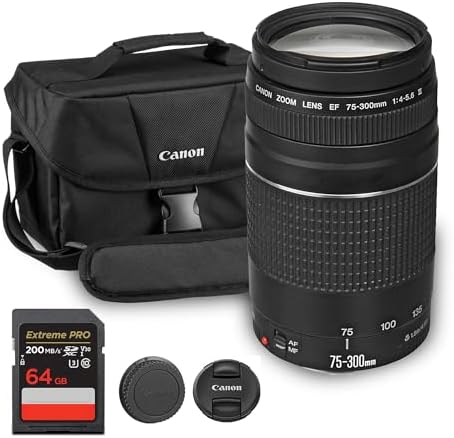
- EF Mount; Aperture Range: f/4-45; DC Autofocus Motor; 4.9′ Minimum Focus Distance; 58mm Filter Thread Diameter
- 4.9-foot closest focusing distance; 32- to 8-degree diagonal angle of view
- Measures 2.8 inches in diameter and 4.8 inches long; weighs 16.8 ounces
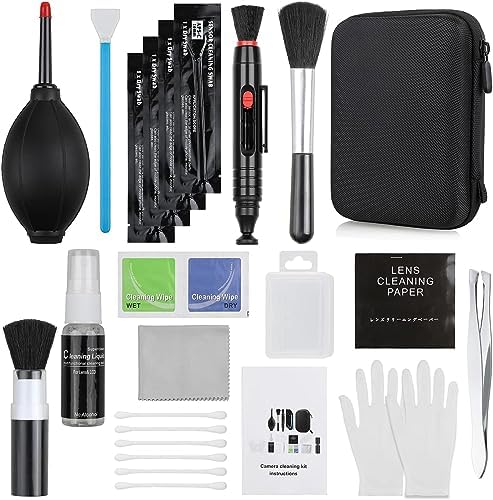
- Professional Camera Lens Cleaning Kit Includes: air blowing * 1, two in one cleaning pen * 1, brush * 1, beauty brush * …
- Zero Scratches, Efficient Cleaning: Extremely fine Microfiber can easily clean the invisible dust, particles and smudges…
- Convenient to Carry and Use: The accessories are all packed in a black storage box. When you need to use it, open the st…
Camera Lenses for DSLR: A Beginner’s Buying Guide to Choosing Perfectly
So, you’ve got a fantastic DSLR camera, but your photos still feel… a little flat. You see those stunning images online with creamy, blurred backgrounds and incredibly sharp subjects, and you wonder, “Why don’t my pictures look like that?” The secret, my friend, isn’t always the camera body—it’s the glass you put in front of it. Investing in the right camera lenses for dslr cameras is the single most impactful upgrade you can make to elevate your photography from simple snapshots to breathtaking art. It’s where the real magic happens!
This guide is your roadmap to understanding the exciting world of DSLR lenses. We’re going to demystify the technical jargon, explore the creative possibilities, and give you the confidence to choose the perfect lens that matches your vision and budget. Get ready, because your photography is about to get a serious power-up!
What to Know
- Focal Length is Your Perspective: This number (in mm) determines your field of view. Low numbers (like 18mm) are wide-angle for landscapes, while high numbers (like 200mm) are telephoto for zooming in on distant subjects.
- Aperture (f-stop) is Your Creative Control: A low f-stop number (like f/1.8) lets in more light, creating that beautiful blurry background (bokeh) and performing well in dark conditions. A high f-stop (like f/11) keeps more of the scene in focus.
- Prime vs. Zoom Lenses: Prime lenses have a fixed focal length, offering superior sharpness and wider apertures for the price. Zoom lenses offer the versatility of multiple focal lengths in one package, perfect for travel and events.
- Compatibility is Key: Always ensure a lens is compatible with your camera’s brand (Canon, Nikon, etc.) and sensor type (full-frame or crop-sensor). Third-party brands like Sigma and Tamron often offer great value but check the mount.
What Exactly Are Camera Lenses for DSLR Cameras?

Think of your camera body as the brain and the lens as the eye. The lens’s job is to gather the light from a scene and focus it precisely onto your camera’s digital sensor to create an image. The quality of the glass elements, the precision of their arrangement, and the mechanics of the lens itself all dramatically affect the final look of your photo—its sharpness, color, contrast, and even the mood.
Most DSLRs are sold with a “kit lens,” typically a basic zoom like an 18-55mm. While these are great for starting, they are built to a price point. They often have limited light-gathering ability (a “slow” or high f-stop number) and can produce images that aren’t as sharp as what your camera is truly capable of. Upgrading to a dedicated lens is like taking the governor off a sports car; you finally get to see what it can really do!
Better lenses for dslr cameras use higher-quality glass, more advanced optical formulas to reduce distortion, and faster, quieter autofocus motors. They give you access to wider apertures, which is the key to achieving that professional-looking background blur and shooting in low-light situations without a flash. In short, the lens dictates your creative options far more than the camera body does.
The Core Features That Define a Great DSLR Lens
When you start shopping for dslr camera lenses, you’ll see a lot of numbers and letters. It can feel overwhelming, but it all boils down to a few key features that control how your images look and feel. Let’s break them down!
Focal Length: Your Creative Viewpoint
Focal length, measured in millimeters (mm), determines the angle of view and magnification. It’s the first thing you should consider because it defines what you can fit in your frame.
- Wide-Angle (approx. 14mm – 35mm): These lenses capture a very wide field of view, making them perfect for sweeping landscapes, architecture, and large group shots. They can create a sense of scale and drama, pulling the viewer into the scene.
- Standard (approx. 35mm – 70mm): This range closely mimics the perspective of the human eye. Lenses in this range, especially the classic 50mm, are incredibly versatile and are loved for portraits, street photography, and everyday shooting. They produce a very natural and relatable look.
- Telephoto (approx. 70mm and up): These lenses bring distant subjects close. They are the go-to choice for wildlife, sports, and any situation where you can’t get physically closer to your subject. They also create a cool effect called “compression,” which makes the background appear closer and more blurred, ideal for flattering portraits.
Aperture (f-stop): The Key to Blurry Backgrounds and Low-Light Magic
Aperture, represented by an “f-number” like f/1.8 or f/4, refers to the opening inside the lens that lets light pass through to the sensor. It’s one of the most exciting tools at your disposal! A lower f-number means a wider opening, which has two incredible benefits.
First, it lets in more light. A lens with an f/1.8 aperture can gather significantly more light than a kit lens at f/5.6. This allows you to shoot in darker environments (indoors, at dusk) with faster shutter speeds, reducing motion blur and the need for a flash. Second, a wide aperture creates a shallow depth of field.
This is the secret to that dreamy, blurry background (known as “bokeh”) that makes your subject pop. It isolates your subject from a distracting background, which is why portrait photographers love lenses with wide apertures.
Prime vs. Zoom Lenses: Simplicity or Versatility?
This is a classic debate, and the right answer depends on your needs.
- Prime Lenses: These have a single, fixed focal length (e.g., 50mm). You can’t zoom in or out. Why would anyone want this? Because they are simpler to design, they are often sharper, lighter, and offer much wider maximum apertures for their price compared to zooms. They force you to “zoom with your feet” by moving around, which can be a fantastic way to improve your composition skills.
- Zoom Lenses: These offer a range of focal lengths (e.g., 24-70mm) in a single lens. Their incredible versatility makes them perfect for events, travel, and situations where you need to change your composition quickly without swapping lenses. The trade-off is that they are typically larger, heavier, and more expensive to get with a wide, constant aperture.
How to Choose the Right Lenses for Your DSLR Camera

Alright, you understand the basics. Now for the fun part: picking the perfect lens for YOU! It’s a personal journey, but following these steps will lead you to a lens you’ll absolutely love. This is where we turn technical knowledge into a practical decision.
Step 1: Identify Your Photography Passion
What do you love to shoot? The answer to this question is the single biggest clue to what lens you need. Different genres of photography have different requirements.
- Portraits: Look for a prime lens with a wide aperture. A 50mm f/1.8 or an 85mm f/1.8 will give you sharp subjects and beautifully blurred backgrounds.
- Landscapes: A wide-angle zoom lens, like a 16-35mm or 10-20mm, is your best friend. It will allow you to capture the grand scale of nature.
- Travel: A versatile zoom lens is often the best choice. A 24-105mm or an 18-135mm can cover everything from wide cityscapes to zoomed-in details, so you don’t have to carry multiple lenses.
- Sports & Wildlife: You need reach. A telephoto zoom lens, like a 70-200mm or a 100-400mm, is essential for getting close to the action.
Step 2: Understand Your Camera’s Sensor Size (Full-Frame vs. Crop-Sensor)
This is a crucial technical point. DSLRs come with two main sensor sizes: full-frame and crop-sensor (often called APS-C). A crop-sensor is smaller, which means it effectively “crops” the image from the lens, making the focal length seem longer. This is called the “crop factor,” which is typically 1.5x for Nikon/Sony and 1.6x for Canon.
What does this mean in practice? A 50mm lens on a crop-sensor Canon DSLR will give you a field of view equivalent to an 80mm lens (50mm x 1.6). This is great for portraits but not so great if you wanted a standard view. Some lenses are designed specifically for crop-sensor cameras (like Canon’s EF-S or Nikon’s DX lenses), so make sure you know what you have before you buy.
Step 3: Check Lens Mount Compatibility
Not every lens fits every camera. Each brand has its own proprietary lens mount. Canon uses EF and EF-S mounts for its DSLRs, while Nikon uses the F-mount. You cannot put a Nikon lens on a Canon camera (or vice-versa) without a special adapter, which can sometimes limit functionality.
Beyond the camera manufacturer’s own lenses (first-party), there are excellent third-party manufacturers like Sigma, Tamron, and Tokina. They make lenses for all the major mounts and often provide amazing quality at a more competitive price. Just be sure to buy the version that is specifically made for your camera’s mount (e.g., “Sigma 35mm f/1.4 Art for Canon EF”).
Pro Tip: When buying a third-party lens, check for reviews that mention autofocus speed and accuracy on your specific camera model. While usually excellent, there can sometimes be minor compatibility quirks.
Step 4: Set a Realistic Budget
Lenses can range from under $150 to well over $10,000. It’s easy to get carried away! Set a budget you’re comfortable with. Remember, a $500 lens on a basic DSLR will produce a far better image than a $150 kit lens on a professional camera body.
Don’t forget the used market! Reputable online stores like KEH, MPB, and Adorama offer used lenses that are thoroughly inspected and come with a warranty. You can often get a fantastic professional-grade lens for the price of a new consumer-grade one. Lenses are durable and hold their value well, making a used purchase a very smart financial move.
Here’s a fantastic video that walks you through the decision-making process:

Top Recommendations: The Best DSLR Lenses for Every Photographer
Ready for some concrete suggestions? While the “best” lens is subjective, some models are legendary for their performance, value, and the creative doors they open. These are the lenses that photographers rave about, and for good reason!
The Must-Have First Upgrade: The “Nifty Fifty” (50mm f/1.8)
If you buy only one lens after your kit lens, make it this one. Every brand has a version, and they are all universally affordable, lightweight, and optically brilliant for the price. The wide f/1.8 aperture is a massive leap from a kit lens, allowing you to shoot in low light and create that gorgeous background blur you’ve been dreaming of. It’s the perfect lens for portraits, food photography, and learning composition.
It’s not just a beginner’s lens; professionals keep one in their bag for its reliability and quality.
The Storyteller’s Choice: The 35mm Prime
While the 50mm is a fantastic portrait lens, some find it a bit tight for general use, especially on a crop-sensor camera. A 35mm prime lens offers a wider, more contextual view that’s closer to what your eye sees. This makes it a favorite for street photography, environmental portraits (where you show the subject in their surroundings), and documentary-style shooting. It’s a lens that tells a story by including more of the scene.
The Versatile Workhorse: The 24-70mm f/2.8
This lens is part of the “Holy Trinity” of professional zooms. It covers the most useful range of focal lengths, from wide-angle to short telephoto, all with a constant, bright f/2.8 aperture. It’s the go-to lens for wedding photographers, photojournalists, and event shooters who need top-tier image quality and the flexibility to adapt to any situation instantly. It’s a significant investment, but for many, it’s the one lens that can do it all, and do it exceptionally well.
The Portrait Master: The 85mm f/1.8 or f/1.4
When you want to create absolutely stunning, flattering portraits, you reach for an 85mm prime. This focal length provides beautiful compression, which slims faces and makes features look pleasing. Combined with a very wide aperture like f/1.8 or f/1.4, it melts backgrounds into a buttery-smooth canvas of color, ensuring your subject is the absolute center of attention. The sharpness and bokeh from a good 85mm lens are simply magical.
The Landscape Legend: A Wide-Angle Zoom (e.g., 16-35mm)
To capture the majesty of a mountain range or the sprawling energy of a city skyline, you need to go wide. A wide-angle zoom gives you the flexibility to frame epic scenes perfectly. Lenses like a 16-35mm on a full-frame camera or a 10-22mm on a crop-sensor body allow you to create images with a powerful sense of depth and scale. They are essential tools for any serious landscape or architectural photographer.
Understanding Pricing: How Much Do DSLR Camera Lenses Cost?

Navigating the cost of dslr camera lenses can be tricky, but prices generally fall into a few predictable tiers based on their features and build quality. Understanding what drives the price will help you find the best value for your needs.
- Budget-Friendly Primes (Under $300): This category is dominated by the fantastic “Nifty Fifty” 50mm f/1.8 lenses from Canon and Nikon. You can also find other affordable primes like a 35mm f/2 in this range. They offer incredible image quality for the money, making them the best bang-for-your-buck upgrade.
- Mid-Range Zooms & Primes ($400 – $1,200): Here you’ll find higher-quality consumer zooms with better optics and build than kit lenses, as well as excellent f/1.8 prime lenses at various focal lengths (like the 85mm f/1.8). You also start to see third-party lenses from brands like Sigma’s Art series, which offer professional-level sharpness at a consumer-friendly price.
- Professional Lenses ($1,300+): This is the top tier. These lenses, like Canon’s “L” series (red ring) or Nikon’s “Gold Ring” lenses, feature the best optics, wide constant apertures (like f/2.8 on zooms or f/1.4 on primes), robust metal construction, and weather sealing. They are built for working professionals who demand maximum performance and durability.
So, what are you paying for with a more expensive lens? Key factors include a wider maximum aperture, the inclusion of image stabilization (which helps reduce blur from camera shake), weather sealing for shooting in tough conditions, and the use of special glass elements that correct for optical imperfections like chromatic aberration (color fringing).
The Pros and Cons of Investing in DSLR Lenses
Upgrading your lens collection is an exciting step, but it’s wise to consider both sides of the coin. It’s a significant investment, and understanding the full picture ensures you make a choice you’ll be happy with for years to come.
The Amazing Advantages (Pros)
- Massive Image Quality Improvement: This is the number one reason. A good lens will deliver sharper images with better color, contrast, and less distortion than any kit lens. It’s a night-and-day difference.
- Unlocks Creative Potential: Wide apertures for blurry backgrounds, wide-angle lenses for dramatic landscapes, telephoto lenses for distant action—new lenses give you new creative tools to bring your vision to life.
- Better Low-Light Performance: A “fast” lens (one with a wide aperture) is a game-changer for shooting indoors, at concerts, or after sunset without resorting to a grainy high ISO or a harsh flash.
- A Great Investment: High-quality lenses hold their value exceptionally well, far better than camera bodies which are quickly outdated by new technology. A great lens purchased today will still be a great lens in ten years.
The Potential Downsides (Cons)
- Cost: Let’s be honest, good glass is not cheap. Building a collection of the best dslr lenses can quickly become more expensive than the camera itself.
- Weight and Bulk: High-quality lenses, especially fast zooms, contain a lot of glass and are often built with metal housings. They can add significant weight and size to your camera bag, which is a consideration for travel or hiking.
- Gear Acquisition Syndrome (GAS): The world of lenses is vast and tempting. It’s easy to fall into the trap of thinking you always need one more lens, when mastering the gear you already have is often more beneficial.
Frequently Asked Questions (FAQ)
Let’s tackle some of the most common questions photographers have when they start exploring the world of lenses.
What 3 lenses does every photographer need?
This often refers to the professional “Holy Trinity” of zoom lenses, which covers a huge range of possibilities. The trinity consists of a wide-angle zoom (like a 16-35mm f/2.8), a standard zoom (like a 24-70mm f/2.8), and a telephoto zoom (like a 70-200mm f/2.8). With these three lenses, a photographer can confidently cover almost any assignment, from architecture to portraits to sports.
What are the 4 types of camera lenses?
While there are many sub-categories, lenses are generally grouped into four main types based on their focal length and function. These are: Wide-Angle lenses for capturing broad scenes, Standard lenses that mimic the human eye’s perspective, Telephoto lenses for bringing distant subjects closer, and Specialty lenses like Macro (for extreme close-ups) and Fisheye (for ultra-wide, distorted views).
Which is better, RF or EF lens?
This question relates specifically to the Canon ecosystem. EF lenses are designed for Canon’s DSLR camera system and have been the standard for decades. RF lenses are the newer design, created for Canon’s mirrorless R-series cameras. RF lenses cannot be used on a DSLR, but EF lenses can be used on an RF mirrorless camera with an adapter, and they work perfectly.
If you have a DSLR, you need EF (or EF-S for crop-sensor) lenses. Many photographers still consider it worthwhile to invest in high-quality EF lenses because of the vast selection and excellent value on the used market.
What is the Holy Trinity of camera lenses?
As mentioned above, the “Holy Trinity” is a term for a three-lens kit of professional f/2.8 zoom lenses that together cover a focal range from ultra-wide to telephoto (typically 16mm all the way to 200mm). This setup provides ultimate versatility and image quality for professionals who need to be ready for anything without changing lenses constantly. It’s the peak of convenience and performance in the zoom lens world.
What lens should a beginner photographer use?
The undisputed best first lens for a beginner is a 50mm f/1.8 prime lens. It’s affordable, it produces images that are dramatically better than a kit lens, and its fixed focal length forces you to learn about composition and framing. It’s a powerful teaching tool and a fantastic portrait lens all in one small, inexpensive package.
Final Thoughts: Your Journey to Incredible Photos Starts Here
Choosing a new lens is one of the most exciting steps you can take in your photography journey. It’s more than just buying a piece of gear; it’s about acquiring a new tool to see and capture the world in a way that wasn’t possible before. The right camera lenses for dslr photography will inspire you, challenge you, and ultimately empower you to create the images you’ve always imagined.
Don’t feel pressured to buy a whole bag of lenses at once. The best approach is to start with one great lens that suits the type of photography you love most. A simple 50mm prime can teach you more about light and composition than a dozen mediocre zooms. Learn it, master it, and let it show you what your camera is truly capable of.
Now, go out there and start shooting. A whole new world of creative possibility is waiting for you, right through your viewfinder. Happy shooting!


![SONY a6000 - Buy YONGNUO 35mm f1.8 APS-C Prime Lens for Portrait Photography? [2026]](https://i0.wp.com/i.ytimg.com/vi/qPTm9mbB-Ec/hqdefault.jpg?w=525&ssl=1)