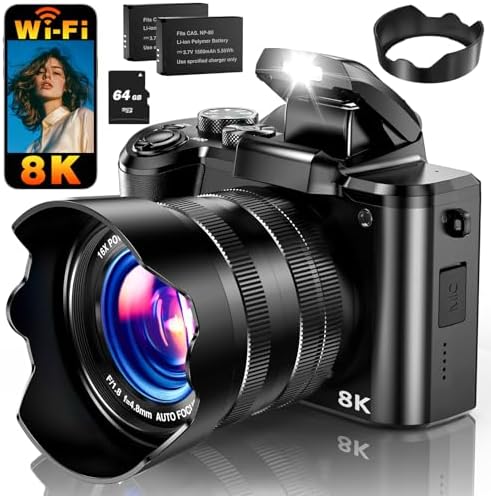
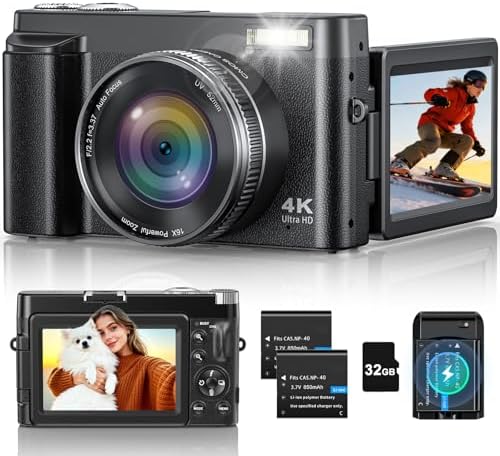
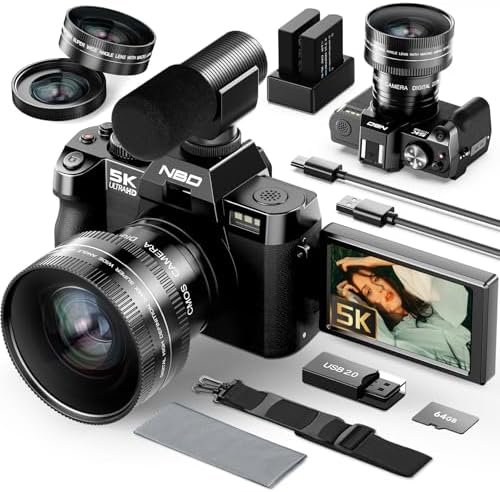
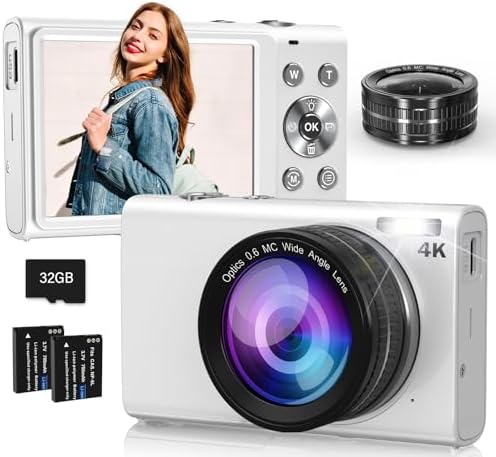
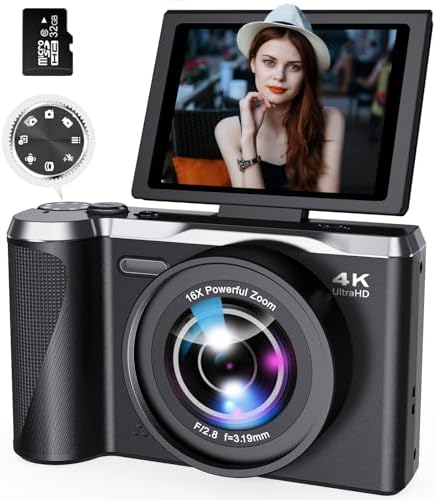
- 【4K UHD 64MP Digital Camera】—- 2025 Newest 4k cameras for photography delivers ultra-high definition videos and images…
- 【Dual Lens Autofocus Photography Camera & 3″ IPS Screen】—- Our digital camera for photography upgraded dual-camera con…
- 【Large-capacity Battery & Portable Travel Camera】—- This small digital camera has 2 large-capacity batteries and charg…

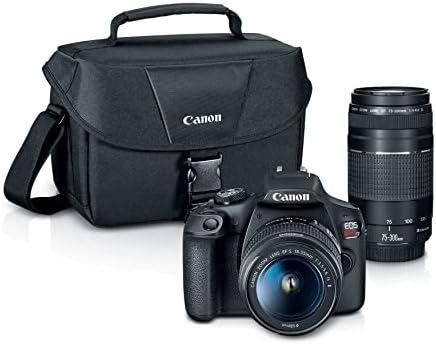
- Improved Dual Pixel CMOS AF and eye detection AF 24.1 Megapixel CMOS (APS-C) sensor with is 100–6400 (H: 12800)
- Built-in Wi-Fi and NFC technology working temperature range: 32-104°F/0-40°C
- 9-Point AF system and AI Servo AF


- 【Professional UHD Optical Lens】: The macro lens for smartphone with CNC-machined aluminium alloy housing and 5-group/5-e…
- 【35X Magnification & F1.05 Large Aperture】: The 35X macro lens kit features an ultra-large F1.05 aperture and 45mm objec…
- 【Fits 52mm Filters】: The macro lens with cpl filter, it perfectly eliminates reflections and glare from surfaces such as…
Camera Lens Types for Beginners: How to Choose the Perfect Lens
Stepping into the world of photography is an incredible adventure, but it can feel a bit overwhelming when you first encounter the sheer number of different camera lenses available. You’ve got your camera body, and now you’re faced with a wall of glass, numbers, and acronyms. What’s the difference between a prime and a zoom. Why would you need a telephoto lens.
Understanding the various types of camera lenses is the single most important step you can take to elevate your photos from simple snapshots to stunning works of art. This guide will break it all down for you in a simple, exciting way.
Think of a lens as the eye of your camera. Just as your own eyes can focus on something far away or take in a wide scene, different lenses are designed for different jobs. Choosing the right one allows you to perfectly capture the image you have in your mind, whether it’s a sprawling mountain landscape, a candid portrait of a loved one, or the intricate details of a tiny insect. We’re about to demystify all the options and get you excited about the creative possibilities waiting for you.
What You’ll Learn
- Prime vs. Zoom Lenses: Understand the fundamental difference between fixed focal length (prime) lenses, known for their sharpness, and versatile zoom lenses that let you change your perspective without moving.
- Focal Length Explained: Learn how focal length (measured in mm) impacts your field of view, from ultra-wide landscape shots to tightly cropped wildlife photos.
- Key Lens Categories: Discover the specific uses for wide-angle, standard, telephoto, and macro lenses, and find out when to use each one for the best results.
- How to Choose Your First Lens: Get practical advice on selecting the right lens based on your camera’s sensor size, your budget, and the type of photography you’re most passionate about.
- Essential Lens Care: Learn simple maintenance tips to protect your investment and keep your lenses performing flawlessly for years to come.
An Overview of Camera Lens Types: Prime vs. Zoom


Before we get into specific styles like wide-angle or telephoto, all camera lens types fall into one of two main families: prime lenses and zoom lenses. Understanding this core distinction is the foundation for everything else. It’s the first big choice you’ll make, and it shapes how you approach your photography.
Think of it like this: a prime lens is like having a pair of scissors, which does one job perfectly. A zoom lens is like a Swiss Army knife—it has multiple tools and offers incredible flexibility. Neither is inherently better; they are just different tools for different creative goals. Let’s break down what makes each one special.
Prime Lenses: The Masters of Simplicity and Quality
A prime lens has a single, fixed focal length. That means if you have a 50mm prime lens, it only shoots at 50mm. You can’t zoom in or out. To change your framing, you have to physically move your feet closer to or farther from your subject.
This might sound like a limitation, but it’s actually one of its greatest strengths.
Because they are built for just one focal length, prime lenses are often optically superior to zoom lenses in the same price range. They tend to be sharper, produce higher-quality images, and have fewer optical imperfections like distortion. Their simpler construction means they can have much wider maximum apertures (like f/1.8 or even f/1.4). A wider aperture lets in more light, making prime lenses absolute superstars in low-light situations.
This also allows you to create that beautiful, creamy, blurred background (known as ‘bokeh’) that makes your subject pop in portraits.
Many photographers love primes because they force you to be more intentional with your composition. Instead of lazily zooming from a distance, you have to engage with your environment and think critically about your position. They are also typically smaller and lighter than zoom lenses, making them a joy to carry around all day.
Best for: Portrait photography, street photography, low-light situations, and anyone who wants the absolute sharpest image quality.
Zoom Lenses: The Champions of Versatility
A zoom lens offers a range of focal lengths in a single package. For example, a standard ‘kit’ lens is often an 18-55mm, and a professional workhorse might be a 24-70mm or a 70-200mm. By twisting a ring on the lens, you can go from a wider view to a more tightly cropped view in seconds.
This versatility is the number one reason photographers love zoom lenses. They are perfect for situations where you can’t easily move around or when the action is happening quickly. Think of shooting a wedding, a sporting event, or traveling where you want to capture a wide variety of shots without constantly swapping lenses. You can shoot a wide architectural shot and then immediately zoom in to capture a detail on the building, all with one lens.
While high-end professional zoom lenses can be incredibly sharp, they are generally more complex and contain more moving glass elements than primes. This can sometimes mean they aren’t quite as tack-sharp as a prime lens and often have a smaller maximum aperture (like f/2.8 or f/4). However, the convenience they offer is often an unbeatable trade-off. For many photographers, having the flexibility to reframe a shot instantly is more valuable than the marginal increase in sharpness from a prime.
Best for: Travel photography, event photography, photojournalism, and any situation where flexibility and the ability to adapt quickly are key.
Exploring Lens Types by Focal Length
Now that we’ve covered the two main families, let’s get into the fun part: how different focal lengths change what your camera sees. Focal length, measured in millimeters (mm), determines the angle of view and the magnification of your subject. A lower number means a wider view, while a higher number means a more magnified, ‘zoomed-in’ view.
Wide-Angle Lenses (Typically 14mm to 35mm)
Have you ever seen a breathtaking photo of a vast mountain range or a dramatic cityscape where it feels like you can see forever? That was almost certainly taken with a wide-angle lens! These lenses have a short focal length, which gives them a very wide field of view. They are designed to capture as much of the scene as possible.
Wide-angle lenses are the go-to choice for landscape, architecture, and real estate photography. They allow you to fit massive subjects into your frame. They also have a unique characteristic of exaggerating perspective. Objects closer to the lens will appear much larger than objects farther away, which you can use to create dramatic, immersive images with a strong sense of depth.
For example, placing a flower in the foreground of a mountain scene can make the entire image feel more three-dimensional.
However, this distortion can be a double-edged sword. If you’re not careful, it can stretch things near the edges of the frame, which is why they are not always the best choice for portraits unless you’re going for a specific stylistic effect. An ultra-wide-angle lens (typically below 24mm) will have even more pronounced distortion, creating incredibly dynamic and sometimes surreal images.
When to use it:
- Sweeping landscapes and epic nature scenes.
- Architectural photography, both interiors and exteriors.
- Astrophotography to capture the vast night sky.
- Creative street photography to create an immersive feel.
Standard Lenses (Typically 35mm to 70mm)
A standard lens, often called a ‘normal’ lens, is designed to capture the world in a way that closely mimics the perspective of the human eye. The most classic standard focal length is 50mm on a full-frame camera. The images produced by these lenses feel natural, familiar, and true to life, with minimal distortion.
This makes the standard lens one of the most versatile and beloved lens types out there. It’s a true jack-of-all-trades. It’s wide enough to capture some environmental context but long enough to shoot flattering portraits without the distortion of a wide-angle. A 50mm prime lens, often called the ‘nifty fifty,’ is frequently recommended as the first lens a new photographer should buy after their kit lens.
Because they are so versatile, standard lenses are perfect for everyday photography. They excel at street photography, documentary work, travel, and casual portraits. They are small, lightweight, and often have very wide apertures (like f/1.8), making them fantastic in low light and for creating beautiful background blur. If you could only have one lens in your bag, a standard prime would be a fantastic choice.
When to use it:
- Street photography and documentary work.
- Environmental portraits where you want to include some background.
- Everyday, walk-around photography.
- Food and product photography.
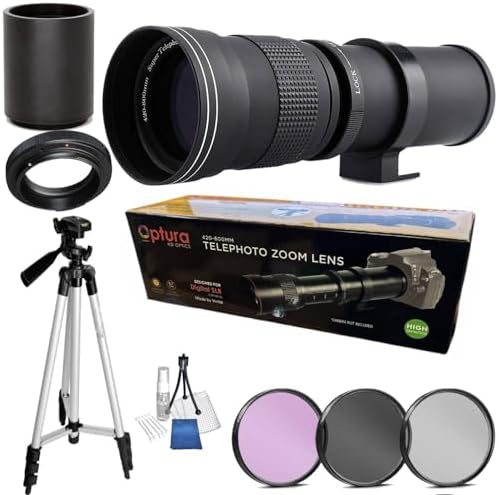
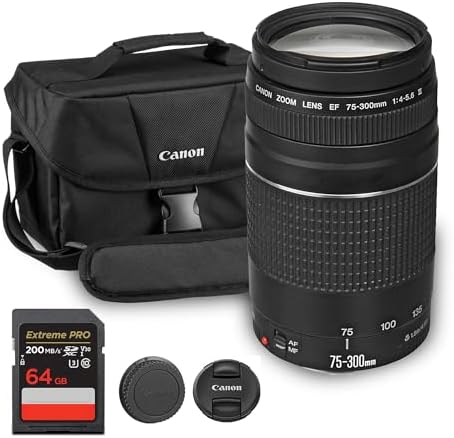
Telephoto Lenses (Typically 70mm and up)
If you want to get up close and personal with a subject that’s far away, you need a telephoto lens. These are the big lenses you see photographers using at sporting events and on wildlife safaris. Their long focal length allows them to magnify distant subjects, making them appear much closer than they are.
Telephoto lenses are essential for wildlife and sports photography, where you can’t physically get close to the action. But their usefulness doesn’t stop there. They are also fantastic for portraiture. A short telephoto lens (around 85mm to 135mm) is a classic choice for portraits because it creates a beautiful compression effect.
This effect makes the background appear closer to the subject than it really is, which helps to isolate the subject and creates incredibly flattering facial features with no distortion.
This ‘lens compression’ is a powerful creative tool. It can make a distant mountain range look like a dramatic backdrop right behind your subject or turn a city street into a compressed, bustling scene. Super-telephoto lenses (300mm and beyond) are highly specialized tools for professional sports and wildlife photographers who need maximum reach to capture subjects from hundreds of feet away.
When to use it:
- Wildlife photography.
- Sports and action photography.
- Flattering portraits and headshots.
- Creating compressed landscape scenes.
Pro Tip: Lens compression doesn’t just make the background look closer; it can also make a scene feel more intimate and layered. Experiment with a telephoto lens to stack elements in your frame, like shooting through leaves or a fence to create a more interesting composition.
Getting Creative with Specialty Camera Lenses

Beyond the standard categories, there’s a whole world of specialty lenses designed for very specific creative purposes. These are the lenses that let you break the rules and capture images that are truly unique and eye-catching. They might not be your everyday lens, but for the right project, they are absolutely incredible.
Macro Lenses: Unveiling the Tiny World
Have you ever wanted to capture the intricate patterns on a snowflake or the tiny hairs on a bumblebee’s leg? For that, you need a macro lens. These lenses are engineered for extreme close-up photography, allowing you to focus on subjects that are just inches away from your camera.
What makes a macro lens special is its ability to reproduce a subject at a 1:1 magnification ratio. This means that the image of the subject projected onto your camera’s sensor is the same size as the subject in real life. This allows for an incredible level of detail that is impossible to achieve with other lens types. You can reveal a hidden world of textures, patterns, and details that are invisible to the naked eye.
While they are designed for close-ups, most macro lenses are also exceptionally sharp and can double as fantastic portrait lenses. A 100mm macro lens, for example, is a popular choice for both detailed product shots and beautiful headshots. They are the perfect tool for flower photography, insect photography, food photography, and capturing fine details in products like jewelry or watches.
When to use it:
- Insect and flower photography.
- Detailed product and food photography.
- Abstract photography focusing on textures and patterns.
- Can also be used for sharp, detailed portraits.
Fisheye Lenses: The Ultimate Distorted View
A fisheye lens is an extreme, ultra-wide-angle lens that produces a wild, distorted, and spherical view of the world. It can capture an incredibly wide field of view—often 180 degrees or more—creating a circular or bubble-like image. Straight lines in your scene will appear dramatically curved, especially near the edges of the frame.
This is not a lens for creating realistic images! It’s a tool for pure creative expression. Fisheye lenses are popular in action sports like skateboarding and snowboarding because they can capture the athlete and their entire environment in one dynamic, energetic shot. They are also used for unique architectural shots, fun and quirky portraits, or any time you want to create a surreal, disorienting effect.
There are two main types of fisheye lenses: circular and full-frame. A circular fisheye projects a complete circle onto the camera’s sensor, with black corners. A full-frame (or diagonal) fisheye fills the entire rectangular frame, but with extreme distortion at the edges. Both are a ton of fun to experiment with and can help you see the world in a completely new way.
When to use it:
- Action sports photography (skateboarding, BMX, etc.).
- Creative architectural and landscape shots.
- Fun, distorted portraits and group photos.
- Creating 360-degree panoramas.
Tilt-Shift Lenses: Mastering Perspective
Tilt-shift lenses are perhaps the most specialized and technical lens type on this list. They have moving parts that allow you to physically tilt or shift the lens relative to the camera’s sensor. This gives you incredible control over perspective and the plane of focus.
The ‘shift’ function is a lifesaver for architectural photographers. When you tilt your camera up to photograph a tall building, the vertical lines of the building appear to converge, making it look like it’s falling backward. By shifting the lens upward, you can keep the camera level and capture the entire building with perfectly straight, parallel lines. It’s a magical tool for correcting perspective distortion.
The ’tilt’ function allows you to change the plane of focus. Normally, your plane of focus is parallel to your camera sensor. Tilting the lens allows you to have a sharp focus that extends from something very close to something very far away, all at a wide aperture. Alternatively, you can use it to create the popular ‘miniature effect,’ where a real-life scene looks like a tiny toy model by creating a very thin slice of focus.
When to use it:
- Professional architectural photography to correct perspective.
- Landscape photography to achieve deep depth of field.
- Creative effects, like the ‘miniature’ look.
How to Choose the Right Lens for Your Camera
Okay, you’ve learned about all the different camera lenses. Now for the big question: how do you pick the right one for you? Choosing a lens is a personal decision that depends on your budget, your camera system, and most importantly, what you love to shoot.
Understanding Focal Length and Aperture
First, think about what you shoot most often. If you love grand landscapes, a wide-angle zoom like a 16-35mm is a fantastic choice. If you’re passionate about portraits, a prime lens like a 50mm f/1.8 or an 85mm f/1.8 will give you that gorgeous background blur. For sports or wildlife, you’ll need the reach of a telephoto zoom, like a 70-200mm or 100-400mm.
Next, consider aperture. The aperture is the opening in the lens that lets light in, and it’s measured in f-stops (e.g., f/1.8, f/4, f/11). A lower f-stop number means a wider opening, which lets in more light and creates a shallower depth of field (more background blur). A lens with a wide maximum aperture (like f/1.8 or f/2.8) is called a ‘fast’ lens and is excellent for low light and portraits.
A ‘slower’ lens might have a maximum aperture of f/4 or f/5.6, which is perfectly fine for shooting outdoors in good light.
Camera Mount and Sensor Size Compatibility
This is a critical technical point. Every camera brand (Canon, Nikon, Sony, etc.) has its own proprietary lens mount. You cannot put a Nikon lens on a Canon camera without a special adapter. When buying a lens, you MUST ensure it is compatible with your camera’s mount (e.g., Canon EF, Nikon F, Sony E-mount).
Additionally, you need to consider your camera’s sensor size. Cameras have either a ‘full-frame’ sensor or a smaller ‘crop sensor’ (often called APS-C). Lenses designed for full-frame cameras will work on crop sensor bodies, but lenses made specifically for crop sensors may not work on full-frame cameras. Using a full-frame lens on a crop sensor camera will also introduce a ‘crop factor,’ which effectively makes the lens’s focal length seem longer.
For example, a 50mm lens on a camera with a 1.5x crop factor will behave like a 75mm lens.
What’s in Your Bag? The “Holy Trinity” of Lenses
For many professional photographers, the ultimate versatile kit is the ‘holy trinity’ of zoom lenses. This typically consists of three f/2.8 zoom lenses that cover a huge range of focal lengths:
- An ultra-wide-angle zoom: Typically 16-35mm f/2.8.
- A standard zoom: Typically 24-70mm f/2.8.
- A telephoto zoom: Typically 70-200mm f/2.8.
With these three lenses, you are prepared for almost any situation, from vast landscapes to tight portraits to distant action, all with a fast, constant aperture. They are a significant investment, but they provide incredible flexibility and professional-quality results.
Keeping Your Lenses in Top Shape: Maintenance and Care

Camera lenses are precision instruments, and taking good care of them will ensure they last a lifetime. Proper maintenance isn’t complicated, but it’s essential for protecting your investment and ensuring you always get the sharpest possible images. A little care goes a long way!
First, always protect the front glass element. The easiest way to do this is to keep a lens cap on whenever you’re not actively shooting. For an extra layer of protection, many photographers use a clear UV filter. This filter screws onto the front of your lens and acts as a shield against scratches, dust, and fingerprints.
It’s much cheaper to replace a scratched filter than to repair a scratched lens.
When it comes to cleaning, be gentle. Dust is your enemy. Before you ever wipe the glass, use a rocket blower to puff away any loose dust or grit. Wiping a gritty piece of dust across your lens can cause permanent scratches.
After blowing off the dust, you can use a soft, microfiber lens cloth or a lens pen to gently wipe away any smudges or fingerprints. Always use a cloth designated for lenses to avoid transferring oils or dirt.
Finally, think about storage and transport. When you’re on the move, keep your lenses in a padded camera bag to protect them from bumps and drops. When storing them at home, try to keep them in a dry, stable environment. Avoid leaving them in a hot car or a damp basement, as extreme temperatures and humidity can damage the delicate internal elements and encourage fungus growth over time.
Pro Tip: When changing lenses outdoors, try to do it quickly and with your camera body pointing downward. This minimizes the amount of time your camera’s sensor is exposed to the open air, reducing the chance of dust getting inside.
Frequently Asked Questions About Camera Lenses
What are the main types of camera lenses?
The main lens types can be categorized by their focal length. These include wide-angle lenses (14-35mm) for landscapes, standard lenses (35-70mm) that mimic the human eye, and telephoto lenses (70mm+) for distant subjects like wildlife and sports. Additionally, there are specialty lenses like macro for close-ups and fisheye for extreme distortion.
What lens do most photographers use?
While it varies by specialty, one of the most universally used lenses is a standard zoom, like a 24-70mm. Its versatility makes it a workhorse for everything from events to travel to portraits. For prime lens enthusiasts, the 50mm prime (‘nifty fifty’) is incredibly popular due to its affordability, sharpness, and natural perspective.
Is a 35mm or 50mm lens better?
Neither is ‘better’—they are just different tools for different visions. A 50mm lens offers a tighter, more natural perspective that is excellent for portraits and isolating subjects. A 35mm lens is slightly wider, making it a favorite for street and environmental photography because it allows you to capture more of the surrounding scene along with your subject.
Is F2.8 or F4 better?
An f/2.8 aperture is ‘better’ in the sense that it is one full ‘stop’ faster than f/4, meaning it lets in twice as much light. This makes an f/2.8 lens superior for shooting in low-light conditions and for achieving a shallower depth of field (more background blur). However, f/2.8 lenses are also significantly larger, heavier, and more expensive than their f/4 counterparts. An f/4 lens is often a great choice for landscape or travel photographers who want a lighter kit and typically shoot in good light.
Final Thoughts
Wow, that was a lot of information, but you made it! You now have a fantastic foundation for understanding the incredible world of camera lenses. From the simple sharpness of a prime to the go-anywhere versatility of a zoom, each lens is a new key that opens up a different creative door. The perfect lens is simply the one that helps you capture the photos you’re passionate about creating.
Don’t feel pressured to buy every lens at once. The best approach is to start with a versatile lens, like a standard zoom or a 50mm prime, and just get out there and shoot! As you discover what you love to photograph, you’ll naturally figure out which lens you need next to bring your creative vision to life.
So get excited! Your camera is waiting, and a whole new world of photographic possibilities is at your fingertips. Grab a lens, start experimenting, and have an absolute blast capturing the world around you.